Blog

  • Creamy Shrimp  Zucchini Skillet

    Creamy Shrimp Zucchini Skillet

    Creamy Shrimp & Zucchini Skillet: A Tropical Delight

    Introduction to Creamy Shrimp & Zucchini Skillet

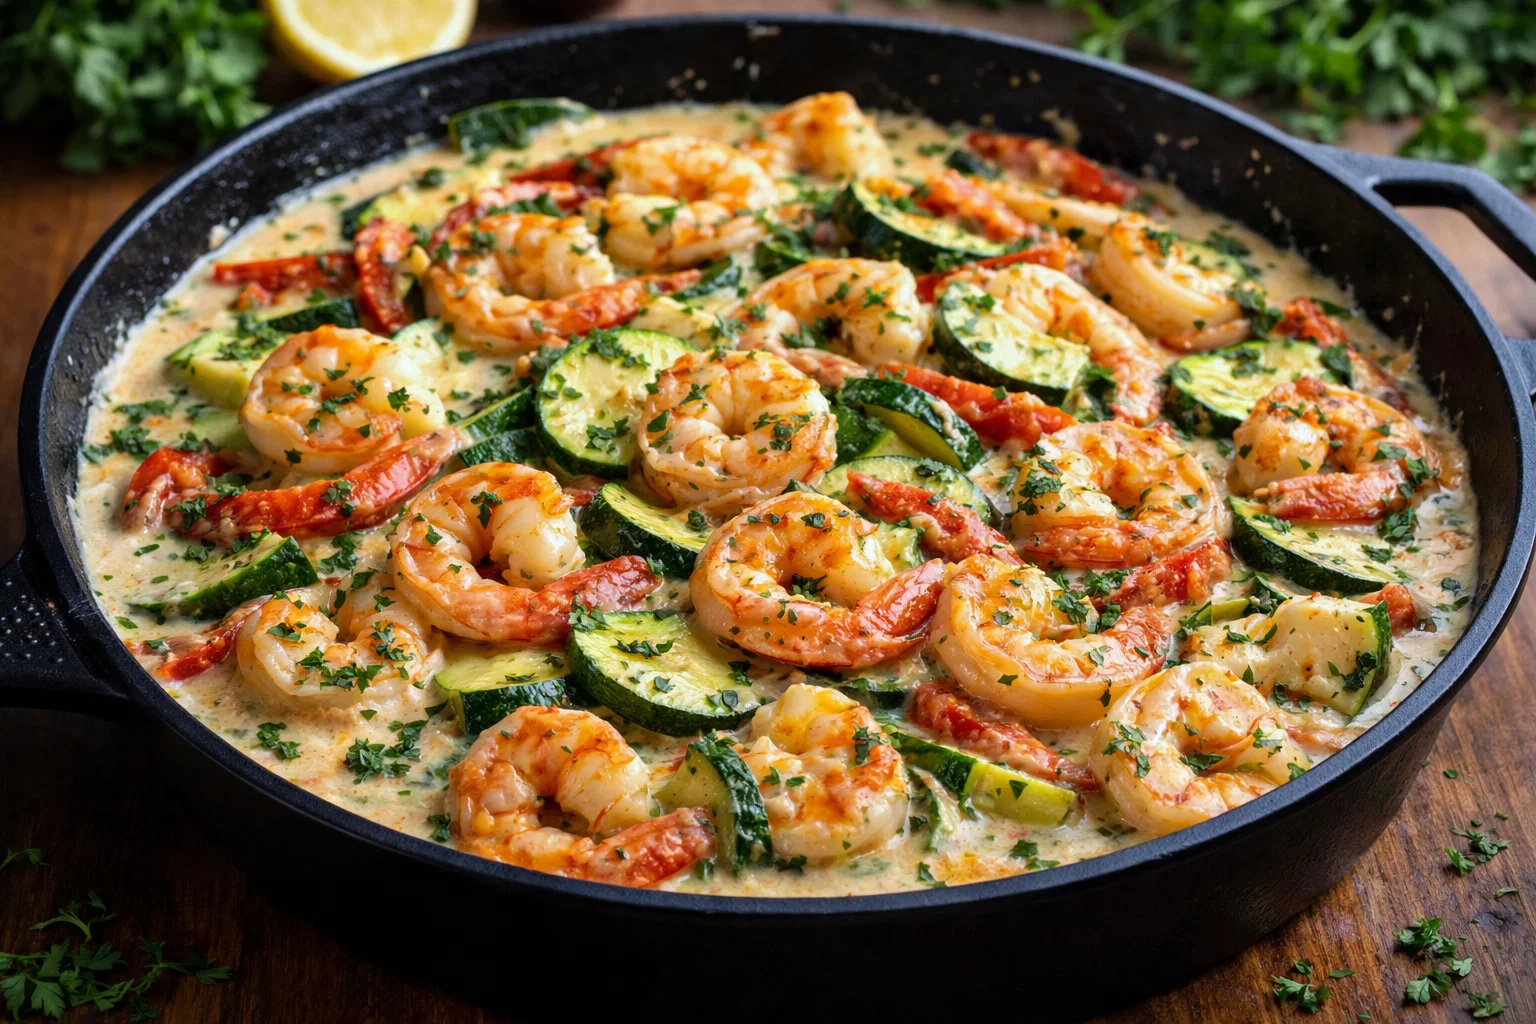
    If you’re searching for easy and delicious shrimp recipes, look no further than this Creamy Shrimp & Zucchini Skillet. This vibrant dish combines succulent shrimp with fresh zucchini in a gorgeous, rich sauce that not only pleases the palate but also delights the senses. Perfect for busy weeknights, this recipe takes just under thirty minutes to prepare and makes for a satisfying meal that everyone can enjoy.

    Healthy eating doesn’t have to be bland, and this recipe is a great testament to that. It features lean protein from shrimp, a multitude of vitamins from zucchini, and is finished with a creamy sauce that gives it a touch of indulgence without the guilt. Plus, it’s incredibly versatile! Make it vegan by substituting shrimp with chickpeas and using plant-based cream. Gluten-free eaters will be pleased as this dish naturally caters to their needs, providing a meal that’s not only nourishing but also packed with flavor.

    So whether you’re a novice cook or a seasoned chef, you can whip up this creamy delight in no time. Join us on this culinary journey and discover how to prepare a scrumptious one-pan meal that’s sure to become a staple in your kitchen. Let’s explore the benefits and advantages of this creamy shrimp and zucchini skillet next!

    Benefits and Advantages of Creamy Shrimp & Zucchini Skillet

    There’s an abundance of reasons why this Creamy Shrimp & Zucchini Skillet stands out among classic shrimp recipes. Firstly, it’s incredibly easy to prepare, making it a go-to dish for busy parents, students, and working professionals. In less than thirty minutes, you can have a mouthwatering meal ready to serve, ideal for those who are short on time but still want to enjoy a healthy and flavorful dinner.

    Moreover, this delightful dish is brimming with health benefits. Shrimp is an excellent source of lean protein, providing your body with essential amino acids needed for muscle repair and growth. When paired with zucchini, you not only get the added nutrients but also a refreshing crunch that enhances the dish’s texture. Zucchini is low in calories and high in dietary fiber, making it perfect for those who are diet-conscious and looking to maintain a healthy lifestyle.

    On top of that, this skillet recipe can easily accommodate various dietary needs. As mentioned earlier, simply swap out the shrimp for plant-based protein or legumes to cater to vegetarians and vegans, while still enjoying the same creamy taste and texture. The meal can also be easily adapted to fit low-carb diets by skipping the use of any starch or serving it without rice or pasta.

    This creamy shrimp and zucchini skillet truly encompasses the essence of simple yet nutritious cooking. In the next section, we’ll take a closer look at the essential ingredients that contribute to its deliciousness and nutritional profile.

    Ingredients Overview

    Essential Ingredients for Creamy Shrimp & Zucchini Skillet

    Creating a delicious Creamy Shrimp & Zucchini Skillet requires just a handful of fresh ingredients. Below, you will find a detailed list along with their measurements and specific purposes:

    • 1 lb shrimp (peeled and deveined): The star of this recipe, providing lean protein and rich flavor.
    • 2 medium zucchinis: Sliced thinly to add crunch and a wealth of vitamins A and C.
    • 2 tablespoons olive oil: Used for sautéing the shrimp and zucchini, contributing good fats.
    • 3 cloves garlic (minced): Adds aromatic flavor, which complements the dish beautifully.
    • 1 cup coconut milk or heavy cream: For a luscious, creamy sauce; choose coconut milk for a dairy-free option.
    • 1 teaspoon paprika: Adds color and a hint of smokiness to the dish.
    • Salt and pepper to taste: Essential seasonings that elevate all flavors.
    • Fresh parsley (chopped): For garnish, adding freshness and a pop of color.

    Diet-Conscious Options:
    Vegan: Replace shrimp with chickpeas and use coconut milk or a plant-based cream.
    Gluten-Free: This recipe is naturally gluten-free as it contains no wheat-based products.
    Low-Calorie: Substituting cream with unsweetened almond milk can help reduce calorie count.

    Dietary Substitutions to Customize Your Creamy Shrimp & Zucchini Skillet

    One of the best perks of this creamy shrimp and zucchini skillet recipe is its versatility. Here are some suggested substitutions that cater to different dietary needs or ingredient availability:

    1. Shrimp Alternatives: If you want to make this dish vegetarian or vegan, chickpeas, tofu, or tempeh can be excellent alternatives to shrimp. These ingredients also provide protein while being plant-based.

    2. Cream Alternatives: While the cream makes the dish rich and tasty, using unsweetened almond milk, silken tofu blended into a creaminess, or even cashew cream can create a lighter yet equally enjoyable dish.

    3. Zucchini Variations: If zucchinis aren’t available, you might consider using yellow squash or even asparagus, each imparting their unique flavors while still keeping the dish fresh and bright.

    4. Spice it Up: If you crave some heat, adding red pepper flakes or sliced jalapeños can provide a delightful kick to your creamy sauce.

    5. Herbs and Spices: Fresh herbs such as basil, cilantro, or thyme can bring additional flavor profiles to the dish, while spices like curry powder or lemon zest can transform the entire flavor experience.

    By considering these substitutions, you can create a version of this creamy shrimp and zucchini skillet that is perfectly aligned with your dietary preferences and ingredient availability.

    How to Prepare the Perfect Creamy Shrimp & Zucchini Skillet: Step-by-Step Guide

    Now that you know the ingredients and potential substitutions, let’s get into the details of preparing this mouthwatering Creamy Shrimp & Zucchini Skillet. Follow these step-by-step instructions to ensure success:

    1. Prepare the Base: Begin by heating 2 tablespoons of olive oil in a large skillet over medium heat. Add the minced garlic and sauté for about 1 minute, or until fragrant.

    2. Add the Shrimp: Once the garlic is aromatic, it’s time to add the peeled and deveined shrimp into the skillet. Cook them for about 2-3 minutes on each side until they turn pink and are opaque. Remove the shrimp from the skillet and set them aside.

    3. Sauté the Zucchini: In the same skillet, add the sliced zucchini. Sauté for roughly 5-7 minutes until it has softened slightly but still retains a bit of crunch. Season with salt and pepper to taste.

    4. Prepare the Creamy Sauce: Pour in the cup of coconut milk or heavy cream, stirring well to combine. Then, sprinkle in the paprika for added flavor. Let the mixture simmer for about 2-3 minutes, allowing it to thicken.

    5. Combine Ingredients: Carefully return the cooked shrimp to the skillet with the creamy sauce. Stir everything together, ensuring the shrimp is fully coated in the sauce. Allow it to cook for an additional 1-2 minutes until everything is heated throughout.

    6. Garnish and Serve: Finally, garnish the dish with freshly chopped parsley. Serve the Creamy Shrimp & Zucchini Skillet on its own or over rice, quinoa, or whole-grain pasta for a more filling meal.

    7. Adapting Cooking Techniques: For a one-pot version, consider cooking the zucchini and shrimp together in a pasta dish, where the flavors meld beautifully, and everything can cook together for added convenience.

    8. Enjoy and Save Leftovers: Once your dish is prepared, take a moment to enjoy your creation! Any leftovers can be stored properly, which we’ll discuss next.

    Mastering Creamy Shrimp & Zucchini Skillet: Advanced Tips and Variations

    To make the most of your Creamy Shrimp & Zucchini Skillet, consider these advanced tips and variations that can enhance your cooking experience:

    1. Use Fresh Produce: Whenever possible, opt for fresh vegetables and seafood. The taste and nutrition value is far superior compared to canned or frozen options.

    2. Colorful Vegetables: Feel free to toss in other colorful veggies like bell peppers, cherry tomatoes, or spinach to boost the nutritional value and aesthetics of the dish.

    3. Add Cheese: If you’re a cheese lover, sprinkle some grated Parmesan or feta on the dish just before serving for an extra layer of flavor.

    4. Experiment with Sauces: For a less creamy option, try a light tomato sauce or even a lemon-butter sauce to give the dish a whole new flavor profile.

    5. Serving Suggestions: For more filling options, consider serving the creamy shrimp and zucchini over whole wheat pasta, zucchini noodles (zoodles), or a bed of fluffy brown rice.

    6. Pairing Suggestions: This dish pairs well with a crisp white wine or mocktail made with sparkling water and fresh citrus for a refreshing contrast to the creamy shrimp.

    With these tips in mind, you can always recreate this dish to not only suit your taste but also impress your family and friends.

    How to Store Creamy Shrimp & Zucchini Skillet: Best Practices

    Properly storing your Creamy Shrimp & Zucchini Skillet is essential for maintaining its taste and texture. Here’s how to do it right:

    • Refrigeration: Once the dish has cooled down to room temperature, transfer it to an airtight container. It can be stored in the refrigerator for up to 3 days. To reheat, place it in a skillet over medium heat until warmed through, or microwave it in 30-second intervals until hot.

    • Freezing: Although this dish can be frozen, note that the texture of the zucchini may change upon thawing. If you plan to freeze it, package the shrimp and cream sauce separately from the zucchini. This allows for better preservation of taste and texture. To freeze, store in freezer-safe containers for up to 2 months.

    • Reheating from Frozen: To reheat a frozen portion, let it defrost in the refrigerator overnight, then heat it gently in a skillet or microwave until warmed through.

    With these storage tips, you can savor the flavors of the Creamy Shrimp & Zucchini Skillet even days after you make it.

    Nutritional Value of Creamy Shrimp & Zucchini Skillet

    Understanding the nutritional value of this dish is key for making informed dietary choices. Below is a general nutritional breakdown per serving (assumes 4 servings total):

    • Calories: Approximately 300-350 kcal
    • Protein: 25g
    • Total Fat: 20g (Saturated Fat: 10g)
    • Carbohydrates: 8g (Fiber: 2g)
    • Cholesterol: 160mg
    • Sodium: 600mg

    Nutritional Insights:

    • Protein: With high protein content from shrimp and possible legumes (if opting for a meatless version), this dish supports muscle recovery and growth.
    • Healthy Fats: The inclusion of healthy fats from olive oil and cream provides energy while keeping you satiated.
    • Low Carb: Naturally low in carbohydrates, making it a great option for keto or low-carb diets, especially if served without additional grains or pastas.

    Always remember to check for pinching dietary restrictions and adjust the recipe accordingly to meet your specific health needs.

    FAQs: Frequently Asked Questions About Creamy Shrimp & Zucchini Skillet

    Q: Can I use frozen shrimp for this recipe?
    A: Absolutely! Just ensure you thaw them before cooking. It’s preferable to do this overnight in the refrigerator.

    Q: How can I make this recipe dairy-free?
    A: Opt for coconut milk or a plant-based cream alternative to keep the creamy element without dairy.

    Q: Is it possible to make this dish ahead of time?
    A: Yes! You can prepare the dish and store it in the fridge for up to three days. Just reheat it gently before serving.

    Q: Can I add other vegetables to this skillet?
    A: Definitely! Feel free to incorporate vegetables like bell peppers, asparagus, or spinach to enhance its nutritional profile.

    Q: What are suitable side dishes for Creamy Shrimp & Zucchini Skillet?
    A: This dish pairs wonderfully with a side salad, whole grain rice, or even cauliflower rice for a low-carb option.

    With these insights, you’re now equipped to create this healthy and delicious Creamy Shrimp & Zucchini Skillet. Enjoy the process and the delightful flavors that await!

  • Healthy Honey Lime Chicken with Mango Salsa

    Healthy Honey Lime Chicken with Mango Salsa

    Healthy Honey Lime Chicken with Mango Salsa: A Tropical Delight

    Introduction to Healthy Honey Lime Chicken with Mango Salsa

    Are you looking for healthy dinner recipes that are not only nutritious but also packed with flavor? Look no further! This Healthy Honey Lime Chicken with Mango Salsa will become your go-to dish for weeknight meals, summer barbecues, or intimate gatherings.

    This vibrant recipe features succulent chicken marinated in a zesty blend of honey and lime, perfectly complemented by a fresh and fruity mango salsa. Not only is it simple to prepare, but it accommodates various dietary preferences, making it a versatile choice for all. The balance of protein and healthy fats ensures this dish leaves you satisfied and energized.

    Whether you’re a busy parent wanting to whip up something quick for dinner, a student who needs a nutritious meal prep option, or someone on a health journey, this recipe has you covered. Plus, it’s gluten-free and can easily be modified to fit vegan diets by substituting chicken with grilled tofu or chickpeas. Ready to embark on a tropical culinary adventure? Let’s dive into this delicious dish!

    Benefits and Advantages of Healthy Honey Lime Chicken with Mango Salsa

    One of the standout features of this Healthy Honey Lime Chicken with Mango Salsa is its simplicity. With just a few wholesome ingredients, you can create a dish that dazzles the palate and nourishes the body. The star of this recipe is chicken breast, a lean protein that supports muscle growth and helps keep you feeling full.

    The sweet and tangy marinade crafted from honey and lime juice not only enhances the flavor of the chicken but also adds nutritional benefits. Honey is a natural sweetener filled with antioxidants, while lime juice delivers a dose of vitamin C, which is essential for boosting your immune system.

    Accompanying this dish is mango salsa, a colorful combination of ripe mangoes, red onion, cilantro, and jalapeño. This refreshing salsa isn’t just a pretty garnish; it is rich in vitamins A and C and provides a boost of fiber. The added crunch and flavor profile give the dish depth, making it endlessly appealing.

    Another advantage of this recipe is its adaptability. You can easily modify it based on your dietary preferences or ingredients you have on hand. Whether you are following a low-carb, gluten-free, or even plant-based diet, this meal aligns with various eating plans while ensuring you enjoy all the flavors.

    In summary, Healthy Honey Lime Chicken with Mango Salsa is the perfect blend of taste and nutrition, making it a top choice among healthy dinner recipes. It’s fast, flexible, and above all, incredibly satisfying!

    Ingredients Overview

    Essential Ingredients for Healthy Honey Lime Chicken with Mango Salsa

    Here’s everything you need to make this delightful dish. Check out the measurements and purpose of each ingredient:

    For the Chicken Marinade

    • 2 lbs of boneless, skinless chicken breasts – A lean source of protein that cooks quickly and stays juicy.
    • 1/4 cup honey (or agave syrup for a vegan option) – This natural sweetener caramelizes during cooking, adding a delicious glaze.
    • Juice of 2 limes – Provides acidity that brightens the dish and enhances flavors.
    • 2 cloves of garlic, minced – Adds depth and a savory note to the marinade.
    • 1 teaspoon cumin – Gives a warm, earthy flavor, enhancing the overall complexity.
    • Salt and pepper to taste – Essential for balancing flavors, these are traditional seasoning staples.

    For the Mango Salsa

    • 2 ripe mangoes, diced – The star of the salsa, offering sweetness and texture.
    • 1/2 red onion, finely chopped – Provides sharpness that contrasts beautifully with the mango.
    • 1 jalapeño, seeded and minced (optional) – Adds a kick, though you can leave it out for a milder salsa.
    • 1/4 cup fresh cilantro, chopped – Brings an aromatic freshness, which brightens the profile.
    • Juice of 1 lime – Ties together the salsa, enhancing the tropical essence.

    Dietary Substitutions to Customize Your Healthy Honey Lime Chicken with Mango Salsa

    Here are some easy substitutions you can make to suit various dietary preferences:

    • To make it vegan: Swap out chicken for grilled tofu, tempeh, or chickpeas. Marinate them in the same mixture for a delightfully satisfying plant-based option.
    • Low-carb version: Use zucchini noodles or cauliflower rice instead of serving over traditional rice, keeping the dish lighter and more in line with low-carb diets.
    • Gluten-free: This recipe is inherently gluten-free as long as you select gluten-free sauces and sweeteners.
    • For added health benefits: Sprinkle chia seeds or flaxseeds into the mango salsa for an extra burst of omega-3 fatty acids and fiber.

    These substitutions allow you to cater to your guests’ preferences or your own dietary choices without sacrificing flavor.

    How to Prepare the Perfect Healthy Honey Lime Chicken with Mango Salsa: Step-by-Step Guide

    Follow these easy and straightforward steps to create your healthy honey lime chicken with mango salsa. This recipe is divided into clear sections for ease.

    1. Prepare the Marinade

    In a bowl, combine the honey, lime juice, minced garlic, cumin, salt, and pepper. Whisk until well combined.

    2. Marinate the Chicken

    Place the chicken breasts in a resealable plastic bag or a shallow dish. Pour the marinade over the chicken, ensuring it’s well coated. Seal the bag or cover the dish and refrigerate for at least 30 minutes, or up to 6 hours for maximum flavor.

    3. Prepare the Mango Salsa

    While the chicken marinates, prepare the mango salsa. In a separate bowl, combine the diced mangoes, red onion, jalapeño, cilantro, and lime juice. Toss gently to combine. Set aside to allow flavors to meld.

    4. Preheat the Grill or Oven

    If you’re grilling the chicken, preheat your grill to medium-high heat. If you opt for baking, preheat your oven to 375°F (190°C).

    5. Cook the Chicken

    • For Grilling: Remove the chicken from the marinade and discard the leftover marinade. Grill the chicken for approximately 6-7 minutes per side, or until the internal temperature reaches 165°F (75°C).
    • For Baking: Transfer the chicken to a baking dish. Bake for 25-30 minutes, or until cooked through, checking that the internal temperature reaches 165°F (75°C).

    6. Rest the Chicken

    Once cooked, remove the chicken from the grill or oven and let it rest for about 5 minutes. This allows the juices to redistribute.

    7. Serve with Mango Salsa

    Slice the chicken and serve it on a platter topped with the fresh mango salsa. This dish pairs wonderfully with brown rice, quinoa, or a fresh green salad.

    8. Enjoy

    Dig in and savor your Healthy Honey Lime Chicken with Mango Salsa. Enjoy knowing you’ve prepared a refreshing and nutritious dish that’s perfect for any occasion!

    This step-by-step guide makes it easy to prepare healthy dinner recipes in no time!

    Mastering Healthy Honey Lime Chicken with Mango Salsa: Advanced Tips and Variations

    To ensure your Healthy Honey Lime Chicken with Mango Salsa turns out perfectly every time, here are some advanced tips and variations to consider:

    Tips for Success

    1. Quality Ingredients: Use ripe, high-quality mangoes for the salsa. Their sweetness will elevate the dish to a new level.
    2. Adjust Spice Levels: If you enjoy more heat, add additional jalapeños or even a dash of cayenne pepper to the marinade.
    3. Food Thermometer: To guarantee perfectly cooked chicken, invest in a meat thermometer to monitor the internal temperature.

    Variations to Try

    • Add Additional Veggies: Incorporate diced bell peppers or cucumbers into the mango salsa for added crunch and nutrition.
    • Herb Infusion: Instead of cilantro, try basil or mint for an entirely different flavor profile that pairs well with chicken.
    • Tropical Twist: Swap mango for pineapple or peach for a fruity variation.
    • Grilled Peppers: Grill bell peppers or zucchini alongside the chicken for a well-rounded meal with vibrant colors.

    These tips and variations allow you to customize your dish, making it a staple in your collection of healthy dinner recipes!

    How to Store Healthy Honey Lime Chicken with Mango Salsa: Best Practices

    Proper storage ensures that your Healthy Honey Lime Chicken with Mango Salsa maintains its flavor and texture. Here’s how to do it:

    Refrigeration

    Store any leftover chicken and mango salsa separately in airtight containers. In the refrigerator, they can last for up to 3 days. It’s essential to keep them in separate containers to prevent the salsa from making the chicken soggy.

    Freezing

    If you want to enjoy this dish later, you can freeze the chicken. Place the cooked chicken in a freezer-safe bag or container, ensuring excess air is removed. It can last in the freezer for up to 3 months. However, it’s best to freeze without the salsa, as it’s best enjoyed fresh.

    Reheating

    When you’re ready to indulge again, thaw the chicken in the refrigerator overnight. Reheat it in the oven at 350°F (175°C) until warmed through, or in a skillet over low heat. For the mango salsa, mix in a bit of lime juice before serving for a fresh flavor boost.

    With proper storage, you’ll have healthy meals ready to go anytime, adding convenience to your collection of healthy dinner recipes!

    Nutritional Value of Healthy Honey Lime Chicken with Mango Salsa

    Nutritional information can be crucial for health-conscious individuals. Here’s a breakdown of the nutritional value for one serving (4 oz) of Healthy Honey Lime Chicken with Mango Salsa, based on using chicken breast and mango salsa without additional sides:

    • Calories: 250
    • Protein: 30g
    • Carbohydrates: 20g
    • Fats: 8g (mostly healthy fats from the olive oil, if used, in salsa)
    • Fiber: 2g
    • Sugar: 10g (from honey and mango)
    • Sodium: 250mg

    Health Benefits Summary

    • High Protein: Supports muscle recovery and growth.
    • Healthy Carbs: Provides energy and supports digestive health.
    • Vitamins and Minerals: Rich in vitamins A and C, promoting overall health.

    This dish not only tastes good but also aligns well with healthy dinner recipes by providing balanced nutrition, perfect for maintaining an active and healthy lifestyle.

    FAQs: Frequently Asked Questions About Healthy Honey Lime Chicken with Mango Salsa

    1. Can I prepare the marinade the night before?
    Absolutely! Marinating the chicken overnight can enhance the flavors even more. Just be mindful not to marinate for too long, as the acidity from the lime juice can start to break down the chicken.

    2. Is the recipe suitable for meal prep?
    Yes, this recipe is perfect for meal prep! You can store the cooked chicken and mango salsa in individual containers for easy grab-and-go lunches or dinners throughout the week.

    3. Can I use frozen mango for the salsa?
    Yes, if fresh mango is not available, you can use frozen mango. Just thaw it before chopping and mixing with the other salsa ingredients.

    4. What should I serve with this dish?
    This dish pairs well with various sides, such as brown rice, quinoa, or a fresh salad. Feel free to get creative based on your personal preferences!

    5. How can I ensure my chicken stays moist?
    Marinating and allowing the chicken to rest after cooking are great ways to maintain moisture. Additionally, cooking the chicken to the proper internal temperature (165°F / 75°C) ensures it remains juicy.

    Transform your dinner experience with Healthy Honey Lime Chicken with Mango Salsa, a dish that brings the flavors of the tropics to your table. Embracing the benefits of vibrant ingredients, health-conscious preparation, and endless customization possibilities, this recipe is a must-try for all culinary enthusiasts. Embrace this delightful addition to your roster of healthy dinner recipes and enjoy every bite!

  • Chicken Shawarma with Garlic Sauce

    Chicken Shawarma with Garlic Sauce

    Chicken Shawarma with Garlic Sauce: A Tropical Delight

    Introduction to Chicken Shawarma with Garlic Sauce

    When it comes to captivating chicken recipes, Chicken Shawarma with Garlic Sauce stands out as a favorite among home cooks and food enthusiasts alike. This dish captivates the senses with its bold flavors and aromatic spices, making it a perfect meal choice for busy weeknights or casual gatherings. What makes this recipe truly special is its versatility: it’s easy to prepare, health-conscious, and suitable for various dietary requirements.

    Chicken shawarma is a compelling fusion of Middle Eastern flair and tropical zest, where marinated chicken is grilled to perfection and served with a creamy garlic sauce that elevates every bite. Not only is it simple to make, but it’s also packed with protein and nutrients, making it a great choice for those looking to maintain a balanced diet. Interested in enjoying a homemade version of this culinary delight? Keep reading, as we guide you through everything you need to know to whip up this easy chicken recipe, catering to busy parents, working professionals, and culinary novices alike.

    Benefits and Advantages of Chicken Shawarma with Garlic Sauce

    One of the primary benefits of making Chicken Shawarma with Garlic Sauce is its simplicity. The preparation requires minimal cooking skill, making it a culinary adventure accessible to everyone—from college students to seasoned chefs. The marinating process infuses the chicken with robust flavors, while the quick grilling or baking method ensures that you spend less time in the kitchen and more time enjoying your delicious meal.

    Additionally, the health benefits of this dish cannot be overstated. It’s an excellent source of lean protein, essential for muscle repair and overall well-being. The combination of spices used in the marinade not only tantalizes the palate but also comes with health perks. Spices like cumin, coriander, and paprika have anti-inflammatory properties and can aid digestion, making this recipe a wholesome option for health-conscious individuals.

    Furthermore, Chicken Shawarma with Garlic Sauce caters to various dietary preferences. The ingredients can be easily modified to create vegan, gluten-free, or low-calorie alternatives, ensuring that everyone can enjoy this delightful dish. By understanding the benefits of this chicken recipe, you’ll be inspired to try your hand at making it at home and delighting your family or guests with a taste of the tropics.

    Ingredients Overview

    Essential Ingredients for Chicken Shawarma with Garlic Sauce

    Here’s a detailed list of the core ingredients you’ll need to prepare Chicken Shawarma with Garlic Sauce:

    • 1 lb boneless, skinless chicken thighs: Juicy and tender, these are perfect for absorbing flavors.
    • 2 tablespoons olive oil: Adds healthy fats that enrich the dish.
    • 3 cloves garlic, minced: Provides an aromatic base for marinating.
    • 1 teaspoon ground cumin: Offers a warm, earthy flavor.
    • 1 teaspoon ground paprika: Gives the dish its signature color and smokiness.
    • 1 teaspoon ground coriander: Delivers a fresh, citrus undertone.
    • 1 teaspoon ground turmeric: Adds vibrant color and strengthens the immune system.
    • Salt and black pepper to taste: Essential for enhancing the flavors.
    • 4 tablespoons plain yogurt (or vegan yogurt): Provides creaminess to the garlic sauce.
    • 2 tablespoons mayonnaise (or vegan mayo): Adds richness to your sauce.
    • 1 tablespoon lemon juice: Brightens up the flavors of the dish.

    Vegan and Gluten-Free Options: For a vegan version, substitute chicken with tofu or tempeh and ensure that all condiments and sauces are gluten-free.

    Dietary Substitutions to Customize Your Chicken Shawarma with Garlic Sauce

    When it comes to dietary preferences and restrictions, this chicken recipe allows for a diverse range of substitutions:

    • Chickpeas: For a plant-based alternative, replace chicken with canned chickpeas. Simply marinate and roast them for a similar flavor profile.
    • Cauliflower: This veggie can also work wonderfully for those looking for a gluten-free and low-calorie option; simply steam or roast.
    • Yogurt Alternatives: If you’re dairy-free, plant-based yogurts made from almond or coconut milk serve as excellent substitutes.
    • Herbs: Fresh herbs like parsley or cilantro can be used as toppings, enhancing flavor and visual appeal.
    • Wraps and Breads: Serve the shawarma in gluten-free wraps or pita bread for a suitable meal for those avoiding gluten.

    With these substitutions, Chicken Shawarma with Garlic Sauce can easily fit into various dietary lifestyles, making it an adaptable addition to any mealtime repertoire.

    How to Prepare the Perfect Chicken Shawarma with Garlic Sauce: Step-by-Step Guide

    Ready to create an irresistible platter of Chicken Shawarma with Garlic Sauce? Follow these simple steps, and enjoy the savory explosion of flavors!

    1. Prepare the Marinade: In a large bowl, whisk together olive oil, minced garlic, cumin, paprika, coriander, turmeric, salt, and black pepper. Ensure the spices are well combined to marinate the chicken evenly.

    2. Marinate the Chicken: Add the chicken thighs to the marinade. Coat them thoroughly. Cover the bowl with plastic wrap or seal it in a zip-lock bag. Allow the chicken to marinate for at least 30 minutes, or for the best flavor, refrigerate it overnight.

    3. Prepare the Garlic Sauce: In a separate bowl, combine the yogurt, mayonnaise (or vegan alternative), lemon juice, and a pinch of salt. Whisk the ingredients until they form a smooth, creamy sauce. Adjust lemon juice and seasoning to taste.

    4. Cook the Chicken: Preheat your grill or skillet over medium-high heat. Remove the chicken from the marinade and place it on the grill. Cook for about 6-7 minutes per side or until the internal temperature reaches 165°F (75°C). For baking, preheat your oven to 400°F (200°C) and bake for 20-25 minutes.

    5. Rest the Chicken: Once cooked, remove the chicken from the heat and let it rest for about 5 minutes. This helps the juices redistribute within the meat, ensuring every bite stays moist and tender.

    6. Slice the Chicken: Using a sharp knife, slice the chicken into thin strips. This allows for easier serving and eating, providing a delightful experience with each bite.

    7. Assemble the Shawarma: In a plate or wrap, layer the sliced chicken with fresh vegetables such as lettuce, cucumbers, tomatoes, and a generous drizzle of garlic sauce.

    8. Garnish and Serve: Sprinkle fresh herbs on top and serve with pita bread or alongside rice. Enjoy your homemade Chicken Shawarma with Garlic Sauce warm and fresh!

    Mastering Chicken Shawarma with Garlic Sauce: Advanced Tips and Variations

    Want to take your chicken shawarma to the next level? Here are some advanced tips and variations to enhance your culinary experience:

    • Use a Meat Thermometer: To ensure perfect doneness, use a meat thermometer. This will give you an accurate reading and guarantee juicy, tender chicken.
    • Experiment with Spices: Feel free to adjust the spice levels. Adding a pinch of cayenne or chili powder can elevate the heat for those who like their food with a bit of kick!
    • Add Vegetables: Incorporate grilled or roasted bell peppers, onions, or zucchini to introduce more flavor and texture.
    • Wrap Variations: Try wrapping the chicken in a flatbread or tortilla with a fusion of toppings like avocado or spicy salsa for a modern twist.
    • Shawarma Bowl: For a low-carb option, serve the chicken over a bed of greens, quinoa, or couscous, topped with garlic sauce and veggies.

    Incorporating these variations can make your meal more enjoyable and cater to different tastes and preferences.

    How to Store Chicken Shawarma with Garlic Sauce: Best Practices

    After enjoying your Chicken Shawarma with Garlic Sauce, proper storage is essential for maintaining its freshness. Here are some best practices to ensure your dish remains delectable for later:

    • Refrigeration: Place any leftover chicken in an airtight container in the refrigerator. It will stay fresh for up to 3-4 days.
    • Freezing: If you want to extend shelf life, consider freezing portions in freezer-safe bags or containers. Frozen chicken shawarma is best consumed within 3 months. To thaw, place it in the refrigerator overnight or use the microwave.
    • Reheating: Reheat any leftovers in the oven at 350°F (175°C) until warmed through, or use the microwave for quick results. Add a splash of water to the container to keep it moist.

    These practices will help you enjoy your Chicken Shawarma with Garlic Sauce while minimizing waste and preserving quality.

    Nutritional Value of Chicken Shawarma with Garlic Sauce

    Understanding the nutritional value of Chicken Shawarma with Garlic Sauce can help you make informed dietary choices. Here’s a rough breakdown of the nutritional content per serving (based on 4 servings):

    • Calories: 350-400
    • Protein: 30g
    • Fat: 20g
    • Carbohydrates: 15g
    • Fiber: 2g
    • Sugar: 3g
    • Sodium: 800mg

    This chicken recipe not only provides a substantial amount of protein necessary for daily muscle function, but it also offers healthy fats from olive oil and hummus, along with beneficial spices that contribute to its antioxidant properties. This dish can easily be made more nutritious by serving it with a generous side of vegetables or whole grains.

    FAQs: Frequently Asked Questions About Chicken Shawarma with Garlic Sauce

    Q: Can I use chicken breast instead of chicken thighs?
    A: Yes, chicken breast is a leaner alternative but may result in a drier texture. To remedy this, marinate it for longer and avoid overcooking.

    Q: Is it possible to make this dish vegetarian?
    A: Absolutely! Substitute chicken with firm tofu or chickpeas for a delicious plant-based version.

    Q: Can I prepare the chicken shawarma in advance?
    A: You can marinate the chicken ahead of time (up to 24 hours) to enhance flavors. Cook just before serving for the best taste.

    Q: What should I serve with chicken shawarma?
    A: Accompany this dish with fresh vegetables, pita bread, or a side of rice or couscous for a complete meal experience.

    Q: Is this recipe gluten-free?
    A: Yes, as long as you use gluten-free wraps or serve it over rice, this dish is suitable for gluten-sensitive diners.

    By addressing these FAQs, you enhance the understanding and accessibility of your Chicken Shawarma with Garlic Sauce recipe for all readers, ensuring they feel confident to try it at home.

    In conclusion, Chicken Shawarma with Garlic Sauce is not just another recipe; it’s a versatile dish that brings joy, nourishment, and flavor to your dinner table. By following the guidelines and tips provided here, anyone can create a tantalizing dish that pleases a wide array of palates. So gather your ingredients, roll up your sleeves, and dive into this tropical adventure today!

  • Italian Nachos

    Italian Nachos

    Italian Nachos: A Tropical Delight

    Introduction to Italian Nachos

    If you’ve ever found yourself searching for unique appetizer recipes that stand out from the typical offerings, then Italian Nachos might just become your new favorite dish. This vibrant twist on traditional nachos combines the indulgence of cheesy goodness with the fresh, bold flavors of Italian cuisine. Whether you’re hosting a casual gathering, enjoying a cozy family night, or simply want to treat yourself, these Italian Nachos provide a delightful experience that caters to all taste buds.

    Not only are these nachos incredibly simple to prepare, but they also offer various health benefits. Packed with ingredients like fresh tomatoes, basil, and protein-rich beans, they serve as a nourishing snack option. Furthermore, Italian Nachos can be customized to accommodate various dietary preferences, making them suitable for vegans, gluten-free eaters, and those watching their calorie intake. With layers of crunchy chips, melted cheese, and fresh toppings, this dish is as delicious as it is appealing.

    So, roll up your sleeves and let’s dive into the world of Italian Nachos! This recipe is sure to impress your friends and family while being an effortless addition to your repertoire of appetizer recipes.

    Benefits and Advantages of Italian Nachos

    Italian Nachos are exceptional for numerous reasons. Firstly, their ease of preparation makes them a perfect choice for busy individuals and families. Within minutes, you can assemble these nachos, making them a go-to option when you’re short on time yet want to serve something delicious. The straightforward nature of this recipe ensures that even novice cooks can whip it up with confidence.

    Secondly, the health benefits of Italian Nachos cannot be overlooked. Unlike conventional nachos that may be laden with unhealthy toppings, this recipe incorporates fresh vegetables, legumes, and lean proteins, providing your body with essential nutrients. The inclusion of ingredients such as tomatoes, olives, and basil not only adds color but also increases fiber content, supporting digestive health.

    Additionally, Italian Nachos stand out because they can cater to various dietary needs. For instance, you can easily make them gluten-free by opting for corn tortilla chips or replacing cheese with a dairy-free alternative to suit vegan diets. Furthermore, potato chips or baked chips can be chosen to keep the calorie count low, making this recipe versatile and health-conscious.

    In summary, Italian Nachos are not just a delightful dish; they are also a thoughtful and practical option for those looking for healthy appetizer recipes. Their rich flavors, nutritional benefits, and adaptability make them a worthy addition to any cooking enthusiast’s collection.

    Ingredients Overview

    Essential Ingredients for Italian Nachos

    To get started on your Italian Nachos, here’s a detailed list of essential ingredients you’ll need:

    • Tortilla Chips (8 oz)
    • Purpose: The crunchy foundation that holds your nachos together.
    • Options: Use corn tortilla chips for a gluten-free alternative.

    • Mozzarella Cheese (2 cups, shredded)

    • Purpose: Offers a gooey, melt-in-your-mouth texture.
    • Options: Substitute with dairy-free or Vegan mozzarella for a hypoallergenic version.

    • Fresh Tomatoes (2 medium, diced)

    • Purpose: Adds freshness and a burst of flavor.
    • Benefits: Rich in antioxidants and vitamins.

    • Olives (½ cup, sliced)

    • Purpose: Provides a briny zing that enhances the dish.
    • Options: Choose Kalamata olives for a more robust flavor.

    • Fresh Basil (¼ cup, chopped)

    • Purpose: Brings a fragrant aroma and Italian flair.
    • Benefits: Contains anti-inflammatory properties.

    • Black Beans (1 cup, cooked)

    • Purpose: Packs protein and fiber.
    • Options: Use canned beans for convenience.

    • Red Onion (1 small, diced)

    • Purpose: Offers a crunchy texture and sharpness.
    • Options: Substitute with green onions if you prefer a milder flavor.

    • Olive Oil (1 tablespoon)

    • Purpose: Helps in roasting the topped ingredients.
    • Benefits: A heart-healthy fat.

    • Italian Seasoning (1 teaspoon)

    • Purpose: Enhances the overall Italian flavor profile.

    This combination of ingredients not only creates a delicious dish but also ensures that it aligns with various dietary restrictions.

    Dietary Substitutions to Customize Your Italian Nachos

    If you have specific dietary needs or ingredient preferences, here are some substitutions you can make while preparing your Italian Nachos:

    1. For Gluten-Free Diets:
    2. Opt for corn-based tortilla chips instead of regular tortilla options to maintain a gluten-free status.

    3. For Vegan Variants:

    4. Substitute mozzarella cheese with vegan cheese or nutritional yeast for a cheesy flavor without dairy.

    5. For Lower-Calorie Options:

    6. Choose part-skim mozzarella or utilize baked tortilla chips instead of fried ones to cut down on calories without sacrificing flavor.

    7. For Increased Fiber:

    8. Consider adding more beans or incorporating leafy greens like spinach or arugula to enhance the fiber content of the dish.

    9. For a Tangy Twist:

    10. Add a drizzle of balsamic reduction on top for a sweet yet tangy flavor that complements the other toppings beautifully.

    With these substitutions, Italian Nachos can be easily tailored to suit every guest’s appetite, ensuring that everyone can enjoy this delicious appetizer recipe.

    How to Prepare the Perfect Italian Nachos: Step-by-Step Guide

    Creating Italian Nachos is a straightforward process that requires minimal cooking skills yet yields impressive results. Follow this step-by-step guide to ensure your nachos are a hit!

    1. Prepare the Base:
    2. Preheat your oven to 350°F (175°C). Arrange the tortilla chips in a single layer on a baking sheet, ensuring they cover the surface evenly. This allows for even cooking and prevents soggy chips.

    3. Mix Ingredients:

    4. In a bowl, combine the diced tomatoes, sliced olives, black beans, chopped basil, and diced red onion. Drizzle with olive oil and sprinkle with Italian seasoning. Stir the mixture well until fully combined.

    5. Add Cheese:

    6. Sprinkle half of the shredded mozzarella cheese evenly over the layer of tortilla chips. This layer acts as a barrier between the chips and the topping, preventing them from getting too soggy.

    7. Layer Toppings:

    8. Next, evenly distribute the prepared mixture of tomatoes, olives, beans, basil, and onions across the layer of cheese and chips.

    9. Top with More Cheese:

    10. Finally, add the remaining mozzarella cheese on top of the mixture, allowing for a delicious cheesy melt that binds all the toppings together.

    11. Bake:

    12. Place the baking sheet in the preheated oven and bake for 10-12 minutes, or until the cheese is melted and bubbly. Keep an eye on the nachos to prevent over-baking.

    13. Rest and Serve:

    14. Once finished, remove the nachos from the oven and let them sit for a few minutes. This allows them to cool slightly and makes them easier to handle.

    15. Garnish:

    16. Sprinkle additional chopped basil or fresh ingredients on top for an added burst of flavor. A drizzle of olive oil or balsamic reduction can offer an extra touch.

    By following these simple steps, you can create mouthwatering Italian Nachos that will wow your taste buds and impress your guests. Feel free to adapt any step to meet your dietary needs or preferences throughout the cooking process.

    Mastering Italian Nachos: Advanced Tips and Variations

    Once you master the basic recipe of Italian Nachos, you can explore a variety of advanced tips and variations to elevate your dish further.

    • Spice It Up: Consider adding jalapeños for a spicy kick. Fresh or pickled jalapeños work well and complement the flavors beautifully.

    • Add More Protein: For a heartier dish, include grilled chicken, turkey, or even Italian sausage on top. This addition will appeal to meat lovers and provide a fulfilling entrée.

    • Experiment with Sauces: Drizzle some pesto or marinara sauce on top before serving. These sauces offer an Italian twist and can enhance the overall flavor profile of the nachos.

    • Serve with Dips: Enhance your Italian Nachos experience by providing dips such as hummus or a creamy avocado sauce. These additions can bring a creamy texture and another flavor dimension to your appetizer.

    • Leftover Magic: If you have leftover ingredients, use them to create a delicious Italian Nachos salad. Simply toss the nacho toppings with leafy greens and a drizzle of olive oil for a refreshing twist.

    These advanced tips and variations ensure that your Italian Nachos remain exciting and versatile, ready for any occasion—be it game night, potluck, or simply a cozy movie evening at home.

    How to Store Italian Nachos: Best Practices

    If you’ve made more Italian Nachos than you can eat in one sitting, fear not! Here are some best practices for storing your nachos to keep them fresh for later:

    • Refrigeration: Let the nachos cool completely at room temperature. Once cooled, store leftover nachos in an airtight container in the refrigerator. Consume within 2-3 days for optimal freshness.

    • Freezing: For even longer storage, consider freezing the nachos. However, note that the texture of the chips may change upon reheating. Freeze them in a single layer on a baking sheet before transferring them to an airtight freezer bag. They can last for about a month frozen.

    • Reheating: To reheat refrigerated nachos, spread them out on a baking sheet and place them in a preheated oven at 350°F (175°C) for about 5-7 minutes until heated through. This method helps to restore some of the crunch to the chips. If reheating frozen nachos, bake from frozen for about 10-15 minutes, checking frequently to avoid burning.

    These storage methods will help retain the quality of your Italian Nachos, allowing you to enjoy them again without compromising taste or texture.

    Nutritional Value of Italian Nachos

    When indulging in Italian Nachos, it’s essential to be mindful of their nutritional value. Here’s a breakdown of the key nutrients you can expect to find in a typical serving (about 1 cup):

    • Calories: 350-400 calories (depending on cheese and chip choices)
    • Total Fat: 18-22 grams
    • Saturated Fat: 8-10 grams
    • Cholesterol: 25-30 mg
    • Sodium: 700-800 mg
    • Total Carbohydrates: 40-45 grams
    • Dietary Fiber: 5-7 grams
    • Sugars: 2-3 grams
    • Protein: 15-20 grams

    The nutritional benefits of Italian Nachos largely stem from their fresh and wholesome ingredients. The black beans and vegetables provide dietary fiber, while the lean proteins and healthy fats support energy levels and overall health. Adjusting the toppings and types of cheese used can further modify the nutritional content, allowing for even greater customization in line with dietary goals.

    As you enjoy this dish, keep in mind the versatility of its ingredients, offering room for adjustments to ensure alignment with various dietary needs without sacrificing flavor.

    FAQs: Frequently Asked Questions About Italian Nachos

    Can I make Italian Nachos ahead of time?

    Yes, you can prepare the toppings ahead of time. Simply store them in separate airtight containers in the refrigerator. When you’re ready to serve, layer the chips and cheese, add the toppings, and bake immediately for a fresh taste.

    What can I use instead of tortilla chips?

    For a healthier alternative, you can use baked pita chips or sliced vegetables like bell peppers or cucumbers as a base to create a unique low-carb platter.

    Are Italian Nachos suitable for vegans?

    Absolutely! By using vegan cheese and ensuring your tortilla chips are dairy and gluten-free, you can create a delicious vegan version without compromising on taste.

    How can I make my nachos spicier?

    Incorporate jalapeños, crushed red pepper flakes, or spicy Italian sausage to add a fiery kick to your dish. Additionally, look for spicy cheese blends to amplify the heat.

    What’s the best way to serve Italian Nachos?

    Serve your Italian Nachos immediately after baking. Pair them with a variety of dips, such as marinara, pesto, or a drizzle of balsamic glaze, for added flavor and presentation.

    By addressing these frequently asked questions, you can ensure that your experience with Italian Nachos is enjoyable and tailored according to your specific preferences or dietary restrictions.

    Conclusion

    In conclusion, Italian Nachos are a delightful fusion of flavors that showcases the deliciousness of Italian cuisine in a fun and approachable format. Perfect for gatherings, family dinners, or a simple snack, this recipe is a fantastic way to impress your guests and satisfy your cravings. Its versatility, health benefits, and the ease of preparation make it an essential addition to your repertoire of appetizer recipes. So, gather your ingredients, and get started on creating this delectable dish!

  • Mississippi Mud Chicken

    Mississippi Mud Chicken

    Mississippi Mud Chicken: A Tropical Delight

    Introduction to Mississippi Mud Chicken

    Are you on the lookout for a delicious yet uncomplicated addition to your repertoire of chicken recipes? Look no further than the mouthwatering Mississippi Mud Chicken. This dish combines tender chicken, rich flavors, and amazing versatility, making it a fantastic choice for home cooks of all skill levels. The best part? It’s both healthy and packed with nutrients, making it suitable for busy parents, students, and anyone who craves a flavorful meal without spending hours in the kitchen.

    With the simplicity of preparation and the potential for dietary adjustments, Mississippi Mud Chicken is ideal for diverse lifestyles—from newlyweds looking to impress each other with a home-cooked meal, to seniors seeking nourishing and easy-to-digest options. Plus, this recipe can easily be adapted to suit vegan, gluten-free, and low-calorie diets.

    By experimenting with a few key ingredients and methods, you can whip up this delightful dish that will surely impress family and friends alike. With the right blend of spices and the comforts of a home-cooked meal, Mississippi Mud Chicken is a culinary adventure worth embarking on. So tie your apron and let’s dive deeper into this recipe that’s bound to become a staple in your collection of chicken recipes!

    Benefits and Advantages of Mississippi Mud Chicken

    Mississippi Mud Chicken is not just a dish; it’s an experience that encompasses flavor, convenience, and health. One of the most compelling benefits of this recipe is its adaptability. Busy parents and working professionals will appreciate the straightforward preparation process, which can be completed in under an hour. Say goodbye to complicated meal prep—this recipe offers a quick path to an impressive dinner.

    Nutritionally, this chicken recipe is a powerhouse. Chicken itself is a lean source of protein, packed with essential amino acids necessary for muscle repair and overall health. By using wholesome ingredients like vegetables, and healthy fats, you can enhance the nutritional value further, making it an excellent choice for diet-conscious individuals.

    Moreover, Mississippi Mud Chicken stands out because it caters to various dietary requirements. Whether you are vegan, gluten-free, or following a low-calorie regimen, there’s a way to tweak this recipe to make it work for you. Notably, coconut milk used in the recipe provides healthy fats and contributes to the tropical flair, while also being a suitable option for those following a dairy-free lifestyle.

    In summary, the advantages of Mississippi Mud Chicken lie in its effortless preparation, adaptability for dietary needs, and health benefits. It’s a colorful, flavorful representation of home-cooked goodness that invites you to try your hand at a dish sure to impress your guests, family, or just yourself!

    Ingredients Overview

    Essential Ingredients for Mississippi Mud Chicken

    To create the perfect Mississippi Mud Chicken, gather the following ingredients:

    • 2 lbs Chicken Breasts (skinless and boneless): A great source of lean protein, perfect for a healthy lifestyle.
    • 1 cup Coconut Milk: Adds creaminess and a subtle tropical flavor, also suitable for dairy-free diets.
    • 1/2 cup Chicken Broth: Enhances the flavor of the dish.
    • 1/2 cup Brown Sugar: Provides sweetness; can be substituted with a natural sweetener like honey or agave syrup.
    • 2 tbsp Soy Sauce (or Tamari for gluten-free option): Adds depth of flavor (use coconut aminos for a soy-free alternative).
    • 1 tbsp Worcestershire Sauce: Brings umami richness.
    • 1 tsp Garlic Powder or 2 cloves Fresh Garlic (minced): Essential for enhancing flavors.
    • 1 tsp Onion Powder: Complements other flavors delicately.
    • 1/2 tsp Paprika: Adds a warm flavor and beautiful color.
    • Salt and Pepper to taste: For seasoning.

    These ingredients not only come together to create a satisfying dish but can also be adjusted to suit various dietary requirements.

    Dietary Substitutions to Customize Your Mississippi Mud Chicken

    1. For Vegan Options: Replace chicken breast with tofu or tempeh to enjoy the full textures and flavors without compromising your dietary preferences. Use vegetable broth and coconut milk to maintain the creamy consistency.

    2. For Gluten-Free: Ensure to use gluten-free soy sauce or coconut aminos instead of regular soy sauce. Check all label ingredients for gluten hidden in sauces.

    3. Low-Calorie Alternatives: Consider using chicken thighs instead of breasts for a richer flavor that remains lower in calories than heavy cream. Also, reduce the brown sugar or replace it with a natural calorie-free sweetener.

    By considering these substitutions, Mississippi Mud Chicken can effortlessly cater to a wide range of diets, ensuring everyone at the table can enjoy this delicious recipe!

    How to Prepare the Perfect Mississippi Mud Chicken: Step-by-Step Guide

    Ready to get cooking? Follow these easy steps to prepare Mississippi Mud Chicken. This straightforward process will guide you through each action, resulting in a dish that is sure to impress.

    1. Prepare the Chicken: Start by rinsing your chicken breasts under cold water and patting them dry with a paper towel. This helps to remove any excess moisture and allows for better browning when cooking.

    2. Season the Chicken: Season both sides of the chicken breasts generously with salt, pepper, garlic powder, onion powder, and paprika. Make sure the seasoning is evenly distributed to enhance flavor across every bite.

    3. Create the Sauce: In a medium bowl, whisk together the coconut milk, chicken broth, brown sugar, soy sauce, and Worcestershire sauce until well combined. This sauce will infuse flavor into the chicken while cooking.

    4. Heat the Pan: In a large skillet over medium heat, add a tablespoon of olive oil. Once hot, place the seasoned chicken breasts in the pan, cooking each side for about 4-5 minutes or until they develop a beautiful golden brown crust.

    5. Add the Sauce: Pour the prepared sauce mixture over the chicken in the skillet. Bring the sauce to a gentle simmer, then cover the skillet with a lid. This allows the chicken to cook through while absorbing the rich flavors of the sauce.

    6. Cook Thoroughly: Allow the chicken to cook for approximately 15-20 minutes, or until the internal temperature reaches 165°F (75°C). If using a meat thermometer, insert it into the thickest part of the chicken to check.

    7. Serve and Enjoy: Once the chicken is cooked through, transfer it from the skillet to a serving plate, spooning some of the remaining sauce over the top. Serve with a side of rice, quinoa, or steamed vegetables for a complete meal.

    8. Optional Finishing Touch: For an extra dimension of flavor, sprinkle fresh herbs such as parsley or cilantro over the top before serving.

    This step-by-step guide ensures that your Mississippi Mud Chicken is prepared perfectly, serving as a wonderful example of easy and rewarding chicken recipes that anyone can master!

    Mastering Mississippi Mud Chicken: Advanced Tips and Variations

    After you’ve made Mississippi Mud Chicken, you might be interested in taking your dish to the next level. Here are some advanced tips and variations to consider:

    • Modify the Protein: Experiment with different proteins like pork or shrimp to see how they adapt to the delicious sauce. Each protein will impart its unique texture and flavors while still absorbing the influences of the spices.

    • Spice it Up: If you’re in the mood for a little heat, add a pinch of cayenne pepper or chili flakes to the sauce. This adjustment not only balances the sweetness of the dish but also gives it an exhilarating flavor kick.

    • Vegetable Additions: For an all-in-one meal, consider adding vegetables like bell peppers, zucchini, or carrots during the cooking process. This adds extra nutrients, color, and texture to your dish, boosting its appeal while keeping it healthy.

    • Modify the Cooking Method: You can adapt this recipe for the oven by transferring the chicken and sauce into a preheated oven at 375°F (190°C) for about 25-30 minutes or until cooked thoroughly. This alternative cooking method can make your meal prep even easier!

    These variations and tips can inspire creativity in the kitchen, making Mississippi Mud Chicken even more enjoyable for yourself and your guests.

    How to Store Mississippi Mud Chicken: Best Practices

    Like many chicken recipes, Mississippi Mud Chicken can be stored with care, ensuring that nothing goes to waste. Here’s how to best preserve your delicious meal:

    • Refrigeration: Allow any leftovers to cool completely before transferring them to an airtight container. Properly stored, your Mississippi Mud Chicken will last in the refrigerator for up to 3-4 days. Be sure to keep the sauce with the chicken to maintain moisture and flavor.

    • Freezing: For long-term storage, Mississippi Mud Chicken can also be frozen. Portion it into freezer-safe containers or bags, squeezing out as much air as possible, and label them with the date. It can be frozen for up to 3 months. When you’re ready to enjoy it again, simply thaw in the refrigerator overnight.

    • Reheating: To reheat, place the chicken in a skillet over low heat, adding a splash of chicken broth or water if needed to avoid drying out. Alternatively, you can use a microwave on medium power, ensuring the chicken is heated thoroughly while retaining moisture.

    Storing your Mississippi Mud Chicken with these practices allows you to savor its flavors without sacrificing quality!

    Nutritional Value of Mississippi Mud Chicken

    Understanding the nutritional value of Mississippi Mud Chicken is essential for those who keep health in mind while cooking. Here’s a breakdown of the estimated nutrition per serving (based on a recipe serving about 4):

    • Calories: 350
    • Protein: 28g
    • Fat: 18g
    • Carbohydrates: 30g
    • Fiber: 2g
    • Sugar: 8g
    • Sodium: 700mg

    Mississippi Mud Chicken provides a healthy balance of macronutrients, ensuring you’re fueling your body well. The protein content supports muscle repair and growth, while healthy fats from coconut milk are beneficial for heart health. Adjustments made to reduce sugar or substitute healthier fats can further enhance its nutritional profile, making it a versatile dish for different dietary preferences.

    FAQs: Frequently Asked Questions About Mississippi Mud Chicken

    1. Can I use frozen chicken for this recipe?

    Yes, you can use frozen chicken, but ensure to thaw it in the refrigerator overnight beforehand to allow it to cook through evenly.

    2. Is there a vegetarian option for Mississippi Mud Chicken?

    Absolutely! Substitute the chicken with tofu or tempeh. Adjust cooking times to ensure the vegetarian protein is adequately heated.

    3. How can I make this dish less sweet?

    To reduce the sweetness, cut back on the brown sugar or replace it with a less sweet alternative like a sugar substitute or simply omit it altogether.

    4. Can I make Mississippi Mud Chicken in advance?

    Yes, Mississippi Mud Chicken can be made in advance and stored in the refrigerator for 3-4 days or frozen for up to 3 months. Just ensure it is stored properly to maintain flavor and moisture.

    5. What can I serve with Mississippi Mud Chicken?

    This dish pairs well with a variety of sides such as rice, quinoa, steamed vegetables, or even a fresh salad. The versatility allows it to complement numerous side dishes effectively.

    In conclusion, Mississippi Mud Chicken is more than just another recipe; it’s a flavorful experience that can adapt to various dietary needs and delight all who partake. So why not take action today and try this delightful dish? Your taste buds will thank you!

  • White Trash Casserole with Doritos

    White Trash Casserole with Doritos

    White Trash Casserole with Doritos: A Tropical Delight

    Introduction to White Trash Casserole with Doritos

    Are you in search of easy dinner recipes that are both crowd-pleasers and incredibly simple to whip up? Look no further! The White Trash Casserole with Doritos is a delightful fusion of flavors and textures that will quickly become a household favorite. This comforting dish combines crunchy Doritos with a creamy chicken mixture, lively veggies, and savory spices to create an explosion of taste in every bite. Whether you’re a busy parent, a college student wanting a quick meal, or a health-conscious individual, rest assured this casserole can easily adapt to suit your needs.

    While it may carry the name “White Trash,” don’t let that fool you—this recipe’s charm lies in its simplicity and versatility. Need a gluten-free version for a friend? Or perhaps you want to make it vegan for a plant-based meal? This casserole can handle it all! Plus, it’s made with readily available ingredients, making it not only accessible but also incredibly budget-friendly. In the following sections, we’ll explore the numerous advantages of this dish, break down the ingredients, and provide step-by-step instructions, tips, and more to ensure you create the perfect casserole every time.

    Benefits and Advantages of White Trash Casserole with Doritos

    This White Trash Casserole with Doritos is the epitome of ease and convenience, making it an ideal option for anyone looking for easy dinner recipes without compromising on flavor. Here’s why you should add this casserole to your dinner repertoire:

    1. Effortless Preparation: This dish comes together in mere minutes, allowing even the busiest of cooks to produce a hearty meal. The cooking process is straightforward, requiring minimal kitchen skills. Just layer the ingredients, pop it in the oven, and let it bake!

    2. Customizable: The versatility of this recipe is phenomenal. Are you gluten-free? Use gluten-free Doritos and cream of mushroom soup. Want a vegetarian option? Swap the chicken for hearty beans and add extra vegetables. Change it according to dietary needs or what’s available in your pantry.

    3. Health-Conscious Options: While this casserole can indulge comfort food cravings, it can also be tailored for health-conscious eaters. Consider using low-fat cheese, lean chicken, or even subbing zoodles (zucchini noodles) for pasta to reduce calories and carbohydrates while adding nutritional value.

    4. Family-Friendly: Children and adults alike adore the crunchy topping and creamy filling. It’s a fantastic way to get picky eaters to consume more vegetables without them realizing it!

    5. Meal Prep Favorite: This dish is perfect for meal prepping. Make a big batch at the start of the week, and you’ll have ready-made meals for busy days ahead.

    In essence, the White Trash Casserole with Doritos checks all the boxes—ease of preparation, health-conscious options, and an adaptable nature make it a standout choice among easy dinner recipes.

    Ingredients Overview

    Essential Ingredients for White Trash Casserole with Doritos

    To whip up your White Trash Casserole, you’ll need the following ingredients:

    • 3 cups cooked chicken (shredded or diced)
    • 2 cups Doritos (Nacho Cheese flavor or your preference)
    • 1 can cream of chicken soup (or gluten-free/vegan alternative)
    • 1 cup sour cream (you can use Greek yogurt for a healthier option)
    • 1 cup shredded cheese (cheddar works best; swap for dairy-free cheese if needed)
    • 1 cup frozen mixed vegetables (like peas, corn, and carrots)
    • 1 tablespoon ranch seasoning mix
    • Salt and pepper to taste

    The ingredients provide a base for a flavorful casserole, with each element playing a vital role in crafting the perfect dish. The Doritos add an iconic crunch, while the cream of chicken soup and sour cream give the casserole its comforting, creamy texture.

    Dietary Substitutions to Customize Your White Trash Casserole with Doritos

    1. Vegan Option: Substitute cooked chicken with shredded jackfruit or chickpeas. Replace the cream of chicken soup with a vegan cream substitute, and use a vegan sour cream and dairy-free cheese to keep it plant-based.

    2. Gluten-Free Option: Use gluten-free Doritos and choose gluten-free cream of mushroom soup. Be sure to check all labels on any prepackaged ingredients to confirm they meet gluten-free standards.

    3. Low-Calorie Option: To create a lower-calorie version, opt for shredded rotisserie chicken, use reduced-fat sour cream, and limit the cheese. You can also boost nutrition by adding more veggies, like spinach or mushrooms.

    4. Low-Carb Option: Swap out the Doritos for crushed pork rinds or almond flour-based chips to create a low-carb version. You can also replace the chicken with cauliflower for a substantial base.

    By utilizing these dietary substitutions, you ensure that this versatile casserole can suit a range of dietary preferences and needs while remaining accessible. Keep these adaptations in mind as you explore this delightful dish.

    How to Prepare the Perfect White Trash Casserole with Doritos: Step-by-Step Guide

    Follow these easy steps to create your delicious White Trash Casserole with Doritos. Whether you’re a seasoned cook or a beginner looking for easy dinner recipes, you’ll find this guide straightforward:

    1. Preheat Your Oven: Begin by preheating your oven to 350°F (175°C).

    2. Prepare Your Chicken: If you haven’t cooked your chicken yet, boil, bake, or sauté it until fully cooked. Allow it to cool, then shred or dice into bite-sized pieces.

    3. Mix the Base: In a large mixing bowl, combine the shredded chicken, cream of chicken soup, sour cream, and ranch seasoning.

    4. Add Vegetables: Gently fold in the frozen mixed vegetables, ensuring they are evenly distributed throughout the mixture.

    5. Layer the Dish: In a greased 9×13-inch baking dish, layer half of the crushed Doritos to cover the bottom.

    6. Pour the Chicken Mixture: Layer the chicken and veggie mixture over the Doritos, spreading it evenly across the entire dish.

    7. Top with Cheese: Sprinkle the shredded cheese evenly over the chicken layer for an extra cheesy finish.

    8. Add More Doritos: Lastly, top with the remaining crushed Doritos, providing that delightful crunch on top.

    9. Bake the Casserole: Place the baking dish in the preheated oven and bake for 30–35 minutes, or until the cheese is melted and bubbly. Consider covering the dish with foil if it browns too quickly.

    10. Cool and Serve: Once fully baked, remove the dish from the oven and let it cool for a few minutes. Serve warm and enjoy!

    Feel free to adapt any of the steps according to your dietary restrictions or preferences. The beauty of this casserole lies in its adaptability.

    Mastering White Trash Casserole with Doritos: Advanced Tips and Variations

    To truly make the most out of your White Trash Casserole with Doritos, consider the following tips and variations:

    • Use Leftover Chicken: This dish is a great way to use leftover rotisserie chicken or turkey, saving you time and reducing waste.

    • Experiment with Flavors: Add different spices or sauces, such as hot sauce for a kick or BBQ chicken for a tangy twist.

    • Flavor Boosters: For enhanced flavor, sauté onions and garlic before adding them to the chicken mixture. Aromatics can elevate the overall taste of the casserole.

    • Vegetable Variations: Feel free to include your favorite vegetables like bell peppers, mushrooms, or spinach. The more colorful, the better!

    • Make It Spicy: For heat lovers, include jalapeños or a sprinkle of cayenne pepper in the chicken mixture.

    Remember, this dish is highly adaptable! Don’t hesitate to let your creativity shine as you experiment with new ingredients and flavors.

    How to Store White Trash Casserole with Doritos: Best Practices

    Proper storage is vital to keeping your White Trash Casserole delicious for future meals. Here’s how to effectively store your dish:

    • Refrigeration: Store leftovers in an airtight container in the refrigerator for up to 3-4 days. Make sure the casserole has cooled completely before transferring it to avoid condensation, which can make the dish soggy.

    • Freezing: For extended storage, freeze your casserole. Wrap it tightly in plastic wrap and then in aluminum foil or transfer it to a freezer-safe container. It can last up to 2-3 months in the freezer.

    • Reheating: When you’re ready to enjoy leftovers, reheat in the oven at 350°F (175°C) for about 20-30 minutes, or until heated through. If the casserole is frozen, it’s best to let it thaw in the fridge overnight before reheating for even cooking.

    By utilizing these storage tips, you can maximize the shelf life of your casserole while maintaining its delightful flavors.

    Nutritional Value of White Trash Casserole with Doritos

    Understanding the nutritional composition of your dishes is essential, especially when preparing easy dinner recipes. For a serving size of approximately one cup of White Trash Casserole with Doritos, the nutritional information is as follows (Exact values can vary based on substitutions and specific brands used):

    • Calories: 350-400
    • Total Fat: 20g
    • Saturated Fat: 10g
    • Cholesterol: 90mg
    • Sodium: 800mg
    • Total Carbohydrates: 30g
    • Dietary Fiber: 3g
    • Sugars: 2g
    • Protein: 22g

    These values make the casserole a hearty option, boasting a good amount of protein to keep you satiated. However, nutritional content can vary, particularly with different dietary substitutions, so consider this template while customizing your recipe.

    FAQs: Frequently Asked Questions About White Trash Casserole with Doritos

    Q: Can I use other chips instead of Doritos?
    A: Absolutely! Feel free to swap Doritos for any other crunchy chips you have on hand, such as Fritos, tortilla chips, or even crushed crackers.

    Q: Is it possible to prepare this casserole in advance?
    A: Yes, you can prepare the casserole up to a day ahead. Just assemble it, cover with foil, and store in the fridge. When ready to bake, cook as directed, adding a few extra minutes if baking straight from the fridge.

    Q: Can I make this casserole without chicken?
    A: Definitely! You can opt for a vegetarian version by using beans or lentils instead of chicken. You can also add more vegetables for added nutrition and flavor.

    Q: Can I freeze the casserole?
    A: Yes! You can freeze the casserole either before baking or after leftovers. Just ensure you wrap it well to avoid freezer burn.

    Q: How can I make this dish spicier?
    A: To add some heat, include diced jalapeños or a pinch of cayenne pepper mixed into the chicken mixture.

    With these FAQs, we hope to clarify any doubts you may have about the recipe, allowing you to dive into making your own White Trash Casserole with Doritos confidently!

    In summary, this White Trash Casserole with Doritos is not merely your average casserole. Its adaptability, ease of preparation, and delightful flavors make it a fantastic option for anyone seeking easy dinner recipes. Whip it up for a family gathering, meal prep, or a cozy weeknight dinner—this dish has got you covered! Enjoy cooking and happy eating!

  • Irresistible Honey Mustard BLT Chicken Sliders

    Irresistible Honey Mustard BLT Chicken Sliders

    Irresistible Honey Mustard BLT Chicken Sliders: A Tropical Delight

    Introduction to Irresistible Honey Mustard BLT Chicken Sliders

    Are you looking for a quick and delicious recipe that will impress your family and friends? Enter the Irresistible Honey Mustard BLT Chicken Sliders! These mini sandwiches are not only bursting with flavor, but they’re also incredibly simple to prepare, making them ideal for busy weeknights or casual gatherings. By blending a touch of sweetness from honey mustard with the savory flavors of crispy bacon, lettuce, and tender chicken, these sliders are delightful in every bite.

    If you’re a fan of chicken recipes, you’ll love how versatile this dish can be. It’s easy to adapt for different dietary needs, making it suitable for everyone—from health-conscious eaters to busy parents. Plus, the health benefits are notable: chicken is a fantastic source of lean protein, while the fresh vegetables add essential nutrients and fiber.

    These sliders can also be veganized by substituting the chicken with chickpeas or tofu, and for gluten-free options, simply use gluten-free buns. The ultimate goal of this recipe is to inspire cooks of all backgrounds to try their hand at gourmet flavors, even in a rush. With just a few ingredients and quick steps, you’ll have a meal that leaves your tastebuds dancing. So, let’s dive into the details!

    Benefits and Advantages of Irresistible Honey Mustard BLT Chicken Sliders

    Beyond their mouthwatering flavor, Irresistible Honey Mustard BLT Chicken Sliders have multiple advantages that set them apart from other chicken-based dishes. Here are some reasons you’ll want to add this recipe to your go-to list:

    1. Simplicity: While some chicken recipes can be labor-intensive, these sliders prioritize simplicity without sacrificing taste. They can be prepared in under 30 minutes, making them perfect for busy evenings when you need a quick meal.

    2. Health-conscious: Lean chicken, paired with fresh lettuce and tomatoes, provides essential vitamins and minerals. Moreover, honey adds natural sweetness without the excessive calories of sugary condiments, making this a healthier option than many restaurant choices.

    3. Flexibility in preparation: Whether you choose to grill, bake, or sauté the chicken, this recipe allows for various cooking methods, accommodating your kitchen setup or personal preferences.

    4. Crowd-pleaser: With their bite-sized format and flavor-packed filling, these sliders are always a hit at parties, picnics, or family dinners. They can be made in large batches, catering to both large gatherings and intimate family meals.

    5. Dietary adaptability: Notably, this recipe can easily suit various dietary needs. By offering substitutions for gluten-free or vegan diets, more people can enjoy these tasty sliders without feeling left out.

    Overall, the Honey Mustard BLT Chicken Sliders are a delightful solution for home cooks seeking a nutritious, flavorful, and versatile recipe that can adapt to various tastes and dietary requirements.

    Ingredients Overview

    Essential Ingredients for Irresistible Honey Mustard BLT Chicken Sliders

    To whip up these delicious chicken sliders, you’ll need a handful of ingredients that are easy to find and relatively inexpensive. Here’s a detailed list along with their purpose:

    • 1 Pound Chicken Breast (or thighs): The foundation of your sliders, chicken provides protein and moisture. You can use skinless, boneless pieces for convenience.

    • 1/4 Cup Honey Mustard: This tangy-sweet condiment is the star of the show, providing a balanced dressing that enhances the freshness of the other ingredients.

    • 8 slices of Bacon: Get the crispy, salty flavor that perfectly complements the chicken. For a healthier option, consider turkey bacon or bacon alternatives.

    • 4 Hamburger Buns: Choose gluten-free or whole wheat buns to add fiber and texture. You can also use lettuce wraps for a low-carb option.

    • 1 Cup Leafy Lettuce (e.g., romaine or spinach): Provides a fresh, crunchy element that’s essential for the classic BLT experience.

    • 1 Medium Tomato, sliced: Adds juiciness and freshness; it’s best to choose ripe, flavorful tomatoes.

    • Salt and Pepper, to taste: Essential for seasoning the chicken for overall flavor enhancement.

    Dietary Substitutions to Customize Your Irresistible Honey Mustard BLT Chicken Sliders

    Here’s how to make substitutions based on dietary needs:

    • Vegan: Replace chicken with chickpeas, tofu, or tempeh marinated in honey mustard. Use vegan bacon substitutes for the crispy element.

    • Gluten-Free: Instead of regular buns, opt for gluten-free hamburger buns or use lettuce leaves to wrap the filling.

    • Low-Calorie: Use a light honey mustard dressing and eliminate the bacon or opt for turkey bacon. Serve in lettuce wraps to minimize carbs.

    Whether you’re lactose intolerant or following a low-carb diet, adjustments can be made easily while still maintaining the recipe’s integrity.

    How to Prepare the Perfect Irresistible Honey Mustard BLT Chicken Sliders: Step-by-Step Guide

    Ready to create your Irresistible Honey Mustard BLT Chicken Sliders? Follow this straightforward step-by-step guide to ensure your sliders turn out perfectly:

    1. Prepare the Chicken: Rinse the chicken breasts under cold water and pat them dry with paper towels. Slice them into smaller pieces to fit the buns more easily.

    2. Season and Cook the Chicken: Season both sides of the chicken with a pinch of salt and pepper. Heat a grill or skillet over medium-high heat and cook the chicken for about 6-7 minutes on each side, or until the internal temperature reaches 165°F (75°C).

    3. Cook the Bacon: While the chicken is cooking, place the bacon slices on a separate skillet over medium heat. Cook until crispy, then transfer to paper towels to drain excess grease.

    4. Mix the Honey Mustard: In a small bowl, combine honey and mustard to create the sauce. Adjust the ratio depending on your taste preference—more honey for sweetness and more mustard for tanginess.

    5. Assemble the Sliders: Slice the buns in half. Spread a generous amount of honey mustard on the bottom half. Layer with crispy bacon, followed by the cooked chicken, fresh lettuce, and slices of tomato. Top with the other half of the bun.

    6. Optional: Toast the Buns: For added texture and flavor, toast the assembled sliders on a skillet for a few minutes until golden brown. This step enhances the overall taste.

    7. Serve: Cut the sliders in half if desired, and serve them warm. Enjoy with your favorite side dishes like sweet potato fries or a fresh salad.

    Tips for Adaptation

    • If making ahead, prep the chicken and the fixings separately, assembling simply before serving.
    • For added flavor, consider marinating the chicken in the honey mustard for a more robust taste.

    By accident or by design, you’ll find this easy approach to preparing sliders not only gets dinner on the table quickly but will also impress even the most discerning guests.

    Mastering Irresistible Honey Mustard BLT Chicken Sliders: Advanced Tips and Variations

    To elevate your Irresistible Honey Mustard BLT Chicken Sliders, consider these advanced tips and variations:

    • Flavor Infusions: Infuse more flavors by marinating the chicken in your favorite herbs and spices. Adding garlic powder, onion powder, or paprika can enhance the flavor profile, making it even more irresistible.

    • Cheese Lover’s Delight: Slices of cheddar or gouda cheese added to the sliders can introduce a rich creaminess that complements the honey mustard. Melt the cheese on top of the chicken just before assembling for an oozy effect.

    • Veggie Variations: Roasted or grilled veggies such as bell peppers, onions, or avocados can be an excellent addition, catering to more veggie-loving eaters.

    • Condiment Alternatives: While honey mustard is delicious, experimenting with BBQ sauce or a spicy aioli can give a unique twist to these sliders.

    • Bite-Sized Appetizers: For gatherings, adapt the recipe to create mini sliders using small dinner rolls for bite-sized snacks that everyone can enjoy.

    These tips not only add variety but also encourage creativity in the kitchen. If you’re looking to wow guests or simply enjoy a new take on a timeless classic, these adaptations can take your dish to the next level.

    How to Store Irresistible Honey Mustard BLT Chicken Sliders: Best Practices

    If you find yourself with leftovers or want to meal prep for the week ahead, here are some storage insights for your Irresistible Honey Mustard BLT Chicken Sliders:

    • Refrigeration: Once the sliders have cooled, place them in an airtight container and store in the refrigerator for up to 3-4 days. This way, they remain fresh and easy to reheat.

    • Freezing: For extended storage, wrap individual sliders securely in plastic wrap and place them in a freezer-safe bag. You can freeze them for up to three months. When you’re ready to eat, thaw in the fridge overnight or warm them in the microwave.

    • Reheating: To reheat, it’s best to use an oven or air fryer for maximum crispness. Preheat the oven to 350°F (175°C) and warm the sliders on a baking sheet for about 10-15 minutes until heated through.

    Avoid reheating more than once, as chicken can lose its quality and moisture on repeat cycles.

    Nutritional Value of Irresistible Honey Mustard BLT Chicken Sliders

    One of the advantages of making Irresistible Honey Mustard BLT Chicken Sliders is that they can be both delicious and nutritious. Here’s a breakdown of the nutritional value for a single slider (with the mentioned ingredients):

    • Calories: 350-400 calories per slider, depending on the bun and sauce used.
    • Protein: Approximately 25g, thanks to the chicken and bacon.
    • Fat: 15g, primarily from the bacon; opting for turkey bacon can reduce this.
    • Carbohydrates: 30g, primarily from the bun; whole grain options will add more fiber.
    • Fiber: 3-4g from the lettuce and tomato, contributing to your daily intake.

    This nutritional breakdown shows that while the sliders are indulgent, they also fit well within a balanced diet if portioned accordingly. Adjustments can be made by substituting ingredients to create lower-calorie or higher-fiber options.

    FAQs: Frequently Asked Questions About Irresistible Honey Mustard BLT Chicken Sliders

    1. Can I make these sliders ahead of time?

    Absolutely! You can prep the chicken and toppings ahead. Just assemble right before serving to keep everything fresh.

    2. What can I substitute for bacon?

    Feel free to use turkey bacon or vegan bacon substitutes for a healthier or plant-based option.

    3. How do I ensure the chicken stays juicy?

    Avoid overcooking the chicken. Use a meat thermometer to check for doneness at 165°F (75°C), and consider marinating beforehand for added flavor.

    4. Can I use a different sauce?

    Yes! BBQ sauce or a spicy aioli can bring a different flavor experience. Don’t be afraid to experiment with flavors!

    5. Are these sliders suitable for meal prep?

    Yes! You can prepare these sliders in advance and store them in the fridge or freezer for later.

    In closing, Irresistible Honey Mustard BLT Chicken Sliders serve as a delightful addition to your culinary repertoire. They’re quick, healthy, and versatile, making them fit seamlessly into every lifestyle. Whether you’re a busy professional, a cooking enthusiast, or anyone in between, this recipe has something for everyone. So gather your ingredients and enjoy the process of creating something truly delicious!

  • Curry Chicken Roti

    Curry Chicken Roti

    Curry Chicken Roti: A Tropical Delight

    Introduction to Curry Chicken Roti

    Curry Chicken Roti is not just a meal; it’s an experience that carries the vibrant flavors of the tropics right into your kitchen. Imagine biting into a flaky, golden-brown roti filled with a savory and aromatic chicken curry. This dish embodies the harmony of spices and comfort food all in one, making it a fantastic addition to your repertoire of chicken recipes.

    One of the standout features of Curry Chicken Roti is its versatility. It caters to various dietary needs, whether you’re looking for a healthy weeknight meal, a satisfying dish for your family, or something that fits into a busy schedule. The roti can be made gluten-free or even vegan with simple substitutions, making it an inclusive option for everyone at the table.

    Not only is this dish simple to prepare, but it also boasts an array of health benefits. The combination of lean chicken, spices, and fresh vegetables creates a nutritious meal that is rich in protein and flavor. Additionally, it can be customized easily to include seasonal vegetables, promoting a balanced diet.

    Let’s embark on this culinary adventure and discover how to create your own delicious Curry Chicken Roti. This easy-to-follow recipe will inspire even novice cooks to create something truly wonderful!

    Benefits and Advantages of Curry Chicken Roti

    There are several compelling reasons to include Curry Chicken Roti in your meal rotation.

    1. Ease of Preparation: This dish shines as a practical choice for busy parents, working professionals, and students alike. The recipe involves straightforward techniques that breathe life into the kitchen without overwhelming you. With ingredients that are easy to find, you won’t spend hours searching for exotic spices; your pantry will mostly contain what’s required.

    2. Health Benefits: When compared to other chicken recipes, Curry Chicken Roti stands out for its healthy profile. The dish is rich in protein from the chicken, which is essential for muscle repair and growth, while vibrant spices such as turmeric and ginger not only add flavor but also offer anti-inflammatory benefits. Vegetables incorporated into the curry increase fiber intake, promoting digestive health.

    3. Customizable: The true beauty of Curry Chicken Roti lies in its flexibility. For those conscious of their diet, you can easily tweak traditional recipes to be low-calorie, gluten-free, or even vegan by substituting chicken with tofu or chickpeas. This adaptability makes it suitable for a diverse range of dietary requirements.

    4. Flavorful and Satisfying: Let’s not ignore the flavor explosion! The spices bring warmth and comfort to each bite, while the roti gives a satisfying contrast in texture. Whether you decide to serve it at a family dinner or at a casual gathering with friends, it is sure to impress and satisfy.

    By integrating Curry Chicken Roti into your cooking routine, you’re not just providing a meal; you’re serving up comfort, nutrition, and joy all wrapped in a delightful package.

    Ingredients Overview

    Essential Ingredients for Curry Chicken Roti

    To prepare the ultimate Curry Chicken Roti, gather the following ingredients:

    For the Curry Filling:

    • 1 lb (450g) boneless chicken thighs or breasts, cubed (lean protein source)
    • 2 tablespoons vegetable oil (coconut oil is a delicious alternative)
    • 1 large onion, finely chopped
    • 3 cloves garlic, minced
    • 1 tablespoon fresh ginger, minced
    • 2 teaspoons curry powder (or garam masala for a deeper flavor)
    • 1 teaspoon ground cumin
    • 1 can (14 oz) coconut milk (for creaminess, can use low-fat version)
    • 1 diced tomato (adds freshness)
    • Salt and pepper to taste
    • 1 cup spinach or any leafy greens (optional, boosts nutrition)

    For the Roti:

    • 3 cups all-purpose flour (or whole wheat for a healthier option; for gluten-free use chickpea flour or almond flour)
    • 1 teaspoon salt
    • 1 tablespoon vegetable oil (or ghee for a richer flavor)
    • Water (as needed, to form a dough)

    This list captures the essence of a well-rounded dish that is filled with nutrition and flavor, while also picking ingredients that cater to various dietary needs.

    Dietary Substitutions to Customize Your Curry Chicken Roti

    Creating a dish that caters to diverse dietary preferences can feel challenging, but for Curry Chicken Roti, it’s all about making simple substitutions:

    • Gluten-Free Option: Use gluten-free flour, such as chickpea (besan) flour or a gluten-free baking blend, for the roti. Be conscious of the ratio of water since gluten-free flours may absorb liquid differently.

    • Vegan Version: Swap the chicken for chickpeas or tofu. Season the tofu well to infuse flavor, or opt for lentils for an equally nutritious plant-based protein. Use coconut cream instead of coconut milk to maintain creaminess.

    • Low-Calorie Adjustment: If you’re aiming for a lighter dish, lean chicken cuts are key. For the roti, you can reduce the oil or use a non-stick spray when cooking to cut calories significantly.

    • Fiber Boost: Add more veggies into your filling such as bell peppers, carrots, or zucchini. Not only do they provide texture and flavor, but they also increase the fiber content.

    These substitutions allow each cook to create a perfect Curry Chicken Roti suited to their dietary needs, making it an adaptable and inclusive choice.

    How to Prepare the Perfect Curry Chicken Roti: Step-by-Step Guide

    Ready to tackle this delicious meal? Follow these step-by-step instructions to make your own Curry Chicken Roti:

    1. Prepare the Dough: In a bowl, mix 3 cups of flour and 1 teaspoon of salt. Add 1 tablespoon of oil and gradually mix in water until a soft dough forms. Knead for about 5-7 minutes until smooth. Cover the dough with a damp cloth, allowing it to rest for 30 minutes.

    2. Cook the Filling: In a pan, heat 2 tablespoons of oil over medium heat. Add the chopped onion and sauté until translucent, about 5 minutes. Stir in the garlic and ginger, and cook for another 2 minutes until fragrant.

    3. Add Spices: Mix in the curry powder and ground cumin, cooking for an additional minute. This helps to release the essential oils in the spices, enhancing the flavor of your chicken recipes.

    4. Cook the Chicken: Add the cubed chicken to the pan. Cook, stirring occasionally, until the chicken is browned and cooked through, about 8-10 minutes.

    5. Incorporate the Vegetables: Pour in the can of coconut milk and add the diced tomato. Allow the mixture to simmer for about 10-15 minutes until slightly thickened—this step is crucial as it melds all the flavors together beautifully. Season with salt and pepper according to taste.

    6. Add Greens: If using spinach or any leafy greens, stir them in during the last 2-3 minutes of cooking to wilt slightly.

    7. Make the Roti: Divide the rested dough into equal portions (about 8-10 pieces). Roll each piece into a ball and then flatten into a circle, about 1/4 inch thick.

    8. Cook the Roti: Heat a skillet over medium heat. Place the rolled roti on the skillet. Cook for about 2 minutes on each side until golden brown, and bubble start to form. Brush with a little oil or butter for a richer taste if desired.

    9. Assemble the Meal: Place a generous spoonful of your savory curry filling inside the roti and fold it like a wrap or danish. Serve hot with a side of yogurt or a simple salad for a delightful contrast.

    10. Enjoy!: Share with family and friends and watch as they rave about your cooking skills. This dish will surely become a family favorite.

    By following these steps, you’ll create a satisfying meal that showcases your culinary flair. Whether you’re a seasoned cook or just beginning, Curry Chicken Roti is approachable and rewarding.

    Mastering Curry Chicken Roti: Advanced Tips and Variations

    To take your Curry Chicken Roti to the next level, consider these advanced tips and variations:

    • Fresh Herbs: For an added layer of flavor, fold in fresh cilantro or mint into your curry filling before stuffing the roti. The fresh herbs will elevate the dish.

    • Spice Level: Adjust the heat according to your taste! Add chopped green chilies or a pinch of cayenne pepper for a spicier version. Conversely, omit the spices for a milder flavor for kids or those sensitive to spice.

    • Saucy Option: Make a curry sauce by keeping the coconut milk a bit runnier and topping the roti with extra sauce before serving. This ensures the dish is creamy and richer, perfect for scooping with the roti.

    • Make-ahead Possibilities: Prepare the filling ahead of time and store it in the refrigerator for up to three days. This is a time-saver for busy cooks, allowing you to whip up fresh roti when ready to eat.

    • Alternative Fillings: Think outside the box! Try different protein options like shrimp or lamb, or wholly vegetarian versions using lentils and beans. Each variation opens doors to new flavor combinations and experiences.

    With these tips, you can add your personal touch to the recipe, making every cooking session a delightful exploration.

    How to Store Curry Chicken Roti: Best Practices

    Storing your Curry Chicken Roti correctly is essential to maintain its flavor and texture. Here’s how to do it:

    • Refrigeration: Once prepared, store leftover curry filling in an airtight container in the refrigerator for up to three days. The roti can be kept at room temperature for 1 day, but it’s better to refrigerate them too if you’re not consuming immediately.

    • Freezing: For longer storage, you can freeze the roti. Place parchment paper between cooked rotis when stacking to prevent them from sticking. Seal them in a freezer-safe bag, and they’ll keep for up to three months. The curry filling can also be frozen separately.

    • Reheating: To reheat frozen roti, place them in a heated skillet for about 1-2 minutes per side until warmed through. For the curry, reheat on low heat in a saucepan, adding a splash of water or coconut milk if the sauce is too thick.

    By following these storage techniques, you ensure that your Curry Chicken Roti remains fresh and delicious, ready whenever a tasty craving strikes!

    Nutritional Value of Curry Chicken Roti

    Understanding the nutritional profile of Curry Chicken Roti helps in meal planning, especially for those who are health-conscious. Let’s break down its key components:

    • Calories: A standard serving of Curry Chicken Roti, including the chicken filling and roti, ranges around 450-500 calories depending on the specific ingredients used.

    • Protein: Thanks to the chicken and veggies, you can expect about 25-30 grams of protein per serving, making it quite filling and beneficial for muscle recovery.

    • Fat: The use of coconut milk contributes saturated fats; each serving contains about 20 grams of total fat, of which approximately 10 grams are saturated. For a healthier option, using light coconut milk can reduce this figure.

    • Carbohydrates: Each serving has approximately 50-60 grams of carbohydrates, primarily from the roti. The fiber content can stand at around 4-5 grams, especially if using whole wheat flour.

    • Vitamins and Minerals: This recipe is packed with vitamins and minerals. The inclusion of leafy greens adds vitamins A, C, and iron, which are crucial for overall health.

    This nutritional breakdown indicates that Curry Chicken Roti can easily fit into a balanced diet without compromising flavor. Enjoying it mindfully contributes to your well-being while delighting your taste buds!

    FAQs: Frequently Asked Questions About Curry Chicken Roti

    1. Can I make Curry Chicken Roti in advance?

    Absolutely! The curry filling can be made ahead of time and stored in the refrigerator for up to three days. Just prepare the roti when you’re ready to eat for the best texture.

    2. How can I make this dish vegan?

    For a vegan option, substitute chicken with chickpeas, lentils, or tofu. Use coconut cream instead of chicken for a delightful texture without compromising on flavor.

    3. What can I use instead of coconut milk?

    You can use low-fat dairy milk or vegetable broth if you’re looking for a lighter option. However, these will alter the richness of the dish.

    4. Is it possible to freeze Curry Chicken Roti?

    Yes, you can freeze both the roti and the curry filling. Just make sure to separate them with parchment paper to avoid sticking.

    5. How do I spice it for kids?

    If you’re serving children, consider reducing the amount of curry powder and avoiding additional spicy ingredients like chilies. You can always add spice for adults later!

    6. Can I make the roti without oil?

    Yes, you can make the roti without oil, but oil helps create a flaky texture. If you prefer, try using a non-stick pan to minimize sticking without using fat.

    Each of these questions addresses common concerns and further inspires readers to try out the recipe with confidence.


    In conclusion, Curry Chicken Roti is a delightful, versatile recipe that’s an excellent addition to any home cook’s collection. With easy preparation, countless customization options, and a host of health benefits, it can adapt to any dietary needs. So whisk up your apron, roll out the dough, and dive into a tropical culinary adventure!

  • Curry Chicken Roti

    Curry Chicken Roti

    Curry Chicken Roti: A Tropical Delight

    Introduction to Curry Chicken Roti

    Curry Chicken Roti is a deliciously comforting dish that embodies the warmth of tropical flavors, making it a staple in many households. This recipe stands out not only for its rich taste but also for its versatility, appealing to home cooks, busy parents, food enthusiasts, and anyone looking for straightforward yet flavorful chicken recipes. The beauty of Curry Chicken Roti lies in its simplicity; it marries tender pieces of chicken in a fragrant curry sauce with a soft, flaky roti that wraps up the goodness, ensuring every bite is filled with flavor.

    Whether you’re a student rushing to prepare dinner or a newlywed eager to impress your partner with your cooking skills, this dish fits the bill perfectly. With a focus on health, Curry Chicken Roti can be customized to suit various dietary preferences. It offers a nourishing option for those conscious about their eating habits without sacrificing taste. Plus, it’s easily adjustable to accommodate vegan and gluten-free diets, ensuring that everyone at the table can enjoy this tropical delight. So, roll up your sleeves and prepare to create a dish that’s not only pleasing to the palate but also nourishes the body and soul!

    Benefits and Advantages of Curry Chicken Roti

    Curry Chicken Roti boasts numerous benefits that make it an ideal choice for various occasions. First and foremost, the ease of preparation is a game-changer for busy individuals and families. The recipe allows for meal prep for the week ahead, making it a great solution for those juggling work and home life.

    In terms of health benefits, this dish brings together lean protein from the chicken, coupled with the nutritional perks of spices like turmeric and cumin. These spices are known to have anti-inflammatory properties and are beneficial for digestion. Additionally, you can easily incorporate vegetables into the curry sauce, enhancing the overall nutrient profile of the meal.

    For those who may be sensitive to gluten or carbs, making a gluten-free roti is a breeze with just a few adjustments to the ingredients. Likewise, for the vegan crowd, substituting chicken with chickpeas, tofu, or lentils brings an entirely new dimension to the dish.

    This recipe stands out among other chicken recipes because it allows for creativity in the kitchen. You can customize the spice level, add seasonal vegetables, or serve it with different sauces to elevate the flavor. This flexibility not only enriches the dining experience but also makes it more culturally immersive.

    By choosing to prepare Curry Chicken Roti, you also address the growing trend of home-cooked meals that are healthier and more economical than dining out. If you’re looking for a recipe that pleases a variety of palates while still being mindful of nutrition, you’ve found it right here!

    Ingredients Overview

    Essential Ingredients for Curry Chicken Roti

    To create your own Curry Chicken Roti, gather the following ingredients:

    For the Curry:

    • 2 tablespoons oil (vegetable or coconut oil, for cooking)
    • 1 medium onion, finely chopped (adds sweetness and depth)
    • 2-3 cloves garlic, minced (for flavor)
    • 1 tablespoon ginger, minced (helps with digestion)
    • 1 teaspoon turmeric powder (anti-inflammatory benefits)
    • 1 teaspoon cumin powder (adds warmth)
    • 1 teaspoon coriander powder (balances flavors)
    • 1/2 teaspoon chili powder (optional, for heat)
    • 1 pound boneless chicken thighs or breasts, cut into cubes (lean protein)
    • 1 can (14 oz) coconut milk (creamy richness)
    • Salt to taste
    • Fresh cilantro for garnish (optional, adds freshness)

    For the Roti:

    • 2 cups all-purpose flour (or whole wheat for added fiber)
    • 1/2 teaspoon salt
    • 3/4 cup warm water (for pliable dough)
    • 2 tablespoons melted butter or ghee (for flakiness)

    Dietary Substitutions to Customize Your Curry Chicken Roti

    • To make it Vegan: Substitute chicken with 1 can chickpeas, drained, or 1 block of firm tofu, pressed and diced.
    • Gluten-Free Option: Replace all-purpose flour with gluten-free flour blend or almond flour for the roti.
    • Low-Calorie Version: Reduce the amount of coconut milk and swap it for low-fat yogurt, or skip the roti for a lighter meal option.
    • Spicy Version: Add extra chili powder or fresh chilies to the curry for those who enjoy a kick.

    These substitutions not only make the dish available for diverse dietary needs but also encourage experimenting with flavors and textures.

    How to Prepare the Perfect Curry Chicken Roti: Step-by-Step Guide

    Get ready to bring the tropical flavors of Curry Chicken Roti into your kitchen with these clear, actionable steps.

    1. Prepare the Base:

    Heat 2 tablespoons of oil in a large skillet over medium heat. Add the chopped onion, cooking until it’s soft and translucent (about 5 minutes).

    2. Mix Ingredients:

    Stir in the minced garlic and ginger. Cook for an additional 1-2 minutes until fragrant. Then, add turmeric, cumin, coriander, and chili powder. Mix well and let the spices bloom for about 30 seconds.

    3. Cook the Chicken:

    Add the chicken cubes to the skillet, mixing them with the spices and onion. Cook until the chicken is browned on all sides (around 5-7 minutes).

    4. Add Coconut Milk:

    Pour in the coconut milk, stirring to combine all ingredients. Bring the mixture to a simmer, then reduce the heat to low, allowing it to cook gently. Cover the skillet and simmer for 15-20 minutes, until the chicken is tender and cooked through.

    5. Season the Curry:

    Taste the dish and season with salt as needed. If you’re preparing a vegan version, allow the chickpeas or tofu to cook down in the same way for the same amount of time.

    6. Prepare the Roti:

    In a large bowl, whisk together flour and salt. Gradually add warm water until a dough forms. Knead the dough on a floured surface for about 5 minutes until smooth and elastic.

    7. Let the Dough Rest:

    Cover the dough with a damp cloth and let it rest for at least 30 minutes. This is an essential step for achieving soft, flaky rotis.

    8. Roll Out the Roti:

    Divide the rested dough into smaller balls. Roll each ball into a circle about 1/8 inch thick.

    9. Cook the Roti:

    Heat a cast-iron skillet over medium-high heat. Cook each roti for about 1-2 minutes on each side until golden and slightly puffed. Brush with melted butter or ghee if desired.

    10. Serve:

    Serve the warm curry over the cooked roti, garnish with fresh cilantro, and enjoy a hearty meal!

    With these steps, you’ll create a delicious, comforting dish ideal for any occasion. Adjust the steps as needed based on personal preference to make your Curry Chicken Roti unique.

    Mastering Curry Chicken Roti: Advanced Tips and Variations

    For those looking to elevate their culinary experience with Curry Chicken Roti, consider these advanced tips and variations:

    • Add Vegetables: Incorporate vegetables such as bell peppers, spinach, or peas into the curry for added nutrition. They can also provide vibrant color and texture.
    • Experiment with Spices: Try adding ingredients like fenugreek for a unique flavor profile or garam masala for a touch of warmth.
    • Serve with Sides: Pair your roti with a refreshing cucumber salad or a spicy mango chutney to complement the flavors of the curry.
    • Make Ahead: Prepare the curry in bulk and store it. This will allow you to have a delicious meal ready to go whenever you’re short on time.
    • Try Different Meats: While chicken is the star here, you can also swap for lamb, beef, or even seafood, changing the dynamics and accentuating different culinary elements.

    These suggestions not only make the recipe richer in flavor but also invite creativity into the kitchen.

    How to Store Curry Chicken Roti: Best Practices

    To store leftover Curry Chicken Roti effectively, follow these guidelines:

    • Refrigeration: Store any leftover curry in an airtight container in the refrigerator for up to 3 days. The flavors will continue to meld, enriching the taste.
    • Freezing: The curry freezes well for up to 3 months, but the roti is best fresh. Consider freezing only the curry. To do this, pour the cooled curry into freezer-safe bags and lay them flat in the freezer to save space.
    • Reheating: When ready to enjoy the leftovers, reheat the curry in a saucepan over low heat or in the microwave, stirring occasionally. If the coconut milk separates, whisk it before serving. For the roti, reheat it on a skillet for that fresh-off-the-griddle taste.

    Following these steps ensures that you enjoy your Curry Chicken Roti at its best even after initial preparation.

    Nutritional Value of Curry Chicken Roti

    Understanding the nutritional profile of Curry Chicken Roti emphasizes its benefits as a healthy meal option. Here’s a breakdown of the approximate nutritional values per serving:

    • Calories: 450-500 (depending on the use of coconut milk and type of roti)
    • Fat: 25-30g (largely from coconut milk and any added butter/ghee)
    • Protein: 25-30g (availing mostly from chicken)
    • Carbohydrates: 40-50g (from the roti)
    • Fiber: 3-5g (if using whole wheat flour)

    The presence of healthy fats from coconut milk not only enhances the flavor but also contributes to essential nutrient absorption. Furthermore, the dish provides a hearty helping of protein, making it a satisfying meal.

    By customizing your ingredients, you can alter the nutrition to better suit your dietary needs while enjoying every bite of this tropical delight.

    FAQs: Frequently Asked Questions About Curry Chicken Roti

    Q1: Can I make Curry Chicken Roti in advance?
    Yes, you can prepare the curry up to a few days in advance. Reheat it when you’re ready to serve along with freshly made roti.

    Q2: How do I make the roti soft?
    Letting your dough rest and ensuring you use warm water helps in achieving a soft and pliable roti.

    Q3: What can I serve with Curry Chicken Roti?
    Cucumber salad, mango chutney, or pickles pair wonderfully with the dish, balancing the spiciness of the curry.

    Q4: Is this recipe suitable for meal prep?
    Absolutely! The curry freezes well and can be portioned out for easy reheating on busy days.

    Q5: Can I adjust the spice level?
    Definitely! Adjust the amount of chili powder according to your taste preference or omit it for a milder flavor.

    With these guidelines and tips, your culinary journey to mastering Curry Chicken Roti is now complete. Enjoy the tropical flavors, nutritional benefits, and versatility this dish brings to your table!

  • Spicy Brazilian Coconut Chicken

    Spicy Brazilian Coconut Chicken

    Spicy Brazilian Coconut Chicken: A Tropical Delight

    Introduction to Spicy Brazilian Coconut Chicken

    When it comes to chicken recipes, few can match the vibrant flavors of Spicy Brazilian Coconut Chicken. This dish brings the exotic taste of Brazil right into your kitchen, combining succulent chicken with rich coconut milk and a medley of spices that deliver a tropical punch with every bite. Not only is this recipe simple to prepare, but it also offers a plethora of health benefits, making it suitable for busy parents, students, and health-conscious individuals alike.

    This delightful recipe is generously flavored with ingredients that boast anti-inflammatory properties and healthy fats, allowing you to indulge without the guilt. Whether you are a novice cook or an experienced chef, you’ll find that this dish is highly accessible and versatile. The beauty of Spicy Brazilian Coconut Chicken lies not just in its taste but also in its adaptability. This recipe can cater to various dietary needs, including gluten-free and lower-calorie options, which means everyone at the table can enjoy this tropical delight.

    By incorporating this dish into your rotation, you not only bring an explosion of flavor to your meals but also a nutritious option that nourishes your body and satisfies your taste buds. So, gather your ingredients and get ready to embark on a culinary adventure that embodies the essence of Brazil!

    Benefits and Advantages of Spicy Brazilian Coconut Chicken

    Spicy Brazilian Coconut Chicken stands out among other chicken recipes due to its unique combination of flavors, health benefits, and ease of preparation. Let’s explore some of the advantages that make this dish a favorite among home cooks and food enthusiasts.

    1. Simple to Prepare

    For busy individuals and families, the thought of a complex recipe can be daunting. Thankfully, Spicy Brazilian Coconut Chicken only requires fundamental cooking skills. With straightforward steps, it takes about 30 minutes from start to finish, making it an ideal weeknight meal that doesn’t compromise on taste or quality.

    2. Nutritional Benefits

    Coconut milk is a standout ingredient in this recipe, loaded with healthy fats and essential vitamins. It helps improve digestion, boosts immunity, and promotes heart health. Additionally, the spices used—such as turmeric and cayenne—add not only flavor but also various health benefits, including anti-inflammatory properties. Thus, you don’t just get a delicious dish; you’re also nourishing your body.

    3. Versatility for Dietary Needs

    This chicken recipe is inherently gluten-free and can easily be adapted for various diets, whether you’re vegan, paleo, or on a low-carb diet. With simple ingredient substitutions, such as using tofu instead of chicken for a vegan option or serving it over cauliflower rice for a low-carb alternative, everyone can enjoy the tropical flavors of Brazil.

    4. Meal Prep Friendly

    If you’re looking to save time on meal prep, Spicy Brazilian Coconut Chicken is perfect for batch cooking. It keeps well in the fridge for a few days, making it easy to have on hand for lunches or quick dinners. Plus, it can be frozen for longer-term storage, making this recipe not only delicious but practical for any busy lifestyle.

    By embracing this Spicy Brazilian Coconut Chicken recipe, you can experience a range of health benefits, flavor-packed meals, and adaptability to fit any dietary lifestyle. Elevate your cooking regime with a dish that promises to impress and satisfy.

    Ingredients Overview

    Essential Ingredients for Spicy Brazilian Coconut Chicken

    Here’s a detailed list of the ingredients you will need for this vibrant dish, along with their precise measurements and explanations of why they’re crucial:

    • 1 pound chicken thighs (skinless, boneless): These are juicy and flavorful, perfect for absorbing spices.
    • 1 can (14 oz) coconut milk: Adds creaminess and richness while providing healthy fats (can substitute with lite coconut milk for lower calories).
    • 1 medium onion, chopped: Contributes sweetness and depth to the flavor profile.
    • 3 cloves garlic, minced: Adds aromatic flavor and health benefits.
    • 1 tablespoon ginger, grated: Provides a zingy flavor and aids digestion.
    • 1 tablespoon olive oil: Used for sautéing the onions and chicken; extra virgin olive oil offers additional antioxidants.
    • 1-2 tablespoons cayenne pepper (adjust for spice preference): Gives the dish its characteristic spiciness.
    • 1 teaspoon turmeric powder: Known for its anti-inflammatory properties and vibrant color.
    • Salt and pepper to taste: Essential for enhancing all flavors.
    • Fresh cilantro for garnish: Adds a fresh herbal note and vibrant color to the dish.

    If you prefer to cater to specific dietary needs, keep reading for valuable substitutions.

    Dietary Substitutions to Customize Your Spicy Brazilian Coconut Chicken

    Are you finding some ingredients hard to source, or do you have dietary restrictions? Here are some easy substitutions to ensure everyone can enjoy this delicious recipe.

    • For a Vegan Option: Replace chicken thighs with extra-firm tofu or chickpeas. Both absorb flavors well and provide ample protein.
    • Gluten-Free Option: This recipe is naturally gluten-free thanks to ingredients like coconut milk and spices. Just ensure that any store-bought stock or sauces used are labeled gluten-free.
    • Low-Calorie Option: Use lite coconut milk to reduce calories while retaining creaminess. You can also serve this dish over steamed vegetables or cauliflower rice instead of traditional rice.
    • Lower Sodium Option: Instead of regular salt, use herbal salt or lemon juice to add flavor without the sodium content.

    Feel free to mix and match these substitutions to cater to your dietary preferences and ingredient availability while keeping the heart of Spicy Brazilian Coconut Chicken intact!

    How to Prepare the Perfect Spicy Brazilian Coconut Chicken: Step-by-Step Guide

    Get ready to whip up a fabulous dish with this step-by-step guide on how to prepare Spicy Brazilian Coconut Chicken! You’ll find that making this enticing recipe is not only easy but also rewarding.

    1. Prepare the Ingredients: Gather all your ingredients and utensils. Chopping the onion, garlic, and ginger ahead of time will help streamline your cooking process.

    2. Sauté the Aromatics: In a large skillet or saucepan, heat the olive oil over medium heat. Once hot, add onions and sauté for about 3-4 minutes until translucent. Then, add garlic and ginger, cooking for an additional minute until fragrant.

    3. Cook the Chicken: Add the chicken thighs to the skillet. Sear each side for 5-7 minutes, allowing the chicken to achieve a golden brown color.

    4. Season the Chicken: Next, sprinkle cayenne pepper, turmeric, salt, and pepper over the chicken, ensuring each piece is well coated. This step is crucial as it layers the flavor throughout the dish.

    5. Add Coconut Milk: Pour in the can of coconut milk, stirring to combine. Bring the mixture to a gentle simmer, allowing all the flavors to meld together beautifully.

    6. Simmer and Thicken: Cover the skillet and let the dish simmer on low-medium heat for about 15-20 minutes. The chicken will become tender, and the sauce will thicken slightly.

    7. Check for Doneness: Use a meat thermometer to ensure the chicken reaches an internal temperature of 165°F. Adjust seasoning with more salt or pepper if necessary.

    8. Garnish and Serve: Once cooked, remove the skillet from heat. Garnish with fresh cilantro before serving hot. Pair it with rice, quinoa, or steamed vegetables for a complete meal.

    Adaptations for Various Dietary Needs

    You can easily modify each step based on dietary requirements. For a low-carb version, consider skipping the rice and garnishing with additional herbs or lime. For vegans, follow the same steps while substituting chicken with tofu, ensuring full flavor infusion is maintained.

    Mastering Spicy Brazilian Coconut Chicken: Advanced Tips and Variations

    Now that you’ve grasped the basics, let’s delve into advanced tips and exciting variations to enhance your Spicy Brazilian Coconut Chicken experience!

    1. Add Tropical Fruits: Consider adding diced mango or pineapple during the last minutes of cooking. This sweet addition will balance the dish’s heat beautifully, creating a tropical salsa.

    2. Experiment with Spice Levels: If you adore heat, try incorporating diced jalapeños or crushed red pepper flakes along with the cayenne for an extra kick.

    3. Substitute Proteins: While chicken is the star here, feel free to swap in shrimp or fish for a completely different flavor profile. Both proteins cook quickly and offer a delightful alternative.

    4. Add Vegetables: For those wanting to boost the nutrition factor, add sliced bell peppers, or spinach during the simmering phase. These will cook down, adding more vitamins and a variety of textures.

    5. Herb Infusions: For a unique twist, experiment with different herbs. Add a dash of Thai basil or even mint for an unexpected layer of flavor that harmonizes beautifully with coconut milk.

    By employing these tips and variations, you can truly tailor the dish to your palate, making it a personal favorite.

    How to Store Spicy Brazilian Coconut Chicken: Best Practices

    To make the most of your cooking experience, it’s important to know the best methods for storing your Spicy Brazilian Coconut Chicken.

    Refrigeration

    If you have leftovers, refrigerate your fully cooked dish in an airtight container within 2 hours of cooking. Properly stored, it will last for 3-4 days in the fridge. Reheat your portion in the microwave or stovetop until warmed through.

    Freezing

    For longer storage, Spicy Brazilian Coconut Chicken can be frozen. Transfer the cooled dish into freezer-safe containers, leaving some space at the top for expansion. When stored appropriately, it can last for up to 3 months in the freezer.

    Reheating

    When you’re ready to enjoy your frozen Spicy Brazilian Coconut Chicken, simply thaw it overnight in the fridge, then use the stovetop or microwave to heat it. If you find the sauce thickened too much after freezing, add a splash of chicken broth or water for a more desirable consistency.

    By following these storage tips, you can ensure that your meal remains fresh and delicious for days or even months to come, making it an excellent option for meal prepping.

    Nutritional Value of Spicy Brazilian Coconut Chicken

    Understanding the nutritional content of your favorite chicken recipes is crucial for maintaining a balanced diet. Here’s a breakdown of the estimated nutritional information for Spicy Brazilian Coconut Chicken (per serving):

    • Calories: 350
    • Protein: 28g
    • Fat: 24g
    • Saturated Fat: 15g
    • Carbohydrates: 10g
    • Dietary Fiber: 2g
    • Sugars: 3g
    • Sodium: 450mg

    Health Benefits

    • High in Protein: Chicken is an excellent source of lean protein, essential for muscle building and repair.
    • Rich in Healthy Fats: Coconut milk contains medium-chain triglycerides (MCTs) that can enhance metabolism and provide quick energy.
    • Vitamins and Minerals: Ingredients like garlic, onions, and spices contribute antioxidants and essential vitamins such as C and B6, supporting overall health.

    By being conscious of the nutritional value of Spicy Brazilian Coconut Chicken, you can enjoy this dish guilt-free while ensuring it aligns with your health goals.

    FAQs: Frequently Asked Questions About Spicy Brazilian Coconut Chicken

    1. Can I make Spicy Brazilian Coconut Chicken ahead of time?

    Absolutely! This dish stores well in the fridge for several days and can be frozen for long-term storage.

    2. Is this recipe suitable for meal prep?

    Yes! It’s perfect for meal prep. Cook a batch and portion it out for easy lunches or dinners throughout the week.

    3. Can I substitute chicken with another protein?

    Definitely! Shrimp, fish, or even roasted vegetables can be used in place of chicken for delightful alternatives.

    4. How spicy is this dish?

    The spice level can be adjusted based on your taste. Start with a smaller amount of cayenne pepper and adjust as necessary to suit your preference.

    5. What can I serve with Spicy Brazilian Coconut Chicken?

    This dish pairs beautifully with rice, quinoa, or steamed vegetables. You can also serve it with a fresh salad or flatbreads to soak up the delicious sauce.

    6. Is this recipe gluten-free?

    Yes! All the ingredients used are gluten-free. Just ensure that any additional sauces or stocks you use are certified gluten-free.

    By addressing these common queries, you’ll be able to prepare and enjoy Spicy Brazilian Coconut Chicken with confidence, regardless of your cooking experience. Unleash your inner chef and enjoy this dish in good company!