Blog

  • Maple Garlic Bacon Chicken

    Maple Garlic Bacon Chicken

    Maple Garlic Bacon Chicken: A Tropical Delight

    Introduction to Maple Garlic Bacon Chicken

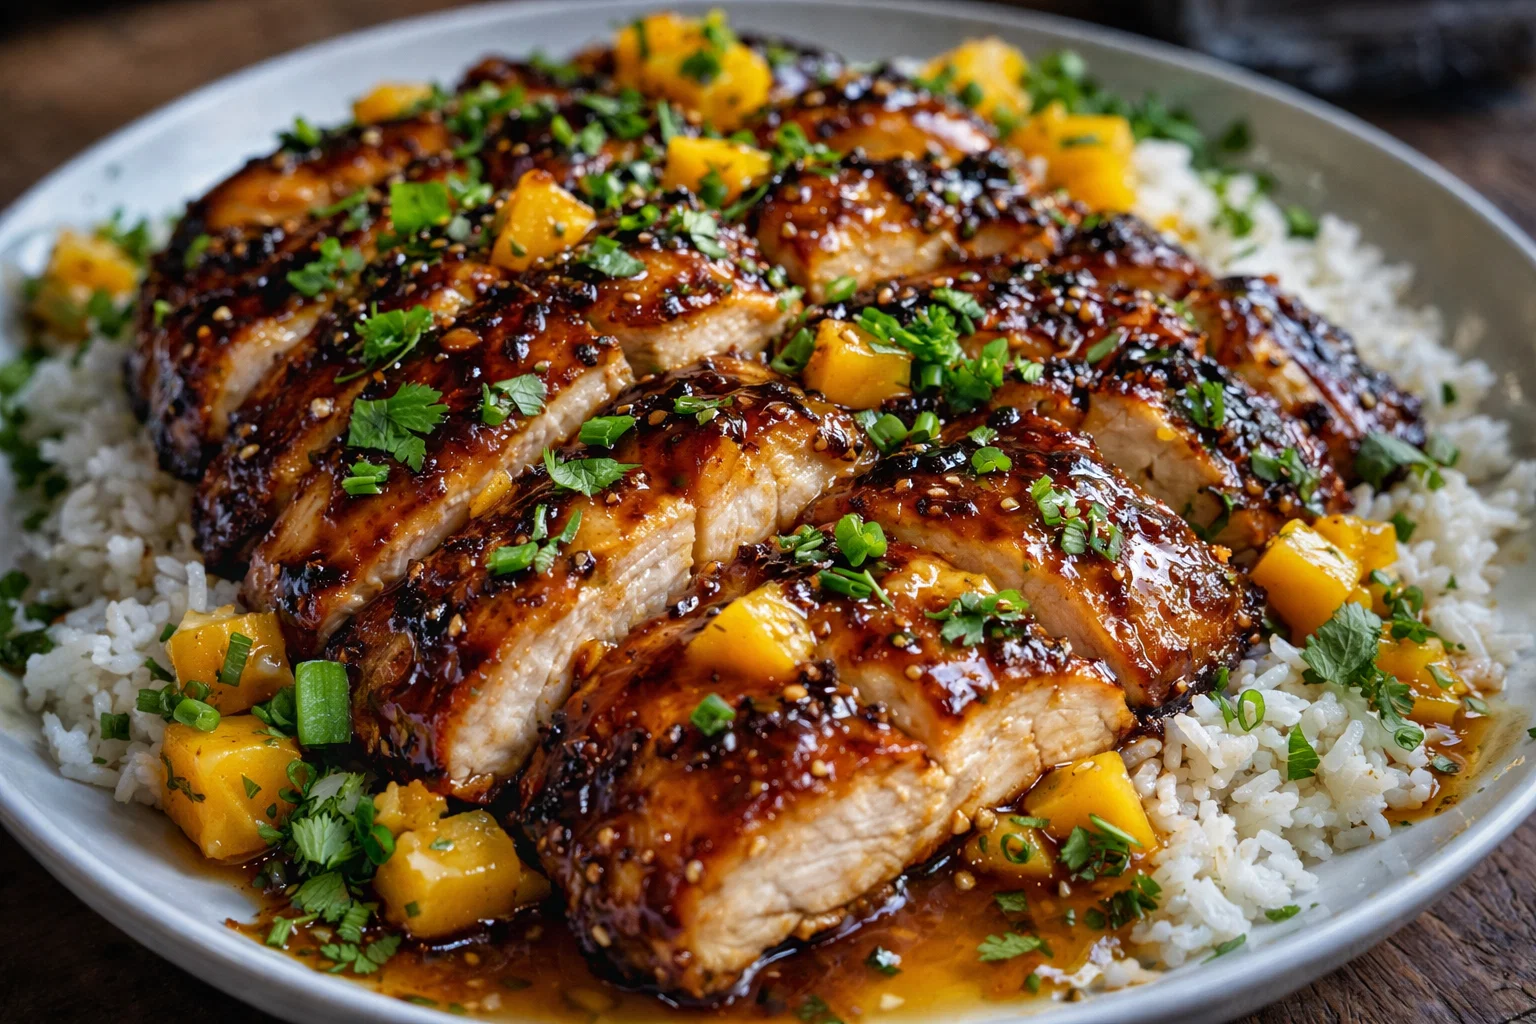
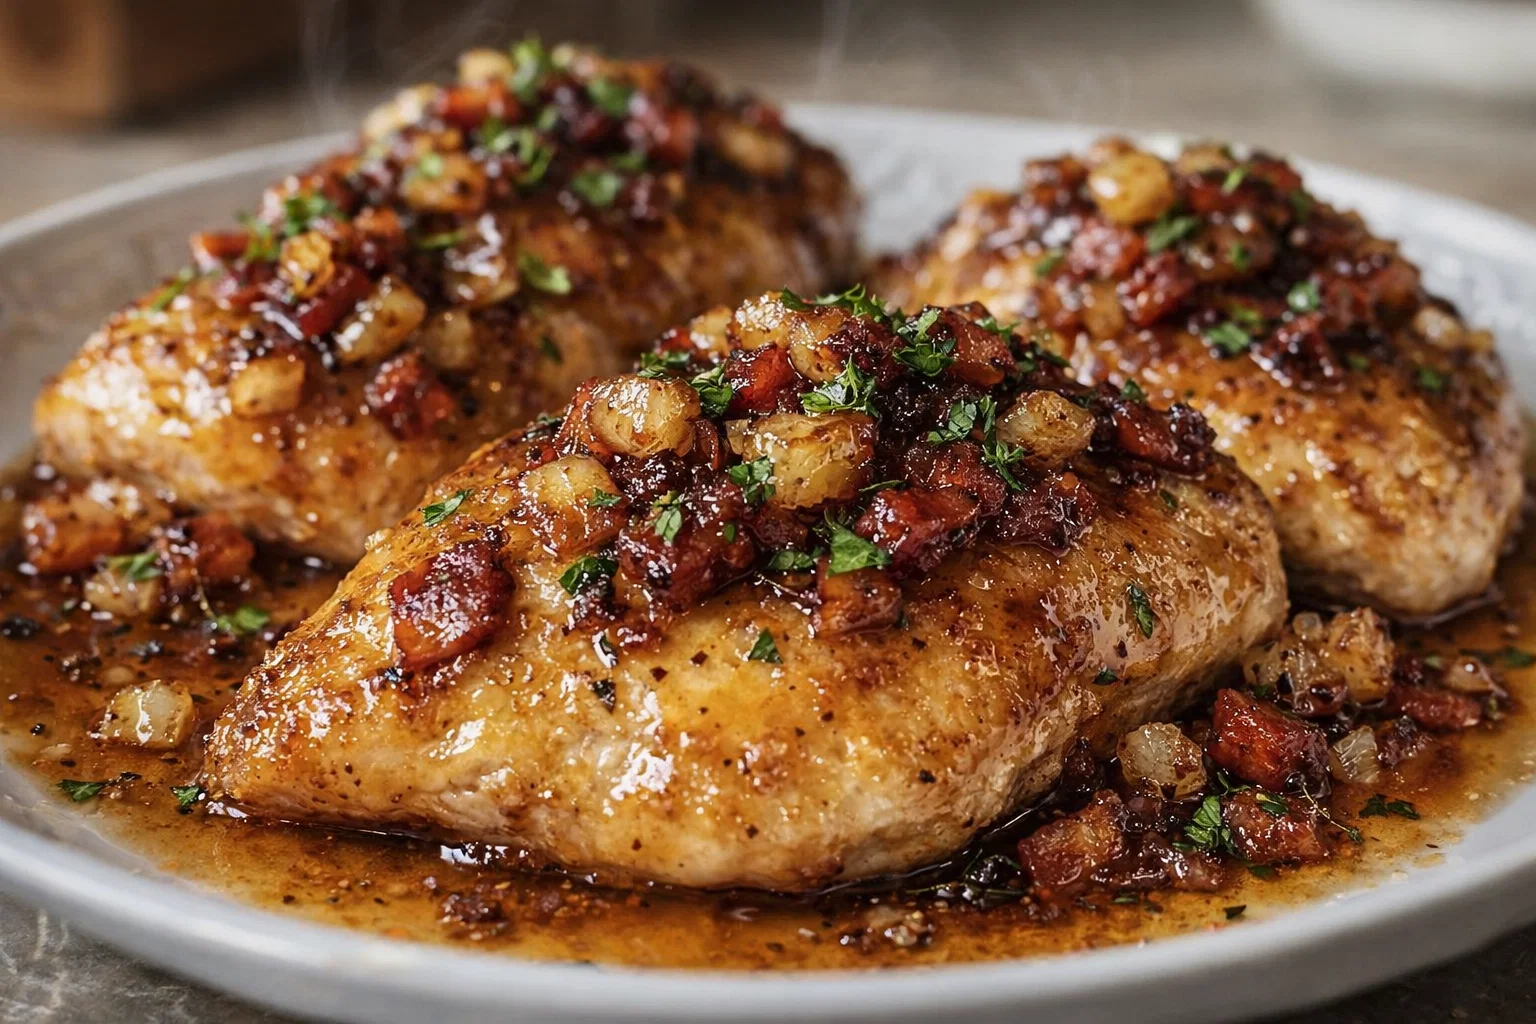
    When it comes to succulent chicken recipes, few dishes rival the flavor combination found in Maple Garlic Bacon Chicken. This delightfully simple recipe harmoniously balances the sweetness of pure maple syrup, the earthy warmth of garlic, and the savory depth of crispy bacon. It’s a dish that not only tantalizes the taste buds but also fits perfectly into a busy lifestyle—ideal for home cooks, working professionals, and busy parents looking to enjoy a gourmet meal without spending hours in the kitchen.

    One of the standout features of this recipe is its health benefits. The ingredients are chosen not only for their flavor but also for their nutritional value. Chicken is a lean protein, which can help in building and repairing muscle while keeping calorie counts in check. Meanwhile, garlic is known for its numerous health benefits, including boosting the immune system, and maple syrup provides a natural sweetness that’s less processed than table sugar.

    Furthermore, this dish can be enjoyed by various dietary needs. While it’s naturally gluten-free, alternatives can easily be made for those seeking vegan options—just swap out the chicken for plant-based protein and the bacon for coconut bacon. Whether you’re a seasoned chef or just starting out, Maple Garlic Bacon Chicken is a versatile dish that beckons to be tried!

    Benefits and Advantages of Maple Garlic Bacon Chicken

    Maple Garlic Bacon Chicken offers several advantages, making it a must-try in the world of chicken recipes. First and foremost, it’s incredibly easy to prepare. With a straightforward ingredient list and simple cooking steps, even novice cooks can produce a meal that feels sophisticated and satisfying. In just under an hour, you can go from ingredients scattered on your kitchen counter to a beautifully plated dish ready for family or guests.

    Health-wise, this recipe checks numerous boxes. Chicken, especially skinless and boneless chicken breasts, is a heart-healthy protein. It’s low in saturated fats, making it suitable for those watching their cholesterol levels. The addition of garlic not only enhances flavor but is also considered a superfood. Benefits such as improved cardiovascular health and enhanced immune function give an added boost to your meal.

    Another aspect worth mentioning is versatility. This dish can easily accommodate various dietary preferences. As noted earlier, alternate ingredients allow individuals following vegan, keto, or gluten-free diets to relish the flavors without sacrificing their dietary restrictions. In addition, the recipe is naturally low in carbs, making it perfect for those maintaining a low-carb diet.

    Finally, flavorful meals like Maple Garlic Bacon Chicken can foster connection and enjoyment at the dinner table. Whether you’re hosting a dinner party or cooking a quiet meal for yourself, this recipe encourages exploration and conversation about delicious food. You may even inspire others to dive into their own cooking adventures!

    Ingredients Overview

    Essential Ingredients for Maple Garlic Bacon Chicken

    To whip up this delectable Maple Garlic Bacon Chicken, gather the following ingredients:

    • 3 to 4 Chicken Breasts (boneless, skinless): This lean meat is the star of the dish, providing protein and essential nutrients.
    • 4 strips of Bacon: Adds a smoky, savory flavor that beautifully complements the sweetness of maple and garlic.
    • 1/4 cup Maple Syrup: Offers a natural sweetness while also providing minerals like manganese and zinc.
    • 4 cloves Garlic (minced): Not only does garlic enrich the taste, but it’s also a health powerhouse.
    • 1 tablespoon Olive Oil: For sautéing, this heart-healthy oil can prevent sticking and add a touch of flavor.
    • Salt and Pepper: Essential seasonings for enhancing all flavors.
    • Fresh Herbs (optional, like parsley or thyme): For garnish, they can elevate the visual appeal and offer additional layers of flavor.

    For diet-conscious readers, various substitutions can be made. For gluten-free versions, ensure the maple syrup is pure and free from additives. Vegan alternatives can substitute chicken with seitan or tempeh, and bacon can be replaced with coconut bacon or smoked tempeh.

    Dietary Substitutions to Customize Your Maple Garlic Bacon Chicken

    Here are some suggested substitutions to cater to different dietary preferences:

    • Vegan Option: Replace chicken with plant-based protein such as tofu, tempeh, or chickpeas. Use coconut bacon or an alternative that mimics the flavors and texture of bacon.
    • Gluten-Free: Ensure that your maple syrup contains no additives that may contain gluten, and always check the ingredient labels.
    • Keto-Friendly: For a low-carb alternative, consider adding spinach or kale to your dish while maintaining the principal components of chicken and maple syrup.
    • Low-Calorie: Substitute the bacon with turkey bacon or omit it entirely, adding a sprinkle of smoked paprika to enhance the flavor without extra calories.

    Ultimately, the beauty of Maple Garlic Bacon Chicken lies in its adaptability, catering to both traditional and modern culinary preferences while ensuring everyone at the table can enjoy this tropical delight!

    How to Prepare the Perfect Maple Garlic Bacon Chicken: Step-by-Step Guide

    Ready to make your very own Maple Garlic Bacon Chicken? Follow these easy steps to create a flavorful dish the whole family will enjoy.

    1. Prepare the Ingredients: Gather and measure all your ingredients. Mince the garlic and set it aside. If using fresh herbs, chop them up as well.

    2. Cook the Bacon: In a large skillet over medium heat, add the bacon strips. Cook until they’re crispy, about 6-8 minutes, turning occasionally. Once done, remove the bacon from the skillet and place it on paper towels to drain the excess grease.

    3. Sauté Garlic: In the same skillet, leave about a tablespoon of bacon grease (or discard for a healthier option). Add the minced garlic and sauté for 2-3 minutes or until fragrant, stirring occasionally to avoid burning.

    4. Prepare Chicken Breasts: Season the chicken breasts with salt and pepper on both sides. If you have dietary restrictions, you can opt for a no-salt seasoning.

    5. Cook Chicken: Increase the heat to medium-high. Add a tablespoon of olive oil to the skillet and then place the seasoned chicken breasts in. Sear for 5-7 minutes on each side, or until cooked through (internal temperature should reach 165°F).

    6. Add Bacon and Maple Syrup: Once the chicken is cooked, crumble the crispy bacon over the top. Pour in the maple syrup, ensuring the chicken is well-coated. Cook for an additional 2-3 minutes, letting the syrup caramelize slightly.

    7. Arrange for Serving: Remove the skillet from heat. Let the chicken sit for a few minutes to absorb the flavors.

    8. Garnish and Serve: Sprinkle with fresh herbs before serving. Pair with a side of sautéed vegetables, rice, or a fresh salad to round out the meal.

    With these straightforward steps, you can create Maple Garlic Bacon Chicken that impresses at any table setting.

    Mastering Maple Garlic Bacon Chicken: Advanced Tips and Variations

    Once you’ve mastered the basics, consider these additional tips and variations for your Maple Garlic Bacon Chicken:

    • Marinate for Extra Flavor: Consider marinating the chicken breasts in a mixture of maple syrup and garlic for a few hours before cooking. This can intensify the flavors significantly.

    • Grill Instead of Pan-Fry: Take your dish outdoors by grilling the chicken. The char from the grill not only enhances flavor but can also be an exciting change in preparation.

    • Add Vegetables: For an all-in-one meal, toss in some bell peppers, asparagus, or broccoli into the skillet as the chicken cooks. These will soak up the flavor of the sauce while adding extra nutrients.

    • Experiment with Herbs: Try adding herbs like rosemary or thyme during cooking for another layer of flavor. They pair beautifully with the garlic and maple syrup.

    • Create a Sauce: Reserve some pan drippings, adding a touch more maple syrup and chicken broth to create a sauce that can be drizzled over the chicken before serving.

    These suggestions will keep your Maple Garlic Bacon Chicken experience fresh and exciting each time you make it.

    How to Store Maple Garlic Bacon Chicken: Best Practices

    If you have leftovers (which is unlikely given how delicious this dish is), follow these best storage practices to ensure your Maple Garlic Bacon Chicken remains flavorful:

    • Refrigeration: Place leftovers in an airtight container and store in the refrigerator. They should remain fresh for about 3-4 days.

    • Freezing: For longer storage, Maple Garlic Bacon Chicken can be frozen. Portion out the chicken in freezer-safe bags or containers, removing as much air as possible. It can last up to 2-3 months in the freezer.

    • Reheating: To reheat, thaw in the refrigerator overnight and then microwave until warm or reheat in a skillet over medium heat. Adding a splash of water or broth can help maintain moisture.

    These practices not only aid in preserving your dish but also add ease to your weeknight dinners.

    Nutritional Value of Maple Garlic Bacon Chicken

    Understanding the nutritional value of your meals is essential, especially when adding new recipes to your repertoire. Here’s a rough estimate of the nutritional content per serving (based on a recipe serving of 4):

    • Calories: Approximately 350-450 (varies based on bacon type and usage)
    • Protein: 32g
    • Carbohydrates: 15g (mostly from maple syrup)
    • Fat: 20g (including healthy fats from olive oil and bacon)
    • Fiber: 0g
    • Sodium: 600mg (varies based on added salt and bacon type)

    This dish stands out amongst other chicken recipes for its well-rounded nutritional profile, balancing lean protein and healthy fats, making it well-suited for a variety of diets without sacrificing taste.

    FAQs: Frequently Asked Questions About Maple Garlic Bacon Chicken

    In this section, we’ll answer some commonly asked questions about Maple Garlic Bacon Chicken to clarify any uncertainties you may have:

    Can I use other types of chicken cuts?

    Yes, you can use thighs or drumsticks instead of breasts. Just be sure to adjust cooking times as darker meats can take longer to cook through.

    Is there a vegan version of Maple Garlic Bacon Chicken?

    Absolutely! You can substitute chicken with tofu or tempeh and use coconut bacon for an equivalent flavor and texture without animal products.

    How do I know when the chicken is done cooking?

    The best way to check doneness is by using a meat thermometer, ensuring that the internal temperature has reached 165°F (75°C). You can also check that the juices run clear.

    Can I prepare this dish ahead of time?

    You can prepare the chicken and sauce ahead of time; just reheat when you’re ready to serve. This makes it a wonderful dish for meal prepping!

    What can I serve Maple Garlic Bacon Chicken with?

    This versatile dish pairs wonderfully with steamed vegetables, quinoa, or a fresh green salad. The choice of sides allows you to cater to various dietary preferences.

    By addressing these questions, we hope to make your cooking experience easier and more enjoyable!


    With its delightful flavors, health benefits, and adaptability for various dietary preferences, Maple Garlic Bacon Chicken is a culinary gem you’ll want in your meal rotation. This recipe proves to be a fantastic addition to the vast world of chicken recipes, perfect for home cooks, busy parents, and food enthusiasts alike. Why not give it a try and bring a touch of tropical delight to your dinner table today? Happy cooking!

  • Irresistible Sweet  Savory Asian Mango Glazed Chicken Twists

    Irresistible Sweet Savory Asian Mango Glazed Chicken Twists

    Irresistible Sweet & Savory Asian Mango Glazed Chicken Twists: A Tropical Delight

    Introduction to Irresistible Sweet & Savory Asian Mango Glazed Chicken Twists

    Indulging in a delightful dish starts with the right recipe, and if you’re looking for an exquisite combination of flavors in chicken recipes, the Irresistible Sweet & Savory Asian Mango Glazed Chicken Twists are the perfect choice. Not only does this recipe tantalize your taste buds with its sweet and savory profile, but it also boasts numerous health benefits. With the vibrant sweetness of mangoes combined with savory Asian spices, this dish transforms an ordinary dinner into a tropical experience.

    Whether you are a busy parent, a student seeking a quick meal, or a health-conscious individual, these chicken twists are ideal for you. This dish stands out for its simplicity — taking only about 30 minutes to prepare and cook, making it perfect for those hectic weeknights. It is naturally gluten-free and can easily be made low-calorie by using skinless chicken and adjusting the amount of glaze.

    Additionally, this recipe also caters to diverse dietary needs. With options for substituting ingredients to create a vegan version, even plant-based eaters can indulge in this culinary delight. The harmonious flavors, ease of preparation, and versatility make the Irresistible Sweet & Savory Asian Mango Glazed Chicken Twists an unforgettable addition to your recipe collection.

    Benefits and Advantages of Irresistible Sweet & Savory Asian Mango Glazed Chicken Twists

    The Irresistible Sweet & Savory Asian Mango Glazed Chicken Twists are more than just a delightful meal. Here’s why this recipe is particularly effective in meeting the diverse demands of today’s eaters:

    1. Ease of Preparation

    One of the primary advantages of this recipe is its simplicity. Preparing a flavorful dish doesn’t have to be complicated, and this recipe exemplifies that. In just a few straightforward steps, you can create a restaurant-quality meal in the comfort of your home. The use of fresh ingredients means there’s no need for extensive marinating or complex cooking techniques.

    2. Health Benefits

    Incorporating chicken into your diet offers various health benefits. This lean protein source supports muscle growth and maintenance, making it an ideal option for fitness enthusiasts. The mango glaze provides a natural sweetness without the need for refined sugars, along with the added benefits of vitamins A and C. Moreover, using fresh vegetables in your twists enhances the overall nutritional value, giving you an added dose of antioxidants.

    3. Diet-Friendly Options

    Whether you’re adhering to a gluten-free lifestyle, looking to cut calories, or following a vegan diet, this recipe has you covered. By making a few simple substitutions, you can create a version of the dish that aligns perfectly with your dietary needs. Notably, swapping chicken for tofu or another plant-based protein maintains the integrity of the flavors while serving diverse eating habits.

    4. Versatility

    This recipe is incredibly versatile. You can serve the chicken twists as an appetizer, main dish, or as part of a festive spread during gatherings. The tropical sweetness of the mango glaze pairs well with a variety of sides, including steamed rice, mixed greens, or even as fillings for wraps.

    In summary, when considering various chicken recipes, these mango-glazed chicken twists shine through due to their ease, health benefits, dietary adaptability, and versatility. They open the door for a world of culinary creativity that anyone can embrace, regardless of skill level.

    Ingredients Overview

    Essential Ingredients for Irresistible Sweet & Savory Asian Mango Glazed Chicken Twists

    To create this delicious dish, it’s essential to gather the following ingredients:

    • 1 lb Chicken Breasts: Lean meat that serves as the base of the recipe. (For a low-calorie option, opt for skinless chicken.)
    • 2 ripe Mangoes: Freshly diced, these provide a naturally sweet and tangy glaze. (Choose organic if possible!)
    • 1/4 cup Soy Sauce: For a savory flavor that enhances the glaze. Use tamari for a gluten-free version.
    • 2 tbsp Honey or Maple Syrup: Acts as a sweetener in the glaze. You can also use agave nectar for vegan alternatives.
    • 2 cloves Garlic: Minced, for added flavor depth.
    • 1 tsp Fresh Ginger: Grated, bringing a zesty kick to the dish.
    • 1 tbsp Rice Vinegar: Provides acidity, balancing the flavors.
    • 1 tbsp Sesame Oil: Adds a nutty aroma; you can substitute with olive oil if needed.
    • Salt and Pepper to taste: Basic seasoning to enhance flavor.
    • 1-2 tbsp Cornstarch: Used for thickening the glaze.
    • Green onions and Sesame Seeds: For garnish, giving a vibrant look and added crunch.

    Notes on Vegan, Gluten-Free, and Low-Calorie Options:

    You can easily make this dish vegan by substituting chicken with firm tofu or tempeh. Ensure all sauces used are gluten-free if that is a dietary consideration. For low-calorie options, use less honey or substitute with a sugar-free alternative.

    Dietary Substitutions to Customize Your Irresistible Sweet & Savory Asian Mango Glazed Chicken Twists

    To accommodate various dietary needs, consider the following substitutions:

    • For Vegan Options: Use firm tofu or Dr. Praeger’s veggie patties instead of chicken. Ensure the soy sauce is a plant-based variant like tamari or coconut aminos.
    • For Gluten-Free Needs: Ensure your soy sauce is gluten-free as well as verifying that any added sauces and seasonings meet gluten-free standards.
    • For Lower Calorie: Remove the honey or use a low-calorie sweetener. Opt for skinless chicken breasts or use a smaller portion of the glaze.

    These substitutions will allow anyone to enjoy this recipe tailor-fit to their dietary preferences while maintaining the delicious essence of the original dish.

    How to Prepare the Perfect Irresistible Sweet & Savory Asian Mango Glazed Chicken Twists: Step-by-Step Guide

    Follow these easy steps to create your Irresistible Sweet & Savory Asian Mango Glazed Chicken Twists:

    1. Prepare the Chicken:
    2. Start by rinsing the chicken breasts under cold water. Pat them dry with paper towels, then slice them into strips about 1 inch thick. This will ensure quick and even cooking.

    3. Make the Mango Glaze:

    4. In a blender, combine the diced mangoes, soy sauce, honey (or maple syrup), minced garlic, grated ginger, rice vinegar, and sesame oil. Blend until smooth. You can adjust sweetness by adding more honey or syrup if desired.

    5. Thicken the Glaze:

    6. Pour the mango mixture into a saucepan over medium heat. Bring it to a simmer, stirring occasionally. In a small bowl, mix cornstarch with a couple of tablespoons of water and stir until smooth. Gradually add this mixture to the simmering glaze to thicken. Continue to cook until it reaches your desired consistency, then remove from heat.

    7. Cook the Chicken:

    8. In a non-stick skillet, heat a little sesame oil over medium-high heat. Add the chicken strips in a single layer, lightly seasoning with salt and pepper. Cook for about 5-7 minutes, flipping halfway through, until the chicken is golden and cooked through.

    9. Coat with Glaze:

    10. Once the chicken is fully cooked, reduce heat to low and pour the mango glaze over the chicken in the pan. Toss gently to ensure all pieces are well coated in delicious sauce, allowing them to soak in the flavors for about 2-3 minutes.

    11. Twist and Assemble:

    12. Remove the chicken from the heat and let it cool slightly. Take a small amount of chicken and place it at one end of a tortilla or wrap. Roll it tightly, folding the ends in like a burrito to secure the filling.

    13. Garnish:

    14. Arrange the chicken twists on a serving plate. Garnish them with sliced green onions and a sprinkle of sesame seeds for visual appeal and crunch.

    15. Serve and Enjoy:

    16. Serve the chicken twists warm, alongside steamed rice or a crisp salad, and enjoy the explosion of tropical flavors in every bite!

    The cooking process is simple but allows for personalization at each step. Whether you want more vegetables or a spicier glaze, this recipe is flexible for adaptation.

    Mastering Irresistible Sweet & Savory Asian Mango Glazed Chicken Twists: Advanced Tips and Variations

    To truly master these chicken twists, consider the following advanced tips and variations:

    1. Experiment with Herbs and Spices: While the recipe already emphasizes ginger and garlic, experiment with adding fresh cilantro or basil for added herbal flavors.

    2. Add Crunch: Including finely chopped bell peppers or carrots not only enhances the presentation but also provides a nice crunch to your dish.

    3. Spicy Variation: If you’re a fan of heat, add a teaspoon of chili flakes or Sriracha to your glaze for a spicy kick. The balance between sweet and spicy can be exceptional!

    4. Baking Option: Instead of pan-frying, take this recipe to the oven. Spread the chicken pieces on a baking sheet, drizzle with glaze, and bake at 400°F (200°C) for about 20 minutes until cooked through. This method can allow for a healthier cooking option.

    5. Presentation Ideas: When hosting, serve the chicken twists on a platter with a light drizzle of additional glaze, creating an eye-catching centerpiece. Complement your dish with fresh mango slices or a colorful salad.

    6. Make-ahead meals: These twists store well and can be made ahead of time for meal prep. Pre-portion them in airtight containers with sauce on the side to keep them fresh.

    With these tips and tricks, you’re not just making a dish; you’re creating an experience that will have your family and friends asking for seconds!

    How to Store Irresistible Sweet & Savory Asian Mango Glazed Chicken Twists: Best Practices

    After you’ve prepared your Irresistible Sweet & Savory Asian Mango Glazed Chicken Twists, knowing how to store them properly is key for preserving both flavor and safety:

    • Refrigeration: Store leftover twists in an airtight container in the refrigerator for up to 3 days. This allows the flavors to meld and enhance over time.

    • Freezing: For longer storage, consider freezing the chicken twists. Place them in a single layer on a baking sheet to freeze individually, then transfer them to a freezer-safe bag or container. They can be kept for up to 3 months.

    • Reheating: To reheat, simply thaw overnight in the fridge if frozen. Microwave until heated through or reheat in a skillet on medium low heat. If desired, add a touch of water or extra glaze to prevent drying out.

    By following these storage methods, you can enjoy your chicken twists well beyond the initial meal, making for a quick and tasty option during busy days!

    Nutritional Value of Irresistible Sweet & Savory Asian Mango Glazed Chicken Twists

    When it comes to any recipe, understanding its nutritional value is essential, especially for those conscious of their dietary choices. Here’s a breakdown of the approximate nutritional information for one serving (2 twists):

    • Calories: 320
    • Protein: 28g
    • Fat: 10g (mostly healthy fats from the sesame oil)
    • Carbohydrates: 30g
    • Fiber: 2g
    • Sugars: 8g (naturally from mango and honey)

    Healthier Options

    As noted previously, the nutrition can vary based on your ingredient choices:
    – For a lower-calorie option, use less glaze or leaner cuts of chicken.
    – Replace honey with a no-calorie sweetener for those reducing sugar intake.
    – Adding more veggies will bump up the fiber content and reduce calories per serving.

    Keeping track of nutritional facts supports those who are diet conscious, ensuring that this delicious dish also aligns with their health goals.

    FAQs: Frequently Asked Questions About Irresistible Sweet & Savory Asian Mango Glazed Chicken Twists

    Q1: Can I prepare the sauce ahead of time?

    Yes! The mango glaze can be made up to 3 days in advance. Store it in an airtight container in the fridge until you’re ready to cook.

    Q2: Is this recipe kid-friendly?

    Absolutely! The sweet mango glaze is often a hit among kids. Plus, they can help wrap the chicken in the tortillas, making it a fun family activity.

    Q3: Can I use other fruits in the glaze?

    Definitely! Other fruits like pineapple or peach can add a unique flavor profile while retaining the tropical essence of this dish.

    Q4: How do I know when the chicken is cooked?

    Chicken should reach an internal temperature of 165°F (75°C) when fully cooked. Using a meat thermometer is the most reliable way to check.

    Q5: What can I serve alongside the chicken twists?

    These versatile twists pair beautifully with sides such as cucumber salad, jasmine rice, or a crunchy slaw.

    Q6: Can I make this recipe in advance for meal prep?

    Yes! The chicken twists store wonderfully in the fridge for up to three days, making them a great option for meal preppers.

    These FAQs help clear common concerns and encourage readers to jump into the kitchen without hesitation.

    In conclusion, the Irresistible Sweet & Savory Asian Mango Glazed Chicken Twists offer a delightful mix of tropical flavors with a recipe that’s simple, healthy, and adaptable. Perfect for various dietary needs, this dish captivates the palette and simplifies meal preparation. Embrace this mouth-watering recipe and turn a weekday meal into a tropical escape with every bite!

  • Stuffed Manicotti with Meat Sauce

    Stuffed Manicotti with Meat Sauce

    Stuffed Manicotti with Meat Sauce: A Tropical Delight

    Introduction to Stuffed Manicotti with Meat Sauce

    Are you ready to elevate your dinner experience with a delightful Italian classic that’s just bursting with flavor? Stuffed Manicotti with Meat Sauce offers a wonderful harmony of textures and tastes, making it a fabulous addition to your collection of pasta recipes. Perfect for busy parents, working professionals, and food enthusiasts alike, this dish combines the satisfaction of pasta and a protein-packed filling in one comforting package.

    The beauty of this recipe lies in its simplicity. Whether you’re a novice cook or a seasoned chef, the step-by-step guide will inspire you to embrace your culinary creativity. Plus, this meal is a hearty option that can cater to various dietary needs, making it accessible to everyone around your dinner table. Packing nutrients and flavor into one dish, stuffed manicotti harmonizes whole grains, lean proteins, and fresh vegetables, ensuring a balanced meal for any diet-conscious individual.

    Moreover, it’s an ideal dish to make ahead of time or prepare for a cozy gathering with family and friends. Not only is it a treat for the taste buds, but it also brings about a sense of comfort. With the enticing aroma wafting from your kitchen, you’ll find it hard to resist diving into this dish immediately. So grab your apron and let’s embark on this culinary adventure that promises to inspire everyone at your table!

    Benefits and Advantages of Stuffed Manicotti with Meat Sauce

    When it comes to choosing the perfect meal, Stuffed Manicotti with Meat Sauce stands out on multiple fronts. One of the primary reasons for its popularity among varied audiences is its ease of preparation. While it may look sophisticated, this recipe can be assembled in no time. You can create a delicious home-cooked meal with minimal effort. This is especially appealing to busy parents and working professionals who value their time in the kitchen.

    Additionally, this dish brings an appealing array of health benefits. Traditionally made with high-quality ingredients, stuffed manicotti can be as nutritious as it is delicious. The tubular pasta provides a wonderful base for stuffing; protein-rich meat, when combined with fresh herbs and low-fat cheese, creates a filling meal without compromising health. You can easily integrate gluten-free pasta options or vegan fillings, appealing to those with specific dietary requirements. Including vegetables in the filling will enhance the nutritional value while providing additional fiber.

    Another great aspect of stuffed manicotti is its versatility. This recipe allows for a myriad of variations, accommodating different tastes, preferences, and seasonal availability. From spicy Italian sausage to a mild turkey filling or even plant-based proteins, there’s a unique twist for every palate. Moreover, if you have picky eaters at home, the creamy meat sauce covering the manicotti might just hide the vegetables they usually resist.

    In summary, Stuffed Manicotti with Meat Sauce is not only a delicious Italian dish but also a practical choice for those seeking a quick, nutritious, and versatile meal option. It truly encapsulates the essence of pasta recipes that cater to a broad audience while being simple to create.

    Ingredients Overview

    Essential Ingredients for Stuffed Manicotti with Meat Sauce

    Here’s a detailed list of ingredients you’ll need to prepare your Stuffed Manicotti with Meat Sauce, complete with precise measurements:

    For the Stuffed Manicotti:

    • 12 pieces manicotti pasta: These shells hold the filling and sauce perfectly. If you’re looking for a gluten-free alternative, use gluten-free manicotti.
    • 1 pound ground beef (or turkey): Provides a hearty protein base. For a vegan option, consider organizations like lentils, mushrooms, or plant-based ground meat.
    • 1 cup ricotta cheese: Adds a creamy texture to the filling. If you’re making a vegan version, swap with tofu or cashew cream.
    • 1 cup shredded mozzarella cheese: Adds melty goodness on top. Dairy-free cheese is a great alternative here.
    • 1/2 cup grated Parmesan cheese: Enhances flavor. Nutritional yeast can be used for a vegan variant.
    • 2 cups spinach or kale (chopped): Nutrient-dense greens packed with vitamins. You can substitute with zucchini or other veggies.
    • 1 egg: Binds the filling. An egg replacement can be 1/4 cup of unsweetened applesauce or a flaxseed egg for vegans.

    For the Meat Sauce:

    • 2 tablespoons olive oil: For sautéing. You can use coconut oil for an alternative.
    • 1 onion (chopped): Adds depth of flavor.
    • 2 cloves garlic (minced): Enhances the aroma and taste.
    • 2 cups crushed tomatoes: Forms the base of the sauce. Fresh tomatoes can also be diced.
    • 1 teaspoon dried oregano: For an added flavor profile.
    • 1 teaspoon dried basil: Complements the meat sauce beautifully.
    • Salt and pepper to taste: Enhances all the flavors.

    Dietary Substitutions to Customize Your Stuffed Manicotti with Meat Sauce

    • Gluten-Free Options: Use gluten-free manicotti and swap traditional pasta for gluten-free varieties.
    • Vegan Options: Replace beef with lentils or a meat substitute. Use tofu ricotta instead of cheese, and skip the egg to keep it plant-based.
    • Dairy-Free: Employ plant-based cheese and milk substitutes, ensuring taste and texture are retained.
    • Low-Calorie Variation: Utilize lean ground meat, and increase the volume of veggies to lower calorie counts without sacrificing flavor.

    With diverse options available, this recipe is versatile enough to accommodate almost anyone!

    How to Prepare the Perfect Stuffed Manicotti with Meat Sauce: Step-by-Step Guide

    Cooking Stuffed Manicotti with Meat Sauce is a straightforward process that encourages creativity. Follow this step-by-step guide to make the perfect dish:

    1. Prepare the Pasta:
    2. Cook the manicotti in a large pot of boiling salted water for about 6-7 minutes, or until slightly undercooked (it will cook more in the oven). Drain and allow it to cool slightly.

    3. Make the Meat Sauce:

    4. In a saucepan over medium heat, add olive oil, onion, and garlic. Sauté for about 2-3 minutes until fragrant.
    5. Add the ground beef (or your chosen protein) and cook until browned. Drain excess fat if necessary.
    6. Stir in crushed tomatoes, oregano, and basil. Allow the sauce to simmer on low heat for 10 minutes while stirring occasionally. Season with salt and pepper.

    7. Prepare the Filling:

    8. In a large bowl, mix ricotta cheese, mozzarella cheese, Parmesan cheese, chopped spinach, seasoning, and egg. Mash together until well combined.

    9. Stuff the Manicotti:

    10. Carefully fill each manicotti with the prepared mixture. Use a piping bag, or a spoon for ease. Set aside.

    11. Assemble the Dish:

    12. Preheat your oven to 375°F (190°C).
    13. Spread a thin layer of meat sauce on the bottom of a baking dish. Arrange the stuffed manicotti in a single layer on top of the sauce. Pour the remaining sauce over the stuffed pasta.

    14. Bake:

    15. Cover the baking dish with aluminum foil and bake in the preheated oven for 25 minutes. Then, remove the foil and bake for an additional 10-15 minutes, or until the cheese on top is bubbly and golden.

    16. Garnish and Serve:

    17. Let the manicotti sit for 5-10 minutes before serving. Garnish with extra parmesan or fresh herbs if desired.

    By following these actions, you’re ensuring each layer of the dish is bursting with flavor. Whether you opt for a classic filling or a novel twist, you’ll create a dish that’s delightful and adaptable.

    Mastering Stuffed Manicotti with Meat Sauce: Advanced Tips and Variations

    While the standard Stuffed Manicotti with Meat Sauce recipe is already delicious, there are many advanced tips and variations you can explore:

    • Batch Cooking: Prepare a large batch of the filling and freeze half for future meals. This is a time-saver for busy days.
    • Ingredient Swap: Experiment with different cheeses, such as goat cheese or blue cheese, for a unique flavor.
    • Zesty Twist: Add a jalapeño or sprinkle red pepper flakes during the sauce preparation for a spicy kick.
    • Herb Infusion: Try adding fresh basil or parsley for a burst of freshness in the filling.
    • Layering Options: Consider a variety of fillings, such as sautéed mushrooms, diced peppers, or artichokes, to create a four-cheese manicotti or a veggie-packed version.

    Each variation allows you to explore new flavors while preserving the beloved essence of stuffed pasta, ensuring that you can always keep mealtime exciting.

    How to Store Stuffed Manicotti with Meat Sauce: Best Practices

    Once you’ve prepared your Stuffed Manicotti with Meat Sauce, proper storage ensures you can enjoy leftovers or prepare dishes in advance without compromising flavor.

    • Refrigeration:
    • Allow the manicotti to cool completely before placing in an airtight container. It can be stored in the fridge for up to 3-4 days.

    • Freezing:

    • If you plan to freeze the dish, it’s best to do so before baking. Wrap tightly in plastic wrap and place in a freezer-safe container to prevent freezer burn. Frozen manicotti can last for up to 3 months.
    • When ready to bake, remove from the freezer and let it defrost in the refrigerator overnight, then bake as instructed.

    • Reheating:

    • To reheat leftovers, preheat your oven to 350°F (175°C). Cover the dish with foil to avoid drying out and bake for 20-25 minutes, or until heated through.

    Maintaining the integrity and flavor of your stuffed manicotti makes for an effortless mealtime later and reduces food waste.

    Nutritional Value of Stuffed Manicotti with Meat Sauce

    Understanding the nutritional aspect of your meals is essential, especially when seeking balanced dishes. Let’s take a closer look at the nutrition profile of Stuffed Manicotti with Meat Sauce:

    • Calories: Approximately 350-400 calories per serving (based on a serving size of two stuffed manicotti).
    • Protein: 20-25g (primarily from meat and cheese).
    • Carbohydrates: 40-45g (from pasta).
    • Fat: 15-20g (depending on the type of meat and cheese).
    • Fiber: 3-5g (from added vegetables).

    Nutritional Benefits:

    • Protein: Essential for muscle growth and repair, making it suitable for active individuals and those seeking to maintain a balanced diet.
    • Vitamins: Spinach and tomatoes contain Vitamin K, Vitamin A, and antioxidants that support overall health.
    • Customizable for Health: By tweaking the ingredients (like using lean meats and higher fiber pasta), you can enhance the nutritional profile according to dietary requirements.

    Aiming for balanced meals that also taste great is key, and Stuffed Manicotti with Meat Sauce achieves that goal perfectly.

    FAQs: Frequently Asked Questions About Stuffed Manicotti with Meat Sauce

    To further assist you with preparing Stuffed Manicotti with Meat Sauce, here are some frequently asked questions:

    Q: Can I prepare the stuffed manicotti ahead of time?
    A: Yes! You can assemble the manicotti and store it in the refrigerator, unbaked, for up to 24 hours. Bake it just before you plan to serve for the freshest outcome.

    Q: What can I substitute for meat?
    A: Ground turkey, chicken, or plant-based proteins like lentils or crumbled tofu work great as alternatives.

    Q: How can I make this dish gluten-free?
    A: Opt for gluten-free manicotti and check the sauce’s ingredients. Make sure the crushed tomatoes have no additives containing gluten.

    Q: Is it possible to freeze the stuffed manicotti?
    A: Certainly! Assemble and freeze unbaked manicotti for up to 3 months; just thaw it in the fridge before baking.

    Q: What are some good sides to serve with this dish?
    A: A fresh salad or steamed vegetables are great accompaniments that balance out the richness of the stuffed pasta.

    Through understanding these aspects, you can confidently whip up this scrumptious Stuffed Manicotti with Meat Sauce and charm your family and friends at any meal. With its inviting taste and beautiful presentation, this dish truly represents what pasta recipes are all about!

  • Creamy Queso Rice with Juicy Steak Strips

    Creamy Queso Rice with Juicy Steak Strips

    Creamy Queso Rice with Juicy Steak Strips: A Tropical Delight

    Introduction to Creamy Queso Rice with Juicy Steak Strips

    Are you looking for a mouthwatering dish that serves as a delightful centerpiece for your next meal? Look no further than this Creamy Queso Rice with Juicy Steak Strips! This recipe combines the richness of creamy queso and the savory goodness of steak, making it a standout among dinner recipes.

    Not only is this dish delicious, but it also caters to a variety of dietary needs. With simple preparation techniques, you can whip up this masterpiece in no time. If you’re a busy parent juggling between work and family meals, a student on a budget, or simply someone who loves cooking, this recipe can fit seamlessly into your lifestyle.

    Moreover, the creamy cheese and juicy steak in this recipe deliver some nutritional benefits, such as protein and calcium, while still being indulgent. It’s perfect for those tropical nights when you want something hearty yet comforting. Whether you’re feeding a crowd or enjoying a cozy dinner for two, this dish will leave you and your guests satisfied and craving more. Packed with flavor and adaptable for various diets, including gluten-free and vegetarian alternatives, it invites all to gather around the table.

    So, gather your ingredients, and let’s dive into the world of Creamy Queso Rice with Juicy Steak Strips!

    Benefits and Advantages of Creamy Queso Rice with Juicy Steak Strips

    Creamy Queso Rice with Juicy Steak Strips is one of those dinner recipes that stands out not only for its delectable flavors but also for its numerous benefits. First and foremost, it is incredibly easy to prepare. In just a few simple steps, you can create a restaurant-quality meal that’ll impress family and friends alike. Busy individuals will appreciate the quick cooking time, allowing you to serve a satisfying meal without spending hours in the kitchen.

    This recipe also shines in the nutritional department. Utilizing lean cuts of steak enables you to enjoy the deliciousness without the guilt. Lean beef is a great source of protein, iron, and essential vitamins, making it a healthy choice for protein-conscious eaters. Additionally, the creamy queso sauce incorporates cheese, which contributes calcium and can be a good source of healthy fats when enjoyed in moderation.

    What’s more, this dish is versatile. Whether you prefer a spicy kick or a milder flavor, you can easily customize it by adding ingredients like jalapeños or diced tomatoes. It can also fit various dietary needs; using gluten-free rice or an alternative protein source can make this meal accessible to those with specific dietary preferences.

    In summary, if you’re in search of a satisfying, adaptable, and wholesome dinner, look no further. Creamy Queso Rice with Juicy Steak Strips is a fabulous option that combines the best of comfort food with the advantages of nutritional meals.

    Ingredients Overview

    Essential Ingredients for Creamy Queso Rice with Juicy Steak Strips

    To create this sumptuous dish, gather the following ingredients:

    • For the Steak Strips:
    • 1 pound of flank steak (can substitute sirloin for a budget-friendly option)
    • 2 tablespoons of olive oil
    • 2 teaspoons of garlic powder
    • 1 teaspoon of ground cumin
    • Salt and pepper to taste

    • For the Creamy Queso Rice:

    • 1 cup of long-grain white rice (substitute with brown rice for whole-grain option)
    • 2 cups of chicken or vegetable broth (choose low sodium for a healthier choice)
    • 1 cup of shredded queso cheese or cheese blend (for gluten-free options, be sure your cheese is certified)
    • 1 cup of milk (replace with almond or oat milk for a dairy-free version)

    • Toppings:

    • Chopped fresh cilantro
    • Diced tomatoes
    • Sliced green onions
    • Avocado (optional)

    These ingredients work together to create a flavorful base, while the toppings add a fresh crunch, making this dish well-rounded. Choose organic or local products where possible for a healthier and tastier meal.

    Dietary Substitutions to Customize Your Creamy Queso Rice with Juicy Steak Strips

    If you have specific dietary needs, several substitutions can make this dish more suitable for your tastes. Here are some suggestions:

    • For Vegetarians: Replace the steak with grilled mushrooms or a plant-based protein like tempeh or tofu marinated in the same spices for that smoky flavor.

    • For Vegans: Use plant-based cheese alternatives for the queso sauce and exchange the milk for an alternative like almond or soy milk. Opt for a protein replacement like lentils or chickpeas.

    • For Gluten-Free Diets: Stick to certified gluten-free rice and ensure the broth and cheese you choose are gluten-free.

    • For a Low-Calorie Option: Substitute regular rice with cauliflower rice and cut down on the cheese. You can also use a leaner cut of steak or reduce the portion size to keep things light.

    These modifications enable you to adapt Creamy Queso Rice with Juicy Steak Strips to meet your dietary preferences without compromising flavor.

    How to Prepare the Perfect Creamy Queso Rice with Juicy Steak Strips: Step-by-Step Guide

    Ready to embark on this culinary journey? Follow this step-by-step guide to create a sensational Creamy Queso Rice with Juicy Steak Strips.

    1. Prepare the Steak Strips:
    2. Slice the flank steak thinly against the grain into strips. This technique ensures tenderness.

    3. Marinate the Steak:

    4. In a bowl, mix olive oil, garlic powder, ground cumin, salt, and pepper. Coat the steak strips with the marinade and allow them to rest for at least 20 minutes. This enhances the flavors.

    5. Cook the Rice:

    6. In a medium saucepan, combine the rice and broth. Bring it to a boil, then reduce heat to low. Cover and simmer for 15-20 minutes or until the rice is tender and the liquid is absorbed.

    7. Add the Creamy Queso:

    8. Once the rice is cooked, stir in the milk and shredded cheese. Mix well over low heat until the cheese is fully melted, creating a creamy sauce.

    9. Sear the Steak Strips:

    10. In a skillet over medium-high heat, add a splash of olive oil. Once hot, add marinated steak strips in batches, ensuring not to overcrowd the pan. Sear for about 3-4 minutes per side, or until cooked through.

    11. Serve the Dish:

    12. On a plate, scoop a generous helping of creamy queso rice and top it with the juicy steak strips.

    13. Garnish:

    14. Finish with chopped cilantro, diced tomatoes, sliced green onions, and avocado for a fresh touch.

    15. Enjoy:

    16. Dive in and relish your homemade Creamy Queso Rice with Juicy Steak Strips!

    This straightforward method proves how cooking can be enjoyable and stress-free while yielding a delicious result. You can also make variations according to taste by altering the toppings or level of spice incorporated in the dish.

    Mastering Creamy Queso Rice with Juicy Steak Strips: Advanced Tips and Variations

    To elevate your cooking experience and wow family and friends even further, consider these advanced tips and variations for your Creamy Queso Rice with Juicy Steak Strips:

    • Experimenting with Spice: For those who love heat, consider adding diced jalapeños or a sprinkle of cayenne pepper to the queso. This can transform your dish into a spicy delight.

    • Infuse Flavors: When cooking the rice, add spices such as taco seasoning or fresh herbs like thyme for added depth of flavor. Fresh lime juice at the end brings a citrusy zing that brightens the entire dish.

    • Switch it Up: Instead of steak, opt for grilled chicken or shrimp as a protein alternative. This adds different textures and flavors while keeping the essence of the dish.

    • Explore Cheese Varieties: Don’t just stick to queso cheese! Try a combination of mozzarella, cheddar, and pepper jack for an exciting twist on the cheesy element.

    • One-Pan Wonder: For a quicker version, consider making the entire recipe in one pan. Start with the steak, add the rice, and pour over the broth and cheese, letting everything cook together. This reduces dishes and saves time.

    These tips will not only help you master the recipe but also encourage creativity in the kitchen, allowing you to personalize it to your preference.

    How to Store Creamy Queso Rice with Juicy Steak Strips: Best Practices

    Storing any leftover Creamy Queso Rice with Juicy Steak Strips properly is essential to maintaining freshness and flavor. Here’s how to do it:

    1. Cooling Down: Allow your dish to cool to room temperature. This step prevents condensation and spoilage when stored.

    2. Refrigerating: Place the cooled dish in an airtight container. It can be stored in the refrigerator for up to 3-4 days. Make sure to label the container to keep track of its freshness.

    3. Freezing: For longer storage, you can freeze portions of the creamy rice and steak. Use freezer-safe containers, and make sure to leave some space for expansion. You can freeze the dish for up to 3 months.

    4. Reheating: When you’re ready to enjoy the leftovers, reheat in the microwave or in a skillet. If it has become too thick, add a splash of milk or broth to restore its creamy consistency.

    By following these storage guidelines, you can enjoy your delicious creation even after the first serving!

    Nutritional Value of Creamy Queso Rice with Juicy Steak Strips

    Understanding the nutritional breakdown of your meals can help you make better dietary choices. Here’s a basic overview of the nutritional value of Creamy Queso Rice with Juicy Steak Strips per serving (approximately):

    • Calories: 600 kcal
    • Protein: 35g
    • Carbohydrates: 55g
    • Fat: 25g
    • Fiber: 2g
    • Calcium: 350mg
    • Iron: 2.5mg

    Health Considerations

    Keep in mind that these values may vary based on the specific ingredients you use and portion sizes. Adjusting oil quantities, cheese types, or using alternative grains can affect overall nutritional content.

    For those watching their calorie intake, consider applying the earlier tips to reduce calories while retaining flavor. Lean cuts of steak and lower-fat dairy options help maintain protein while being more health-conscious.

    Understanding these details allows you to savor your meal while keeping your dietary goals in check.

    FAQs: Frequently Asked Questions About Creamy Queso Rice with Juicy Steak Strips

    1. Can I make this dish ahead of time?

    Absolutely! You can prepare the creamy queso rice and the marinated steak strips in advance. Store them separately in the refrigerator. When ready to eat, just heat everything up together.

    2. What can I use instead of steak?

    If beef isn’t your preference, grilled chicken, shrimp, or even plant-based proteins like tofu or tempeh work well. Be creative and adjust seasoning and cooking times accordingly.

    3. Is there a gluten-free option?

    Yes! You can easily make this recipe gluten-free by selecting certified gluten-free broth and cheese. Additionally, using brown rice or cauliflower rice will keep it gluten-free while adding nutritional value.

    4. How do I make this dish spicier?

    To add heat, integrate finely chopped jalapeños or a dash of hot sauce in the creamy queso sauce. Adjust to your desired spice level to create the perfect balance!

    5. Can I freeze leftovers?

    Sure! As mentioned, the dish can be frozen for up to three months. Just remember to store in airtight containers and to reheat adequately before serving.

    With these answers, you’re set to create and enjoy your Creamy Queso Rice with Juicy Steak Strips with confidence!


    In summary, Creamy Queso Rice with Juicy Steak Strips is more than just a meal; it’s an experience that brings flavor, nutrition, and versatility to your dining table. By following the detailed steps and considerations outlined in this guide, you can master this delectable dish and enjoy it in numerous ways. Prepare to impress your family and friends, as they’ll be clamoring for seconds! This recipe is sure to become a staple in your collection of dinner recipes. Don’t wait any longer; give it a try today!

  • Italian Chicken Saltimbocca

    Italian Chicken Saltimbocca

    Italian Chicken Saltimbocca: A Tropical Delight

    Introduction to Italian Chicken Saltimbocca

    Italian Chicken Saltimbocca is a dish that encapsulates the spirit of Italian cuisine—simple yet bursting with flavor. This incredible recipe is not only a delightful addition to your collection of chicken recipes, but it also offers a splendid combination of juicy chicken breasts, aromatic herbs, and the richness of prosciutto. The beauty of this dish lies in its ease of preparation, making it perfect for busy parents, newlyweds, and anyone looking to whip up a delicious meal in a flash.

    The health benefits are notable too. Chicken is a powerhouse of lean protein, ideal for those looking to maintain a healthy lifestyle, while sage—a primary seasoning in this dish—provides antioxidants and anti-inflammatory properties. Additionally, Saltimbocca can easily be tailored to fit various dietary requirements, appealing to a wide audience, including gluten-free and low-calorie eaters.

    Whether you’re cooking for a romantic dinner or a family gathering, Italian Chicken Saltimbocca stands out as not only an appetizing choice but also as a dish that can accommodate different tastes and dietary restrictions. With this guide, you’ll discover the flavors of Italy right in your kitchen, inspiring you to gather friends and family around the table for a delightful culinary experience.

    Benefits and Advantages of Italian Chicken Saltimbocca

    The allure of Italian Chicken Saltimbocca extends beyond its delightful taste. Let’s delve into the multiple benefits it offers, making it a standout amongst traditional chicken recipes.

    Ease of Preparation

    One of the first things you’ll appreciate about this dish is how simple it is to prepare. The entire recipe can be completed in under 30 minutes, allowing busy individuals—be they working professionals, students, or parents—to create an impressive meal without spending hours in the kitchen.

    Health Benefits

    Italian Chicken Saltimbocca is not only delicious but also packed with valuable nutrients. Chicken breast is an excellent source of protein, crucial for muscle health and recovery. It’s also low in fat and calories, making it suitable for diet-conscious individuals. Meanwhile, fresh sage helps boost digestion and adds a fragrant aromatic profile to the dish.

    Customization

    Another attribute that makes this recipe particularly appealing is its adaptability. It can be easily modified to cater to various dietary needs. For example, you can substitute prosciutto with a plant-based alternative for a vegan option or use gluten-free breadcrumbs if necessary. Such flexibility ensures that everyone can enjoy a plate of this exquisite dish.

    Flavorful Experience

    Most importantly, the balance of flavors from the chicken, salty prosciutto, and the earthiness of sage creates a wow factor that is impressive yet completely approachable. This dish can transport you to the charming streets of Italy with just a single bite, making it ideal for food enthusiasts and travelers longing for authentic Italian cuisine.

    By choosing to make Italian Chicken Saltimbocca, you take a step towards a culinary adventure loaded with health benefits, flavor, and convenience.

    Ingredients Overview

    Essential Ingredients for Italian Chicken Saltimbocca

    Creating the perfect Italian Chicken Saltimbocca requires selecting quality ingredients. Below is a detailed list of all components you’ll need:

    Ingredients:
    4 boneless, skinless chicken breasts (approximately 1.5 lbs): Source of lean protein.
    8 slices of prosciutto: Adds a savory, salty flavor (substitutable with turkey bacon for a lower-calorie option).
    1/2 cup fresh sage leaves (approximately 20-30 leaves): Provides aromatic flavors and health benefits.
    1/4 cup all-purpose flour: Optional for dredging (use gluten-free flour for gluten-free diets).
    1/4 cup olive oil: For sautéing; rich in healthy fats.
    1/2 cup white wine (or chicken broth for a non-alcoholic option): Enhances the sauce’s flavor.
    Salt and pepper (to taste): Essential for seasoning, enhance the overall taste profile.
    Lemon wedges (for garnish): Optional, to brighten up the flavors when serving.

    These carefully selected ingredients work together to create a dish that is not only appealing to the palate but also nutritious. Now, let’s explore dietary substitutions to ensure everyone can enjoy this recipe.

    Dietary Substitutions to Customize Your Italian Chicken Saltimbocca

    Dietary needs can vary, and this dish can be adapted accordingly without compromising flavor or experience. Here are some suggestions for substitutions:

    1. For a Vegan Option:
    2. Chicken: Substitute traditional chicken with thinly sliced, marinated tofu or eggplant.
    3. Prosciutto: Use a plant-based prosciutto-style product to maintain a similar taste profile.
    4. White Wine: Opt for vegetable broth.

    5. For Gluten-Free:

    6. Flour: Substitute all-purpose flour with gluten-free flour or cornstarch.
    7. Breadcrumbs (if desired): Use gluten-free alternatives.

    8. For Lower Calorie Options:

    9. Fat Content: Utilizing cooking spray instead of olive oil can help reduce the total calorie count.
    10. Prosciutto: Consider turkey bacon, as it tends to be lower in calories.

    11. Spice it up: For those who enjoy a bit of heat, consider adding crushed red pepper flakes to the final sauce.

    These dietary adaptations allow anyone to savor the flavors of Italian Chicken Saltimbocca without worry, making the dish a fantastic choice for inclusive gatherings.

    How to Prepare the Perfect Italian Chicken Saltimbocca: Step-by-Step Guide

    Creating Italian Chicken Saltimbocca is a breeze when following these step-by-step instructions. Let’s get started on bringing this delightful recipe from your kitchen to the dining table.

    Step-by-Step Instructions

    1. Prepare the Chicken: Place the chicken breasts between two sheets of plastic wrap. Use a meat mallet to pound each piece gently until about 1/2 inch thick. This step ensures even cooking.

    2. Season the Chicken: Sprinkle salt and pepper to taste on both sides of the chicken. Seasoning is crucial for enhancing the flavor profile of the dish.

    3. Assemble the Saltimbocca: Lay two sage leaves on each piece of chicken, then top with two slices of prosciutto. Press them down lightly so they adhere. This layering ensures the flavors meld beautifully during cooking.

    4. Dredge in Flour (Optional): If you choose to use flour, lightly dredge each piece of prosciutto-topped chicken in flour. Shake off any excess. This step helps create a crispier texture when sautéed.

    5. Heat Olive Oil: In a large skillet, heat the olive oil over medium heat. Ensure that the pan is hot enough to create a satisfying sizzle when you add the chicken.

    6. Cook the Chicken: Place the chicken in the skillet, prosciutto-side down. Cook for about 4-5 minutes on each side, or until golden brown and cooked through. If it looks a little crisped at the edges, that’s a sign of extra flavor.

    7. Remove and Keep Warm: Once cooked, remove the chicken from the skillet and keep it warm on a plate covered loosely with aluminum foil. This retention of warmth ensures the chicken stays juicy.

    8. Create the Sauce: In the same skillet, add the white wine (or chicken broth) and scrape up the browned bits on the bottom of the pan (these are flavor gold!). Cook for about 3 minutes, allowing it to reduce slightly.

    9. Finish with Lemon: Squeeze in the juice of one lemon, adjust seasoning with salt and pepper if needed, and return the chicken to the skillet for a final coating in the sauce.

    10. Serve: Plate the chicken, drizzling the sauce on top and garnishing with fresh lemon wedges and additional sage if desired.

    By following these simple yet effective steps, you’ll create a mouth-watering dish that will impress everyone at the table. Each step can be adapted as needed, allowing for variations based on dietary preferences.

    Mastering Italian Chicken Saltimbocca: Advanced Tips and Variations

    Once you’ve nailed the classic Italian Chicken Saltimbocca, consider these advanced tips and variations to elevate your dish:

    1. Play with Flavors: Experiment with adding ingredients like sun-dried tomatoes or olives to the sauce for a Mediterranean twist. These ingredients can offer a different flavor profile that complements the chicken beautifully.

    2. Cheese Lover’s Delight: Mix in some fresh mozzarella before serving; it adds a creamy texture that perfectly contrasts with the salty prosciutto.

    3. Herb Infusions: Integrate other herbs like thyme or rosemary alongside sage to amplify the aroma and flavor complexity. Experimenting with herbs will take your dish to the next level.

    4. Different Proteins: Switch out chicken for veal or fish, as these proteins also lend themselves well to the same preparation methods.

    5. Meal Prep: If you want to enjoy this dish on a busy weeknight, consider prepping the chicken in advance. Assemble the prosciutto and sage, cover and refrigerate. When you’re ready, follow the cooking steps for a quick meal.

    Through these tips and variations, you ensure that Italian Chicken Saltimbocca remains an exciting part of your collection of chicken recipes, adaptable to seasons and assorted tastes.

    How to Store Italian Chicken Saltimbocca: Best Practices

    Proper storage is key to maintaining the quality and flavor of leftover Italian Chicken Saltimbocca. Follow these best practices for refrigeration, freezing, and reheating:

    Refrigeration

    • Cooling: Allow Italian Chicken Saltimbocca to cool completely at room temperature before you store it. This step prevents condensation, which can lead to sogginess.
    • Storing: Place your chicken in an airtight container with any remaining sauce. It can be stored in the refrigerator for up to 3 days.

    Freezing

    • Freezing: If you have leftovers beyond three days, consider freezing for longer preservation. Ensure the dish is cooled fully, wrap it tightly in plastic wrap, then place it in an airtight freezer-safe container or vacuum seal.
    • Duration: You can safely freeze Italian Chicken Saltimbocca for up to 2 months.

    Reheating

    • Thawing: For the best results, thaw the frozen chicken in the refrigerator overnight before reheating.
    • Reheating: Warm in a preheated oven at 350°F (175°C) for about 15-20 minutes or until heated through. To maintain moisture, you can add a splash of white wine or chicken broth and cover with foil.

    Following these storage practices ensures that you can enjoy your Italian Chicken Saltimbocca at its best, even days after you’ve initially prepared it.

    Nutritional Value of Italian Chicken Saltimbocca

    Maintaining a diet-conscious approach while preparing delicious meals is key for many cooks. Here’s a breakdown of the nutritional value of Italian Chicken Saltimbocca per serving:

    Nutritional Information (Approximate Values):
    Calories: 350
    Protein: 30g
    Total Fat: 15g
    Saturated Fat: 4g
    Carbohydrates: 10g
    Dietary Fiber: 1g
    Sugars: 0g
    Sodium: 700mg
    Cholesterol: 80mg

    Health Benefits

    • High Protein: Essential for muscle growth and satiety, this dish serves as an excellent option for those looking to increase protein intake.
    • Low Carbohydrate: Suitable for low-carb diets or anyone wanting to maintain energy levels without excess sugars.
    • Moderate Fat Content: With predominantly healthy fats from olive oil, this recipe promotes overall cardiovascular health.

    These nutritional values illustrate that Italian Chicken Saltimbocca can be a wholesome addition to your collection of chicken recipes, ensuring you can savor indulgent flavors without compromising on health.

    FAQs: Frequently Asked Questions About Italian Chicken Saltimbocca

    1. Can I use chicken thighs instead of breasts?

    Absolutely! Chicken thighs will also work wonderfully, offering a richer flavor and slightly different texture.

    2. How do I make this dish gluten-free?

    To make the recipe gluten-free, simply replace all-purpose flour with gluten-free flour. Ensure that the prosciutto and chicken broth (if used) are also certified gluten-free.

    3. Can I prepare this dish ahead of time?

    Yes! You can assemble the chicken with the prosciutto and sage a few hours ahead of time and refrigerate until you’re ready to cook. This prep helps in expediting the cooking process.

    4. What can I serve with Italian Chicken Saltimbocca?

    Consider pairing with a side of garlic mashed potatoes, roasted vegetables, or a fresh arugula salad to create a balanced meal.

    5. Can I use a different cooking method?

    While frying gives the best texture, you could also bake the stuffed chicken at 375°F (190°C) for about 25-30 minutes until cooked through.

    With these FAQs, you’re armed with the knowledge to tackle any concerns with confidence, allowing you to fully enjoy the process of making Italian Chicken Saltimbocca.

    Conclusion

    Italian Chicken Saltimbocca is more than just a meal; it’s an invitation to enjoy flavors that bring families and friends together. Easy to prepare, adaptable to various dietary needs, and rich in nutrition, this recipe acts as the perfect embodiment of the warmth and affection found in Italian cooking. With its impressive flavor profile and visual appeal, it’s bound to become a favorite in your collection of chicken recipes, whether it’s for a cozy dinner at home or an extravagant feast with loved ones.

    So gather your ingredients, roll up your sleeves, and let the beautiful aroma of Italian Chicken Saltimbocca waft through your kitchen, inspiring everyone to indulge in a delightful culinary experience. Enjoy every bite!

  • Vegetable Lasagna with Sweet Potato, Butternut Squash  Cranberry Glaze

    Vegetable Lasagna with Sweet Potato, Butternut Squash Cranberry Glaze

    Vegetable Lasagna with Sweet Potato, Butternut Squash & Cranberry Glaze: A Tropical Delight

    Introduction to Vegetable Lasagna with Sweet Potato, Butternut Squash & Cranberry Glaze

    If you’re seeking delicious and nutritious dinner recipes, look no further! This Vegetable Lasagna with Sweet Potato, Butternut Squash, and a zesty Cranberry Glaze is not just a meal; it’s a celebration of flavors and health. Ideal for any occasion, this dish perfectly balances wholesome ingredients with culinary creativity, making it a hit for busy families, health-conscious individuals, and anyone who loves a plant-based feast.

    This lasagna is a breeze to prepare. With layers of colorful vegetables and a rich cranberry glaze, it is both visually stunning and satisfyingly delicious. Not only is it vegan and gluten-free, but it also brings a multitude of health benefits, thanks to the nutrient-dense ingredients. Sweet potatoes and butternut squash are not only rich in vitamins and fiber but also add a natural sweetness that complements the tartness of the cranberry glaze beautifully.

    In this article, we will explore the simplicity and versatility of this recipe, emphasizing its suitability for diverse dietary needs. Whether you’re cooking for two or hosting a festive gathering, this Vegetable Lasagna inspired by tropical flavors will surely impress your guests while keeping you healthy. So, roll up your sleeves and get ready to craft a dish that’s as nourishing as it is delightful!

    Benefits and Advantages of Vegetable Lasagna with Sweet Potato, Butternut Squash & Cranberry Glaze

    Vegetable Lasagna with Sweet Potato, Butternut Squash, and Cranberry Glaze stands out among popular dinner recipes for several reasons. Firstly, its preparation is straightforward, making it the perfect choice for novice cooks and seasoned chefs alike. With step-by-step instructions, you can easily create layers of goodness that come together to create a harmonious dish.

    From a health perspective, this recipe packs a punch. Sweet potatoes and butternut squash are both excellent sources of antioxidants, vitamins A and C, and fiber, contributing to your overall wellness. Incorporating these vegetables not only provides essential nutrients but also enhances the dish’s flavor profile. Additionally, cranberries bring natural sweetness and a tart kick, enriched with antioxidants, making this glaze a versatile addition not just for lasagna but for various other dishes as well.

    Moreover, this lasagna caters to different dietary preferences. It’s vegan, gluten-free, and low-calorie, allowing a broad audience to enjoy it without compromising their dietary requirements. Perfect for busy parents, students, or working professionals, it offers easy meal prep options. Just make a large batch on weekends, and you have meals ready for the week ahead!

    Ultimately, this Vegetable Lasagna is not just a meal option; it’s a delightful way to explore healthier eating habits while also indulging in a delicious dish that satisfies your taste buds. By preparing this dish, you provide a nurturing source of nutrition for yourself and your loved ones, making mealtime both enjoyable and rewarding.

    Ingredients Overview

    Essential Ingredients for Vegetable Lasagna with Sweet Potato, Butternut Squash & Cranberry Glaze

    To create this delicious Vegetable Lasagna, you will need the following ingredients:

    • 12 Whole Wheat Lasagna Noodles (or gluten-free noodles)
      These provide a hearty base, and whole wheat options add more fiber.

    • 2 Medium Sweet Potatoes (peeled and diced)
      Rich in vitamins A and C, they also add sweetness and creaminess to the dish.

    • 2 cups Butternut Squash (diced or cubed)
      Another great source of vitamins and fiber, this squash complements the sweet potatoes and adds texture.

    • 1 cup Fresh Cranberries (for the glaze)
      These add a burst of tartness and are high in antioxidants. Fresh or frozen can work, but fresh is preferred for flavor.

    • 1 large Onion (chopped)
      Provides a flavorful base and depth of flavor to the lasagna.

    • 3 cloves of Garlic (minced)
      Garlic packs a flavor punch and offers numerous health benefits, such as boosting the immune system.

    • 2 cups Spinach (fresh or chopped)
      A nutrient powerhouse, spinach adds a lovely green color and is packed with vitamins and minerals.

    • 1 cup Vegan Cheese (optional for layering)
      Perfect for those who want a cheesy texture without dairy. It melts beautifully over the vegetables.

    • 2 tablespoons Olive Oil
      Healthy fats help absorb vitamins from the vegetables and add rich flavor.

    • Salt and pepper to taste
      Essential for enhancing flavors in any dish.

    • 1-2 tablespoons Maple Syrup (for the glaze)
      Balancing the tartness of cranberries, maple syrup adds natural sweetness.

    • 1 tablespoon Balsamic Vinegar (optional for the glaze)
      This brings a depth of flavor and tanginess to the cranberry mixture.

    • Dried herbs (like oregano, basil, and thyme) to season
      These elevate the flavor profile and add aromatic qualities.

    Dietary Substitutions to Customize Your Vegetable Lasagna with Sweet Potato, Butternut Squash & Cranberry Glaze

    This lasagna is remarkably versatile. Here are some substitutions based on dietary preferences:

    • Gluten-Free: Use gluten-free lasagna noodles or thinly sliced zucchini or eggplant as a base to keep the structure intact while making it gluten-free.

    • Vegan Cheese: For those avoiding dairy, you can either skip the cheese or use nut-based cheeses which add creaminess and flavor without the lactose.

    • Additional Vegetables: Feel free to incorporate other vegetables such as mushrooms, bell peppers, or zucchini. These can add a variety of flavors and enhance the nutrition profile.

    • Cranberry Options: If cranberries are unavailable, a mix of blended raspberries or blueberries can achieve a similar flavor profile, providing that fruity tartness.

    • Creaminess: For extra creaminess, consider using cashew cream or pureed silken tofu with nutritional yeast as a cheese substitute.

    Overall, customization helps meet specific dietary restrictions while maintaining the integrity of this delicious dish.

    How to Prepare the Perfect Vegetable Lasagna with Sweet Potato, Butternut Squash & Cranberry Glaze: Step-by-Step Guide

    Ready to dive in? Here’s a step-by-step guide to create your own Vegetable Lasagna with Sweet Potato, Butternut Squash, and Cranberry Glaze. Each step is easy to follow, whether you are a novice cook or an expert in the kitchen.

    1. Prepare the Vegetables:
      Start by preheating your oven to 375°F (190°C). Meanwhile, peel and cube the sweet potatoes and butternut squash. Toss them in a bowl with olive oil, salt, and pepper. Spread them evenly on a baking sheet and roast for about 25-30 minutes until tender. This will intensify their flavors and sweetness.

    2. Sauté the Aromatics:
      In a large skillet over medium heat, add 2 tablespoons of olive oil. Once heated, add the chopped onion and sauté until translucent, about 5 minutes. Then add minced garlic and cook for another minute until fragrant.

    3. Add Spinach:
      Toss in the fresh spinach to the skillet and cook until wilted. This should take about 2-3 minutes. Once done, remove from heat and set aside.

    4. Prepare the Cranberry Glaze:
      In a small saucepan, combine fresh cranberries, maple syrup, and balsamic vinegar. Cook over medium heat, stirring occasionally until the cranberries burst and the mixture thickens, around 10-15 minutes. Adjust sweetness according to your taste.

    5. Cook the Noodles:
      In a large pot, bring salted water to a boil and cook lasagna noodles according to package instructions until al dente. Drain and lay them flat on parchment paper to prevent sticking.

    6. Assemble the Lasagna:
      In a large baking dish, start with a layer of noodles at the bottom. Top it with roasted sweet potatoes and butternut squash, followed by a layer of the sautéed onion and spinach. Drizzle some cranberry glaze over the vegetables and sprinkle a layer of vegan cheese (if using).

    7. Repeat Layers:
      Continue layering, following this sequence: noodles, vegetables, glaze, and cheese until you exhaust your ingredients, finishing with a layer of noodles topped with cranberry glaze and a sprinkle of the remaining cheese.

    8. Bake the Lasagna:
      Cover the baking dish with aluminum foil and bake for about 30 minutes. After this, remove the foil and bake for an additional 10-15 minutes until the top is golden and bubbly.

    9. Serve and Enjoy:
      Once baked, let the lasagna cool for about 10 minutes before slicing. This allows the layers to set. Serve warm, garnished with fresh herbs if desired.

    Consider making a large batch, as this dish stores beautifully and tastes even better the next day!

    Mastering Vegetable Lasagna with Sweet Potato, Butternut Squash & Cranberry Glaze: Advanced Tips and Variations

    Perfecting your Vegetable Lasagna is an enjoyable process. Here are some advanced tips and variations to experiment with, ensuring you explore the full potential of this dish:

    • Layer with Pesto: If you’re looking for a flavor boost, consider spreading a layer of homemade or store-bought vegan pesto between the layers. This adds an herbaceous richness that’s delightful with the vegetables.

    • Zucchini Noodle Swap: For a low-carb version, substitute lasagna noodles with thinly sliced zucchini. Just sprinkle salt over the slices and let them sit to draw out moisture before layering; they’ll hold up well in the baking process.

    • Experiment with Seasonings: Feel free to adjust seasonings, such as adding a pinch of red pepper flakes for a little heat or fresh herbs like thyme and parsley for a fragrant finish.

    • Top with Breadcrumbs: For a crispy topping, combine gluten-free breadcrumbs with a bit of olive oil and sprinkle on top for the last few minutes of baking. This elevates the texture of your lasagna beautifully.

    • Change-up the Glaze: Instead of cranberry, try using a tomato sauce with added herbs or a vegan cheese sauce complemented with spices. This creates an entirely new flavor profile while still being incredibly satisfying.

    By utilizing these tips, you can personalize your Vegetable Lasagna, making it uniquely yours and ensuring it never feels repetitive, no matter how often you prepare it!

    How to Store Vegetable Lasagna with Sweet Potato, Butternut Squash & Cranberry Glaze: Best Practices

    When it comes to storing your Vegetable Lasagna with Sweet Potato, Butternut Squash, and Cranberry Glaze, there are some best practices to follow:

    • Refrigeration:
      After cooking, ensure the lasagna cools to room temperature. Once cooled, cover it tightly with aluminum foil or store it in an airtight container. It should keep well in the refrigerator for up to 4-5 days.

    • Freezing:
      If you want to store it for longer, consider freezing. Cut the lasagna into portions, wrap each portion in plastic wrap followed by aluminum foil, and place in a freezer-safe container. It can last for up to three months in the freezer.

    • Reheating:
      When ready to eat, thaw any frozen portions overnight in the refrigerator. You can reheat individual servings in the microwave or place the whole baking dish back into the oven at 350°F (175°C) for about 30-35 minutes, covering it with foil to keep it moist.

    These storage tips help maintain the flavor and texture of your lasagna, making it convenient for meal prepping or quick weeknight dinners.

    Nutritional Value of Vegetable Lasagna with Sweet Potato, Butternut Squash & Cranberry Glaze

    A serving of this Vegetable Lasagna is not only tasty but also packed with nutrition. Here’s a breakdown of the approximate nutritional value per serving (based on 8 servings):

    • Calories: 280-350
    • Total Fat: 10-14g (depending on the addition of cheese)
    • Saturated Fat: 1-3g
    • Cholesterol: 0mg (vegan)
    • Sodium: 400-700mg (varies with added salt and pre-cooked sauces)
    • Total Carbohydrates: 45-55g
    • Dietary Fiber: 8-10g
    • Sugars: 6-10g (natural sugars from the vegetables)
    • Protein: 9-12g (depending on cheese included)

    This composition makes it a wholesome meal, filled with vitamins and minerals from the vegetables. The high fiber content aids digestion and keeps you full longer, while the healthy fats support brain function and overall well-being.

    By enjoying this Vegetable Lasagna, you contribute positively to your nutritional intake while enjoying an indulgent and flavorful dish!

    FAQs: Frequently Asked Questions About Vegetable Lasagna with Sweet Potato, Butternut Squash & Cranberry Glaze

    Can I substitute the sweet potatoes with other vegetables?

    Absolutely! If sweet potatoes aren’t available, feel free to use regular potatoes, carrots, or even eggplant for a different texture and flavor.

    Is this lasagna suitable for meal prep?

    Yes! This Vegetable Lasagna is perfect for meal prep. You can store individual portions in the fridge or freeze them for later use.

    How can I make this recipe lower in calories?

    To reduce calories, you can use fat-free or reduced-fat cheese options, skip extra oil in sautéing, or reduce the portion size of noodles and increase vegetables.

    Can I use frozen vegetables in this recipe?

    Certainly! Using frozen vegetables can save you time. Just make sure to thaw and drain any excess moisture to prevent the lasagna from becoming watery.

    Is it necessary to include the cranberry glaze?

    While the cranberry glaze adds a unique flavor and brightness, feel free to omit it or substitute with a tomato sauce or pesto to fit your taste preferences.

    Can I make this lasagna ahead of time and bake it later?

    Yes! You can assemble the lasagna ahead of time. Just cover it tightly and store it in the refrigerator, then bake it when you’re ready.

    What sides pair well with this Vegetable Lasagna?

    A fresh garden salad or steamed vegetables complement this dish perfectly. You can also serve garlic bread for a satisfying meal.

    Can I scale this recipe to serve more or fewer people?

    Definitely! Adjust the ingredients proportionally to scale the recipe up or down as needed. Just make sure to use an appropriately sized baking dish.

    Conclusion

    This Vegetable Lasagna with Sweet Potato, Butternut Squash, and Cranberry Glaze is a delicious and versatile addition to your dinner recipe lineup. Not only does it offer a nutritious alternative to traditional comfort food, but it also allows for personalization to ensure it suits a variety of dietary restrictions and preferences. So give it a try, and let the vibrant flavors brighten your dining table! With its ease of preparation and stunning presentation, this lasagna is bound to become a favorite for anyone who values wholesome cooking. Happy cooking!

  • Cream Cheese  Bacon Stuffed Doritos

    Cream Cheese Bacon Stuffed Doritos

    Cream Cheese & Bacon Stuffed Doritos: A Tropical Delight

    Introduction to Cream Cheese & Bacon Stuffed Doritos

    If you’re on the lookout for easy and delicious appetizer recipes that can wow your guests while keeping your preparation time minimal, then the Cream Cheese & Bacon Stuffed Doritos are your perfect pick! This delightful dish combines the exhilarating crunch of Doritos with a creamy, savory filling of cream cheese and crispy bacon, creating a snack that is irresistibly delicious. It’s not just simple; it’s also versatile enough to cater to various dietary needs, making it an ideal choice for everyone—from busy parents to savvy students seeking inexpensive yet satisfying snacks.

    The beauty of this recipe lies in its simplicity. You can whip it up in under 30 minutes, making it a go-to option for last-minute gatherings, game-day parties, or even a cozy movie night at home. With every cheesy, bacon-filled bite, you’ll experience an explosion of flavors that will leave your taste buds dancing. Moreover, this recipe offers health-conscious individuals the opportunity to use low-fat cream cheese or turkey bacon, making it perfect for those seeking lighter alternatives without sacrificing flavor.

    Crafting these stuffed Doritos is also an opportunity to get everyone involved in the kitchen; it’s a fun activity that can engage your little ones or friends while sharing sweet, insightful moments. So roll up your sleeves, grab some Doritos, and let’s dive into this cheesy adventure!

    Benefits and Advantages of Cream Cheese & Bacon Stuffed Doritos

    When it comes to appetizer recipes, the Cream Cheese & Bacon Stuffed Doritos shine brightly among the rest. Here’s why:

    1. Simplicity: The entire process of creating these delicious bites involves minimal effort. You only need to mix a few ingredients, stuff them, and bake for a short time. This ease makes it an excellent choice for novice cooks or those who want something hassle-free yet impressive.

    2. Delicious Flavor: With the perfect combination of creamy cheese and savory bacon, these stuffed Doritos provide a delightful contrast that satisfies cravings. The salty crunch of the chips complements the rich, creamy filling, making each bite a genuinely delightful experience.

    3. Customizable: One of the most significant advantages of this recipe is its adaptability to various dietary preferences. Whether someone is vegetarian, vegan, gluten-free, or health-conscious, you can easily modify the ingredients to suit your dietary needs. For instance, substitute turkey bacon, use vegan cream cheese, and opt for gluten-free Doritos to cater to your guests.

    4. Nutritional Balance: While traditionally deemed a guilty pleasure, you can also make this recipe a healthier option by using low-fat or reduced-calorie ingredients. Incorporating fresh herbs or serving with a side of veggies can enhance its nutritional value.

    5. Social Snack: Perfect for parties, gatherings, or family dinners, these stuffed Doritos foster a sense of community. Encouraging guests to grab their favorites straight from the serving platter creates a relaxed, inviting atmosphere that everyone will appreciate.

    Incorporating these benefits and advantages makes the Cream Cheese & Bacon Stuffed Doritos a standout option in your collection of appetizer recipes. It’s not just about flavor; it’s about making your culinary experiences memorable and enjoyable.

    Ingredients Overview

    Essential Ingredients for Cream Cheese & Bacon Stuffed Doritos

    To get started, gather the following ingredients for your Cream Cheese & Bacon Stuffed Doritos:

    • 1 bag of Doritos (your favorite flavor): This will be the crispy base for the dish.
    • 8 oz. cream cheese, softened: Provides a creamy filling. For a lighter version, use reduced-fat cream cheese.
    • 4 slices of bacon, cooked and crumbled: Adds a savory, crispy texture. Turkey bacon can be used for a leaner alternative.
    • ¼ cup green onions, chopped: Imparts freshness and a hint of flavor.
    • 1 cup shredded cheese (cheddar or your choice): Enhances creaminess and flavor. Consider using a dairy-free cheese for a vegan option.
    • 1 tsp garlic powder: Adds depth and richness.
    • 1 tsp onion powder: Creates a well-rounded taste.

    These ingredients are accessible and affordable, making this recipe not only delightful but also budget-friendly.

    Dietary Substitutions to Customize Your Cream Cheese & Bacon Stuffed Doritos

    Customization is key when it comes to dietary preferences. Here are some helpful substitutions to adapt the recipe for different needs:

    1. For Vegan Diets: Replace cream cheese with vegan cream cheese or cashew-based cheese. Use tempeh or sautéed mushrooms instead of bacon for a savory twist.

    2. For Gluten-Free Options: Ensure that you use gluten-free Doritos. Many brands offer gluten-free varieties so everyone can enjoy this tasty snack.

    3. Lower Calorie Choices: Opt for low-fat cream cheese and turkey bacon to reduce caloric intake. You can also decrease cheese quantity or use a lower-calorie cheese alternative.

    4. For Dairy-Free Preferences: Use plant-based cream cheese and non-dairy cheese. Be sure to check the labels for any hidden dairy ingredients.

    5. Spice it Up: If you love heat, add some chopped jalapeños or a dash of hot sauce into the cream cheese mixture for added flavor!

    These substitutions serve not just to cater to different dietary needs but also to offer a unique twist on a classic appetizer recipe.

    How to Prepare the Perfect Cream Cheese & Bacon Stuffed Doritos: Step-by-Step Guide

    Now that we have all the ingredients, let’s dive into the preparation of these mouthwatering Cream Cheese & Bacon Stuffed Doritos:

    1. Prepare the Baking Sheet: Preheat your oven to 350°F (175°C). Line a baking sheet with parchment paper to prevent sticking and make cleanup easy.

    2. Cook the Bacon: In a medium-sized skillet, cook the bacon until crispy. Once done, transfer to a paper towel to drain excess grease. Once cooled, crumble the bacon into small bits.

    3. Blend the Cream Cheese Mixture: In a mixing bowl, combine softened cream cheese, crumbled bacon, green onions, shredded cheese, garlic powder, and onion powder. Stir until the mixture is well combined and creamy.

    4. Stuff the Doritos: Carefully take a Dorito and apply a generous amount of the cream cheese mixture onto one side. Be careful not to overload, as it may spill out. Repeat this process until all Doritos are stuffed.

    5. Arranging on the Baking Sheet: Place the stuffed Doritos face-up on the prepared baking sheet in a single layer. If you prefer a crispier texture, you can also add an additional sprinkle of cheese on top.

    6. Bake to Perfection: Slide the baking sheet into the preheated oven and bake for 12-15 minutes, or until the cheese melts and the edges of the Doritos are golden brown.

    7. Serve and Enjoy: Once baked, remove the Doritos from the oven, let them cool slightly, and serve warm. Pair with your favorite dipping sauce for an extra kick!

    Feel free to modify the cooking time if you prefer a crunchier texture or want to achieve a golden finish. The beauty of these appetizer recipes is their adaptability to personal preferences.

    Mastering Cream Cheese & Bacon Stuffed Doritos: Advanced Tips and Variations

    To perfect your Cream Cheese & Bacon Stuffed Doritos, consider the following advanced tips and variations:

    • Flavor Up: Experiment with different types of cheese in your filling (like pepper jack for heat or mozzarella for gooeyness). The flavor profile can change significantly with minor tweaks.

    • Add Fresh Herbs: Incorporate fresh parsley or cilantro to brighten the filling and add another layer of flavor. The freshness can uplift the entire dish.

    • Make a Dip: Instead of stuffing the Doritos, consider creating a dip version! Mix all the ingredients and serve them in a bowl with Doritos on the side for dipping.

    • Stuff Other Chips: While Doritos are fantastic, this combination also works well with other chips such as tortilla chips or even pita chips for a unique take.

    • Serve with Salsa: Accompany your stuffed Doritos with some salsa, guacamole, or ranch dressing for added flavor and variety.

    As you experiment with these variations, you’ll discover new favorites and keep your gatherings lively and delicious. These tips ensure that every time you prepare this tasty dish, it can be a unique experience.

    How to Store Cream Cheese & Bacon Stuffed Doritos: Best Practices

    To keep your leftover Cream Cheese & Bacon Stuffed Doritos fresh, consider these best practices:

    • Refrigeration: Store any leftover stuffed Doritos in an airtight container in the refrigerator for up to 3 days. If you anticipate leftovers, consider packing them separately so they stay crisp.

    • Freezing: For longer storage, you can freeze the stuffed Doritos before baking. Lay them on a baking sheet lined with parchment paper to freeze individually, then transfer them to a freezer-safe container or bag. When you’re ready to enjoy them, simply bake directly from frozen, increasing the cooking time by about 5-10 minutes.

    • Reheating: To reheat leftover baked Doritos, place them back in the oven at 350°F (175°C) for about 10 minutes, or until heated through and slightly crispy again. Avoid using the microwave, as this can create a soggy texture.

    By following these storage guidelines, you ensure that your Cream Cheese & Bacon Stuffed Doritos maintain their delicious flavor and texture.

    Nutritional Value of Cream Cheese & Bacon Stuffed Doritos

    Understanding the nutritional value of your meal is important, especially when considering dietary goals. Here’s a general breakdown of the nutritional content per serving of Cream Cheese & Bacon Stuffed Doritos (assuming 1 serving = 2 stuffed Doritos):

    • Calories: Approximately 250-300 kcal
    • Protein: 7-10 grams
    • Fat: 15-20 grams
    • Carbohydrates: 20-25 grams
    • Fiber: 1-2 grams
    • Sodium: 400-600 mg

    These numbers can vary based on the specific ingredients used (like the type of cheese or bacon). If you’re looking to make this dish healthier, consider opting for lower-fat cream cheese, turkey bacon, or reducing the overall cheese quantity. As every individual has different dietary needs, adjust accordingly to fit your lifestyle.

    FAQs: Frequently Asked Questions About Cream Cheese & Bacon Stuffed Doritos

    1. Can I make these ahead of time?

    Yes, you can prepare the filling and stuff the Doritos in advance. Store them in the refrigerator, and bake them just before serving for the best texture.

    2. How can I make this recipe gluten-free?

    To make it gluten-free, simply use gluten-free Doritos, as many brands offer suitable options. The rest of the ingredients should be naturally gluten-free.

    3. Are there vegetarian options?

    Definitely! You can substitute bacon with cooked mushrooms or a plant-based alternative. There are many meat substitutes available in the market today that mimic the flavor of bacon.

    4. What dipping sauces go well with this recipe?

    These stuffed Doritos pair deliciously with salsa, guacamole, sour cream, or ranch dressing. Feel free to try different sauces based on personal preference.

    5. Can I bake these stuffed Doritos from frozen?

    Absolutely! If you freeze the stuffed Doritos before baking, you can bake them directly from the freezer. Just remember to increase the baking time slightly to ensure they cook through.

    These frequently asked questions will help clarify common concerns readers might have regarding the preparation and modification of Cream Cheese & Bacon Stuffed Doritos.


    With this comprehensive guide to making Cream Cheese & Bacon Stuffed Doritos, you have all the tools necessary to create an appetizing and memorable dish for any occasion. This recipe, packed with flavor and versatility, will become a favorite in your collection of appetizer recipes, bringing joy to your gatherings and leaves everyone craving more! Happy cooking!

  • Baked Cottage Cheese Alfredo

    Baked Cottage Cheese Alfredo

    Baked Cottage Cheese Alfredo: A Tropical Delight

    Introduction to Baked Cottage Cheese Alfredo

    Are you on the lookout for innovative dinner recipes that offer both simplicity and flavor? Look no further than Baked Cottage Cheese Alfredo, a dish that beautifully combines the creamy richness of Alfredo with the high-protein goodness of cottage cheese. This delightful recipe not only caters to health-conscious individuals, but it also appeals to busy families, students craving a quick meal, and culinary enthusiasts who want to impress.

    One of the standout qualities of Baked Cottage Cheese Alfredo is its versatility. It can be easily adapted to meet various dietary needs—including vegan and gluten-free options—making it a perfect choice for gatherings. Additionally, it’s a simple dish to prepare, requiring minimal ingredients and effort, yet yielding maximum flavor and satisfaction.

    The creamy texture, enhanced by the melting cheese and savory spices, offers a tropical escape that is wholesome and fulfilling. So whether you’re a working professional looking for a quick meal after a long day or newlyweds experimenting in the kitchen, this recipe will surely hit the spot. Dive into this tropical delight that is not just a meal but an experience, and enjoy the nutritional benefits that accompany each serving.

    Benefits and Advantages of Baked Cottage Cheese Alfredo

    When it comes to dinner recipes, Baked Cottage Cheese Alfredo shines brightly due to its numerous advantages. One of the main benefits is the ease of preparation. It requires minimal time and effort; perfect for busy individuals or families who want a delicious meal without spending hours in the kitchen. Prepping the ingredients takes just a few minutes, and once assembled, it can bake while you relax or attend to other errands.

    Another significant advantage of this dish is its nutritional value. Cottage cheese serves as a fantastic source of protein, calcium, and essential vitamins, making it a healthy alternative to traditional Alfredo recipes that often rely on heavy cream and butter. The protein content can help keep you full longer, which is a boon for diet-conscious individuals looking for filling meals that won’t sabotage their goals.

    For those with dietary restrictions, this recipe is easily customizable. You can make it gluten-free by opting for gluten-free pasta or substituting a few ingredients to create a vegan version. The versatility of Baked Cottage Cheese Alfredo allows it to cater to a wide range of dietary needs, ensuring everyone at the table can enjoy it.

    Lastly, Baked Cottage Cheese Alfredo is deliciously comforting, making it an ideal choice for family gatherings or potlucks. The creamy, cheesy sauce paired with pasta not only satisfies taste buds but also warms the soul during chilly nights. What more could you ask for in a dish that meets various needs and preferences?

    Ingredients Overview

    Essential Ingredients for Baked Cottage Cheese Alfredo

    To whip up this scrumptious Baked Cottage Cheese Alfredo, gather the following essential ingredients:

    • 16 ounces of pasta (gluten-free option available): Choose your favorite type; penne or rotini works well to capture the creamy sauce.
    • 2 cups of cottage cheese (low-fat or full-fat): The star of the dish, providing a protein boost and a creamy texture.
    • 1 cup of shredded mozzarella cheese: Adds melty goodness while making the dish appetizing.
    • ½ cup of grated Parmesan cheese: Enhances flavor with its sharpness.
    • 2 tablespoons of olive oil: Helps in sautéing and adds healthy fats.
    • 4 cloves of garlic (minced): Provides a wonderful aroma and flavor.
    • 1 teaspoon of salt and pepper to taste: Basic but essential for seasoning.
    • 1 teaspoon of dried Italian herbs (basil, oregano): Balance the flavors and add depth to the dish.
    • Optional: Fresh basil or parsley for garnishing.

    This dish offers a sensible approach to dinner recipes, promising both flavor and nutritional benefits.

    Dietary Substitutions to Customize Your Baked Cottage Cheese Alfredo

    Here are some substitutions you can make to accommodate different dietary needs:

    • Pasta Alternatives: If you’re following a gluten-free diet, opt for gluten-free pasta varieties made from rice, corn, or legumes. You can also use zucchini noodles or spaghetti squash for a low-carb option.
    • Vegan Modifications: To make the dish vegan, switch out the cottage cheese for a plant-based alternative. Many brands offer cashew-based or almond-based cheeses that provide a similar creamy texture. Replace the mozzarella and Parmesan with vegan cheese blends or nutritional yeast for a cheesy flavor without dairy.
    • Low-Calorie Adjustments: Use low-fat cottage cheese and mozzarella to reduce calorie count while still enjoying the dish’s creamy goodness. You can also reduce the amount of cheese in the recipe if you’re watching your fat intake.

    With these adaptations in mind, this recipe remains flexible enough to serve a wide audience while still delivering deliciousness to every plate.

    How to Prepare the Perfect Baked Cottage Cheese Alfredo: Step-by-Step Guide

    Creating your own Baked Cottage Cheese Alfredo is a journey that anyone can undertake, regardless of their cooking experience. Follow this carefully curated, step-by-step guide to achieve the best results.

    1. Prepare the Pasta:
    2. Start by boiling a large pot of salted water. Once boiling, add your pasta of choice and cook it according to package instructions until it’s al dente. This usually takes around 8-10 minutes. Drain the pasta and set aside.

    3. Sauté the Garlic:

    4. In a large skillet, heat the olive oil over medium heat. Add the minced garlic and sauté until fragrant and golden, approximately 1-2 minutes. Be cautious not to burn it, as this could impart a bitter taste.

    5. Mix the Base:

    6. In a mixing bowl, combine the cooked pasta, cottage cheese, mozzarella cheese, Parmesan cheese, sautéed garlic, salt, pepper, and dried herbs. Stir until all the ingredients are well incorporated, ensuring the pasta is fully coated with the cheese mixture.

    7. Transfer to Baking Dish:

    8. Preheat your oven to 350°F (175°C). Grease a 9×13-inch baking dish lightly with cooking spray. Transfer the pasta-cheese mixture to the dish, spreading it evenly.

    9. Add Extra Cheese:

    10. For an indulgent touch, sprinkle some additional mozzarella or Parmesan on top of the pasta. This layer will create a delectable golden crust when baked.

    11. Bake:

    12. Place the baking dish in the preheated oven and bake for 25-30 minutes, or until the cheese is melted, bubbly, and slightly golden on top.

    13. Serve:

    14. Once out of the oven, allow it to cool for a few minutes. Garnish with fresh basil or parsley, and serve hot. Enjoy your meal with a side salad or steamed vegetables.

    Remember, the beauty of this recipe lies in its adaptability. Feel free to throw in seasonal vegetables like spinach, zucchini, or bell peppers to increase its nutritional value without compromising the flavor.

    Mastering Baked Cottage Cheese Alfredo: Advanced Tips and Variations

    Once you’ve mastered the base recipe, consider the following advanced tips and variations to elevate your Baked Cottage Cheese Alfredo experience:

    1. Incorporate Proteins:
    2. For additional protein, consider adding cooked chicken, shrimp, or even chickpeas if you want to keep it plant-based. Simply mix them in just before transferring the pasta to the baking dish.

    3. Experiment with Cheeses:

    4. Use a combination of cheeses for depth of flavor. Cheddar, gouda, or even a spicy pepper jack can add an interesting twist to the traditional recipe.

    5. Try Different Herbs and Spices:

    6. Play around with herbs to create a unique flavor profile. Consider using fresh herbs like rosemary or thyme or spices such as cayenne for added heat.

    7. Add a Crunchy Topping:

    8. For added texture, sprinkle breadcrumbs mixed with a bit of melted butter on top before baking. This will create a crispy layer that contrasts perfectly with the creamy pasta.

    9. Make it a One-Pan Dish:

    10. For an even simpler meal, prepare the pasta and bake it all in one pan. Just cook your proteins and garlic directly in the baking dish and combine everything before baking.

    These tips not only enhance your dish but also encourage creativity in the kitchen. Feel free to experiment until you find your favorite version of Baked Cottage Cheese Alfredo!

    How to Store Baked Cottage Cheese Alfredo: Best Practices

    Storing your Baked Cottage Cheese Alfredo properly ensures that you can enjoy leftovers without compromising quality. Here are the best practices:

    • Refrigeration: Allow the baked dish to cool to room temperature before covering it with plastic wrap or aluminum foil. Properly stored, it can last in the refrigerator for up to 3-4 days.

    • Freezing: If you have a larger batch, consider freezing it. To do this, allow it to cool, then portion it into airtight containers. It can be stored in the freezer for up to 2-3 months.

    • Reheating: When ready to enjoy a leftover serving, thaw it in the refrigerator overnight if frozen. You can then reheat it in the oven at 350°F (175°C) for about 20-25 minutes until heated through. Adding a splash of milk or water can help rehydrate the dish and revive its creamy texture.

    By following these storage practices, you can maintain the integrity of the flavors while enjoying this delicious dish for multiple meals.

    Nutritional Value of Baked Cottage Cheese Alfredo

    Understanding the nutritional value of your meals is essential, especially when considering healthy dinner recipes. Here is an approximate breakdown of the nutritional value per serving of Baked Cottage Cheese Alfredo:

    • Calories: 350-400 kcal
    • Protein: 20-25 grams
    • Fat: 12-15 grams
    • Carbohydrates: 45-50 grams
    • Fiber: 2-4 grams
    • Calcium: 300-400 mg
    • Sodium: 600-800 mg

    These values may vary based on ingredient choices and portion sizes, but they help provide insight into how this dish can fit into a balanced diet. With high protein content and essential nutrients, Baked Cottage Cheese Alfredo is ideal for individuals looking to maintain a nutritious lifestyle while enjoying delightful dinners.

    FAQs: Frequently Asked Questions About Baked Cottage Cheese Alfredo

    1. Can I substitute ricotta cheese for cottage cheese in this recipe?
    2. Absolutely! Ricotta can be used for a creamier texture, but it will change the nutritional profile slightly, providing less protein than cottage cheese.

    3. Is Baked Cottage Cheese Alfredo suitable for a gluten-free diet?

    4. Yes! Simply use gluten-free pasta of your choice, and enjoy the dish without gluten concerns.

    5. Can I make this recipe ahead of time?

    6. Yes, Baked Cottage Cheese Alfredo can be prepared ahead of time. Assemble it the night before, store it in the refrigerator, and bake it when ready to serve.

    7. What vegetables can I add to the recipe?

    8. Feel free to add vegetables like spinach, broccoli, or roasted peppers to boost the nutrition and add color to your dish.

    9. How long does it take to bake?

    10. The baking process typically takes about 25-30 minutes at 350°F (175°C) until bubbly and golden.

    11. Can I make this dish vegan?

    12. Yes, simply swap out the dairy for plant-based alternatives, as listed in the dietary substitutions section!

    In conclusion, Baked Cottage Cheese Alfredo is not just a recipe; it’s an adaptable dish that caters to various dietary needs while delivering comforting, rich flavors. It’s perfect for any occasion, whether you’re enjoying it at home with your family or serving it during a special gathering. With its health benefits, easy preparation, and deliciousness, you’ll want to make this a recurring staple in your collection of dinner recipes!

  • Baked Cottage Cheese Alfredo

    Baked Cottage Cheese Alfredo

    Baked Cottage Cheese Alfredo: A Tropical Delight

    Introduction to Baked Cottage Cheese Alfredo

    Are you looking for a quick and delightful meal that fits perfectly into your busy lifestyle? The Baked Cottage Cheese Alfredo is not only a simple recipe but also a healthy option that caters to a variety of dietary needs. Perfect for those who seek nutritious dinner recipes that are quick to prepare, this dish incorporates the creamy goodness of cottage cheese into a classic Alfredo sauce, making it both rich in flavor and guilt-free.

    Cottage cheese, often overlooked, is a fantastic source of protein and calcium, making this meal ideal for growing children, fitness enthusiasts, and busy working professionals. Moreover, its versatility means that it can easily be modified to suit vegan and gluten-free diets, allowing everyone to enjoy it.

    What makes this recipe particularly appealing is its ease of preparation. Whether you are a newlywed learning to cook or a seasoned chef in search of a fresh take on a classic dish, the Baked Cottage Cheese Alfredo will inspire you to whip up an impressive dinner in no time. Let’s dive deeper into the benefits of this delectable dish.

    Benefits and Advantages of Baked Cottage Cheese Alfredo

    The Baked Cottage Cheese Alfredo isn’t just a meal; it’s a cooking experience with numerous benefits. Firstly, it promotes simplicity. The preparation doesn’t involve complicated techniques or hard-to-find ingredients. With just a few steps, you can create a fantastic dinner recipe that impresses family and friends alike.

    Secondly, this dish boasts several health benefits. Cottage cheese is high in protein and low in fat, helping to keep your calorie intake in check without sacrificing flavor. It is rich in probiotics and vital nutrients, which promote gut health and aid digestion. Packed with vitamins and minerals, this meal supports overall well-being, making it a smart choice for diet-conscious individuals.

    Moreover, the customization options are endless. From vegan swaps to gluten-free alternatives, everyone can enjoy this delicious Alfredo. Parents will appreciate how easily it fits into their kids’ diets, while health enthusiasts can indulge guilt-free. This versatility is a standout feature that makes the Baked Cottage Cheese Alfredo an advantageous addition to your collection of dinner recipes.

    Nutritional Value:

    Many dinner recipes lack nutrition; however, this dish offers a healthy balance of macronutrients. The calcium from cottage cheese strengthens bones, while protein aids in muscle repair and growth. You can also incorporate a variety of veggies to boost the nutritional content – think spinach, sun-dried tomatoes, or broccoli.

    In summary, the benefits of Baked Cottage Cheese Alfredo lie in its simplicity, health-conscious ingredients, and versatility, making it a must-try recipe that caters to various dietary preferences.

    Ingredients Overview

    Essential Ingredients for Baked Cottage Cheese Alfredo

    Creating a delightfully nutritious Baked Cottage Cheese Alfredo starts with the right ingredients. Here is what you’ll need for this recipe:

    1. Cottage Cheese (2 cups): The star of the dish, cottage cheese provides creaminess while being rich in protein.
    2. Pasta (8 oz): Choose whole wheat or gluten-free pasta to boost the health factor (considering dietary needs).
    3. Alfredo Sauce (2 cups): You can either use store-bought or make your own using low-fat milk and flour.
    4. Garlic Powder (1 teaspoon): Adds a flavorful kick without the hassle of peeling fresh garlic.
    5. Parmesan Cheese (½ cup, grated): Essential for that authentic Alfredo taste (omit for vegan adaptations).
    6. Black Pepper (to taste): For seasoning, adding just the right amount of spice.
    7. Salt (to taste): Necessary for bringing together all flavors.
    8. Fresh Spinach (1 cup, chopped): Optional, but highly recommended for an extra health boost.
    9. Olive Oil (2 tablespoons): For sautéing and adding healthful fats.

    Diet-conscious options:
    – For a vegan version, substitute cottage cheese with silken tofu blended until smooth, and use nutritional yeast instead of Parmesan.
    – For a gluten-free option, ensure you select gluten-free pasta.

    Dietary Substitutions to Customize Your Baked Cottage Cheese Alfredo

    This recipe is flexible, allowing you to adapt it to various dietary requirements or ingredient availability:

    • Dairy-Free: Replace cottage cheese with a vegan cream cheese or a nut-based cheese. Use coconut milk instead of regular milk for the sauce.
    • Low-Carb: Swap regular pasta with zucchini noodles or spaghetti squash. The texture might differ slightly, providing a different but delicious take.
    • Vegetable Boost: For added nutrition, consider adding diced bell peppers, peas, or mushrooms. Not only do they incorporate more vitamins, but they also add vibrant colors and textures to the dish.

    Customization makes this recipe unique and ensures that it can serve anyone’s dietary needs while still being delicious.

    How to Prepare the Perfect Baked Cottage Cheese Alfredo: Step-by-Step Guide

    Now that you have all the ingredients prepared, it’s time to dive into the step-by-step instructions for creating your Baked Cottage Cheese Alfredo.

    1. Preheat the Oven:
      Preheat your oven to 375°F (190°C). This will ensure that your dish cooks evenly.

    2. Cook the Pasta:
      In a large pot, boil water and add a pinch of salt. Once boiling, add your chosen pasta and cook according to the package instructions until al dente. Drain the pasta and set aside.

    3. Prepare the Alfredo Sauce:
      In a saucepan over medium heat, combine the cottage cheese, garlic powder, and salt. If you’re making your own sauce, add low-fat milk gradually until you achieve your desired consistency. Stir continuously until heated through.

    4. Mix Ingredients:
      In a large mixing bowl, combine the cooked pasta with the Alfredo sauce. Stir well to ensure the pasta is generously coated. If you’re adding spinach or other vegetables, fold them in at this point.

    5. Transfer to Baking Dish:
      Pour the pasta mixture into a greased baking dish. Make sure to spread it evenly.

    6. Add Toppings:
      Sprinkle the grated Parmesan on the top evenly and add a dash of black pepper for added flavor. For an even more decadent dish, consider drizzling a touch of olive oil over the top.

    7. Bake:
      Place the baking dish in the preheated oven and bake for approximately 25-30 minutes, or until the top is golden and bubbly.

    8. Cool and Serve:
      Once out of the oven, let it cool for a few minutes before serving. This allows the sauce to thicken slightly and enhances the flavor!

    Making Baked Cottage Cheese Alfredo can be an enjoyable experience for all skill levels. The key is to follow these clear instructions, and you’ll have an impressive meal ready in no time.

    Mastering Baked Cottage Cheese Alfredo: Advanced Tips and Variations

    To elevate your Baked Cottage Cheese Alfredo, consider trying these advanced tips and variations:

    • Herb Infusions: Add fresh herbs like basil or thyme to the Alfredo sauce for an aromatic twist. Dried herbs work well, too, but fresh enhances flavor remarkably.
    • Protein Add-Ins: For those who want added protein, consider incorporating grilled chicken or shrimp into the mix.
    • Cheesy Variations: Experiment with blending different cheeses, such as mozzarella or cheddar, to give a complex flavor profile to the dish.
    • Colorful Veggies: Roasting vegetables beforehand can bring out their sweetness, adding depth to your dish. Roasted tomatoes can lend a delightful burst of flavor.
    • Spicy Kick: If you enjoy a bit of heat, don’t hesitate to add red pepper flakes or chopped jalapeños.

    These variations and tips will not only help you master the Baked Cottage Cheese Alfredo but also encourage creativity and diversity in your dinner recipes collection.

    How to Store Baked Cottage Cheese Alfredo: Best Practices

    Proper storage of your Baked Cottage Cheese Alfredo is essential for maintaining its flavor and freshness. Here are the best practices to follow:

    • Refrigeration: Allow the dish to cool completely before transferring it to an airtight container. Stored in the fridge, it should stay fresh for up to 4-5 days.

    • Freezing: If you want to save a portion for later, consider freezing it. Wrap your dish in plastic wrap, then cover it with a layer of aluminum foil to prevent freezer burn. Baked Cottage Cheese Alfredo can last up to 2-3 months in the freezer.

    • Reheating: For best results when reheating, let the frozen dish thaw in the fridge overnight. Reheat in the oven at 350°F (175°C) for about 20-25 minutes, or until heated through. You can use a microwave for faster reheating but note that the texture may differ.

    These simple storage methods ensure that you enjoy your Baked Cottage Cheese Alfredo for days to come!

    Nutritional Value of Baked Cottage Cheese Alfredo

    Understanding the nutritional value of your meal is essential for anyone wanting to maintain a balanced diet. Here are the estimated nutritional facts per serving (serving approximately 1 cup):

    • Calories: 250 kcal
    • Protein: 22 g
    • Fat: 9 g
    • Carbohydrates: 30 g
    • Fiber: 4 g
    • Sugars: 3 g

    Nutritional Benefits

    The primary ingredients in Baked Cottage Cheese Alfredo contribute various nutrients:
    Cottage Cheese: High in protein and calcium, promotes muscle health and strong bones.
    Whole Wheat Pasta: Provides fiber and B vitamins essential for energy levels.
    Fresh Vegetables: Depending on your additions, they will add vitamins A, C, and K to fortify the dish nutritionally.

    Remember, variations in ingredients (e.g., choosing low-fat options or adding more vegetables) can alter these values, so you can adjust the recipe to meet your dietary preferences while still enjoying healthful benefits!

    FAQs: Frequently Asked Questions About Baked Cottage Cheese Alfredo

    1. Can I make Baked Cottage Cheese Alfredo vegan?

    Yes! Substitute cottage cheese with silken tofu and omit Parmesan or replace it with nutritional yeast for a cheesy flavor without dairy.

    2. How can I make this dish gluten-free?

    Simply use gluten-free pasta to make sure the entire recipe meets gluten-free standards.

    3. What vegetables can I add to this recipe?

    You can enhance the dish with a variety of vegetables like spinach, bell peppers, zucchini, and even mushrooms for added flavor and nutrients.

    4. How do I store leftovers?

    Once cooled, store leftover Baked Cottage Cheese Alfredo in an airtight container in the refrigerator for up to 5 days or freeze for up to 3 months.

    5. Can I use low-fat milk instead of whole milk for the sauce?

    Absolutely! Using low-fat milk is a great way to cut calories while maintaining creaminess in the sauce.

    6. How can I reheat the Baked Cottage Cheese Alfredo?

    To reheat, place the dish in an oven preheated to 350°F (175°C) for about 20-25 minutes, or heat in the microwave for a few minutes, covered.

    In conclusion, the Baked Cottage Cheese Alfredo is a wonderful addition to any repertoire of dinner recipes, combining health, convenience, and delicious flavors. Whether you’re adapting for dietary needs, preparing for a busy week, or treating yourself, this dish checks all the boxes for a wholesome, satisfying meal. Happy cooking!

  • Baked Dijon Chicken Thighs

    Baked Dijon Chicken Thighs

    Baked Dijon Chicken Thighs: A Tropical Delight

    Introduction to Baked Dijon Chicken Thighs

    When it comes to easy and delightful meals, baked Dijon chicken thighs stand out as a definitive favorite among home cooks and food enthusiasts alike. This enticing dish not only serves as a delicious dinner option, but also fits perfectly into a balanced lifestyle. Chicken thighs, known for their rich flavor and succulent texture, become an extraordinary centerpiece when coated with tangy Dijon mustard and baked to perfection.

    What truly sets this recipe apart is its simplicity. With just a few key ingredients and minimal prep time, even busy parents or students can whip up a wholesome meal without stress. Packed with protein, these chicken thighs are not only satisfying but also nutritious, making them a great choice for health-conscious individuals.

    Moreover, this recipe can easily be adapted to accommodate various dietary needs. Whether you’re following a gluten-free diet, seeking low-calorie options, or looking for dairy-free alternatives, this dish can be customized to meet your specific requirements. In essence, baked Dijon chicken thighs offer a universal appeal—ideal for busy professionals, newlyweds looking for romantic dinner ideas, travelers craving comfort food, and seniors needing simple nutrition. So, let’s embark on this culinary journey and explore the magic of baked Dijon chicken thighs!

    Benefits and Advantages of Baked Dijon Chicken Thighs

    Baked Dijon chicken thighs are not only delicious, but they also bring an array of benefits that make them a go-to recipe for various lifestyles and dietary preferences. One of the most significant advantages is the ease of preparation. This dish allows you to quickly combine ingredients, pop them in the oven, and let the magic happen—perfect for home cooks with busy schedules.

    From a health perspective, chicken thighs are an excellent source of protein, essential for muscle repair and growth. They contain necessary nutrients like iron, zinc, and Vitamin B12, which support energy levels and overall health. Furthermore, the inclusion of Dijon mustard not only adds fabulous flavor but also delivers health benefits; it contains antioxidants and may aid digestion.

    In addition to being healthy, baked Dijon chicken thighs are versatile. They can be served with a variety of sides, from roasted vegetables to grains, providing endless possibilities for customization. This dish is also perfect for meal prepping, allowing busy parents or working professionals to have a nutritious meal ready to go throughout the week.

    Another appealing aspect is the adaptability of this recipe. It can be a crowd-pleaser at family gatherings, a great option for romantic date nights, or even a fancy dish for hosting guests. In summary, baked Dijon chicken thighs are a quick, healthy, and incredibly flavorful option that fit seamlessly into any lifestyle.

    Ingredients Overview

    Essential Ingredients for Baked Dijon Chicken Thighs

    Here’s a complete list of the ingredients you’ll need to create these mouthwateringly delicious baked Dijon chicken thighs:

    • Chicken Thighs (4-6 pieces): The star of the show, offering juicy, flavorful meat.
    • Dijon Mustard (1/4 cup): Adds tanginess and depth, enhancing the flavor profile.
    • Olive Oil (2 tablespoons): Helps the mustard adhere to the chicken and adds healthy fats.
    • Garlic Cloves (3, minced): Provides aromatic flavor and health benefits.
    • Honey (2 tablespoons): Balances the mustard’s acidity and adds sweetness.
    • Salt (1 teaspoon): Highlights the flavors of the dish.
    • Black Pepper (1/2 teaspoon): Adds a touch of spiciness.
    • Fresh Rosemary or Thyme (1 tablespoon, minced): Offers fragrant herbal notes for added complexity.

    Dietary Options:
    Gluten-Free: This recipe is inherently gluten-free.
    Low-Calorie: Swap honey with a low-calorie sweetener to reduce sugar content.
    Vegan Option: Replace chicken thighs with hearty vegetables like eggplant or tofu, and use a vegan Dijon mustard.

    Dietary Substitutions to Customize Your Baked Dijon Chicken Thighs

    Adapting this recipe for various dietary needs is straightforward. If you prefer boneless chicken thighs, feel free to substitute, noting that they may require slightly shorter cooking times. For those looking to reduce fat intake, skinless chicken thighs will work just as well.

    For individuals on a low-carb diet, simply remove the honey or replace it with a sugar-free alternative like stevia. If you want to go for a spicy twist, adding a pinch of cayenne pepper or swapping the garlic for chili garlic sauce can enhance the flavor profile significantly.

    If you have a busy week ahead and want to incorporate meal prep, the baked Dijon chicken thighs can be cooked in bulk. Simply double the recipe, store the extra servings in airtight containers, and enjoy them for lunch or dinner throughout the week.

    This adaptability makes baked Dijon chicken thighs a fantastic option for anyone, regardless of dietary restrictions or preferences.

    How to Prepare the Perfect Baked Dijon Chicken Thighs: Step-by-Step Guide

    Creating tender and flavorful baked Dijon chicken thighs is easier than you might think. Follow these step-by-step instructions to achieve a delicious, satisfying meal that your family and friends will adore.

    1. Preheat Your Oven: Start by preheating your oven to 425°F (220°C). This high temperature will help create crispy skin and juicy meat.

    2. Prepare the Marinade: In a medium-sized bowl, mix together 1/4 cup of Dijon mustard, 2 tablespoons of olive oil, 3 minced garlic cloves, 2 tablespoons of honey, 1 teaspoon of salt, and 1/2 teaspoon of black pepper. This marinade is what brings your chicken thighs to life.

    3. Coat the Chicken Thighs: Place your chicken thighs in a large mixing bowl. Pour the marinade over the chicken and toss it to ensure each piece is evenly coated. If you have the time, marinating for at least 30 minutes in the refrigerator will enhance the flavors even more.

    4. Arrange in Baking Dish: Once coated, transfer the chicken thighs to a baking dish, placing them skin-side up. Ensure there’s a little space between each thigh to allow even cooking.

    5. Add Fresh Herbs: Sprinkle the minced rosemary or thyme over the chicken thighs, adding an aromatic punch. Fresh herbs elevate the dish!

    6. Bake in Oven: Place the baking dish in your preheated oven and bake for about 35-45 minutes, or until the internal temperature of the chicken reaches 165°F (75°C). The skin should be golden brown and crispy.

    7. Broil for Extra Crispiness (Optional): For an extra crispy finish, consider broiling the chicken thighs for an additional 3-5 minutes after baking. Keep a close eye on them to prevent burning.

    8. Let Rest: After coming out of the oven, let the chicken thighs rest for about 5 minutes. This allows the juices to redistribute, ensuring every bite is tender and juicy.

    9. Serve and Enjoy: Serve your baked Dijon chicken thighs hot, alongside your favorite roasted vegetables, rice, or a fresh salad.

    Pro Tips:

    • For added depth of flavor, consider brining your chicken thighs for a couple of hours before marinating.
    • Gluten-free soy sauce can be added for an umami boost if you want to experiment with flavors.
    • This dish works great on a grill as well, just adjust the cooking times accordingly.

    By following these steps, you’ll have a beautiful dish of baked Dijon chicken thighs that impresses both in flavor and presentation!

    Mastering Baked Dijon Chicken Thighs: Advanced Tips and Variations

    To elevate your baked Dijon chicken thighs even further, consider these advanced tips and variations to perfect the dish or tailor it to your taste.

    1. Add a Citrus Element: Incorporating lemon or lime juice into the marinade not only adds brightness but also enhances the acidity, balancing the richness of the chicken. Simply squeeze half a lemon into the marinade before coating your chicken.

    2. Try Different Mustards: While Dijon mustard is the traditional choice, experimenting with different types of mustard can yield delicious results. Spicy brown mustard or honey mustard can add varying flavor profiles.

    3. Infuse with Spices: Mix in spices like paprika or smoked paprika to the marinade for a smoky twist. This elevates the dish and gives a unique flair to the baked chicken thighs.

    4. Experiment with Vegetable Combinations: For a one-pan meal, consider placing sliced onions, carrots, and bell peppers in the baking dish with the chicken. They’ll roast beautifully and soak up the flavorful drippings.

    5. Serve with a Sauce: Create a quick sauce using the drippings after baking. Simply add a splash of chicken broth and reduce on the stove for a rich, savory glaze to pour over the chicken thighs.

    By using these advanced techniques, your baked Dijon chicken thighs will transform into a culinary masterpiece that’s sure to impress anyone at the dinner table!

    How to Store Baked Dijon Chicken Thighs: Best Practices

    When it comes to storing your delicious baked Dijon chicken thighs, there are best practices to ensure they remain fresh and flavorful for longer:

    1. Refrigeration: Allow the chicken thighs to cool down to room temperature. Once cooled, transfer them to an airtight container, propping the lid to allow steam to escape initially. They can be refrigerated for up to 4 days.

    2. Freezing: If you wish to make a bulk batch, consider freezing portions of the cooked chicken. Wrap individual pieces in plastic wrap or foil, then place them in a sealed freezer bag. This will help prevent freezer burn. Properly packaged, the chicken can be stored in the freezer for up to 3 months.

    3. Reheating: When ready to enjoy leftovers, preheat your oven to 350°F (175°C). Place the chicken thighs in an oven-safe dish, cover with aluminum foil to maintain moisture, and heat for about 20-25 minutes until warmed through. Alternatively, for a quicker option, you can use a microwave, heating for about 2-3 minutes on medium power.

    By following these storage and reheating methods, you can enjoy your baked Dijon chicken thighs several days after they’ve been made—perfect for meal prepping or savoring delicious leftovers!

    Nutritional Value of Baked Dijon Chicken Thighs

    Understanding the nutritional benefits of baked Dijon chicken thighs can help you make informed decisions about your meals. Here’s a standard nutritional breakdown for one serving (assuming a serving size of one chicken thigh weighing approximately 130 g):

    • Calories: 250
    • Protein: 22 g
    • Carbohydrates: 5 g
    • Fat: 17 g
    • Saturated Fat: 3 g
    • Cholesterol: 90 mg
    • Sodium: 400 mg
    • Fiber: 0 g
    • Sugar: 3 g

    These values may vary based on the specific ingredients and portion sizes you choose, especially if you’re opting for lower-fat options or adjusting the marinade. Remember that chicken thighs provide a wealth of nutrients and dietary benefits, including protein, essential vitamins, and healthy fats without an overload of carbohydrates.

    Moreover, if you’re interested in keeping your dish lighter, consider using skinless chicken thighs to significantly reduce fat content while still enjoying all the robust flavors of the Dijon mustard marinade.

    This nutritional overview reinforces why baked Dijon chicken thighs make for a perfect dish that’s healthy and satisfying!

    FAQs: Frequently Asked Questions About Baked Dijon Chicken Thighs

    1. Can I use bone-in chicken thighs instead of boneless?

    Yes! Bone-in chicken thighs are a great substitute, though they will require a slightly longer cooking time. Just ensure the internal temperature reaches 165°F (75°C).

    2. What can I substitute for Dijon mustard?

    If Dijon mustard is not available, you can use yellow mustard, spicy brown mustard, or a mix of mayonnaise and vinegar for a similar tangy flavor.

    3. How do I make this dish gluten-free?

    This recipe is already gluten-free! Just ensure the mustard and any other condiments you use are gluten-free as well.

    4. Can I marinate the chicken thighs overnight?

    Absolutely! Marinating the chicken overnight allows the flavors to deeply penetrate the meat, making it even more flavorful.

    5. What sides pair well with baked Dijon chicken thighs?

    Consider serving the chicken with roasted vegetables, a fresh garden salad, quinoa, or even mashed potatoes. These side dishes complement the rich flavors beautifully!

    6. Can I use this recipe for other types of meat?

    Certainly! This marinade also works well with pork chops or baked salmon, giving diverse options for your meal planning.

    With this comprehensive guide, you’re all set to create mouthwatering baked Dijon chicken thighs that will become a staple in your kitchen. Enjoy the simplicity and flavor that this recipe brings to your dining table!