Tag: chicken

  • Hawaiian Huli Huli Chicken Stack

    Hawaiian Huli Huli Chicken Stack

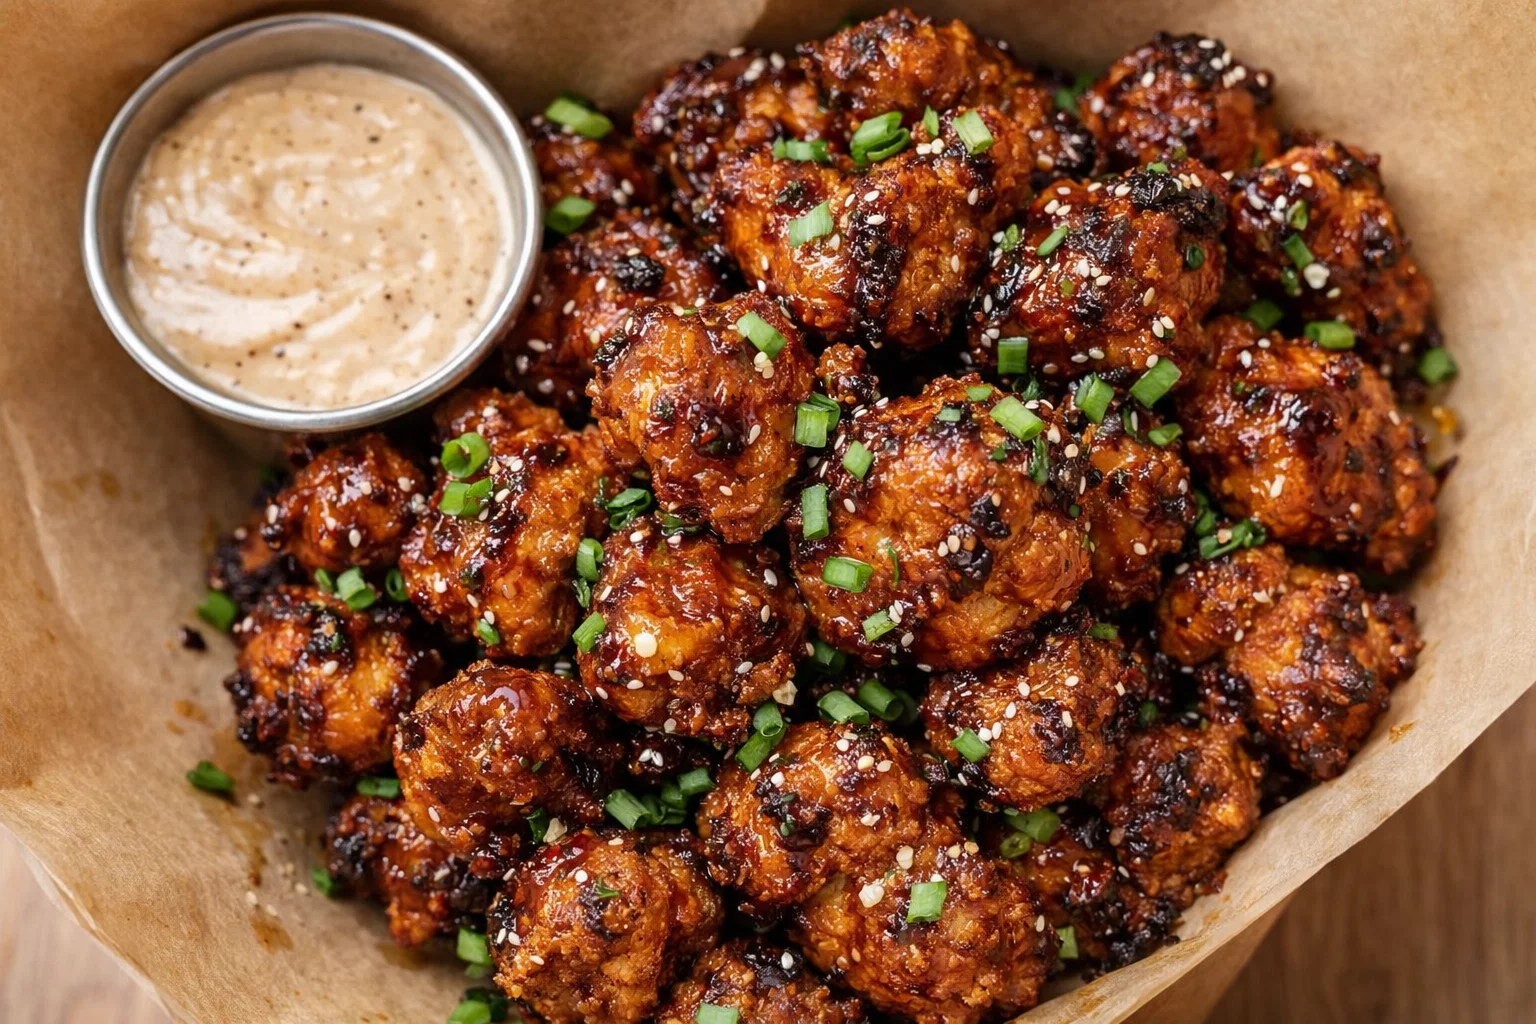
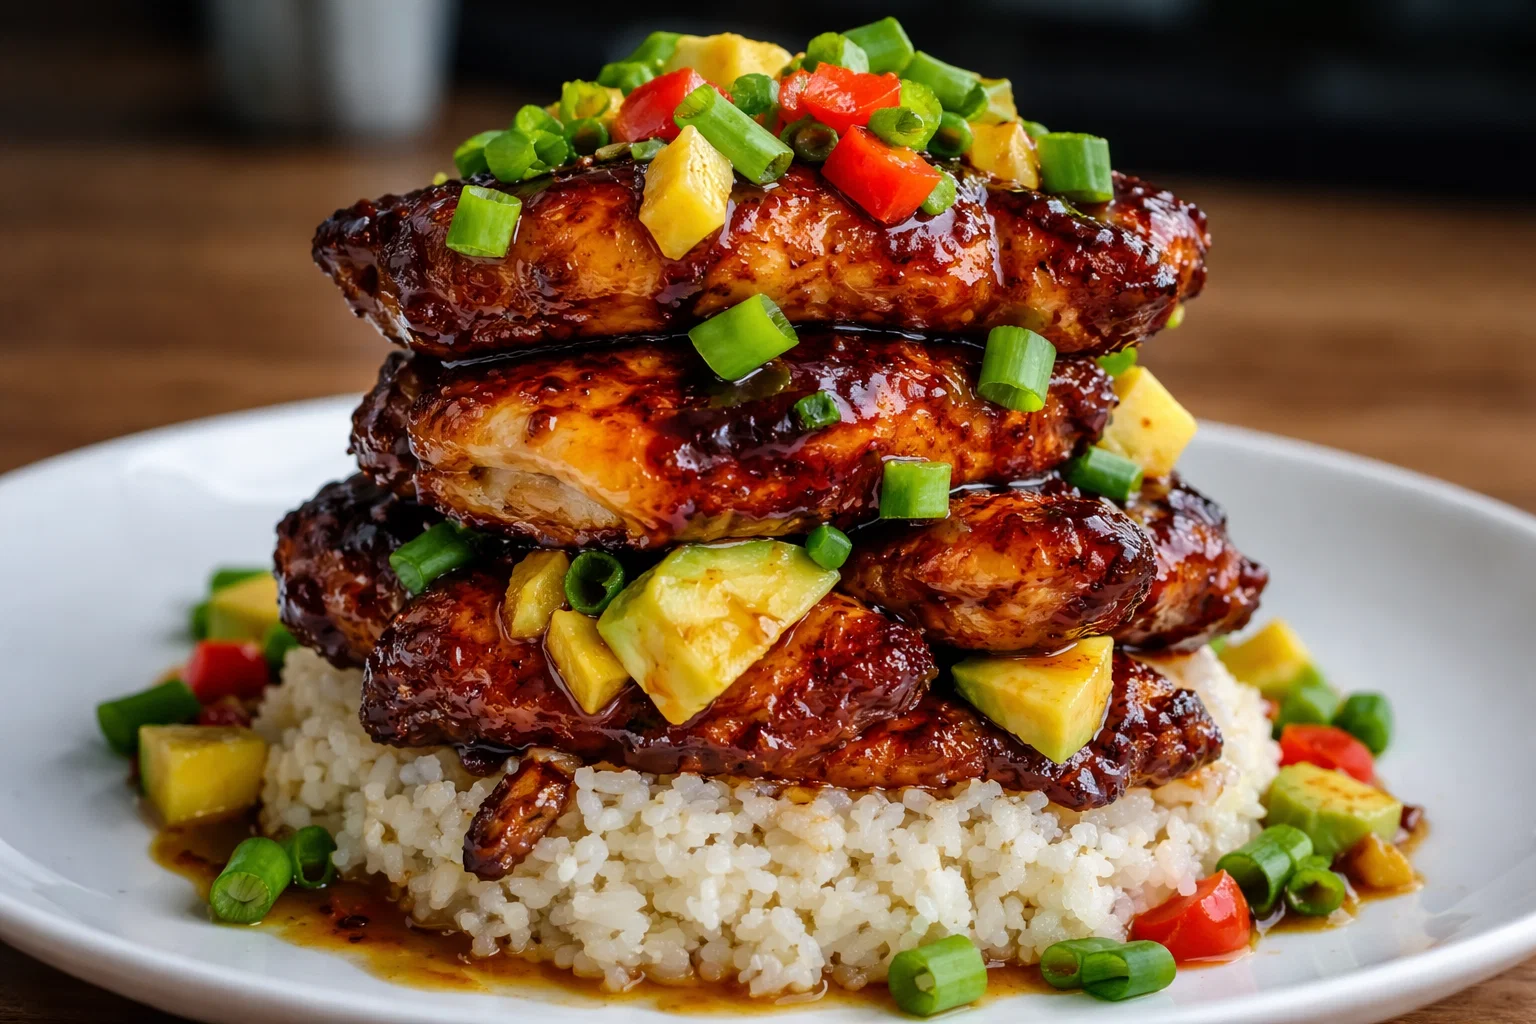
    Hawaiian Huli Huli Chicken Stack: A Tropical Delight

    Introduction to Hawaiian Huli Huli Chicken Stack

    If you’re looking for an exquisite dish that combines tropical flavors with a touch of simplicity, look no further than the Hawaiian Huli Huli Chicken Stack. This delightful recipe ranks high among chicken recipes, offering an alluring blend of sweet Hawaiian flavors, juicy grilled chicken, and fresh vegetables. What makes this recipe so appealing is not just its taste but also its versatility.

    Imagine serving a dish that can be adapted for various dietary needs, whether you’re catering to gluten-free diners, vegans, or low-calorie enthusiasts. The Hawaiian Huli Huli Chicken Stack is perfect for busy parents needing a quick meal, college students savoring the flavors of home, or newlyweds looking to impress their guests. This dish stands out, not only because of its impressive presentation but also due to its health benefits. Rich in lean protein and packed with vitamins from fresh ingredients, this recipe is a delightful choice for anyone seeking to maintain a balanced diet.

    With its ease of preparation and the ability to customize ingredients based on what you have in your kitchen, this Hawaiian dish will become a staple in your collection of go-to chicken recipes. Whether grilled, baked, or sautéed, each mouthful brings the essence of the islands right to your dining table.

    Benefits and Advantages of Hawaiian Huli Huli Chicken Stack

    The Hawaiian Huli Huli Chicken Stack is more than just a tasty meal; it’s a harmonious blend of nutrition, convenience, and delightful flavors. One of the primary advantages of this recipe is its simplicity. Designed to be quick and easy, it requires minimal cooking skills, making it accessible for a wide audience. Whether you are an experienced cook or a novice just starting, you’ll find that this dish allows for creativity while also being straightforward.

    From a health perspective, this recipe stands out for its nutritious elements. Chicken is well-known for being a lean protein source, vital for muscle building and repair. Coupled with fresh vegetables such as bell peppers and green onions, it packs a punch of essential vitamins and minerals. This dish can be served over brown rice or quinoa for an extra boost of fiber, making it suitable for diet-conscious individuals.

    Moreover, adaptability is key. You can easily modify the Hawaiian Huli Huli Chicken Stack to align with various dietary requirements. Substitute traditional chicken with grilled tofu or tempeh for a vegan-friendly version, or opt for a gluten-free soy sauce variant. This flexibility makes it an excellent choice for gatherings where guests may have varied dietary restrictions.

    In summary, the Huli Huli Chicken Stack excels in making nutritious eating deliciously achievable. With its tropical flair and nourishing ingredients, this dish not only enriches your palate but also serves as a beacon of healthiness within the landscape of popular chicken recipes.

    Ingredients Overview

    Essential Ingredients for Hawaiian Huli Huli Chicken Stack

    To create the perfect Hawaiian Huli Huli Chicken Stack, you will need the following ingredients:

    • 2 pounds boneless, skinless chicken thighs or breasts: The chicken is the heart of this dish, providing a good source of protein.
    • 1/4 cup soy sauce (or tamari for gluten-free): Adds umami flavor.
    • 1/4 cup brown sugar: Enhances sweetness and caramelizes during cooking.
    • 1/4 cup ketchup: Acts as a base for the marinade, contributing sweetness and thickness.
    • 1/4 cup pineapple juice: The tropical essence of the recipe, imparting a fruity flavor.
    • 2 tablespoons rice vinegar: Adds acidity to balance the sweetness.
    • 2 cloves garlic, minced: A flavor powerhouse that enhances the dish.
    • 1 teaspoon grated fresh ginger: Provides warmth and depth to the marinade.
    • 2 green onions, chopped: Offers freshness and a hint of crunch.
    • 1 red bell pepper, sliced: Adds color and vitamins.
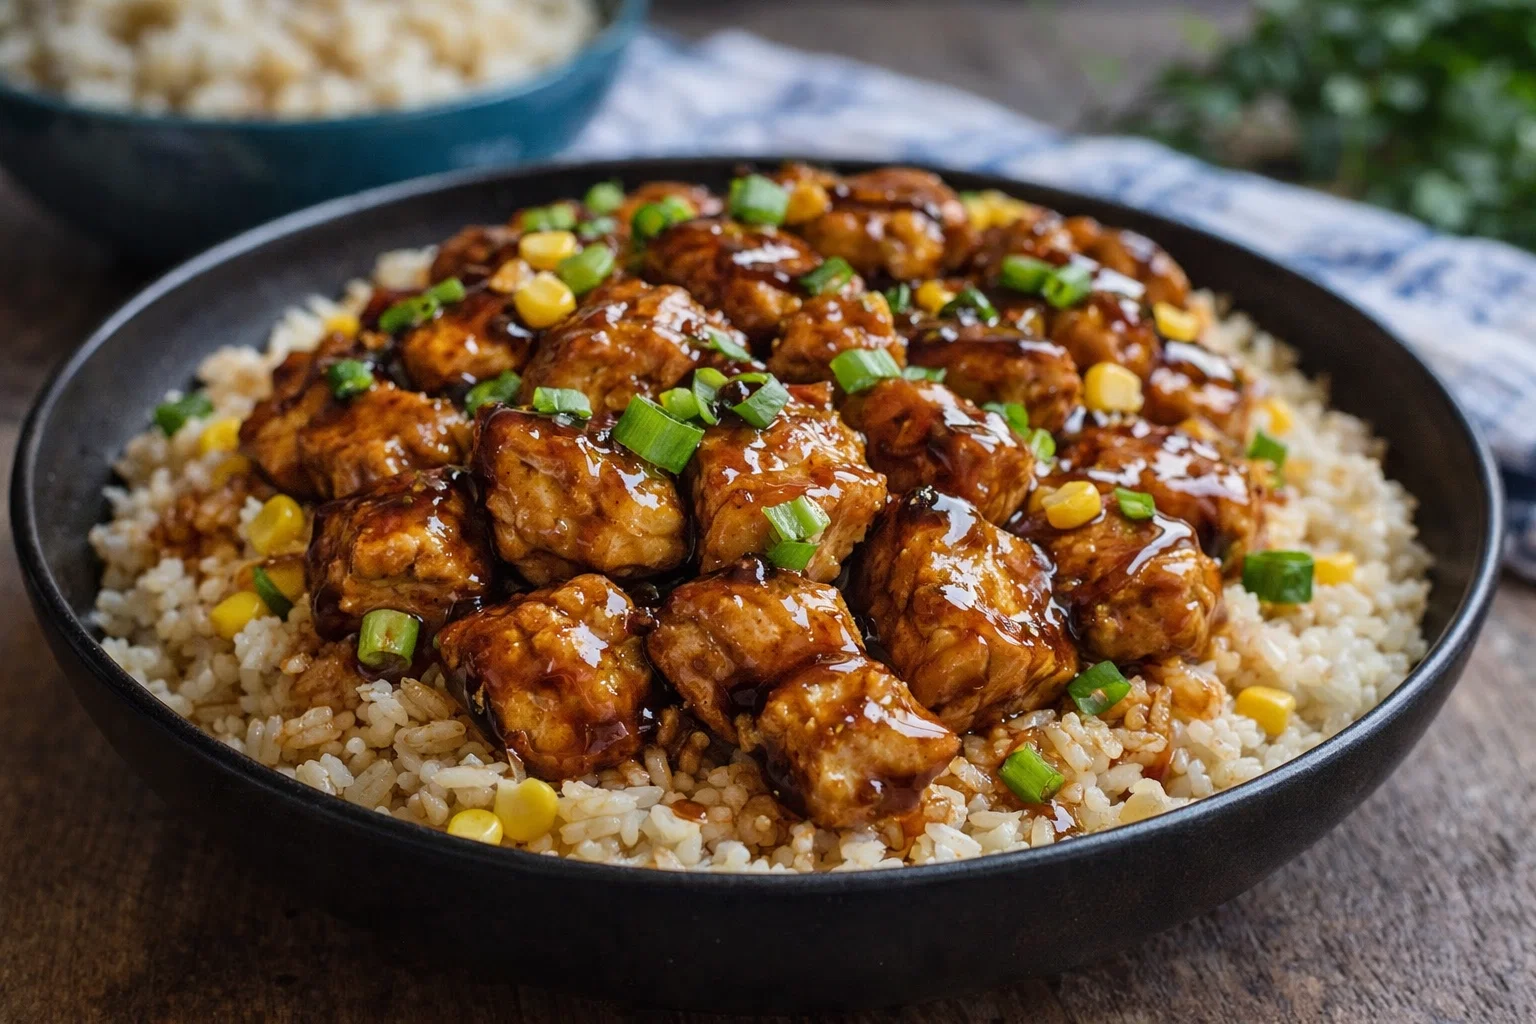
    • 1 cup cooked brown rice or quinoa: A nutritious base to layer the stack.
    • Fresh cilantro or parsley for garnish: Brightens the dish visually and enhances flavor.

    This list allows for flexibility; make sure to choose organic produce and high-quality chicken for the best results.

    Dietary Substitutions to Customize Your Hawaiian Huli Huli Chicken Stack

    A major advantage of the Huli Huli Chicken Stack is its ability to cater to various dietary preferences. Below are some suggested substitutions to consider:

    • Vegan Option: Replace chicken with grilled tofu or tempeh, marinating and preparing it the same way for a delicious vegetarian alternative.
    • Gluten-Free Option: Use tamari instead of soy sauce and ensure all other ingredients are labeled gluten-free.
    • Low-Calorie Option: Opt for skinless chicken breasts and use a calorie-friendly sweetener like stevia or monk fruit instead of brown sugar.
    • Paleo Option: Replace brown sugar with honey or pure maple syrup, and use cauliflower rice instead of brown rice for a low-carb version.

    These substitutions make it easy to customize the Hawaiian Huli Huli Chicken Stack without compromising on flavor, allowing it to align with various dietary needs while still being one of your favorite chicken recipes.

    How to Prepare the Perfect Hawaiian Huli Huli Chicken Stack: Step-by-Step Guide

    Creating a Hawaiian Huli Huli Chicken Stack is a satisfying endeavor. Just follow these straightforward steps to produce a dish that’s visually stunning and delicious.

    1. Marinate the Chicken: In a bowl, mix soy sauce, brown sugar, ketchup, pineapple juice, rice vinegar, garlic, and ginger. Add the chicken, ensuring it’s well coated. Cover and marinate for at least 30 minutes (or overnight in the fridge for optimal flavor).

    2. Prepare the Grill: Preheat your grill or a grill pan over medium-high heat. If using a grill, oil the grates to prevent sticking.

    3. Cook the Chicken: Remove the chicken from the marinade (reserve marinade) and grill each piece for about 5-7 minutes per side, or until the internal temperature reaches 165°F (75°C). Brush with the reserved marinade during the last few minutes of cooking for extra flavor.

    4. Detail the Vegetables: While the chicken is cooking, slice the bell pepper and chop the green onions. These will be used later for stacking.

    5. Prepare the Base: In a bowl, prepare the cooked brown rice or quinoa as the base of the stack. Season it lightly with salt and a drizzle of olive oil for flavor.

    6. Stack Your Ingredients: Once the chicken is cooked, let it rest for a few minutes. Then, slice the chicken into strips. Begin stacking your plate: start with a portion of brown rice or quinoa, followed by a piece of grilled chicken, slices of bell pepper, and a sprinkle of green onions.

    7. Garnish: Finish the stack with cilantro or parsley for a pop of color and freshness.

    8. Serve: Serve with additional pineapple chunks or leftover marinade on the side if desired.

    This step-by-step approach ensures a delicious Hawaiian Huli Huli Chicken Stack every time and can be easily adapted to meet dietary preferences, exemplifying the versatility of modern chicken recipes.

    Mastering Hawaiian Huli Huli Chicken Stack: Advanced Tips and Variations

    To elevate your Hawaiian Huli Huli Chicken Stack even further, consider these advanced tips and variations:

    • Add Spice: For those who enjoy a bit of heat, consider incorporating Sriracha or red pepper flakes into the marinade to give the dish an extra kick.
    • Fruit Toppings: Experiment with grilled pineapple or mango slices as toppings for added sweetness and tropical flair.
    • Wrap It Up: For a fun twist, wrap your stack in a lettuce leaf or tortilla to create Hawaiian Huli Huli Chicken tacos.
    • Skewers: Create skewers by alternating pieces of chicken, bell peppers, and onion. Marinate and grill them for easy serving at parties!
    • Meal Prep: Consider making a larger batch to store in the fridge for easy meal prep. This stack reheats well and remains flavorful.

    These tips not only enhance the original recipe but also make it flexible, showcasing its adaptability and solidifying its place within your repertoire of favorite chicken recipes.

    How to Store Hawaiian Huli Huli Chicken Stack: Best Practices

    Storing leftovers of your Hawaiian Huli Huli Chicken Stack is simple. Here are some best practices to ensure the dish remains delicious:

    • Refrigeration: Allow the stack to cool to room temperature before placing it in an airtight container. It’s best consumed within 3-4 days when stored in the fridge.

    • Freezing: For longer storage, consider freezing the cooked chicken separately from the rice and vegetables. Wrap the chicken tightly in plastic wrap and then place it in a freezer-safe bag. It can last up to 3 months in the freezer. When reheating, allow it to thaw in the refrigerator overnight, and then reheat gently in the microwave or oven.

    • Reheating: When reheating, add a splash of water or reserved marinade to avoid drying it out. Ensure that the chicken is heated thoroughly to an internal temperature of 165°F (75°C).

    By following these storage guidelines, you maintain both the flavor and safety of your Hawaiian Huli Huli Chicken Stack, offering a delightful meal that can be enjoyed multiple times—perfect for busy individuals or families.

    Nutritional Value of Hawaiian Huli Huli Chicken Stack

    Understanding the nutritional benefits of your meals is essential, especially when enjoying delightful dishes such as the Hawaiian Huli Huli Chicken Stack. Here’s a breakdown per serving, assuming the recipe yields about four servings:

    • Calories: Approximately 350 calories
    • Protein: 30g
    • Fat: 10g
    • Carbohydrates: 40g
    • Fiber: 5g
    • Sugar: 8g
    • Sodium: 800mg

    This nutritional profile shows that the Hawaiian Huli Huli Chicken Stack offers a wholesome balance of protein, healthy fats, and carbohydrates, making it an excellent meal choice for individuals trying to maintain a balanced diet. The integration of brown rice or quinoa adds an extra layer of fiber, and using lean chicken ensures low saturated fat content, aligning with many dietary guidelines.

    By incorporating fresh ingredients and making mindful substitutions, this dish can cater to various health goals, making it a versatile option among chicken recipes.

    FAQs: Frequently Asked Questions About Hawaiian Huli Huli Chicken Stack

    1. Can I use chicken breasts instead of thighs for this recipe?

    Yes, chicken breasts can be used, but they may require slightly less cooking time due to being leaner. Ensure they are cooked through to an internal temperature of 165°F (75°C).

    2. How can I make this dish vegan?

    To make the Hawaiian Huli Huli Chicken Stack vegan, simply replace the chicken with grilled tofu or tempeh. The marinade will work well with these alternatives, giving you a delicious vegetarian experience.

    3. Can I prep this dish in advance?

    Absolutely! You can marinate the chicken in advance and store it in the refrigerator, or you can cook all components ahead of time. Just keep in mind to store them separately until you’re ready to assemble the stack.

    4. What can I serve with this dish?

    This stack pairs beautifully with side salads, grilled vegetables, or fresh tropical fruit like pineapple or mango for a more extensive meal.

    5. How do I adapt this recipe for a low-sodium diet?

    To reduce sodium, switch to low-sodium soy sauce or coconut aminos, and limit additional salt in the cooking process. You can also enhance flavors with extra herbs and spices instead of salt.

    These FAQs address common concerns and queries, helping readers engage with the recipe confidently while presenting variations that maintain its appeal among popular chicken recipes.

    This comprehensive guide to creating a Hawaiian Huli Huli Chicken Stack encapsulates everything you need to make this exceptional dish a standout at your dining table. Whether for quick weeknight dinners or special occasions, this recipe promises to deliver flavor and nutritional value, all wrapped in a tropical experience that delights your senses!

  • Sticky Honey Garlic Cauliflower Wings

    Sticky Honey Garlic Cauliflower Wings

    Sticky Honey Garlic Cauliflower Wings: A Tropical Delight

    Introduction to Sticky Honey Garlic Cauliflower Wings

    If you’re on the hunt for a delightful addition to your collection of appetizer recipes, look no further! Sticky Honey Garlic Cauliflower Wings are the perfect blend of sweet and savory, providing a satisfying crunch that will tantalize your taste buds. Not only are these wings incredibly delicious, but they are also straightforward to prepare, making them an excellent choice for both novice cooks and experienced chefs.

    This recipe is a game-changer for those looking to add a healthy twist to their snacking habits. Made from cauliflower, a nutritious vegetable high in fiber and low in calories, these wings are also suitable for vegan and gluten-free lifestyles. You can indulge in the rich flavors without any guilt, as they are packed with health benefits. With a sticky, mouthwatering honey garlic glaze, these cauliflower wings will leave your guests begging for more. Served as an appetizer or a main dish, they are versatile enough for any occasion—be it a casual family gathering, a busy weeknight dinner, or a celebratory feast with friends.

    Each bite offers a burst of flavor, thanks to the harmonious blend of honey, garlic, and spices. So, why not add this fantastic recipe to your menu? You’ll find that it caters to a variety of dietary preferences, making it an inclusive option for all your guests. Get ready to unleash your inner chef and create Sticky Honey Garlic Cauliflower Wings that will impress everyone!

    Benefits and Advantages of Sticky Honey Garlic Cauliflower Wings

    Sticky Honey Garlic Cauliflower Wings come with a wealth of benefits that make them an ideal addition to your go-to appetizer recipes. For starters, they are remarkably easy to prepare. With minimal prep time and straightforward cooking instructions, even the busiest home cooks can whip these up in no time. This means you can create a delicious snack without spending hours in the kitchen.

    In terms of health benefits, these cauliflower wings are a fantastic alternative to traditional chicken wings. Not only are they lower in calories, but they also provide essential nutrients such as vitamins C and K, fiber, and antioxidants, which can help to improve digestion and support overall health. By substituting cauliflower for meat, you’re also reducing saturated fat intake, making this dish heart-friendly without sacrificing flavor.

    Moreover, this recipe is incredibly versatile. You can customize the seasonings to your preference, making it easy to adapt for those who enjoy spicier snacks or prefer milder flavors. Additionally, with simple modifications, you can make these wings keto-friendly, low-carb, or tweak them to accommodate other dietary restrictions. You can serve them with a variety of dipping sauces, from creamy ranch to tangy BBQ, further enhancing the flavor profiles.

    Beyond their health benefits, these wings bring a sense of fun and adventure to any gathering. They are an eye-catching dish that encourages communal eating, and they also appeal to a wide audience, including busy parents, students juggling multiple responsibilities, and health-conscious individuals. Each bite is a delightful experience that wraps a flavorful journey into every morsel.

    Ingredients Overview

    Essential Ingredients for Sticky Honey Garlic Cauliflower Wings

    To create the perfect Sticky Honey Garlic Cauliflower Wings, you will need the following essential ingredients. This list includes precise measurements, and I’ve highlighted vegan, gluten-free, and low-calorie options where applicable:

    • 1 large head of cauliflower (about 1 pound): The star ingredient, providing a meaty texture without the calories found in chicken wings.
    • 1/2 cup all-purpose flour (or gluten-free alternative like almond flour): This coats the cauliflower, creating a crunchy outer layer.
    • 1/2 cup breadcrumbs (use gluten-free breadcrumbs for dietary needs): This enhances the crunchiness of the wings.
    • 1 teaspoon garlic powder: Adds depth of flavor to the batter.
    • 1 teaspoon paprika: A smoky element that complements the sweetness of the honey.
    • 1 teaspoon salt: Essential for enhancing the flavors of the dish.
    • 1/2 teaspoon black pepper: Adds mild heat to the batter.
    • 1/2 cup honey (or maple syrup for a vegan option): This is the base of the sticky glaze, infusing sweetness into every bite.
    • 2-3 cloves garlic, minced: Fresh garlic makes the glaze rich and aromatic.
    • 1 tablespoon soy sauce (or tamari for gluten-free): Provides umami and enhances the depth of the glaze.
    • 1 tablespoon apple cider vinegar: Balances the sweetness with a slight tang.
    • 1 tablespoon sesame oil: Adds a nutty flavor to the entire dish.

    Dietary Substitutions to Customize Your Sticky Honey Garlic Cauliflower Wings

    Feel free to customize your Sticky Honey Garlic Cauliflower Wings to adhere to various dietary needs. Consider these substitutions to make the recipe more inclusive:

    • Gluten-Free Options: Swap out all-purpose flour for gluten-free flour or almond flour. Ensure your breadcrumbs are certified gluten-free.
    • Vegan Alternatives: Use maple syrup instead of honey for sweetness, maintaining the delicious glaze while keeping it plant-based.
    • Low-Calorie Version: Reduce or eliminate the honey by using a sugar substitute like stevia, or create a glaze with balsamic vinegar to achieve a different flavor profile without extra calories.
    • Spice It Up: For those who love a bit of heat, add cayenne pepper or chili powder to the flour mixture to turn up the spice factor.
    • Herbs or Spices for Flavor: Consider adding dried herbs like oregano or thyme to the breadcrumb mixture for extra flavor.

    With these substitutions, you can make Sticky Honey Garlic Cauliflower Wings that everyone can enjoy, no matter their dietary restrictions!

    How to Prepare the Perfect Sticky Honey Garlic Cauliflower Wings: Step-by-Step Guide

    Preparing Sticky Honey Garlic Cauliflower Wings is not only rewarding, but it’s also an easy process that anyone can follow. Here’s a detailed, step-by-step guide to ensure your cauliflower wings turn out perfectly every time.

    1. Preheat the Oven: Preheat your oven to 425°F (220°C). Line a baking sheet with parchment paper for easy cleanup and to prevent sticking.

    2. Prepare the Cauliflower: Wash the cauliflower thoroughly. Cut it into bite-sized florets, aiming for uniform size to ensure even cooking.

    3. Make the Coating: In a mixing bowl, whisk together the flour, garlic powder, paprika, salt, and black pepper. In a separate bowl, pour in cold water (or non-dairy milk for added creaminess) to create a batter. Dip each cauliflower piece into the batter, allowing any excess to drip off.

    4. Coat with Breadcrumbs: After dipping the florets in the batter, roll them in breadcrumbs until evenly coated. This step is essential for achieving that crispy texture.

    5. Arrange on Baking Sheet: Place the coated cauliflower wings on the prepared baking sheet in a single layer. Avoid overcrowding, as this helps them crisp up nicely.

    6. Bake the Wings: Place the baking sheet in the preheated oven and bake for 20-25 minutes, or until the wings are golden brown and crispy.

    7. Prepare the Honey Garlic Sauce: While the wings are baking, combine honey (or maple syrup), minced garlic, soy sauce (or tamari), apple cider vinegar, and sesame oil in a small saucepan. Cook over medium heat, stirring frequently, until the mixture thickens slightly—about 5-7 minutes.

    8. Toss the Wings in Sauce: Once the wings are done, take them out of the oven and drizzle the honey garlic sauce over them. Gently toss to coat the wings evenly in the sticky glaze.

    9. Bake Again: Return the coated wings to the oven for an additional 5-10 minutes to allow the sauce to caramelize slightly. This gives your wings that sought-after sticky finish.

    10. Serve: Remove from the oven and allow them to cool slightly before serving. Serve with your choice of dipping sauce such as vegan ranch or a zesty yogurt dip.

    With these simple steps, you can create a crowd-pleasing appetizer that is sure to impress! Feel free to adapt each stage of the preparation to suit your dietary needs.

    Mastering Sticky Honey Garlic Cauliflower Wings: Advanced Tips and Variations

    Enhancing your Sticky Honey Garlic Cauliflower Wings can transform a great dish into a spectacular one. Here are some advanced tips and variations to help you master this recipe.

    • Add a Twist of Citrus: Drizzling freshly squeezed lime or lemon juice over the wings just before serving can add a refreshing contrast to the sweet and savory flavors.

    • Try Different Sauces: Experiment with different flavors by adding buffalo sauce, sriracha, or even a spicy teriyaki sauce to create a different glaze.

    • Baking vs. Air Frying: For an extra crispy texture, consider cooking your cauliflower in an air fryer instead of baking. Air fryers typically use less oil and yield a crisper result.

    • Garnish for Presentation: Top your wings with sesame seeds or freshly chopped green onions to enhance presentation and add a pop of color.

    • Make-ahead Options: If you’re preparing for a party, consider prepping the cauliflower and battering it a few hours beforehand. Just store it in the refrigerator until you’re ready to bake.

    These tips and variations will make your Sticky Honey Garlic Cauliflower Wings truly unique and enjoyable for all.

    How to Store Sticky Honey Garlic Cauliflower Wings: Best Practices

    To keep your Sticky Honey Garlic Cauliflower Wings fresh and delicious, proper storage is essential. Here are some best practices for refrigeration, freezing, and reheating:

    • Refrigeration: If you have leftovers, store them in an airtight container in the refrigerator. They can typically last up to 3-4 days. To maintain their crispy texture, consider reheating them in an oven rather than a microwave.

    • Freezing: For longer storage, you can freeze the wings. Before freezing, ensure they are fully cooled and place them in a freezer-safe container. They can last for up to 3 months in the freezer. For best results, place parchment paper between layers to prevent sticking.

    • Reheating: When you’re ready to eat the frozen wings, let them thaw in the fridge overnight. To reheat, preheat your oven to 375°F (190°C) and bake for 15-20 minutes or until heated through, flipping halfway to ensure even warming. If you’re in a rush, you can use an air fryer, which usually takes about 10-12 minutes for reheating!

    These storage tips will ensure your Sticky Honey Garlic Cauliflower Wings remain flavorful and fulfilling every time you enjoy them, whether fresh out of the oven or reheated later.

    Nutritional Value of Sticky Honey Garlic Cauliflower Wings

    Understanding the nutritional value of your meals can help you maintain a balanced diet. Here’s the estimated nutritional profile for a serving of Sticky Honey Garlic Cauliflower Wings, which typically serves about 4:

    • Calories: Approximately 200 calories per serving
    • Protein: 5 grams
    • Carbohydrates: 30 grams
    • 3 grams of dietary fiber
    • 10 grams of sugar (if using honey)
    • Fat: 7 grams
    • Sodium: 600 milligrams (this can vary based on soy sauce used)
    • Vitamins: High in Vitamin C and K from cauliflower

    This dish is a great option for those looking for healthy appetizer recipes with a strong nutrient profile. The ingredients provide a range of benefits, making it an ideal selection for anyone looking to indulge without compromising their health.

    FAQs: Frequently Asked Questions About Sticky Honey Garlic Cauliflower Wings

    Q1: Can I make Sticky Honey Garlic Cauliflower Wings ahead of time?
    Yes, you can prepare the wings and their coating in advance, storing them in an airtight container until you’re ready to bake.

    Q2: How can I make these cauliflower wings spicier?
    You can add cayenne pepper to the batter or incorporate sriracha into your honey garlic sauce for an extra kick.

    Q3: Are there any good gluten-free substitutes for the flour and breadcrumbs?
    Absolutely! You can use gluten-free flour for coating and consider using almond flour or gluten-free breadcrumbs for a crispy texture.

    Q4: How do these wings reheat?
    For the best results, reheat in the oven or air fryer to maintain the crispiness rather than using a microwave.

    Q5: Can I use other vegetables instead of cauliflower?
    Yes! You can substitute cauliflower with other vegetables like broccoli, Brussels sprouts, or even mushrooms for variation.

    Incorporating these questions and answers into your knowledge base will help ensure that your guests enjoy every aspect of this delectable dish while also addressing any concerns they may have.


    With this comprehensive guide, you’re now equipped to create the best Sticky Honey Garlic Cauliflower Wings, perfect for any occasion! This vegan, gluten-free recipe remains all about health and flavor, serving as an incredible addition to your list of appetizer recipes. Enjoy cooking, and happy eating!

  • Spinach Stuffed Chicken

    Spinach Stuffed Chicken

    Spinach Stuffed Chicken: A Tropical Delight

    Introduction to Spinach Stuffed Chicken

    Are you searching for an exciting new recipe to elevate your weeknight dinner? Look no further than this Spinach Stuffed Chicken! A delightful dish that combines tender chicken breast with a creamy, flavorful spinach and cheese filling, this recipe is brimming with health benefits and culinary inspiration. As part of the vast world of chicken recipes, this dish stands out for its simplicity and adaptability, making it an excellent choice for busy parents, students, and food enthusiasts alike.

    One of the key advantages of spinach stuffed chicken is its versatility. It works beautifully as a comforting family meal or as an elegant dish for special occasions. Not only is it satisfying, but the combination of spinach and cheese also provides essential nutrients, making it a health-conscious option. Spinach is rich in vitamins A, C, and K, offering powerful antioxidants that promote overall well-being. With its vibrant flavors and minimal prep time, this dish is perfect for anyone striving to maintain a balanced diet without sacrificing taste.

    Whether you are a newlywed looking to impress your partner with your culinary skills or a working professional pressed for time, spinach stuffed chicken is the ideal solution. With its gluten-free and low-calorie variations, it caters to a range of dietary needs while being delicious and filling. Join us as we dive deeper into this fantastic recipe and discover just how easy it is to make this tropical delight!

    Benefits and Advantages of Spinach Stuffed Chicken

    This spinach stuffed chicken dish isn’t just another entry in the world of chicken recipes. It’s a culinary gem that brings a wealth of benefits to the table. First and foremost, this recipe is incredibly simple to prepare, making it suitable for cooks of all skill levels. In just a few steps, you can craft a dish that feels gourmet, delighting both family and friends.

    Ease of Preparation

    One of the biggest hurdles home cooks face is finding recipes that are both quick and impressive. Spinach stuffed chicken fits this criteria perfectly! In less than an hour, you can go from raw ingredients to a breathtaking plate. The steps are straightforward, minimizing the stress often associated with cooking dinner after a long day.

    Health Benefits

    When it comes to health, spinach is a star player. This leafy green is low in calories yet high in essential vitamins and minerals. Coupled with lean chicken breast, you’re getting a wholesome meal packed with protein and nutrients. This recipe allows for various low-calorie substitutions, ensuring that you can enjoy a satisfying dish without compromising your health goals.

    Unique Flavor and Appeal

    What truly sets spinach stuffed chicken apart is its unique taste profile. The creamy filling blends rich flavors with fresh spinach, and when baked, the chicken becomes juicy and flavorful. This harmony of tastes ensures you experience an exciting fusion in every bite, encouraging even the pickiest eaters to appreciate its deliciousness.

    Versatile and Customizable

    Additionally, this dish is highly versatile. You can easily substitute different cheeses, switch up herbs or spices, or even incorporate other vegetables into the filling. This flexibility allows you to tailor the recipe to meet your personal tastes or dietary restrictions. Whether you’re pursuing vegetarian options or need gluten-free adaptations, spinach stuffed chicken can be customized to meet all your culinary needs.

    In summary, if you’re looking for a recipe that marries simplicity, health benefits, incredible flavor, and versatility, spinach stuffed chicken will surely impress any home cook eager to showcase their skills in the kitchen.

    Ingredients Overview

    Essential Ingredients for Spinach Stuffed Chicken

    To achieve the deliciousness of spinach stuffed chicken, you’ll need a few key ingredients. Below, we break down what you’ll require, along with specific measurements to ensure perfect execution. Each ingredient plays a crucial role in contributing to the dish’s flavors and nutrition:

    • Chicken Breasts (4 pieces, about 6 ounces each): The foundation of the dish, chicken breast is lean and packed with protein. Opt for organic or free-range if possible.

    • Fresh Spinach (4 cups, chopped): Offers valuable nutrients while adding an earthy flavor. Fresh leaves are preferred, but you can use frozen spinach; just make sure to thaw and drain it well.

    • Cream Cheese (8 ounces, softened): This provides creaminess to the filling. For a healthier option, low-fat cream cheese can be used.

    • Feta Cheese (1 cup, crumbled): Gives a tangy flavor and pairs well with spinach. Alternatively, you may substitute with ricotta for a milder taste or nutritional yeast for a dairy-free, vegan option.

    • Garlic (2 cloves, minced): Adds aromatic flavor. Feel free to increase or decrease the amount according to your taste.

    • Olive Oil (2 tablespoons): Perfect for sautéing spinach and garlic. Extra virgin olive oil provides additional health benefits.

    • Salt and Pepper to taste: Essential seasonings to enhance all other flavors.

    • Paprika (1 teaspoon): A lovely spice to add depth; this is optional but recommended for color and flavor.

    • Parmesan Cheese (¼ cup, grated): For topping the chicken before baking, giving a crispy, golden finish.

    This list shapes the wonderful world of spinach stuffed chicken and highlights its nourishing potential. It’s tailored to not just meet taste preferences but also dietary needs, ensuring everyone gets a chance to enjoy this delicious dish.

    Dietary Substitutions to Customize Your Spinach Stuffed Chicken

    Making this recipe fit your dietary requirements is easy! Here are suggestions for substitutions and alternatives that cater to different needs:

    • Gluten-Free: Ensure that the chicken is coated with a gluten-free breadcrumb topping, or skip the topping altogether for a low-carb version.

    • Dairy-Free/Vegan: Replace cream cheese with vegan cream cheese and omit feta. Nutritional yeast can offer a cheesy flavor without the dairy. Additionally, consider using firm tofu blended with spices and herbs for a satisfying filling.

    • Low-Calorie: Opt for low-fat cream cheese or Greek yogurt in place of full-fat cream cheese. Using less cheese overall can also lower calories while keeping it tasty.

    • Add more veggies: Consider adding finely diced bell peppers or mushrooms to the filling for extra flavor and nutrients.

    • Herbs and spices: Customize this dish by including herbs such as basil, parsley, or thyme in the filling. Spices like cayenne pepper can also add a hint of heat if desired.

    This flexibility allows anyone, from busy parents to health-conscious individuals, to create a version of spinach stuffed chicken that perfectly aligns with their lifestyle.

    How to Prepare the Perfect Spinach Stuffed Chicken: Step-by-Step Guide

    Now that we’ve covered the ingredients, it’s time to dive into the how-to of this exciting dish! Follow these clear, actionable steps to prepare a remarkable spinach stuffed chicken that will impress anyone at your dinner table.

    1. Prepare the Base:
    2. Preheat your oven to 375°F (190°C). This ensures a perfectly cooked chicken with a golden crust.

    3. Cook the Spinach Mixture:

    4. In a large non-stick skillet, heat the olive oil over medium heat.
    5. Once hot, add minced garlic and sauté for about 30 seconds, until fragrant.
    6. Add chopped spinach to the skillet and cook until wilted (about 3-4 minutes). Stir occasionally.

    7. Mix Ingredients:

    8. In a mixing bowl, combine the sautéed spinach and garlic with cream cheese, feta cheese, salt, pepper, and paprika.
    9. Stir until everything is well combined and the mixture is creamy. This is your delicious stuffing!

    10. Prepare Chicken Breasts:

    11. Pat the chicken breasts dry with paper towels. This helps to achieve a better sear.
    12. Use a sharp knife to carefully slice a pocket into each chicken breast, ensuring not to cut all the way through.

    13. Stuff the Chicken:

    14. Take a generous portion of the spinach and cheese mixture and carefully stuff it into each chicken breast, securing it with toothpicks if necessary.
    15. Season the outside with a pinch of salt and additional pepper for flavor.

    16. Sear the Chicken:

    17. Heat a little more olive oil in the same skillet over medium-high heat.
    18. Sear each stuffed chicken breast for about 4-5 minutes on each side until golden brown. This locking in of flavor is crucial!

    19. Bake the Chicken:

    20. Transfer the chicken breasts to a baking dish.
    21. Sprinkle parmesan cheese on top for a crispy finish.
    22. Bake in the preheated oven for 20-25 minutes or until the chicken is cooked through and reaches an internal temperature of 165°F (75°C).

    23. Rest and Serve:

    24. Remove the dish from the oven and let the chicken rest for a few minutes. This allows the juices to redistribute for optimal flavor.
    25. Slice and serve warm, optionally garnished with fresh herbs such as parsley.

    With these steps, your spinach stuffed chicken will become a favorite in your collection of chicken recipes, perfect for any occasion!

    Mastering Spinach Stuffed Chicken: Advanced Tips and Variations

    To truly master this spinach stuffed chicken, consider the following practical tips and exciting variations. These tricks will ensure your dish is not only delicious but also tailored to your specific palate:

    • Use Fresh Ingredients: Aim for fresh spinach and quality cheeses for the best flavor. While frozen ingredients can work, they often lose texture, affecting the quality of the filling.

    • Marinate for Flavor: For an extra flavor boost, try marinating the chicken breasts in lemon juice, olive oil, garlic, and herbs for at least 30 minutes prior to stuffing and baking. This results in a juicy chicken filled with flavor.

    • Experiment with Flavors: Don’t hesitate to experiment! Try adding sun-dried tomatoes, artichokes, or pine nuts to the filling for a Mediterranean twist.

    • Grilled Option: Instead of baking, consider grilling the stuffed chicken. This adds a smoky flavor that pairs beautifully with the creamy filling.

    • Pairing Suggestions: Serve your spinach stuffed chicken with side dishes like roasted vegetables, quinoa salad, or mashed potatoes to create a wonderfully balanced meal.

    By integrating these advanced tips and variations, you’ll elevate your cooking to new heights, delighting friends and family with your culinary expertise!

    How to Store Spinach Stuffed Chicken: Best Practices

    Proper storage of spinach stuffed chicken is essential for maintaining flavor and freshness. If you have leftovers or want to prepare the dish ahead of time, follow these best practices:

    Refrigeration

    • After Cooking: Allow the chicken to cool to room temperature.
    • Wrap Leftovers: Store any uneaten portions in an airtight container. It can safely stay in the fridge for up to 3-4 days.

    Freezing

    • Before Cooking: If you’d like to prep in advance, you can freeze the stuffed chicken before baking. Ensure each piece is tightly wrapped in plastic wrap, then place it in a freezer-safe bag. It can be frozen for up to 3 months.
    • After Cooking: Similarly, cooked spinach stuffed chicken can be frozen. Store it in an airtight container or freezer-safe bag; this can last for about 2-3 months in the freezer.

    Reheating

    • Oven: The best method to reheat the chicken is to use an oven. Preheat your oven to 350°F (175°C), place the chicken in an oven-safe dish, cover with foil to prevent drying, and heat until warmed through (about 15-20 minutes).

    • Microwave: For a quicker method, you can use the microwave. Heat on medium power, covered, for about 2-3 minutes or until heated evenly, though this method may lead to loss of texture.

    By following these storing and reheating tips, you’ll ensure your spinach stuffed chicken remains delicious, making it a dish you’ll want to enjoy again and again!

    Nutritional Value of Spinach Stuffed Chicken

    Understanding the nutritional components of spinach stuffed chicken adds to its appeal as a wholesome meal option. Below are the nutritional breakdown and benefits correlated with each serving, as well as some general figures based on commonly used ingredients.

    Nutritional Information (per serving, based on 4 servings)

    • Calories: Approximately 350-400 calories (depending on the cheese and chicken cut used).
    • Protein: About 35 grams, making it an excellent source of lean protein.
    • Fat: Approximately 18 grams (healthy fats from olive oil and cheeses; opt for low-fat alternatives to reduce this).
    • Carbohydrates: Roughly 6 grams, making it low in carbs.
    • Fiber: Contains about 2 grams, primarily from spinach, contributing to digestive health.
    • Vitamins and minerals: Packed with vitamins A, C, and K, along with iron and calcium from spinach and cheese.

    This nutritional density demonstrates that spinach stuffed chicken is not just flavorful but also a balanced meal worth considering for those conscious of their dietary intake.

    FAQs: Frequently Asked Questions About Spinach Stuffed Chicken

    1. Can I make spinach stuffed chicken ahead of time?

    Absolutely! You can prepare it ahead of time by stuffing the chicken and refrigerating it until you’re ready to cook. It can also be frozen if you plan to make it in bulk.

    2. What can I substitute for cream cheese?

    You can use low-fat cream cheese, Greek yogurt, or vegan cream cheese alternatives. Additionally, pureed cottage cheese or cashew cream can provide a similar texture.

    3. How do I prevent the filling from leaking out?

    To prevent the filling from leaking out during cooking, make sure to tightly seal the chicken pockets with toothpicks and avoid overstuffing them.

    4. Is spinach stuffed chicken suitable for meal prep?

    Yes! Spinach stuffed chicken stores well in the fridge and freezes nicely, making it a great choice for meal prep. Simply reheat as needed for delicious, hassle-free meals.

    5. Can this recipe be made gluten-free?

    Yes, by ensuring that you skip any breadcrumb topping or use gluten-free breadcrumbs, this recipe can easily be modified for gluten sensitivities!

    Spinach stuffed chicken is a versatile and delicious option among various chicken recipes, perfect for any occasion. Whether you wish to prepare it for a family dinner or meal prep for the week, this dish represents the epitome of satisfying and healthful cooking. Bon appétit!

  • Chinese Style Mango Chicken Stir Fry

    Chinese Style Mango Chicken Stir Fry

    Chinese Style Mango Chicken Stir Fry: A Tropical Delight

    Introduction to Chinese Style Mango Chicken Stir Fry

    Are you in search of an easy and flavorful dish to elevate your culinary experiences? Look no further than this Chinese Style Mango Chicken Stir Fry! This tropical delight marries tender chicken and sweet mango in a vibrant, quick-cooking meal that’s perfect for busy weekdays or leisurely weekends.

    Not only does this dish tantalize your taste buds, but it also offers numerous health benefits due to its fresh ingredients. With lean protein from chicken and the vibrant, fruity goodness of mango, you’re not just cooking a meal; you’re creating a nutritious feast. The use of fresh vegetables adds crunch and color, ensuring that every bite is as delightful to the eyes as it is to the palate.

    What makes this recipe a standout among chicken recipes is its versatility, catering to a variety of dietary needs, including gluten-free and low-calorie options. Whether you’re a busy parent looking to whip up something quick for your family, a student needing a simple yet nutritious meal, or a health-conscious individual wanting to satisfy your cravings without guilt, this stir fry is a fantastic choice. It’s deliciously simple, yet stunning enough to impress your guests, making it ideal for a romantic dinner or a friendly gathering.

    Benefits and Advantages of Chinese Style Mango Chicken Stir Fry

    Ease of Preparation

    One of the primary advantages of the Chinese Style Mango Chicken Stir Fry is its simplicity. The recipe is designed to be prepared in just under 30 minutes, making it an excellent choice for busy weeknights when time is of the essence. The straightforward steps allow even novice cooks to impress their family and friends without spending endless hours in the kitchen. Shorter cooking time means the nutrients of the ingredients are preserved, ensuring a healthy dish that doesn’t skimp on flavor.

    Health Benefits

    In addition to being quick and easy, this dish is also packed with health benefits. Chicken breast is a lean source of protein, essential for building and repairing tissues. Meanwhile, mangoes are rich in vitamins A, C, and E, antioxidants that are vital for maintaining a healthy immune system and skin. The addition of colorful vegetables—including bell peppers, broccoli, and snap peas—provides an array of nutrients and fiber, contributing to overall well-being and digestive health.

    Versatile and Customizable

    This recipe stands out among chicken recipes for its versatility. Not only can you tailor it to your dietary preferences, but you can also switch up the ingredients based on what you have on hand. Need a vegetarian option? Simply omit the chicken and replace it with tofu or tempeh. Looking for a gluten-free meal? Swap out soy sauce for tamari or coconut aminos. Feeling gourmet? Experiment with additional spices or garnishes to make it your own. This stir fry can morph to fit any occasion or preference, making it a staple in your culinary repertoire.

    Ingredients Overview

    Essential Ingredients for Chinese Style Mango Chicken Stir Fry

    Here’s a detailed list of the key ingredients for this vibrant dish, along with their roles and benefits:

    • Chicken Breast (1 pound): A lean protein that cooks quickly and remains juicy. It can be substituted with tofu for a vegetarian version.
    • Mango (1 large): Provides natural sweetness and is high in vitamins and antioxidants. Can be replaced with peach or pineapple if mango isn’t available.
    • Bell Peppers (1 each of red, yellow, and green): Adds crunch, flavor, and a burst of color. They are rich in vitamins C and A.
    • Broccoli (1 cup, chopped): A nutrient powerhouse, supplying fiber and vitamin K.
    • Snap Peas (1 cup): Offers a fresh taste and crisp texture, rich in vitamins A and C.
    • Soy Sauce (1/4 cup, low-sodium recommended): Adds umami depth. Use tamari for a gluten-free version.
    • Garlic (2 cloves, minced): Packs flavor and has anti-inflammatory properties.
    • Ginger (1 tablespoon, fresh, minced or grated): Adds warmth and aids digestion.
    • Olive Oil or Sesame Oil (2 tablespoons): Used for sautéing; provides healthy fats.
    • Cornstarch (1 tablespoon): Helps thicken the sauce; can be substituted with arrowroot powder for a gluten-free option.
    • Scallions (2, sliced for garnish): Adds a fresh, oniony flavor.

    Dietary Substitutions to Customize Your Chinese Style Mango Chicken Stir Fry

    This recipe allows for various substitutions depending on dietary preferences and ingredient availability:

    • Protein: Instead of chicken, use shrimp, beef, or a plant-based protein like tofu or tempeh.
    • Vegetables: Feel free to replace bell peppers and snap peas with your favorites—zucchini, carrots, or even asparagus could work beautifully.
    • Sweetener: If you prefer a sweeter sauce, add a teaspoon of honey or agave syrup. You can skip this if mangoes provide enough sweetness for your taste.
    • Spice Level: For heat lovers, add a pinch of red pepper flakes or a dash of chili sauce while cooking.

    How to Prepare the Perfect Chinese Style Mango Chicken Stir Fry: Step-by-Step Guide

    Cooking the perfect Chinese Style Mango Chicken Stir Fry is easier than you might think! Follow these detailed steps to create this tantalizing dish loaded with tropical flavor.

    1. Prepare Your Ingredients: Start by washing and cutting the chicken breast into bite-sized pieces. Then, peel and dice the mango, and chop the bell peppers and broccoli into manageable pieces. Slice the scallions for garnish and mince the garlic and ginger finely.

    2. Marinate the Chicken: In a bowl, toss the chicken pieces with 2 tablespoons of soy sauce and 1 tablespoon of cornstarch. Let it marinate for about 10 minutes while you prepare the rest of the ingredients. This step boosts flavor and ensures a great texture later on.

    3. Heat the Oil: In a large skillet or wok, heat 2 tablespoons of olive oil over medium-high heat. If you prefer a nutty flavor, sesame oil can be used.

    4. Cook the Chicken: Once the oil is hot, add the marinated chicken to the skillet. Sauté for about 5-7 minutes, or until the chicken is golden brown and cooked through. Ensure it is regularly stirred to avoid sticking.

    5. Add Aromatics: Reduce the heat to medium and add the minced garlic and ginger. Stir-fry for another minute until fragrant. This step brings an incredible depth of flavor to your stir fry.

    6. Incorporate Vegetables: Add the chopped bell peppers, broccoli, and snap peas to the skillet. Stir well and sauté for about 2-3 minutes until the vegetables are tender-crisp. This quick cooking method helps retain the veggies’ nutrients.

    7. Mix in the Mango: Gently fold the diced mango into the stir fry. Allow it to heat through for another 2 minutes. The heat will slightly soften the mango, making it even more delicious.

    8. Thicken Sauce: Drizzle in the remaining soy sauce (adjust according to taste) and stir to coat everything evenly. If you prefer a thicker sauce, you can add a bit more cornstarch mixed with water at this stage.

    9. Final Touches: Taste for seasoning and adjust as needed. Remove from heat and garnish with sliced scallions for a pop of freshness.

    10. Serve: Serve the mango chicken stir fry hot over a bed of steamed rice, quinoa, or noodles.

    This dish is not only delicious but also adaptable. You can easily change the proteins or veggies to match personal preferences or dietary needs.

    Mastering Chinese Style Mango Chicken Stir Fry: Advanced Tips and Variations

    Once you’ve mastered the basics of this delicious mango chicken stir fry, here are advanced tips and variations to elevate your culinary creation:

    Advanced Cooking Techniques

    • Stir-Fry in Batches: If you are cooking for a crowd, consider stir-frying the chicken in smaller batches to avoid overcrowding the skillet. This helps ensure even cooking.
    • Tempering Spice: For a more aromatic base, consider adding spices like star anise or Chinese five-spice to the oil before adding the chicken. This step will infuse the dish with a wonderful flavor.

    Variations to Try

    • Tropical Twist: Add pineapple or diced kiwi for an extra fruity flavor that brings the dish to another level.
    • Noodles vs. Rice: Replace rice with noodles to create a delicious noodle stir-fry. Buckwheat noodles or rice noodles work particularly well.
    • Vegetarian Delight: Make a veggie-packed version using eggplant, zucchini, and cauliflower. Include tofu for protein, or skip it for a lighter dish.

    How to Store Chinese Style Mango Chicken Stir Fry: Best Practices

    After preparing this delightful dish, you may want to make extra servings for later! Here’s how to store Chinese Style Mango Chicken Stir Fry effectively:

    Refrigeration

    Refrigerate the Stir Fry: Allow the leftovers to cool to room temperature before transferring the stir fry to airtight containers. You can refrigerate for up to 3-4 days. When reheating, use a microwave or stovetop, adding a splash of water to prevent drying.

    Freezing Instructions

    Freeze for Longevity: For longer storage, place the cooled stir fry in freezer-safe containers or bags. It can be stored for up to three months.

    Reheating from Frozen: Thaw in the refrigerator overnight and reheat on the stove or microwave until heated through. Alternatively, you can directly reheat from frozen, although this may add additional cooking time.

    Nutritional Value of Chinese Style Mango Chicken Stir Fry

    Understanding the nutritional content of your meals can empower your cooking choices. Here’s a breakdown of the nutritional value per serving for the Chinese Style Mango Chicken Stir Fry:

    • Calories: Approximately 380 calories
    • Protein: About 30g
    • Fat: 12g (mostly healthy fats from the olive oil)
    • Carbohydrates: 40g
    • Fiber: 5g
    • Sugar: 8g
    • Sodium: Variable, depending on soy sauce used

    This breakdown ensures you understand the balance in the dish. With rich protein from chicken and healthy carbs from vegetables, it offers a fulfilling and nourishing option suitable for various diet plans.

    FAQs: Frequently Asked Questions About Chinese Style Mango Chicken Stir Fry

    1. Can I make this recipe vegan?

    Absolutely! You can easily transform this dish into a vegan delight by substituting chicken with tofu or tempeh. Use plant-based alternatives for ostensible flavors, like mushroom soy sauce to retain the umami effect.

    2. What type of soy sauce should I use?

    For a gluten-free option, tamari is a great alternative to traditional soy sauce. A low-sodium soy sauce is advisable for health-conscious cooks trying to manage their sodium intake.

    3. How do I know when the chicken is cooked perfectly?

    The chicken is done when it reaches an internal temperature of 165°F (75°C) and juices run clear. Avoid overcooking to keep it juicy and tender.

    4. Can I add more vegetables to this stir fry?

    Absolutely! This dish welcomes customization. Feel free to add in other veggies such as carrots, zucchini, or bok choy for added color and nutrition.

    5. What can I serve with this dish?

    Chinese Style Mango Chicken Stir Fry pairs beautifully with steamed jasmine rice, fried rice, or rice noodles. For a low-carb option, serve over a bed of greens or cauliflower rice.

    This article serves not just as a recipe; it is your guide to enjoying a tropical culinary experience at home, filled with vibrant flavors and health benefits. So gather your ingredients and embark on the delightful journey of crafting this Chinese Style Mango Chicken Stir Fry!

  • Easy Cream Cheese Doritos Chicken

    Easy Cream Cheese Doritos Chicken

    Easy Cream Cheese Doritos Chicken: A Tropical Delight

    Introduction to Easy Cream Cheese Doritos Chicken

    If you’re on the hunt for quick and delicious chicken recipes, you’ve landed in the right place! Easy Cream Cheese Doritos Chicken combines the creamy richness of cream cheese with the unmistakable crunch of Doritos for a dish that’s both comforting and satisfying. This recipe stands out not only for its unique flavor but also for its incredible simplicity, making it an excellent choice for busy evenings or weeknight family dinners.

    In just a few steps, you can create a meal that pleases even the pickiest eaters while also offering you a convenient way to whip up something memorable. Best of all, it offers a fantastic balance of taste and nutrition. This dish can easily be tailored to fit various dietary requirements, including gluten-free or low-calorie options. Whether you’re a busy parent juggling homework and work, a college student seeking a quick meal, or anyone in between, this Easy Cream Cheese Doritos Chicken makes cooking less of a chore and more of a joy.

    Allow the flavors to transport you, combining the richness of chicken with the delightful crunch and subtle cheesiness of Doritos. As you prepare this dish, you will discover why it has become a favorite in many households, adding a tropical twist to traditional chicken recipes that will leave your family and guests eagerly asking for seconds.

    Benefits and Advantages of Easy Cream Cheese Doritos Chicken

    When it comes to crafting the ultimate comfort food, Easy Cream Cheese Doritos Chicken hits all the right notes. Here’s why you should consider making this dish:

    1. Simplicity at Its Best: This recipe is not just easy; it’s remarkably uncomplicated. With minimal ingredients and straightforward steps, even those with little cooking experience can achieve delicious results. The preparation allows you to spend less time in the kitchen and more time enjoying your meal.

    2. Health Benefits: Chicken is a lean protein source packed with essential nutrients, including B vitamins, iron, and zinc. When paired with cream cheese, which provides healthy fats, this dish offers a balanced nutritional profile. In addition, using lighter cream cheese options can greatly reduce the overall calorie count.

    3. Versatile Dietary Needs: One of the major advantages of this chicken recipe is its flexibility. You can easily modify it to cater to various dietary preferences. Whether you’re vegan, gluten-sensitive, or simply looking to cut down on calories, plenty of substitutions will help you achieve a similar and satisfying outcome.

    4. Family-Friendly Appeal: With the crunchy Doritos topping, this dish appeals to kids and adults alike. It’s an excellent way to introduce new flavors while keeping familiar textures loved by the family. The dish has all the makings of a family staple, ensuring that everyone leaves the table happy.

    5. Time-Saving: In a world where everyone seems to be busy, this recipe comes to the rescue. Prep time takes just minutes, and you can have a hearty meal on the table in under an hour. Perfect for busy weeknights or unexpected guests, this chicken recipe is a true lifesaver.

    6. Delicious Leftovers: If you manage to have any leftovers (which is quite unlikely!), they can be refrigerated or even frozen for later enjoyment. Dishes that taste even better the second time around are a bonus in any cook’s repertoire.

    Overall, Easy Cream Cheese Doritos Chicken is a must-try recipe that promises to deliver flavor, ease of preparation, and flexibility for varying dietary needs—all the while becoming a cherished addition to your collection of chicken recipes.

    Ingredients Overview

    Essential Ingredients for Easy Cream Cheese Doritos Chicken

    Here’s what you will need to create a batch of Easy Cream Cheese Doritos Chicken:

    • 4 Chicken Breasts (boneless and skinless) – This lean protein is the primary ingredient, providing essential nutrients while serving as the base of the dish.
    • 8 oz Cream Cheese (softened) – Choose regular, low-fat, or vegan cream cheese as per your dietary requirements. This will ensure the chicken remains moist and flavorful.
    • 1 cup Doritos (crushed) – Use your favorite flavor (Nacho Cheese is popular). This topping will provide a fantastic crunch and a burst of flavor that distinguishes this dish.
    • 1/2 cup Shredded Cheese (such as cheddar or mozzarella) – Optional, for added creaminess and cheesy goodness. (Vegan cheese can be used for dairy-free options.)
    • 1 teaspoon Garlic Powder – This adds depth and richness to the dish, enhancing the overall flavor.
    • 1 teaspoon Onion Powder – Another layer of taste that complements the chicken wonderfully.
    • Salt and Pepper to taste – Essential seasonings that elevate all the other flavors.
    • 1 tablespoon Olive Oil – For coating the chicken which helps in preventing sticking if baking.

    Notes for Dietary Considerations:

    • Gluten-Free: Choose gluten-free Doritos to accommodate those with gluten sensitivities.
    • Low-Calorie: Opt for reduced-fat cream cheese and measure your Doritos carefully to keep the calorie count down.
    • Vegan Friendly: Substitute chicken with firm tofu or tempeh and use vegan cream cheese and cheese alternatives.

    Dietary Substitutions to Customize Your Easy Cream Cheese Doritos Chicken

    This recipe is wonderfully adaptable to cater to various dietary preferences. Here are some suggested substitutions.

    • Chicken: Replace chicken breasts with turkey or tofu for a leaner option. If opting for tofu, use extra-firm tofu for the best results.
    • Cream Cheese: Use a dairy-free alternative for those who are lactose intolerant or vegan. Cashew cream or silken tofu blended until smooth can also provide a creamy consistency.
    • Doritos: While original Doritos are a favorite, consider using other tortilla chips for different flavors or even making your own baked chips to control the ingredients.
    • Cheese: If you want a lower-fat option, use a mix of cream cheese and Greek yogurt. Also, vegan cheese options are becoming increasingly diverse and delicious.
    • Spices: Customize flavors with smoked paprika, cayenne pepper, or your favorite herbs to elevate the dish even further.

    By following these suggestions, you can effortlessly adapt the Easy Cream Cheese Doritos Chicken to suit your personal taste preferences and dietary restrictions, ensuring a dish that everyone can enjoy.

    How to Prepare the Perfect Easy Cream Cheese Doritos Chicken: Step-by-Step Guide

    Now that you have all your ingredients ready, let’s dive into the simple steps to prepare your Easy Cream Cheese Doritos Chicken:

    1. Prepare the Oven: Preheat your oven to 375°F (190°C). This ensures that your chicken cooks evenly and gets that perfect golden-brown crust.

    2. Prep the Chicken: Using a meat mallet or rolling pin, gently pound the chicken breasts to ensure they cook evenly. Season the breasts with salt, pepper, garlic powder, and onion powder. This step infuses flavor right into the chicken.

    3. Mix the Cream Cheese: In a mixing bowl, combine the softened cream cheese with any remaining garlic and onion powder for flavor enhancement. If desired, fold in half of the shredded cheese. This mixture will coat the chicken and keep it moist while adding flavor.

    4. Coat the Chicken: Take the seasoned chicken breasts and generously spread the cream cheese mixture on top. Ensure that each piece is well-covered, allowing the flavors to combine during baking.

    5. Crush the Doritos: In a ziplock bag or food processor, crush the Doritos into chunky crumbs. You want a mix of coarse pieces for texture that adheres well to the chicken.

    6. Dredge in Doritos: Gently press each coated chicken breast into the crushed Doritos, ensuring an even coating. This will create that signature crunchy topping that makes this dish so delicious.

    7. Arrange on a Baking Sheet: Place the coated chicken breasts on a baking sheet lined with parchment paper or a silicone baking mat to prevent sticking. Drizzle the olive oil over the tops of the chicken for a hint of crispness while baking.

    8. Bake to Perfection: Insert the baking sheet into your preheated oven and bake for approximately 25-30 minutes or until the internal temperature reaches 165°F (75°C). The Doritos coating should turn golden and crisp.

    9. Add Additional Cheese (Optional): For that ooey-gooey texture, remove the baking sheet about 10 minutes before the dish is done, and sprinkle the remaining shredded cheese on top. Return to the oven until the cheese melts and becomes bubbly.

    10. Serve and Enjoy: Once baked to perfection, remove the chicken from the oven, allow it to sit for a few minutes, and then slice into your desired portions. Serve warm with dipping sauces, healthy sides, or atop a fresh salad for a complete meal.

    Your Easy Cream Cheese Doritos Chicken is now ready to be enjoyed! Its extravagant blend of flavors and textures will surely impress everyone at the table.

    Mastering Easy Cream Cheese Doritos Chicken: Advanced Tips and Variations

    While the base recipe is already fantastic, you can take your Easy Cream Cheese Doritos Chicken to new heights with these advanced tips and variations:

    • Add Fresh Herbs: Consider adding fresh herbs like parsley or chives into the cream cheese mixture for a refreshing touch. This flavors up the dish while adding appealing colors.

    • Spice it Up: If you crave some heat, add diced jalapeños, crushed red pepper flakes, or sriracha sauce into the cream cheese mixture. This spicy twist will elevate the flavor profile dramatically.

    • Make it a Casserole: For a twist, layer cooked rice or any grain as the base in a baking dish, follow with your chicken preparation, and top with extra Doritos and cheese. Bake until bubbly for a comforting casserole dish.

    • Experiment with Flavors: Use flavored Doritos (like Cool Ranch) or other brands to change the flavor profile of the dish without altering its essence.

    • Meal Prep: This dish is perfect for meal prep! Prepare multiple chicken breasts at once, bake them, and store them in individual containers for easy grab-and-go meals during the week.

    By incorporating these tips, you can customize your Easy Cream Cheese Doritos Chicken to reflect your personal tastes, turning it into a family favorite that you can enjoy time and time again.

    How to Store Easy Cream Cheese Doritos Chicken: Best Practices

    Properly storing your Easy Cream Cheese Doritos Chicken ensures that the flavors remain intact and that it stays safe to eat.

    • Refrigerator: After your chicken has cooled completely, transfer the remaining portions into an airtight container and refrigerate. The chicken can be safely stored in the refrigerator for up to 3-4 days.

    • Freezer: If you wish to store leftovers for a longer period, consider freezing the chicken. Wrap individual pieces in plastic wrap and place them in a freezer-safe container or a ziplock bag. They can be frozen for up to 2-3 months.

    • Reheating: When ready to enjoy the leftovers, you can either reheat the chicken in the microwave for 2-3 minutes or place it in the oven at 350°F (175°C) for about 15-20 minutes, making sure it reaches an internal temperature of 165°F (75°C). Adding a splash of chicken broth or water while reheating in the oven can help retain moistness.

    By following these best practices for storage, you can enjoy your Easy Cream Cheese Doritos Chicken while minimizing waste and maximizing flavor.

    Nutritional Value of Easy Cream Cheese Doritos Chicken

    When it comes to chicken recipes, understanding the nutritional content of your dish is essential, especially for diet-conscious individuals. Here’s a general breakdown of the nutritional values per serving of Easy Cream Cheese Doritos Chicken, assuming the recipe serves four:

    • Calories: Approximately 400-500 calories
    • Total Fat: 25g
    • Saturated Fat: 10g
    • Trans Fat: 0g
    • Cholesterol: 100mg
    • Sodium: 800mg
    • Total Carbohydrates: 30g
    • Dietary Fiber: 2g
    • Sugars: 2g
    • Protein: 35g

    Adjustments for Health:

    • Opt for low-fat or vegan cream cheese to reduce fat content.
    • Choose baked chips or homemade alternatives for a healthier crunch.
    • Include a side of vegetables or greens to increase fiber and nutrient intake.

    Monitor portion sizes, as this dish can be calorie-dense depending on the ingredients you choose. These adjustments will help you maintain a balanced diet while still enjoying this delicious recipe.

    FAQs: Frequently Asked Questions About Easy Cream Cheese Doritos Chicken

    Can I use frozen chicken for this recipe?

    Yes, you can use frozen chicken breasts. Just ensure they are fully defrosted before cooking for even baking.

    What can I use instead of Doritos if I want to avoid processed foods?

    You can use homemade tortilla chips or even toasted breadcrumbs seasoned with your chosen spices for a healthier alternative.

    Is this recipe suitable for meal prepping?

    Absolutely! Easy Cream Cheese Doritos Chicken stores well in the fridge and can be frozen, making it an excellent option for meal prepping.

    Can I add vegetables to this recipe?

    Certainly! Chopped spinach, diced bell peppers, or even corn can be incorporated into the cream cheese mixture or served alongside the chicken for added nutrition.

    How can I make this dish spicier?

    For those who enjoy heat, feel free to add diced jalapeños or hot sauce into the cream cheese mixture for a spicy kick!

    What is the best way to reheat leftovers?

    The best way to reheat leftovers is in the oven for a few minutes to maintain crispness, but they can also be microwaved if you’re in a hurry.

    By addressing these common questions, you can ensure a smoother cooking process and enhance your overall enjoyment of Easy Cream Cheese Doritos Chicken. Ready to make it at home? Gather your ingredients and start cooking today! Enjoy your culinary adventure!

  • Honey BBQ Chicken Rice

    Honey BBQ Chicken Rice

    Honey BBQ Chicken Rice: A Tropical Delight

    Introduction to Honey BBQ Chicken Rice

    Honey BBQ Chicken Rice is more than just a meal; it’s a delightful experience that captures the essence of tropical flavors right on your plate. This recipe stands out for its simplistic charm and nutritional benefits, making it a fantastic option for a diverse audience, including busy parents, students, cooking enthusiasts, and dietary-conscious individuals. Within this dish, tender chicken pieces are enveloped in a delectable honey barbecue glaze, perfectly complemented by fluffy rice. Whether you’re an experienced chef or a novice in the kitchen, this recipe offers both ease of preparation and a rich taste that will tantalize your taste buds.

    One of the most appealing aspects of this dish is its adaptability to various dietary needs. With simple ingredient swaps, it can easily cater to vegan or gluten-free lifestyles. The balance of protein, carbs, and essential nutrients ensures that it is both satisfying and health-focused, making it a stellar option for anyone looking to whip up quick yet nutritious chicken recipes. Whether you’re enjoying a family dinner or a simple lunch, you’ll find that Honey BBQ Chicken Rice quickly becomes a favorite in your culinary repertoire.

    Benefits and Advantages of Honey BBQ Chicken Rice

    In the bustling world we live in, finding quick, nutritious meals that don’t compromise on flavor can be a challenge. Honey BBQ Chicken Rice excels in this area. The preparation process is straightforward, usually taking under an hour from start to finish. This makes it an excellent choice for those hectic weeknights when you just don’t have the time to spend hours in the kitchen. Additionally, it’s an ideal recipe that caters to the tastes of children and adults alike; its sweet and savory combination is universally appealing, ensuring that even the pickiest eaters will enjoy a satisfying meal.

    Health-wise, this recipe offers substantial benefits. Chicken is a lean source of protein, essential for muscle repair and overall health. The inclusion of brown rice adds fiber, which aids digestion and promotes a healthy lifestyle. Moreover, honey provides a natural sweetness and is often lower in calories compared to refined sugars, all while delivering vital antioxidants.

    What sets this dish apart from other chicken recipes is its versatility. You can easily tweak the flavors to include spicier ingredients or add vegetables to increase nutritional value. You can even portion it for meal prep, allowing for quick, grab-and-go lunches throughout the week. The convenience of preparing a dish that can please various dietary preferences, such as vegan, gluten-free, or low-calorie options, makes Honey BBQ Chicken Rice an attractive choice for anyone—regardless of their culinary experience or culinary needs.

    Ingredients Overview

    Essential Ingredients for Honey BBQ Chicken Rice

    To prepare Honey BBQ Chicken Rice, gather the following essential ingredients:

    • Boneless Chicken Breast (about 1 lb): Provides a lean protein source. Can substitute with tofu for a vegan option.
    • Brown Rice (1 cup): A healthier alternative to white rice, this provides fiber and nutrients. For gluten-free diet, ensure rice is certified gluten-free.
    • Honey (1/2 cup): Adds natural sweetness and aids in creating a sticky glaze. Maple syrup can be a good vegan alternative.
    • BBQ Sauce (1/2 cup): Choose a low-sugar or homemade BBQ sauce for a healthier option. Vegan BBQ sauce is available for dairy-free preferences.
    • Olive Oil (2 tbsp): Used for cooking the chicken; it adds healthy fats. Avocado oil can also be a wonderful substitute.
    • Garlic Powder (1 tsp): Enhances flavor without calorie load.
    • Onion Powder (1 tsp): Adds depth to the flavor without overwhelming sweetness.
    • Salt and Pepper (to taste): Essential for balancing flavors.
    • Chopped Green Onions (for garnish): Adds a freshness to the dish.

    These ingredients not only ensure a flavorful dish but also cater to health-conscious individuals who don’t want to sacrifice taste for nutrition.

    Dietary Substitutions to Customize Your Honey BBQ Chicken Rice

    This recipe is incredibly versatile, and there are several substitutions you can make depending on dietary restrictions or preferences:

    • Vegan Substitutes: Replace chicken with firm tofu or tempeh. Use maple syrup or agave nectar instead of honey and opt for a vegan-friendly BBQ sauce. Brown rice can be replaced with quinoa or cauliflower rice for a low-carb option.
    • Gluten-Free Options: Verify all sauces are gluten-free. You might consider brown rice or quinoa as a grain alternative.
    • Low-calorie alternatives: Use skinless chicken breasts, or lean turkey breast, and opt for a sugar-free BBQ sauce. Reducing the amount of honey can also lower the calorie count.
    • Vegetable Boost: Add bell peppers, broccoli, or snap peas during cooking to enhance the nutritional value and bring extra flavor.

    By employing these substitutions, you can adjust this comforting recipe to meet any dietary need, allowing everyone to enjoy the deliciousness of Honey BBQ Chicken Rice.

    How to Prepare the Perfect Honey BBQ Chicken Rice: Step-by-Step Guide

    Step 1: Prepare the Base

    Begin by rinsing 1 cup of brown rice under cold water until the water runs clear. This helps to remove any excess starch. Next, cook the rice according to brand instructions—in general, combine the rinsed rice with 2 cups of water in a pot, bring to a boil, then reduce heat to low, cover, and let it simmer for about 40-45 minutes until tender.

    Step 2: Marinate the Chicken

    While the rice is cooking, take 1 lb of boneless chicken breasts and slice them into bite-sized pieces for even cooking. In a medium bowl, mix 1/2 cup honey and 1/2 cup BBQ sauce together. Add the chicken pieces into the bowl and coat them evenly. Allow them to marinate for at least 15-20 minutes. This marination will deepen the flavors and ensure tender chicken.

    Step 3: Cook the Chicken

    Heat 2 tablespoons of olive oil in a large skillet over medium-high heat. Once the oil is hot, carefully add the marinated chicken pieces to the skillet, making sure to reserve any remaining marinade. Sauté the chicken pieces for about 5-7 minutes or until they are golden brown and cooked through, stirring occasionally to ensure even cooking.

    Tip: For those needing a quicker meal prep, you could also cook the chicken in an air fryer or instant pot, adjusting the cooking time accordingly.

    Step 4: Combine and Glaze

    Once the chicken is fully cooked, add the reserved marinade to the skillet and let it simmer for an additional 3-5 minutes. This step allows the BBQ sauce to thicken and cling beautifully to the chicken, creating a mouthwatering glaze.

    Step 5: Serve

    Fluff the cooked brown rice with a fork and serve it as the base on plates. Top generously with the glazed Honey BBQ chicken. For an added touch, garnish with freshly chopped green onions.

    Step 6: Enjoy

    Take a moment to appreciate your culinary creation! This meal is best enjoyed warm, but it also makes for great leftovers that can be easily reheated.

    This method of preparing Honey BBQ Chicken Rice balances time efficiency with satisfying full flavors, reinforcing its place as a favorite among diverse chicken recipes.

    Mastering Honey BBQ Chicken Rice: Advanced Tips and Variations

    To elevate your Honey BBQ Chicken Rice experience, consider these advanced tips and variations:

    1. Experiment with Flavors: Try adding minced ginger or smoked paprika to the marinade for a different flavor profile. This addition will enhance the smokiness and warmth of the dish.

    2. Add Vegetables: For a one-pan meal, consider throwing in chopped veggies such as bell peppers, zucchini, or corn during the last few minutes of chicken cooking time. This not only enhances the nutritional content but also adds color to your dish.

    3. Use Different Grains: Swap out brown rice for other grains like farro, quinoa, or even cauliflower rice to keep the dish exciting and adaptable to various culinary desires.

    4. Freezer Meal: If you want to prep this dish in advance, consider marinating the chicken and freezing it with the sauce. When you’re ready to cook, simply thaw and follow cooking steps. It can be a fantastic time-saver during busy weeks.

    5. Spice it Up: For those who prefer more heat, add chili flakes or even Sriracha sauce into the BBQ mixture for a creative twist.

    By implementing these tips and variations, you can keep your Honey BBQ Chicken Rice exciting, appealing, and in tune with your taste buds’ whims!

    How to Store Honey BBQ Chicken Rice: Best Practices

    Knowing how to store your Honey BBQ Chicken Rice can extend its freshness and help you enjoy leftovers safely. Here are the best practices:

    1. Refrigeration: If you have leftovers, allow the dish to cool completely. Store it in an airtight container in the refrigerator for up to three days. Make sure to separate the chicken and rice if possible to maintain texture.

    2. Freezing: This dish freezes wonderfully! Portion it out into freezer-safe containers, and it can last up to three months. Thaw overnight in the refrigerator when you’re ready to enjoy it again.

    3. Reheating: When it’s time to eat, reheat the chicken and rice separately in the microwave or over the stove on low heat. Add a splash of water if the rice seems a bit dry during reheating.

    Following these best practices ensures you can enjoy your Honey BBQ Chicken Rice even after the initial cooking session, making it a fantastic meal for meal prep enthusiasts.

    Nutritional Value of Honey BBQ Chicken Rice

    Nutritional value is essential for any recipe, especially for those juggling health-related goals. While specific values can depend on the portion size and exact ingredients used, here’s a general breakdown for one serving of Honey BBQ Chicken Rice made with boneless chicken breast and brown rice:

    • Calories: Approximately 400-450
    • Protein: 30 grams (lean source from chicken)
    • Fat: 10 grams (from olive oil and possible BBQ sauce)
    • Carbohydrates: 55 grams (from brown rice)
    • Fiber: 5 grams (from brown rice and added vegetables, if used)
    • Sugars: 12 grams (mostly from honey)

    These values make Honey BBQ Chicken Rice not just a sumptuous meal but also balanced in essential nutrients. Letting you indulge without the guilt allows readers to align their culinary practices with healthier living goals.

    FAQs: Frequently Asked Questions About Honey BBQ Chicken Rice

    1. Can I make this recipe with chicken thighs instead of breasts?

    Yes, chicken thighs can certainly be used, making the dish juicier and richer in flavor. Just adjust the cooking time as thighs may take a bit longer.

    2. How can I make this recipe vegetarian?

    To make Honey BBQ Chicken Rice vegetarian, simply replace the chicken with firm tofu or tempeh, and use a vegan BBQ sauce.

    3. What can I use instead of honey for a vegan dish?

    Maple syrup or agave nectar makes a great substitute for honey in the marinade while keeping the dish deliciously sweet.

    4. Can I prepare Honey BBQ Chicken Rice in advance?

    Absolutely! You can marinate the chicken and store it in the fridge for a day or freeze it. Just make sure to fully cook it after thawing.

    5. How can I increase the spice level?

    For those who crave heat, include chili powder, cayenne pepper, or a dash of hot sauce into your marinade to give your dish some extra kick.

    This Honey BBQ Chicken Rice recipe captures the flavor and ease that every home cook desires. With a few simple steps, healthy ingredients, and versatile adaptations, it promises to become a staple in your collection of chicken recipes. Enjoy cooking!

  • Cacio E Pepe Chicken

    Cacio E Pepe Chicken

    Cacio E Pepe Chicken: A Tropical Delight

    Introduction to Cacio E Pepe Chicken

    Welcome to a culinary journey through the soulful flavors of Italy with a delightful twist – Cacio E Pepe Chicken. This dish effortlessly combines the classic essence of Cacio E Pepe, a Roman pasta favorite, with succulent chicken, making it one of the most appealing chicken recipes for any night of the week. As we all juggle busy lifestyles, this recipe not only saves time in the kitchen but also brings together health and taste without sacrificing flavor.

    Cacio E Pepe Chicken is perfect for everyone, from home cooks and busy parents to students on the go and diet-conscious individuals seeking a nutritious meal. With simple ingredients like chicken breasts and a few pantry staples, this recipe can be yours in just under 30 minutes. Besides being a winner in terms of convenience, it also offers a blend of protein, healthy fats, and essential nutrients, ensuring you enjoy a wholesome dish that supports your culinary adventures.

    Moreover, this recipe effortlessly aligns with various dietary preferences, making it gluten-free and easy to customize. Whether you’re a newlywed trying to impress your partner with your cooking skills or a traveler looking for comforting, familiar tastes, Cacio E Pepe Chicken is the ultimate answer to your culinary needs.

    Benefits and Advantages of Cacio E Pepe Chicken

    Cacio E Pepe Chicken isn’t just another dish; it represents a harmony of flavors that meets the demands of modern cooking. Here’s why this recipe stands out among other chicken recipes:

    1. Ease of Preparation

    Preparing Cacio E Pepe Chicken is a breeze, making it a perfect choice for busy schedules. With under ten easily accessible ingredients, even beginners can whip up this dish effortlessly while feeling like gourmet chefs.

    2. Health Benefits

    Combining protein-rich chicken with the goodness of olive oil, Pecorino Romano cheese, and a touch of black pepper, this dish promotes health without harsh dietary restrictions. The use of olive oil provides heart-healthy fats, while the cheese and pepper contribute essential nutrients and flavors.

    3. Versatile and Customizable

    This chicken recipe shines in its adaptability. Whether you’re looking for a vegetarian alternative, seeking to replace the chicken with tofu, or adjusting portion sizes for a family meal, this dish covers it all. Additionally, it can be made gluten-free by using gluten-free pasta or skipping it entirely, making it suitable for a variety of dietary needs.

    4. Flavor Explosion

    The vibrant flavors of Cacio E Pepe Chicken—rich, creamy, and savory—delight your taste buds, turning a simple weeknight dinner into a memorable culinary experience. The expertly combined ingredients create a comforting yet sophisticated dish that can impress guests or satisfy a craving for a hearty meal.

    5. Time-Saving

    In today’s fast-paced world, this recipe stands out due to its quick preparation and cooking time. With the whole meal ready in under half an hour, it helps you maintain a busy lifestyle while ensuring you and your family enjoy vibrant, delicious meals regularly.

    In summary, Cacio E Pepe Chicken offers a unique blend of simplicity, health, versatility, and flavor, making it a must-try addition to your collection of chicken recipes.

    Ingredients Overview

    Essential Ingredients for Cacio E Pepe Chicken

    Before diving into your cooking adventure, let’s gather everything you need for Cacio E Pepe Chicken. Here’s a detailed list of ingredients to bring this dish to life:

    1. Chicken Breasts (2 pieces, boneless and skinless)
    2. Rich in protein, chicken breasts offer the main source of nutrients in this recipe.

    3. Pecorino Romano Cheese (1 cup, grated)

    4. This hard, Italian cheese adds creaminess and umami flavor. For a vegan substitute, you can use nutritional yeast.

    5. Extra Virgin Olive Oil (3 tablespoons)

    6. A great source of healthy fats, olive oil is essential for sautéing and adds flavor.

    7. Black Pepper (to taste)

    8. Essential for that classic Cacio E Pepe taste. Freshly ground pepper is preferable.

    9. Salt (to taste)

    10. Enhances the dish’s flavors; use sparingly, as Pecorino can be salty.

    11. Chicken Broth (1/2 cup, low-sodium)

    12. Adding moisture and depth to the flavors, low-sodium broth is a healthier choice.

    13. Garlic (2 cloves, minced)

    14. Brings aromatic flavor, enhancing the entire dish.

    15. Lemon (1, zested and juiced)

    16. Provides brightness and acidity; lemon zest adds a fresh note.

    Dietary Substitutions to Customize Your Cacio E Pepe Chicken

    1. For Gluten-Free Options
    2. Replace pasta with gluten-free spaghetti or zoodles (zucchini noodles) for a lower-carb option. Using gluten-free breadcrumbs can also help if you’d like to create a crispy topping.

    3. For Lower Calorie Needs

    4. Opt for skinless chicken thighs for tenderness with fewer calories or reduce cheese for a lighter dish. Plant-based chicken alternatives like chickpeas or lentils can be substitutes for varying protein sources.

    5. Dairy-Free Alternatives

    6. Use cashew cream or coconut milk mixed with nutritional yeast to achieve creaminess without dairy.

    7. Vegetarian Version

    8. Swap chicken for thick-cut mushrooms or eggplant, which can absorb flavors well while providing a hearty bite.

    9. Spicy Variation

    10. For a kick, add crushed red pepper flakes to the dish while cooking.

    These substitutions ensure that your Cacio E Pepe Chicken fits a range of dietary needs while providing the same delightful experience.

    How to Prepare the Perfect Cacio E Pepe Chicken: Step-by-Step Guide

    Creating Cacio E Pepe Chicken is straightforward. Let’s dive into this step-by-step guide that makes cooking enjoyable:

    1. Prepare the Base:
    2. Begin by seasoning the chicken breasts lightly with salt and freshly ground black pepper on both sides. Set aside.

    3. Cook the Chicken:

    4. In a large skillet, heat the extra virgin olive oil over medium-high heat. Once hot, add the seasoned chicken breasts. Sear on both sides for about 5-6 minutes, or until golden brown and cooked through. Use a meat thermometer to ensure they reach an internal temperature of 165°F (75°C). Remove the chicken from the skillet and set aside on a plate.

    5. Sauté Garlic:

    6. In the same skillet, lower the heat to medium and add minced garlic. Sauté for about 1-2 minutes, stirring frequently, until fragrant and lightly golden. Be cautious not to burn it, as burnt garlic can turn bitter.

    7. Add Broth and Cheesiness:

    8. Pour in the chicken broth and bring it to a gentle simmer. Scrape any browned bits from the skillet to infuse the broth with flavor. Ensure it simmers for about 3-5 minutes.

    9. Create Sauce:

    10. Stir in the grated Pecorino Romano cheese gradually until melted and creamy. If the sauce is too thick, add more broth or a splash of water until you reach your desired consistency.

    11. Incorporate Chicken:

    12. Once the sauce is creamy, return the cooked chicken to the skillet, spooning the sauce over to ensure it’s well coated. Cook on low for an additional 2-3 minutes.

    13. Finish with Lemon:

    14. Add the zest and juice of the lemon, stirring to combine. This will add brightness. You can also sprinkle extra black pepper to taste.

    15. Serve:

    16. Remove from heat and serve Cacio E Pepe Chicken atop a bed of your choice of pasta, zucchini noodles, or alongside a fresh salad.

    Optional Step:

    1. Garnish:
    2. For an added touch, sprinkle with extra Pecorino and fresh herbs, such as parsley or basil, before serving.

    This simple step-by-step approach guarantees delicious results while allowing for easy modifications that suit your dietary preferences.

    Mastering Cacio E Pepe Chicken: Advanced Tips and Variations

    Elevate your Cacio E Pepe Chicken experience with these advanced tips and variations:

    1. Experiment with Pasta:
    2. While chicken is the star, consider adding traditionally cooked pasta to the dish. Toss your favorite pasta (like spaghetti, fettuccine, or whole-grain choices) right at the end, incorporating it with the chicken for a hearty meal.

    3. Using Other Proteins:

    4. Swap out chicken for shrimp or scallops for a seafood twist, both of which pair beautifully with the rich and creamy cheese sauce.

    5. Smoky Flavor Add-In:

    6. Introduce smoked paprika for a subtle smoky flavor profile, adding a modern twist to this traditional dish.

    7. Add Vegetables:

    8. Incorporate in-season vegetables like spinach, peas, or asparagus, sautéing them alongside the garlic for added color and nutrition.

    9. Make it a Bake:

    10. Transfer everything (post-step 8) to a baking dish, sprinkle with extra cheese, and bake at 375°F (190°C) until bubbly and golden, approximately 15-20 minutes, for a delightful cheese crust.

    Experimenting with Cacio E Pepe Chicken allows you to create a variety of dishes using the same base recipe. Each twist adds a unique flavor experience while staying true to the original concept.

    How to Store Cacio E Pepe Chicken: Best Practices

    To keep your Cacio E Pepe Chicken fresh for later enjoyment, follow these best storage practices:

    Refrigeration:

    • Place any leftover Cacio E Pepe Chicken in an airtight container and store it in the refrigerator. It can stay fresh for up to 3-4 days.

    Freezing:

    • To freeze, first allow the chicken to cool completely. Then, wrap individual portions tightly in plastic wrap followed by aluminum foil, or simply use a freezer-safe airtight container. Cacio E Pepe Chicken can maintain quality for about 2-3 months in the freezer.

    Reheating:

    • When you’re ready to enjoy your leftover dish, thaw the chicken in the refrigerator for several hours or overnight.
    • Reheat it gently in a skillet over low heat, adding a splash of chicken broth or water to retain moisture, ensuring it doesn’t dry out. Alternatively, you can microwave it for a quick option, covered, to steam without losing the sauce’s richness.

    With these storage techniques, you can enjoy the comforting flavors of Cacio E Pepe Chicken again without sacrificing quality or taste.

    Nutritional Value of Cacio E Pepe Chicken

    Cacio E Pepe Chicken not only delights your palate but also nourishes your body. Here’s a breakdown of the nutritional profile for one serving (considering two servings from the recipe described):

    • Calories: 450-500
    • Protein: 40g
    • Carbohydrates: 6g (if served without pasta)
    • Fat: 30g
    • Saturated Fat: 10g
    • Cholesterol: 120mg
    • Sodium: 800mg
    • Fiber: 0g (with dietary fiber increase if vegetables or whole-grain pasta are added)

    Nutritional Benefits:

    • High Protein Source: Perfect for those looking to build muscle or stay satiated throughout the day.
    • Source of Healthy Fats: Providing dozes of monounsaturated fats for heart health.
    • Calcium and Phosphorus: Essential for bone health, thanks to the cheese.

    Understanding the nutritional value of Cacio E Pepe Chicken allows you to enjoy it guilt-free, tailored to suit your dietary goals.

    FAQs: Frequently Asked Questions About Cacio E Pepe Chicken

    1. Can I make this recipe ahead of time?
    2. Yes! You can prepare the Cacio E Pepe Chicken ahead of time, refrigerate, and simply reheat when you’re ready to serve.

    3. Can I use other types of cheese?

    4. Absolutely! While Pecorino Romano is traditional, Parmesan or Grana Padano can work well too. For a dairy-free version, nutritional yeast is a great substitute.

    5. Is it suitable for freezing?

    6. Yes, Cacio E Pepe Chicken can be frozen and reheated later. Follow the proper storage methods to maintain its deliciousness.

    7. Can I make this recipe vegetarian?

    8. Yes! Substitute the chicken with hearty vegetables like mushrooms or cauliflower, and follow the same cooking procedure.

    9. How spicy can I make it?

    10. If you enjoy heat, consider adding crushed red pepper flakes or a dash of your favorite hot sauce to the dish for that extra kick!

    11. What should I serve with Cacio E Pepe Chicken?

    12. Serve it alongside a fresh garden salad, garlic bread, or your favorite pasta to round out the meal.

    By addressing common questions, we hope to assist you in your cooking journey and inspire confidence in preparing this beautiful dish.

    Cacio E Pepe Chicken is a versatile, delicious meal that fits into any dietary preference and makes for a delightful addition to your repertoire of chicken recipes. Enjoy every moment of creating and savoring this sophisticated dish!

  • Mediterranean Chicken Gyros with Creamy Feta Tzatziki

    Mediterranean Chicken Gyros with Creamy Feta Tzatziki

    Mediterranean Chicken Gyros with Creamy Feta Tzatziki: A Tropical Delight

    Introduction to Mediterranean Chicken Gyros with Creamy Feta Tzatziki

    If you’re on the lookout for a fulfilling meal that’s not only delicious but also easy to prepare, look no further than Mediterranean Chicken Gyros with Creamy Feta Tzatziki. As one of the best chicken recipes you’ll ever make, this dish brings the vibrant flavors of the Mediterranean straight to your kitchen. With tender, marinated chicken, crunchy veggies, and a creamy sauce, it offers a balance of taste and health benefits that busy parents, food enthusiasts, and diet-conscious individuals will surely appreciate.

    Not only does this meal cater to a variety of dietary needs, but it can also be effortlessly adjusted to suit vegan and gluten-free alternatives. The convenience of this recipe makes it perfect for anyone—from students preparing quick meals to newlyweds honing their cooking skills.

    Furthermore, the health benefits are noteworthy. Chicken is an excellent source of protein, while the vegetables add essential vitamins and minerals. The creamy feta tzatziki provides a dose of healthy fats, making each bite a delightful mix of nourishment and flavor. As you read on, you’ll discover how simple it is to whip up these Mediterranean Chicken Gyros in the comfort of your home.

    Benefits and Advantages of Mediterranean Chicken Gyros with Creamy Feta Tzatziki

    When it comes to weeknight dinners or weekend meal prep, Mediterranean Chicken Gyros with Creamy Feta Tzatziki stand out for several reasons. First, this recipe is incredibly simple to follow. It requires minimal cooking skills and can be prepared in under an hour, making it an ideal choice for busy individuals or families. For those who love spending time in the kitchen, the marinating process allows you to infuse rich flavors into the chicken, upping the dish’s appeal.

    In addition to being easy to prepare, this meal is also packed with health benefits. Chicken breast is leaner than other cuts, making it a preferred choice for health-conscious eaters. The tzatziki sauce, made from Greek yogurt and feta cheese, is rich in probiotics and calcium, promoting gut health and strong bones. Veggies such as cucumbers and tomatoes offer hydration and antioxidants, ensuring a well-rounded meal.

    Moreover, this dish offers versatility. It can be served in pita bread, as a salad, or even in a grain bowl, appealing to different palates and preferences. Whether you’re a senior looking for nutritious meals or a student living on a budget, this recipe can be easily tailored to fit your lifestyle.

    By including Mediterranean Chicken Gyros in your meal rotation, you’re not just enjoying a delicious meal; you’re also making a commitment to simple ingredients and wholesome flavors that benefit your overall well-being.

    Ingredients Overview

    Essential Ingredients for Mediterranean Chicken Gyros with Creamy Feta Tzatziki

    To create mouthwatering Mediterranean Chicken Gyros with Creamy Feta Tzatziki, gather the following ingredients:

    For the Chicken Marinade:

    • 2 lbs chicken breast (Hormone-free, skinless preferred for health benefits)
    • 3 tablespoons olive oil (provides healthy fats and enhances flavor)
    • 4 cloves garlic, minced (adds flavor and has numerous health benefits)
    • 1 tablespoon dried oregano (brings a traditional Mediterranean taste)
    • 1 teaspoon paprika (adds color and mild sweetness)
    • Salt and pepper to taste

    For the Tzatziki Sauce:

    • 1 cup Greek yogurt (high in protein and probiotics)
    • ½ cucumber, grated and drained (adds freshness)
    • 2 tablespoons feta cheese, crumbled (adds creaminess)
    • 1 clove garlic, minced (for flavor)
    • 1 tablespoon lemon juice (balances flavors and adds acidity)
    • Salt to taste

    For Serving:

    • 4 pita breads (whole wheat or gluten-free options available)
    • 1 cup lettuce, shredded
    • 1 cup tomatoes, diced
    • ½ red onion, thinly sliced
    • Fresh parsley, for garnish (optional)

    These ingredients not only work harmoniously to create delightful flavors but also offer various health benefits, making them suitable for a range of dietary preferences.

    Dietary Substitutions to Customize Your Mediterranean Chicken Gyros with Creamy Feta Tzatziki

    If you’re looking to cater to specific dietary needs, consider the following substitutions for Mediterranean Chicken Gyros:

    • Vegan Option: Swap the chicken with marinated tofu or jackfruit. Use a plant-based yogurt for the tzatziki sauce, such as almond or coconut yogurt.
    • Gluten-Free Option: Use gluten-free pita bread or burrito wraps. You may also serve the chicken and tzatziki over a salad instead of in bread.
    • Low-Calorie Option: Opt for grilled or baked chicken thighs instead of breasts for more flavor with less fat. You can also reduce the amount of feta in the tzatziki to lower calories.

    When accommodating dietary alternatives, always check for certified products. Ingredients like gluten-free pita bread or plant-based yogurts are increasingly easier to find. Being creative with substitutes allows you to enjoy this recipe while adhering to your nutritional preferences.

    How to Prepare the Perfect Mediterranean Chicken Gyros with Creamy Feta Tzatziki: Step-by-Step Guide

    Now that you have your ingredients prepped, it’s time to dive into the cooking process. Follow this step-by-step guide to create your very own Mediterranean Chicken Gyros with Creamy Feta Tzatziki:

    1. Marinate the Chicken:
    2. In a bowl, mix together olive oil, minced garlic, oregano, paprika, salt, and pepper.
    3. Add the chicken breast to the marinade, ensuring each piece is fully coated. Let it marinate for at least 30 minutes. If you can, marinate for a few hours or overnight to deepen the flavors.

    4. Prepare the Tzatziki Sauce:

    5. In another bowl, combine Greek yogurt, grated cucumber (make sure to squeeze out excess water), garlic, lemon juice, and crumbled feta.
    6. Mix until smooth and creamy. Adjust salt to taste.
    7. Refrigerate while you cook the chicken to allow flavors to meld.

    8. Cook the Chicken:

    9. Preheat your grill or stovetop grill pan over medium-high heat.
    10. Remove the chicken from the marinade and place it on the hot grill. Cook for about 6-8 minutes on each side, or until the internal temperature reaches 165°F (75°C).
    11. After cooking, let the chicken rest for a few minutes before slicing to retain juices.

    12. Warm the Pita:

    13. While the chicken is resting, warm the pita bread on the grill for about 1-2 minutes per side until they are soft and pliable.

    14. Assemble the Gyros:

    15. Slice the cooked chicken into strips.
    16. On each piece of pita bread, layer lettuce, diced tomatoes, red onion, and the sliced chicken.
    17. Generously drizzle the creamy feta tzatziki sauce over the top.

    18. Finish with Garnish:

    19. Sprinkle fresh parsley on top for an added burst of flavor and presentation.
    20. Wrap the pita and serve immediately. Enjoy your delicious Mediterranean Chicken Gyros!

    Tips for Modification

    • For a spicy kick, add sliced jalapeños or a pinch of red pepper flakes to your tzatziki.
    • If you’d like to include more veggies, consider slicing bell peppers or grilling zucchini to include in your gyros.

    With this easy and quick guide, you can whip up this delightful dish that’s perfect for any occasion.

    Mastering Mediterranean Chicken Gyros with Creamy Feta Tzatziki: Advanced Tips and Variations

    To elevate your Mediterranean Chicken Gyros experience, consider these advanced tips and variations:

    • Marinate Longer: For the best flavor, let your chicken marinate overnight. The longer it sits, the more flavorful it becomes.
    • Grilled Vegetables: Add grilled vegetables such as eggplant or zucchini to your gyros for extra texture and flavor.
    • Try Different Meats: Swap chicken for lamb or beef for a different taste. Just be mindful of their respective cooking times.
    • Serve with Side Dishes: Pair your gyros with Greek salad, roasted potatoes, or couscous for a complete meal.
    • Make it a Meal Prep: Prepare multiple servings of the chicken and tzatziki ahead of time. Store in individual containers for easy grab-and-go lunches throughout the week.

    These variations will keep the dish exciting and adaptable to your evolving palate or dietary needs.

    How to Store Mediterranean Chicken Gyros with Creamy Feta Tzatziki: Best Practices

    If you find yourself with leftovers or want to meal prep, here are the best methods for storing your Mediterranean Chicken Gyros with Creamy Feta Tzatziki:

    • Refrigeration: Store leftover chicken gyros in an airtight container in the fridge for up to 3 days. Assemble the gyros fresh to prevent the pita from becoming soggy.
    • Freezing Chicken: The cooked chicken can be frozen for up to 3 months. Ensure it’s tightly wrapped or sealed in a freezer bag. Thaw in the fridge before reheating.
    • Reheating Chicken: To reheat, place chicken in the microwave or oven. If using the oven, cover with foil to retain moisture and heat at 350°F (175°C) for about 15 minutes or until warmed through.

    Be cautious not to freeze the tzatziki, as it may separate when thawed. Simply whip up a fresh batch when you’re ready to enjoy your gyros again.

    Nutritional Value of Mediterranean Chicken Gyros with Creamy Feta Tzatziki

    Understanding the nutritional value can help incorporate Mediterranean Chicken Gyros into your diet mindfully. Here’s a breakdown of this dish’s nutritional information per serving:

    • Calories: Approximately 450
    • Protein: 36g
    • Total Fat: 20g (includes healthy fats from olive oil and feta)
    • Carbohydrates: 25g
    • Fiber: 4g
    • Sugar: 3g

    These gyros stand out as a well-balanced meal, providing sufficient protein, healthy fats, and carbohydrates, making them a worthwhile addition to anyone’s recipe collection, particularly those focused on healthy chicken recipes.

    FAQs: Frequently Asked Questions About Mediterranean Chicken Gyros with Creamy Feta Tzatziki

    Can I make these gyros in advance?

    Yes! You can marinate the chicken and prepare the tzatziki sauce ahead of time. For best results, assemble the gyros shortly before serving to keep the pita fresh.

    Is there a vegetarian alternative to chicken?

    Absolutely! Consider using marinated tofu or grilled portobello mushrooms. Both can deliver great flavor while keeping the essence of this dish intact.

    How can I make the dish spicier?

    Incorporate red pepper flakes into the chicken marinade or add sliced jalapeños into your gyro before serving for an extra kick.

    What to serve with Mediterranean Chicken Gyros?

    These gyros pair beautifully with a Greek salad, roasted vegetables, or even fries for a satisfying meal.

    Can I substitute Greek yogurt for the tzatziki sauce?

    If lactose intolerant or vegan, use a plant-based yogurt, ensuring your shaker incorporates those fresh cucumber flavors.

    Mediterranean Chicken Gyros with Creamy Feta Tzatziki is not just a meal; it’s an experience filled with vibrant flavors and health benefits. Whether you’re cooking for yourself or hosting a dinner party, this dish will certainly impress your guests and family alike. Enjoy cooking this delightful recipe and make it a staple in your rotating menu!

  • Melt In Your Mouth Caesar Chicken

    Melt In Your Mouth Caesar Chicken

    Melt In Your Mouth Caesar Chicken: A Tropical Delight

    Introduction to Melt In Your Mouth Caesar Chicken

    Welcome to the culinary adventure of creating the Melt In Your Mouth Caesar Chicken! If you’re on the lookout for irresistible chicken recipes that meld rich flavors and health benefits, you’ve come to the right place. This dish is not just a meal; it’s a delightful experience for your taste buds. Imagine tender, juicy chicken fillets complemented by a creamy Caesar dressing bursting with zesty herbs and spices. What’s more? It’s remarkably simple to prepare, making it an ideal choice for busy parents, working professionals, and even cooking novices.

    Not only is this recipe packed with flavor, but it can also cater to various dietary preferences – whether you’re vegetarian, gluten-free, or looking for a low-calorie option. Its versatility ensures that you can enjoy a wholesome dinner any day of the week. Furthermore, this Caesar chicken can easily fit within a balanced diet, offering lean protein that fits the needs of fitness enthusiasts and diet-conscious individuals alike. As you venture into this delectable journey, know that you’re preparing a dish that brings joy not only to your palate but also to your loved ones.

    Dive into the world of melt-in-your-mouth chicken recipes; you won’t regret it!

    Benefits and Advantages of Melt In Your Mouth Caesar Chicken

    One of the most compelling reasons to embrace the Melt In Your Mouth Caesar Chicken is its extraordinary ease of preparation. With just a handful of accessible ingredients, you can create a hearty and sumptuous dish that feels gourmet. This is perfect for home cooks who may not have hours to devote to dinner preparation.

    Health benefits abound! This chicken dish is not only low in carbohydrates but also high in protein, making it a wonderful meal for those focused on maintaining muscle mass or managing their weight. Additionally, protein-rich meals have been proven to keep you satiated longer, potentially preventing unhealthy snacking later in the day.

    What makes this recipe stand out among other chicken recipes is its adaptability. You can easily swap out protein sources or dressings to suit your unique dietary needs. If you desire a vegan option, substitute chicken with tofu or chickpeas, and use plant-based Caesar dressing without compromising the creamy texture and bold flavor. Additionally, if you are specifically looking for gluten-free alternatives, many amazing gluten-free bread options exist for croutons, ensuring everyone can enjoy this dish without worry.

    Moreover, this Melt In Your Mouth Caesar Chicken is not just flavorful; it’s also visually appealing. The vivid greens of Romaine lettuce paired with grilled chicken leaves an inviting presentation, enhancing the dining experience. In conclusion, this easy-to-make dish ensures that your meals are healthy, delightful, and suitable for a myriad of dietary preferences, making it a go-to recipe for all occasions.

    Ingredients Overview

    Essential Ingredients for Melt In Your Mouth Caesar Chicken

    To create your Melt In Your Mouth Caesar Chicken, gather the following key ingredients:

    • Chicken Breasts (4 medium-sized): The lean protein base of the dish, promoting muscle health.
    • Caesar Dressing (1 cup): A creamy and flavorful accompaniment. Look for versions that are low-calorie or vegan if you want a healthier option.
    • Romaine Lettuce (1 head, chopped): The classic base that adds crunch and nutrients.
    • Parmesan Cheese (½ cup, grated): A deliciously rich cheese that enhances flavor. Vegan cheese alternatives can be used for a plant-based diet.
    • Croutons (1 cup): Often made from rustic bread, adding a satisfying crunch. Gluten-free bread can be used for a gluten-free version.
    • Olive Oil (2 tablespoons): For sautéing, offering healthy fats that are good for heart health.
    • Garlic Powder (1 teaspoon): Adds depth of flavor without overpowering the dish.
    • Salt and Pepper (to taste): Essential seasonings that enhance all flavors.

    This list brings together common ingredients you may already have at home with substitutions to cater to various dietary needs.

    Dietary Substitutions to Customize Your Melt In Your Mouth Caesar Chicken

    • To replace Chicken for a vegan option: Use tofu or tempeh, marinated in the same Caesar sauce to absorb flavors. This will offer a distinct texture while keeping it meat-free.

    • For a low-calorie option: Choose skinless chicken breasts and opt for a light Caesar dressing or homemade versions using Greek yogurt.

    • Gluten-free adjustments: When making your croutons, you can select gluten-free bread, ensuring that this dish can be enjoyed by those with gluten sensitivities or celiac disease.

    • Dairy-free alternatives: Use nutritional yeast or vegan cheese in place of Parmesan to maintain that cheesy essence without dairy.

    When it comes to creating chicken recipes, this dish stands out for its flexibility. Feel free to play around with ingredients and make it your own!

    How to Prepare the Perfect Melt In Your Mouth Caesar Chicken: Step-by-Step Guide

    Creating a Melt In Your Mouth Caesar Chicken is straightforward and rewarding. Follow these easy steps to orchestrate this delightful dish:

    1. Prepare the Base: Start by preheating your grill or oven to medium-high heat. If using chicken breasts, pound them to an even thickness (about ¾ inch) to ensure uniform cooking.

    2. Marinate the Chicken: In a bowl, combine your chicken breasts with ½ cup of Caesar dressing, ensuring they’re well-coated. Let them marinate for at least 30 minutes for maximum flavor absorption or refrigerate overnight if you plan ahead.

    3. Grill the Chicken: Place the marinated chicken on the grill. Cook each side for about 6-8 minutes, or until the internal temperature reaches 165°F. If you prefer, you can bake the chicken for about 25-30 minutes, turning halfway through.

    4. Prepare the Lettuce: While the chicken is cooking, wash and chop the Romaine lettuce. Place it in a serving bowl, and if you like, toss it with a splash of Caesar dressing to enhance flavor.

    5. Combine Ingredients: Once the chicken is cooked, remove it from the grill and let it rest for about 5 minutes. Slice the chicken into strips, ensuring each piece retains its juiciness.

    6. Add to the Salad: Top the chopped Romains lettuce with the grilled chicken strips. Sprinkle with grated Parmesan cheese and toss in croutons for added texture.

    7. Dress it Up: Finish off by drizzling any remaining Caesar dressing over the salad to your taste.

    8. Serve & Enjoy: Your Melt In Your Mouth Caesar Chicken is now ready to be enjoyed! Serve immediately while the chicken is warm for the best flavors.

    This step-by-step guide ensures that even novice cooks can create an incredible dish. Adapt each step based on your dietary preferences; all these adjustments make this recipe even more delightful!

    Mastering Melt In Your Mouth Caesar Chicken: Advanced Tips and Variations

    To elevate your Melt In Your Mouth Caesar Chicken, consider these advanced tips and variations:

    • Flavor Infusion: Try marinating the chicken in lemon juice and zest along with the Caesar dressing. This adds a bright acidity that balances the creamy dressing beautifully.

    • Herb Variations: Incorporating fresh herbs, like basil or cilantro, can introduce a new dimension of flavor. Simply mix them into your dressing or sprinkle them on top before serving.

    • Veggie Additions: Enhance the nutrition by adding avocado slices, cherry tomatoes, or even grilled bell peppers for a colorful presentation.

    • Make it a Wrap: Transform this Caesar chicken salad into a wrap by placing all the ingredients in a large tortilla or lettuce wrap. Such variations offer portable and fun meal options.

    • Alternative Proteins: Consider using shrimp or salmon instead of chicken for a seafood twist. These proteins pair excellently with Caesar flavors.

    By thinking outside the box, you transform traditional chicken recipes into uniquely personal dishes!

    How to Store Melt In Your Mouth Caesar Chicken: Best Practices

    Storage is essential for maintaining the freshness of your Melt In Your Mouth Caesar Chicken. Here are the best practices:

    • Refrigeration: Store leftovers in an airtight container in the fridge for up to 3 days. This helps keep the chicken moist while preventing other odors from seeping in.

    • Freezing: While it’s not advisable to freeze the entire salad given the lettuce’s texture, you can freeze the grilled chicken separately. Wrap it tightly in plastic wrap or foil, then place it in a freezer-safe bag. It should last up to 3 months.

    • Reheating Tips: When reheating the chicken, avoid the microwave if possible, as it may dry out the meat. Opt for a skillet on low heat, adding a bit of water to create steam. This will keep the chicken moist.

    By following these storage practices, you can enjoy your delicious Caesar chicken throughout the week, without compromising flavor or texture.

    Nutritional Value of Melt In Your Mouth Caesar Chicken

    Understanding the nutritional profile of Melt In Your Mouth Caesar Chicken is easy when considering how it benefits your health. Here’s an estimated breakdown per serving:

    • Calories: 450-500 (Depending on specific ingredients used)
    • Protein: 35-40g
    • Carbohydrates: 15-20g
    • Fats: 25-30g
    • Saturated Fats: 5-7g
    • Fiber: 2-3g
    • Sugar: 1g
    • Sodium: 800-1000mg (varies with dressing)

    The combination of lean protein from chicken and healthy fats from olive oil offers a balanced meal profile. By leveraging healthy substitutions, you can easily reduce calories or sodium levels without sacrificing the dish’s heartiness.

    Knowing the nutrition can help you make informed decisions about meal portions and ingredient choices, making this a valuable addition to your collection of chicken recipes.

    FAQs: Frequently Asked Questions About Melt In Your Mouth Caesar Chicken

    Here are some common questions regarding the Melt In Your Mouth Caesar Chicken recipe:

    1. Can I use other types of chicken?
    2. Absolutely! You can use chicken thighs for a juicier bite or even shredded rotisserie chicken for a quick option.

    3. How can I make it dairy-free?

    4. Simply swap out Parmesan cheese for nutritional yeast or a dairy-free alternative, and use a vegan Caesar dressing.

    5. What if I don’t have Caesar dressing on hand?

    6. A DIY version can be made using Greek yogurt, Dijon mustard, lemon juice, garlic, and anchovy paste for flavor.

    7. Can I prepare this in advance?

    8. Yes! The chicken can be marinated the night before, and you can assemble the salad just before serving to maintain freshness.

    9. Is this suitable for meal prep?

    10. Certainly! Just keep the salad ingredients separate from the chicken and dressing, and assemble at mealtime to preserve freshness.

    11. What are some pairings for this dish?

    12. This Caesar chicken pairs well with roasted vegetables, quinoa, or even fresh fruit for a well-rounded meal.

    This FAQ section aims to clarify any hesitations about preparing your Melt In Your Mouth Caesar Chicken, ensuring a smooth cooking experience.


    In conclusion, the Melt In Your Mouth Caesar Chicken is an exemplary recipe worthy of your kitchen. Its simplicity, versatility, and delightful flavors ensure that it fits seamlessly into your meal repertoire. Whether you’re an experienced chef or a culinary novice, this dish is just what you need for your weekly meals. So, gather those ingredients, unleash your inner chef, and enjoy your new favorite chicken recipe!

  • Cajun Wings

    Cajun Wings

    Cajun Wings: A Tropical Delight

    Introduction to Cajun Wings

    Cajun wings bring the heat and the flavor, making them an exceptional choice for anyone looking to elevate their chicken recipes. These spicy, savory delights are perfect for casual gatherings, cozy family dinners, or even a late-night snack. With the combination of bold Cajun spices and succulent chicken, this recipe is bound to become a household favorite.

    What makes Cajun wings appealing is their simplicity. The process of preparing them is quick and straightforward, making it easy for busy parents and working professionals to dive into the kitchen without stress. Moreover, this dish can accommodate various dietary preferences, including gluten-free and low-calorie versions, making Cajun wings a versatile option. Whether you enjoy them alongside a cooling dip or on their own, these wings pack a flavorful punch that satisfies any craving.

    When preparing Cajun wings, you can look forward to health benefits as well. Chicken is a great source of lean protein, packed with essential vitamins and minerals. By opting for baking instead of frying, you can create a lower-fat dish that doesn’t compromise on taste. With countless chicken recipes available, Cajun wings stand out for their exciting spices and adaptiveness to numerous palates. Gather your ingredients and get ready to impress yourself and your guests with this tantalizing recipe!

    Benefits and Advantages of Cajun Wings

    Cajun wings offer numerous advantages that make them an excellent choice for home cooks of all skill levels. Firstly, the ease of preparation allows you to whip up a batch even if you’re short on time. A simple spice blend and a few minutes of baking can lead to a delicious meal or snack that everyone will love. For busy families and students, these wings provide a fantastic way to enjoy a home-cooked dish without spending hours in the kitchen.

    Health-wise, Cajun wings boast a significant number of benefits due to their main ingredient: chicken. Lean chicken is rich in protein, which helps in muscle building and provides long-lasting energy. Moreover, innovative ingredient substitutions can cater to various dietary regulations, making them suitable for health-conscious individuals and those with dietary restrictions.

    A unique feature of Cajun wings is their customization potential. You can easily adjust the spice levels based on your family’s preferences, providing a tailored dish that suits various tastes. For those seeking vegetarian options, swapping out chicken for plant-based alternatives presents endless possibilities to enjoy Cajun flavors without compromising dietary choices.

    In conclusion, Cajun wings aren’t just delicious; they’re also accessible, healthful, and highly adaptable, making them an exceptional addition to your repertoire of chicken recipes. Whether it’s a family dinner, game night, or a special occasion, these wings promise to satisfy and impress all guests.

    Ingredients Overview

    Essential Ingredients for Cajun Wings

    To create your own batch of scrumptious Cajun wings, you will need the following ingredients:

    • 2 lbs chicken wings: Choose fresh, organic wings for the best flavor.
    • 2 tablespoons olive oil: This adds richness and helps the spices adhere to the wings.
    • 1 tablespoon Cajun seasoning: A blend of spices typical of Cajun cuisine, provides heat and flavor. [Vegan option: Use plant-based protein wings.]
    • 1 teaspoon garlic powder: Adds depth and enhances the umami flavor.
    • 1 teaspoon onion powder: Complements the garlic and rounds out the spice profile.
    • 1 teaspoon smoked paprika: Provides a hint of smokiness to balance the spices.
    • Salt and pepper to taste: Seasoning to enhance the natural flavors of the chicken.
    • Fresh parsley for garnish: Optional, but adds freshness and a pop of color to your dish.

    Taking a moment to understand these ingredients can help you appreciate the complexity of flavors in this dish. Each adds not only taste but also nutrition, making this recipe a great choice for feeding your family or whipping up a fun treat for yourself.

    Dietary Substitutions to Customize Your Cajun Wings

    Customization is key to making your Cajun wings suitable for anyone’s dietary needs. Here are a few suggestions to modify the recipe:

    • Gluten-Free: Ensure that the Cajun seasoning you use is gluten-free, as some blends may contain wheat-based fillers.
    • Vegan: Swap chicken wings for plant-based protein options, such as cauliflower or tofu. This substitution not only accommodates vegans but also adds an intriguing twist to the classic recipe.
    • Low-Calorie: Baking the wings instead of frying drastically reduces the calorie content. In addition, you can use a minimal amount of olive oil or replace it with a non-stick cooking spray.

    These substitutions maintain the essence of classic Cajun wings while enhancing dietary flexibility, ensuring everyone at your table can enjoy this delightful dish.

    How to Prepare the Perfect Cajun Wings: Step-by-Step Guide

    Creating Cajun wings can be a fun and satisfying experience. Follow these simple steps to prepare these delicious chicken recipes.

    1. Preheat the Oven: Start by preheating your oven to 400°F (200°C). This temperature allows the wings to cook evenly and become crisp without frying.

    2. Prepare the Wings: Rinse the chicken wings under cold water and pat them dry with paper towels. This step is crucial for achieving a crispy texture.

    3. Mix Ingredients: In a mixing bowl, combine the olive oil, Cajun seasoning, garlic powder, onion powder, smoked paprika, salt, and pepper. Whisk until well blended, creating a flavorful coating for the wings.

    4. Coat the Wings: Add the chicken wings to the bowl and toss them in the mixture until all wings are evenly coated. For extra flavor, you can marinate them for at least 30 minutes, or even overnight.

    5. Arrange on Baking Sheet: Line a baking sheet with parchment paper or aluminum foil for easy clean-up. Arrange the wings in a single layer, ensuring they have space in between for even cooking.

    6. Bake the Wings: Place the baking sheet in the preheated oven and bake for 40-45 minutes, flipping the wings halfway through to get them crispy on both sides.

    7. Check for Doneness: Use a meat thermometer to ensure the internal temperature reaches 165°F (74°C), confirming that the wings are fully cooked.

    8. Garnish and Serve: Once baked, remove the wings from the oven, let them cool for a few minutes, then garnish with freshly chopped parsley before serving. Pair with your favorite dipping sauce, like ranch or blue cheese dressing.

    By following this step-by-step guide, you can create mouth-watering Cajun wings that are both satisfying and delicious. Plus, these instructions can easily be adapted based on dietary needs or preference.

    Mastering Cajun Wings: Advanced Tips and Variations

    While the basic recipe for Cajun wings is fantastic, there are several advanced tips and variations that can elevate your dish further.

    • Add Unique Flavors: Incorporate your favorite spices into the Cajun seasoning to make it your own. Consider adding a pinch of cayenne pepper for extra heat or a hint of honey to balance the spice.
    • Experiment with Cooking Methods: While baking is straightforward and healthy, you can also try air-frying the wings for a crispier exterior without excessive oil. Alternatively, grilling them adds a smoky flavor that complements the Cajun spices beautifully.
    • Sauce It Up: After baking, toss the wings in a homemade BBQ sauce or a spicy buffalo sauce for an extra kick. This additional layer of flavor creates a distinct version of Cajun wings.
    • Family-Friendly Variations: For young taste buds, reduce the spice level or serve the wings with a sweeter honey mustard sauce as a dip. It makes it easier for little ones to enjoy the meal while maintaining the integrity of the dish.

    By applying these advanced tips and variations, you can personalize your Cajun wings to suit any occasion or palate, ensuring that your guests are continually surprised and delighted.

    How to Store Cajun Wings: Best Practices

    Storing Cajun wings properly helps maintain their deliciousness for future meals. Here are the best practices for refrigeration, freezing, and reheating this dish:

    • Refrigeration: Allow leftover wings to cool completely, then transfer them to an airtight container. They can safely be stored in the refrigerator for up to 3 days.

    • Freezing: If you want to preserve your Cajun wings for a longer period, consider freezing. Pack them in a freezer-safe bag, removing as much air as possible before sealing. They can last in the freezer for up to 3 months.

    • Reheating: When ready to enjoy the leftovers, preheat the oven to 350°F (175°C). Place the wings on a baking sheet and reheat for about 15-20 minutes until hot and crispy again. You can also microwave them, but be mindful that this method may not yield a crispy texture.

    By following these storage practices, you can maximize the shelf life of your Cajun wings and have them ready for indulgence whenever the craving strikes.

    Nutritional Value of Cajun Wings

    Understanding the nutritional content of Cajun wings can help you make informed choices when enjoying this dish. The following are general nutritional values for a serving of approximately 4-5 wings:

    • Calories: ~400
    • Protein: ~30g
    • Fat: ~25g
    • Carbohydrates: ~2g
    • Fiber: ~0g
    • Sugars: ~0g

    Keep in mind that nutrient values can vary based on portion sizes and any modifications you make to the recipe. For example, opting for healthier cooking methods or using leaner cuts of chicken could further enhance the dish’s nutritional profile.

    Additionally, if you make substitutions—like using vegetable wings or a different cooking method—it’s essential to recalculate those figures to suit your dietary needs.

    In summary, Cajun wings can easily fit into various dietary lifestyles, offering a great mixture of protein and flavor while remaining relatively low in carbs.

    FAQs: Frequently Asked Questions About Cajun Wings

    Whether you’re new to cooking or have experience under your belt, you may still have questions about Cajun wings. Here are some common inquiries:

    Q1: Can I use frozen chicken wings?
    A1: Yes, you can use frozen chicken wings! However, be sure to thaw them completely before baking to ensure even cooking.

    Q2: How can I make Cajun wings less spicy?
    A2: To reduce the spiciness, consider using less Cajun seasoning or balancing it with a sweeter sauce like honey mustard for serving.

    Q3: What dipping sauces pair well with Cajun wings?
    A3: Traditional choices include ranch or blue cheese dressing. You can also try a spicy aioli or a citrus-based dip for a refreshing contrast.

    Q4: Can I prepare these wings ahead of time?
    A4: Absolutely! You can marinate the wings in the seasoning mix and refrigerate for several hours or overnight. Just remember to cook them fresh before serving for the best texture.

    Q5: Are there any nutritious alternatives to traditional wings?
    A5: Yes! You can use cauliflower or mushrooms as a plant-based alternative, creating a flavorful and satisfying dish for vegetarian or vegan diets.

    These FAQs address many common concerns, helping you navigate your Cajun wing-making journey without any hitches. Enjoy experimenting with this vibrant dish as you dive into one of the most delightful chicken recipes around!