Tag: casserole

  • Easy One-Pot Italian Sausage Orzo Dinner

    Easy One-Pot Italian Sausage Orzo Dinner

    Easy One-Pot Italian Sausage Orzo Dinner: A Tropical Delight

    Introduction to Easy One-Pot Italian Sausage Orzo Dinner

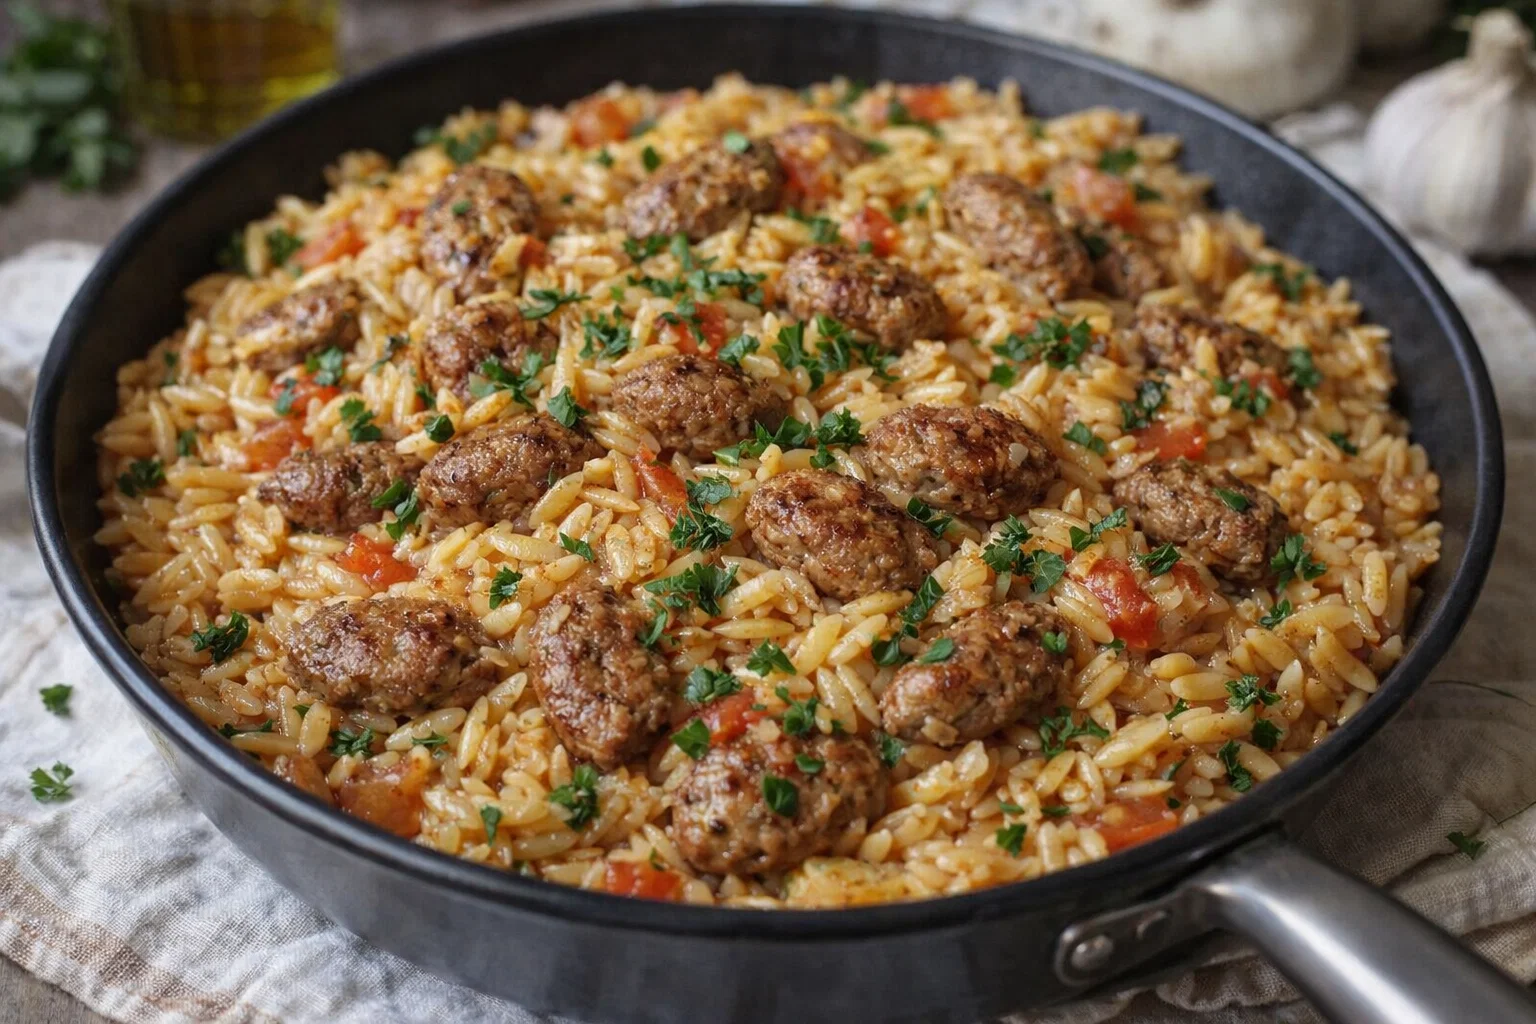
    Looking for easy dinner recipes that combine taste, health, and simplicity? Look no further than this Easy One-Pot Italian Sausage Orzo Dinner! This vibrant dish offers a delightful mix of flavors and textures, perfectly balanced with succulent Italian sausage, tender orzo pasta, and a colorful array of veggies. What sets this recipe apart is its one-pot preparation, making cleanup a breeze—ideal for busy weeknights or simple family meals.

    Imagine serving a dish that not only pleases the palate but is also a source of wholesome ingredients. Packed with protein and vitamins, this meal caters to various dietary needs, including options for vegetarians and health-conscious individuals. It’s versatile, too; you can easily modify it to suit your preferences or what’s available in your pantry.

    With its quick cooking time and minimal prep, this Easy One-Pot Italian Sausage Orzo Dinner can become a staple in your recipe rotation. Whether you’re a busy parent trying to squeeze dinner into a hectic schedule or a student locating ways to eat well on a budget, this recipe promises satisfaction without compromise. It’s a delectable Mediterranean-inspired dish that’s sure to impress guests, making it perfect for newlyweds and seasoned hosts alike. Let’s dive into the details to see why this recipe is not just a meal, but a culinary experience you’ll want to recreate.

    Benefits and Advantages of Easy One-Pot Italian Sausage Orzo Dinner

    The Easy One-Pot Italian Sausage Orzo Dinner is not just about convenience; it offers numerous benefits that elevate it as one of the best easy dinner recipes.

    1. Simplicity of Preparation

    This dish shines in its straightforward cooking process. With just one pot to manage, you’ll save time and effort in both the cooking and cleaning phases. No need for multiple pans and utensils; everything comes together harmoniously in one vessel. From sautéing the sausage to simmering the orzo, step-by-step, this recipe ensures you focus on enjoying the cooking experience rather than dreading the cleanup.

    2. Health Benefits

    The combination of Italian sausage and orzo provides a balanced meal rich in protein and complex carbohydrates. Plus, the inclusion of fresh veggies like spinach, bell peppers, and tomatoes means you’re also packing in essential vitamins and minerals—great for boosting your health. For those looking to reduce caloric intake, options for lean turkey sausage or even plant-based alternatives can satisfy your dietary preferences without sacrificing flavor.

    3. Versatility

    One of the standout features of this easy dinner recipe is its versatility. You can adapt it to fit various dietary needs. For gluten-free diets, simply substitute regular orzo with a gluten-free pasta option. Vegetarians can replace sausage with hearty tofu or beans for protein. The ability to customize based on what’s left in your fridge makes this dish perfect for home cooks who want to minimize waste.

    4. Family-Friendly

    This meal appeals to everyone—kids, adults, and seniors alike. With its vibrant colors and comforting flavors, even the pickiest eaters are likely to enjoy it. Plus, the ease of preparation means you can involve your children, making cooking a fun family activity that encourages them to learn about cooking healthy meals.

    5. Time Efficiency

    In an age where time is of the essence, this recipe stands out for its quick preparation and cooking times. With just 30 minutes from start to finish, you can serve a fulfilling meal that tastes as if it came from a fine restaurant without slaving away in the kitchen.

    These compelling benefits make the Easy One-Pot Italian Sausage Orzo Dinner your go-to option for nourishing meals that fit seamlessly into your busy lifestyle.

    Ingredients Overview

    Essential Ingredients for Easy One-Pot Italian Sausage Orzo Dinner

    Creating the most delicious Easy One-Pot Italian Sausage Orzo Dinner requires a collection of simple, yet flavorful ingredients. Here’s what you’ll need:

    • 12 oz Italian sausage (or turkey/chicken sausage): Provides essential protein and rich flavor.
    • 1 cup orzo pasta: A star ingredient that absorbs flavors beautifully.
    • 1 medium onion, diced: Adds sweetness and depth to the dish.
    • 1 bell pepper (red, yellow, or green), chopped: For color and crunch.
    • 2 cups spinach leaves (fresh or frozen): Packed with nutrients, boosts health.
    • 2 cloves garlic, minced: Enhances flavor with its aromatic essence.
    • 1 can (14.5 oz) diced tomatoes: To bring acidity and moisture to the dish.
    • 4 cups chicken or vegetable broth: Provides a base of flavor and vital moisture.
    • 1 teaspoon Italian seasoning: Blends well with the sausage for a classic flavor profile.
    • Salt and pepper to taste: Essentials for balancing flavors.
    • Fresh basil for garnish (optional): Adds a finishing touch with freshness.

    Dietary Alert:

    • Vegan Option: Substitute Italian sausage with plant-based sausage or tempeh, and ensure to use vegetable broth.
    • Gluten-Free Option: Swap orzo with gluten-free pasta alternatives, such as rice or quinoa.
    • Low-Calorie Option: Use lean turkey sausage and increase veggie quantities for fullness without added calories.

    Dietary Substitutions to Customize Your Easy One-Pot Italian Sausage Orzo Dinner

    Every kitchen varies, and so do dietary needs. Below are some excellent substitutions to consider for a tailored experience:

    • Sausage: While traditional Italian sausage provides a fantastic flavor, you can easily switch it to turkey sausage for a leaner option or even a plant-based version to cater to vegan diets. For additional flavor in a vegetarian version, consider adding smoked paprika or nutritional yeast.

    • Orzo Pasta: If you need a gluten-free option, consider using gluten-free orzo or other pasta shapes. Brown rice or quinoa work as excellent alternatives that offer a different yet equally delicious texture.

    • Vegetable Choices: Feel free to replace spinach with kale, or add seasonal vegetables such as zucchini or asparagus. Using what’s fresh will enhance both flavor and nutrition.

    • Broth Options: Swap chicken broth with vegetable broth to suit vegetarian diets; homemade broth adds a richer taste if you have the time.

    • Herbs and Seasonings: Get creative with herbs. While Italian seasoning works well, feel free to substitute with fresh herbs like parsley or thyme to bring out unique flavors.

    These substitutions make crafting your Easy One-Pot Italian Sausage Orzo Dinner an enjoyable adventure in culinary creativity!

    How to Prepare the Perfect Easy One-Pot Italian Sausage Orzo Dinner: Step-by-Step Guide

    Creating this delightful Easy One-Pot Italian Sausage Orzo Dinner is a breeze! Follow these straightforward steps, ensuring to note the dietary adaptations along the way.

    1. Prepare the Base

    Start by heating a large pot or skillet over medium heat. Add a small dribble of olive oil, just enough to coat the bottom. Once hot, add the Italian sausage. If you’re using a plant-based or turkey sausage, brown it in the same manner. Tip: Use a wooden spoon to break the sausage into bite-sized pieces as it cooks.

    2. Sauté Aromatics

    Next, add the diced onion and chopped bell pepper to the pot. Stir everything together and cook for about 5 minutes, allowing the veggies to soften. Add the minced garlic towards the end for an extra hit of flavor; sauté for another minute until fragrant. Note: If you’re making a vegetarian version, skip this step initially and add the garlic while sautéing the vegetables later on.

    3. Incorporate the Orzo

    Now it’s time to add in the orzo pasta. Stir it well to coat in the drippings from the sausage and to toast it slightly for better flavor. This step can elevate the dish, providing additional nutty notes.

    4. Add Liquids and Seasonings

    Pour in the diced tomatoes with their juices and the chicken or vegetable broth. Add the Italian seasoning, salt, and pepper. Mix everything well and bring it to a gentle boil so that the flavors meld together beautifully.

    5. Cook the Orzo

    Once boiling, reduce the heat to a simmer and cover the pot. Allow the orzo to cook for about 10-12 minutes or until tender, stirring occasionally to prevent sticking. If necessary, add a bit more broth or water if the mixture gets too thick.

    6. Incorporate Fresh Veggies

    Once the orzo is nearly done, fold in the spinach. The residual heat will wilt the spinach perfectly without overcooking it. If desired, adjust seasoning to taste.

    7. Garnish and Serve

    After everything is nicely cooked and combined, remove the pot from heat. Let it stand for a few minutes before serving. Optional: Garnish with fresh basil or grated Parmesan cheese for an extra touch of flavor.

    8. Enjoy!

    Serve hot and enjoy your Easy One-Pot Italian Sausage Orzo Dinner with friends and family!

    You’ll find that this dish is incredibly satisfying, and with its adaptability, it’s sure to fit into any dietary preference or temporary ingredient shortage, reinforcing its status as a go-to for easy dinner recipes.

    Mastering Easy One-Pot Italian Sausage Orzo Dinner: Advanced Tips and Variations

    To elevate your cooking experience and ensure your Easy One-Pot Italian Sausage Orzo Dinner reaches perfection, consider the following tips and variations:

    Advanced Cooking Tips

    • Use High-Quality Sausage: Always choose high-quality sausage for the best flavor. Whether you’re going for spicy or mild, the choice will significantly influence the dish.

    • Customize Seasonings: Personalize your seasoning blend by adding crushed red pepper for heat or freshly chopped herbs like oregano or parsley for more freshness.

    • Lid On or Off: For a creamier consistency, you can cook with the lid on most of the time but remove it during the last few minutes to allow excess moisture to evaporate.

    Delicious Variations

    • Mediterranean Twist: Add ingredients like Kalamata olives, sun-dried tomatoes, or feta cheese to give your dish a Mediterranean flair.
    • Creamy Version: For a creamier take, consider stirring in a dollop of cream cheese or sour cream right before serving. This will enrich the dish and create luscious textures.

    • Make It a Bake: After combining all ingredients, transfer them to a baking dish, top with shredded cheese, and bake at 375°F for about 15 minutes until bubbly and golden.

    Meal Prep Option

    You can easily scale this recipe for meal prep. Make a larger batch, portion it out into containers, and store them in the fridge for quick meals later in the week. Easy to reheat and super filling!

    These advanced tips and variations not only enhance the flavor and texture but also invite creativity into your cooking process, making your Easy One-Pot Italian Sausage Orzo Dinner a personal masterpiece.

    How to Store Easy One-Pot Italian Sausage Orzo Dinner: Best Practices

    After enjoying your Easy One-Pot Italian Sausage Orzo Dinner, you may have leftovers. Here’s how to store it effectively for maximum freshness.

    Refrigeration: Store any leftover orzo dinner in an airtight container in the refrigerator. It will last about 3-4 days. To reheat, simply warm it in the microwave or on the stovetop with a splash of broth to regain moisture.

    Freezing: If you want to extend its lifespan, you can freeze portions of this dish. Place the cooled orzo dinner in freezer-safe containers or bags. It will keep well for up to 3 months. When you’re ready to eat, thaw in the refrigerator overnight and re-heat on the stovetop or microwave.

    Reheating: When reheating, adding a little bit of broth or water during the warming process helps retain moisture, preventing it from turning dry.

    By following these storage practices, you ensure that your Easy One-Pot Italian Sausage Orzo Dinner remains delicious and ready for a quick meal at any time!

    Nutritional Value of Easy One-Pot Italian Sausage Orzo Dinner

    Understanding the nutritional profile of your meals is essential, especially when looking for the best easy dinner recipes that keep you fueled and healthy. Here’s the estimated nutritional value per serving (assuming 6 servings):

    • Calories: 380
    • Protein: 18g
    • Carbohydrates: 45g
    • Fat: 14g
    • Saturated Fat: 4g
    • Cholesterol: 50mg
    • Sodium: 800mg
    • Fiber: 4g
    • Sugar: 3g

    Nutrition Insights

    • Protein: The Italian sausage adds a good amount of protein while the orzo provides carbohydrates for energy.
    • Vitamins and Minerals: The inclusion of vegetables like spinach and bell peppers enriches the meal with vitamins A and C, iron, and essential antioxidants.
    • Customization: Remember, personalizing the recipe can alter the nutritional content. Opting for turkey sausage or adding more vegetables will make it even healthier.

    Understanding the nutritional value helps tailor the recipe to fit your dietary needs. You can indulge in this splendid dish while remaining aware of its health benefits!

    FAQs: Frequently Asked Questions About Easy One-Pot Italian Sausage Orzo Dinner

    1. Can I make this dish without meat?

    Absolutely! Simply use plant-based sausage, tofu, or skip the protein altogether and rely on the orzo and vegetables for a hearty meal.

    2. Is orzo gluten-free?

    Traditional orzo is made from wheat and is not gluten-free. However, you can find gluten-free orzo made from rice or other gluten-free grains available at most supermarkets.

    3. Can I use other types of pasta?

    Yes! Feel free to substitute orzo with another small pasta shape like ditalini or even larger shapes such as penne. Just be sure to adjust the cooking time accordingly.

    4. How can I adjust the flavors?

    You can customize the flavors by adjusting the seasonings, adding different herbs, or including extras like olives or capers for a Mediterranean vibe.

    5. How do leftovers reheat?

    Reheating leftovers is easy. Use a microwave or stovetop, adding a little broth or water to maintain moisture during reheating.

    With these FAQs answered, you’re now equipped with all the knowledge you need to tackle the Easy One-Pot Italian Sausage Orzo Dinner. Enjoy creating a dish that’s not only simple but also delightful and nutritious—proving effortlessly that delicious meals can be quick and easy!

  • Frito Cowboy Cabbage

    Frito Cowboy Cabbage

    Frito Cowboy Cabbage: A Tropical Delight

    Introduction to Frito Cowboy Cabbage

    Frito Cowboy Cabbage is a delightful and hearty dish that brings together savory flavors, crispy textures, and a vibrant look. Ideal for busy weekdays or laid-back weekends, this recipe is a perfect addition to your collection of dinner recipes. Whether you’re a home cook with a family to feed or a student living in a dorm, Frito Cowboy Cabbage is not only simple to make but also adapts wonderfully to accommodate various dietary preferences.

    What’s more, this dish is healthy and satisfying. With its rich content of vegetables and protein, you can enjoy it without guilt. Plus, it’s a vegan, gluten-free, and low-calorie meal. Each bite delivers essential nutrients, making it a fantastic option for health-conscious individuals or families aiming to eat well while saving time in the kitchen.

    As you dive into this article, you’ll discover how to prepare Frito Cowboy Cabbage so you can impress friends, family, or even just yourself! You’ll learn about its benefits, ingredient substitutions, cooking methods, and more, ensuring you can recreate this delicious dish with ease.

    Benefits and Advantages of Frito Cowboy Cabbage

    The Frito Cowboy Cabbage stands out among dinner recipes for numerous reasons. Firstly, the ease of preparation makes it accessible for all levels of cooks. You can whip it up in less than an hour, ensuring that even the busiest of individuals can enjoy a home-cooked meal without spending extensive time in the kitchen.

    Secondly, this dish is packed with health benefits. Cabbage is low in calories yet high in essential vitamins C and K, fiber, and antioxidants. This makes it a great choice for anyone looking to maintain or lose weight while still feeling full and satisfied. Additionally, the inclusion of protein-rich beans and other flavorful ingredients like corn adds a fulfilling aspect to the meal without excessive calories.

    Another advantage is its versatility. If you’re mindful of dietary restrictions, Frito Cowboy Cabbage can easily be modified. The recipe can accommodate vegan diets, gluten-free preferences, and various flavor profiles with simple substitutions.

    This dish is also an excellent vehicle for creativity. Want it spicier? Add jalapeños. Prefer a smokier flavor? Try incorporating smoked paprika. Frito Cowboy Cabbage not only satisfies hunger but also invites experimentation, making it a hit among adventurous eaters and traditionalists alike.

    Ingredients Overview

    Essential Ingredients for Frito Cowboy Cabbage

    To prepare Frito Cowboy Cabbage, you will need the following ingredients. Each is selected for its health benefits, and you can easily customize the quantities based on your serving needs.

    • 1 head of green cabbage (medium size): This is the base of the recipe, providing fiber, vitamins, and a light crunch.
    • 1 can (15 oz) of black beans (drained and rinsed): A great source of plant-based protein and fiber.
    • 1 can (15 oz) of corn (drained): Adds sweetness and texture. Opt for low-sodium varieties for a healthier option.
    • 1 packet of ranch dressing mix: Choose vegan ranch mix for a plant-based option.
    • 1 cup of shredded cheddar cheese (or dairy-free cheese): For richness and flavor.
    • 1 bag of Fritos corn chips (about 10 oz): The delightful crunch that takes this dish to another level.
    • 1 tablespoon of olive oil: A heart-healthy fat for sautéing your ingredients.
    • Optional toppings: Chopped green onions, fresh cilantro, or avocado for extra nutrition and flavor.

    With a few simple adjustments, you can easily make this dish vegan or gluten-free. Just make sure to use certified gluten-free corn chips and a ranch dressing mix that aligns with your dietary needs.

    Dietary Substitutions to Customize Your Frito Cowboy Cabbage

    Frito Cowboy Cabbage is incredibly flexible, allowing you to cater to various dietary needs:

    • Vegan Version: Use plant-based cheese and a vegan ranch dressing mix. The dish still maintains a great flavor profile.
    • Gluten-Free Version: Substitute the Fritos with gluten-free tortilla chips if needed and ensure the ranch mix is certified gluten-free.
    • Low-Calorie Version: Reduce the cheese amount or omit it altogether. Increase the vegetables for a nutrient-rich alternative without compromising volume or texture.
    • Protein Boost: For those seeking extra protein, consider adding cooked lentils or quinoa. This also enriches the meal with additional minerals and fiber.

    By being adaptable, Frito Cowboy Cabbage caters to a variety of dietary needs without sacrificing flavor or enjoyment.

    How to Prepare the Perfect Frito Cowboy Cabbage: Step-by-Step Guide

    Frito Cowboy Cabbage can be prepared in a few simple steps that make it foolproof for home cooks of any experience level. Below is a comprehensive guide to ensure your dish turns out perfectly.

    1. Prepare the Base: Finely chop the cabbage into bite-sized pieces. This allows for even cooking and ensures each bite is full of flavor.

    2. Heat the Oil: In a large skillet, heat one tablespoon of olive oil over medium heat. The oil will help cook the cabbage while adding a rich flavor.

    3. Sauté the Cabbage: Add the chopped cabbage to the skillet. Sauté for about 5-7 minutes until the cabbage becomes tender. Make sure to stir it frequently to avoid burning.

    4. Add in Beans and Corn: Once the cabbage is cooked, stir in the drained black beans and corn. Cook for an additional 2-3 minutes until everything is heated through.

    5. Mix in Dressing: Sprinkle the ranch dressing mix over the cabbage mixture. Stir thoroughly to coat the vegetables evenly with the seasoning.

    6. Incorporate Cheese: Add the shredded cheddar cheese (or vegan alternative) into the skillet. Mix until the cheese melts and blends into the veggies. You can omit the cheese if you prefer a dairy-free option.

    7. Prepare for Serving: Transfer the mixture into a baking dish or large serving bowl. This helps in presenting the dish beautifully on the table.

    8. Top with Fritos: Just before serving, sprinkle the Fritos chips on top to maintain their crispiness. This touch ensures a delightful crunch in every serving.

    9. Add Optional Toppings: Consider adding chopped green onions, fresh cilantro, or diced avocado as a garnish. These not only enhance the visual appeal but also contribute additional flavors and nutrients.

    10. Serve Hot: Frito Cowboy Cabbage is best enjoyed warm. You can serve it as a standalone dish or alongside your favorite protein.

    This easy-to-follow recipe makes Frito Cowboy Cabbage a standout choice among dinner recipes that are both flavorful and nutritious. Feel free to adjust the quantities according to your preference, making it as spicy or cheesy as you like!

    Mastering Frito Cowboy Cabbage: Advanced Tips and Variations

    While the basic Frito Cowboy Cabbage recipe is delicious on its own, there are various ways to elevate it further. Here are some advanced tips and variations to experiment with:

    • Spice It Up: For those who enjoy a little heat, sprinkle in some red pepper flakes or add diced jalapeños while sautéing the cabbage. This will provide a delightful kick to the flavors.

    • Smoke Flavor: Incorporating smoked paprika or chipotle powder can introduce a lovely smoky undertone that enhances the dish’s overall taste.

    • Vegetable Variations: Feel free to experiment with other vegetables like diced bell peppers, zucchini, or spinach. This is a great way to incorporate more vitamins and minerals while adding different textures.

    • Protein Variants: For a heartier meal, consider adding cooked chicken, turkey, or ground beef. This can make it a complete meal, suitable for serving at gatherings or family dinners.

    • Summer Version: During the warmer months, you can grill the cabbage lightly before mixing it with the other ingredients. This adds a distinctive grilled flavor and makes it a perfect dish for summer cookouts.

    • Cooling Dips: Serve the dish with a side of sour cream, Greek yogurt, or guacamole as a creamy and refreshing accompaniment.

    These tips not only help in enhancing the flavor profile of Frito Cowboy Cabbage but also allow you to personalize the dish to your liking. By keeping the foundation of this dinner recipe and playing with various elements, you can create a dish that feels new and exciting every time you serve it.

    How to Store Frito Cowboy Cabbage: Best Practices

    Making Frito Cowboy Cabbage in advance? Here’s how to store it properly for the best flavor and freshness:

    • Refrigeration: Store leftover Frito Cowboy Cabbage in an airtight container in the refrigerator. It will typically last for 3-4 days. When reheating, you may need to add a splash of water or broth to prevent it from drying out.

    • Freezing: While this dish is best enjoyed fresh, you can freeze it if necessary. Portion the cabbage mixture into freezer-safe containers. Just be aware that the Fritos’ texture may change upon freezing. Consider keeping them separate until serving.

    • Reheating: To enhance the flavors again, reheat in a skillet over medium heat, stirring gently until heated through. If reheating in a microwave, use a covered dish and heat in short increments, stirring in between to ensure even heating.

    Proper storage ensures that your Frito Cowboy Cabbage remains tasty and nourishing, making it a convenient option for meal prep enthusiasts looking to maximize their kitchen efficiency while exploring various dinner recipes.

    Nutritional Value of Frito Cowboy Cabbage

    Understanding the nutritional benefits of Frito Cowboy Cabbage can help you appreciate this dish even more. Per serving (estimated serving size of 1 cup), here’s a breakdown of the nutritional content:

    • Calories: Approximately 300-350 (depending on cheese and Fritos used)
    • Protein: 12-15 grams (from beans and cheese)
    • Total Fat: 12-15 grams (mostly from olive oil and cheese)
    • Carbohydrates: 40 grams (including dietary fiber)
    • Dietary Fiber: 10-12 grams (thanks to cabbage and beans)
    • Sugars: 2-4 grams (natural sugars from corn)
    • Sodium: Varies based on ranch dressing mix; opt for lower-sodium varieties for a healthier choice.

    As you can see, Frito Cowboy Cabbage is nutritious, offering a good blend of macronutrients that keeps you fueled and feeling good. You can also modify the ingredients based on your dietary preferences for further optimization.

    This dish aligns perfectly with anyone focused on maintaining balanced nutrition amidst a busy day filled with home, work, or study responsibilities. The inclusion of healthy ingredients ensures that it’s more than just a fulfilling meal.

    FAQs: Frequently Asked Questions About Frito Cowboy Cabbage

    1. Can I make Frito Cowboy Cabbage ahead of time?
    Absolutely! You can prepare the cabbage mixture and store it in an airtight container in the refrigerator for 3-4 days. Just add the Fritos right before serving to maintain their crunch.

    2. How can I make this dish spicier?
    If you’re a fan of heat, consider adding diced jalapeños or cayenne pepper while sautéing the cabbage. You can also sprinkle crushed red pepper flakes before serving.

    3. Is there a way to make this recipe lower in calories?
    Definitely! You can reduce the cheese quantity, choose low-fat options, or even skip it entirely. Increase the vegetable ratio for bulk without significant calorie addition.

    4. What are some good side dishes to serve with this?
    Frito Cowboy Cabbage is fantastic on its own but can also pair well with cornbread or a mixed salad for a complete meal.

    5. Can I freeze leftovers?
    Yes, but it’s best to freeze the cabbage mixture without the Fritos. Store in freezer-safe containers, and once you reheat it, add fresh Fritos to maintain their crunch.

    6. What can I substitute for ranch dressing mix?
    You can create a simple dressing using Greek yogurt mixed with garlic powder, onion powder, and dill. Alternatively, look for vegan ranch mixes available in stores.

    Frito Cowboy Cabbage is not just a meal; it’s an experience that brings people together. It’s versatile, savory, and full of healthy goodness — perfect for anyone looking to enjoy dinner recipes that pack flavor without the fuss. So why not try making this dish at home? Your taste buds will thank you!

  • Vegetable Lasagna with Sweet Potato, Butternut Squash  Cranberry Glaze

    Vegetable Lasagna with Sweet Potato, Butternut Squash Cranberry Glaze

    Vegetable Lasagna with Sweet Potato, Butternut Squash & Cranberry Glaze: A Tropical Delight

    Introduction to Vegetable Lasagna with Sweet Potato, Butternut Squash & Cranberry Glaze

    If you’re seeking delicious and nutritious dinner recipes, look no further! This Vegetable Lasagna with Sweet Potato, Butternut Squash, and a zesty Cranberry Glaze is not just a meal; it’s a celebration of flavors and health. Ideal for any occasion, this dish perfectly balances wholesome ingredients with culinary creativity, making it a hit for busy families, health-conscious individuals, and anyone who loves a plant-based feast.

    This lasagna is a breeze to prepare. With layers of colorful vegetables and a rich cranberry glaze, it is both visually stunning and satisfyingly delicious. Not only is it vegan and gluten-free, but it also brings a multitude of health benefits, thanks to the nutrient-dense ingredients. Sweet potatoes and butternut squash are not only rich in vitamins and fiber but also add a natural sweetness that complements the tartness of the cranberry glaze beautifully.

    In this article, we will explore the simplicity and versatility of this recipe, emphasizing its suitability for diverse dietary needs. Whether you’re cooking for two or hosting a festive gathering, this Vegetable Lasagna inspired by tropical flavors will surely impress your guests while keeping you healthy. So, roll up your sleeves and get ready to craft a dish that’s as nourishing as it is delightful!

    Benefits and Advantages of Vegetable Lasagna with Sweet Potato, Butternut Squash & Cranberry Glaze

    Vegetable Lasagna with Sweet Potato, Butternut Squash, and Cranberry Glaze stands out among popular dinner recipes for several reasons. Firstly, its preparation is straightforward, making it the perfect choice for novice cooks and seasoned chefs alike. With step-by-step instructions, you can easily create layers of goodness that come together to create a harmonious dish.

    From a health perspective, this recipe packs a punch. Sweet potatoes and butternut squash are both excellent sources of antioxidants, vitamins A and C, and fiber, contributing to your overall wellness. Incorporating these vegetables not only provides essential nutrients but also enhances the dish’s flavor profile. Additionally, cranberries bring natural sweetness and a tart kick, enriched with antioxidants, making this glaze a versatile addition not just for lasagna but for various other dishes as well.

    Moreover, this lasagna caters to different dietary preferences. It’s vegan, gluten-free, and low-calorie, allowing a broad audience to enjoy it without compromising their dietary requirements. Perfect for busy parents, students, or working professionals, it offers easy meal prep options. Just make a large batch on weekends, and you have meals ready for the week ahead!

    Ultimately, this Vegetable Lasagna is not just a meal option; it’s a delightful way to explore healthier eating habits while also indulging in a delicious dish that satisfies your taste buds. By preparing this dish, you provide a nurturing source of nutrition for yourself and your loved ones, making mealtime both enjoyable and rewarding.

    Ingredients Overview

    Essential Ingredients for Vegetable Lasagna with Sweet Potato, Butternut Squash & Cranberry Glaze

    To create this delicious Vegetable Lasagna, you will need the following ingredients:

    • 12 Whole Wheat Lasagna Noodles (or gluten-free noodles)
      These provide a hearty base, and whole wheat options add more fiber.

    • 2 Medium Sweet Potatoes (peeled and diced)
      Rich in vitamins A and C, they also add sweetness and creaminess to the dish.

    • 2 cups Butternut Squash (diced or cubed)
      Another great source of vitamins and fiber, this squash complements the sweet potatoes and adds texture.

    • 1 cup Fresh Cranberries (for the glaze)
      These add a burst of tartness and are high in antioxidants. Fresh or frozen can work, but fresh is preferred for flavor.

    • 1 large Onion (chopped)
      Provides a flavorful base and depth of flavor to the lasagna.

    • 3 cloves of Garlic (minced)
      Garlic packs a flavor punch and offers numerous health benefits, such as boosting the immune system.

    • 2 cups Spinach (fresh or chopped)
      A nutrient powerhouse, spinach adds a lovely green color and is packed with vitamins and minerals.

    • 1 cup Vegan Cheese (optional for layering)
      Perfect for those who want a cheesy texture without dairy. It melts beautifully over the vegetables.

    • 2 tablespoons Olive Oil
      Healthy fats help absorb vitamins from the vegetables and add rich flavor.

    • Salt and pepper to taste
      Essential for enhancing flavors in any dish.

    • 1-2 tablespoons Maple Syrup (for the glaze)
      Balancing the tartness of cranberries, maple syrup adds natural sweetness.

    • 1 tablespoon Balsamic Vinegar (optional for the glaze)
      This brings a depth of flavor and tanginess to the cranberry mixture.

    • Dried herbs (like oregano, basil, and thyme) to season
      These elevate the flavor profile and add aromatic qualities.

    Dietary Substitutions to Customize Your Vegetable Lasagna with Sweet Potato, Butternut Squash & Cranberry Glaze

    This lasagna is remarkably versatile. Here are some substitutions based on dietary preferences:

    • Gluten-Free: Use gluten-free lasagna noodles or thinly sliced zucchini or eggplant as a base to keep the structure intact while making it gluten-free.

    • Vegan Cheese: For those avoiding dairy, you can either skip the cheese or use nut-based cheeses which add creaminess and flavor without the lactose.

    • Additional Vegetables: Feel free to incorporate other vegetables such as mushrooms, bell peppers, or zucchini. These can add a variety of flavors and enhance the nutrition profile.

    • Cranberry Options: If cranberries are unavailable, a mix of blended raspberries or blueberries can achieve a similar flavor profile, providing that fruity tartness.

    • Creaminess: For extra creaminess, consider using cashew cream or pureed silken tofu with nutritional yeast as a cheese substitute.

    Overall, customization helps meet specific dietary restrictions while maintaining the integrity of this delicious dish.

    How to Prepare the Perfect Vegetable Lasagna with Sweet Potato, Butternut Squash & Cranberry Glaze: Step-by-Step Guide

    Ready to dive in? Here’s a step-by-step guide to create your own Vegetable Lasagna with Sweet Potato, Butternut Squash, and Cranberry Glaze. Each step is easy to follow, whether you are a novice cook or an expert in the kitchen.

    1. Prepare the Vegetables:
      Start by preheating your oven to 375°F (190°C). Meanwhile, peel and cube the sweet potatoes and butternut squash. Toss them in a bowl with olive oil, salt, and pepper. Spread them evenly on a baking sheet and roast for about 25-30 minutes until tender. This will intensify their flavors and sweetness.

    2. Sauté the Aromatics:
      In a large skillet over medium heat, add 2 tablespoons of olive oil. Once heated, add the chopped onion and sauté until translucent, about 5 minutes. Then add minced garlic and cook for another minute until fragrant.

    3. Add Spinach:
      Toss in the fresh spinach to the skillet and cook until wilted. This should take about 2-3 minutes. Once done, remove from heat and set aside.

    4. Prepare the Cranberry Glaze:
      In a small saucepan, combine fresh cranberries, maple syrup, and balsamic vinegar. Cook over medium heat, stirring occasionally until the cranberries burst and the mixture thickens, around 10-15 minutes. Adjust sweetness according to your taste.

    5. Cook the Noodles:
      In a large pot, bring salted water to a boil and cook lasagna noodles according to package instructions until al dente. Drain and lay them flat on parchment paper to prevent sticking.

    6. Assemble the Lasagna:
      In a large baking dish, start with a layer of noodles at the bottom. Top it with roasted sweet potatoes and butternut squash, followed by a layer of the sautéed onion and spinach. Drizzle some cranberry glaze over the vegetables and sprinkle a layer of vegan cheese (if using).

    7. Repeat Layers:
      Continue layering, following this sequence: noodles, vegetables, glaze, and cheese until you exhaust your ingredients, finishing with a layer of noodles topped with cranberry glaze and a sprinkle of the remaining cheese.

    8. Bake the Lasagna:
      Cover the baking dish with aluminum foil and bake for about 30 minutes. After this, remove the foil and bake for an additional 10-15 minutes until the top is golden and bubbly.

    9. Serve and Enjoy:
      Once baked, let the lasagna cool for about 10 minutes before slicing. This allows the layers to set. Serve warm, garnished with fresh herbs if desired.

    Consider making a large batch, as this dish stores beautifully and tastes even better the next day!

    Mastering Vegetable Lasagna with Sweet Potato, Butternut Squash & Cranberry Glaze: Advanced Tips and Variations

    Perfecting your Vegetable Lasagna is an enjoyable process. Here are some advanced tips and variations to experiment with, ensuring you explore the full potential of this dish:

    • Layer with Pesto: If you’re looking for a flavor boost, consider spreading a layer of homemade or store-bought vegan pesto between the layers. This adds an herbaceous richness that’s delightful with the vegetables.

    • Zucchini Noodle Swap: For a low-carb version, substitute lasagna noodles with thinly sliced zucchini. Just sprinkle salt over the slices and let them sit to draw out moisture before layering; they’ll hold up well in the baking process.

    • Experiment with Seasonings: Feel free to adjust seasonings, such as adding a pinch of red pepper flakes for a little heat or fresh herbs like thyme and parsley for a fragrant finish.

    • Top with Breadcrumbs: For a crispy topping, combine gluten-free breadcrumbs with a bit of olive oil and sprinkle on top for the last few minutes of baking. This elevates the texture of your lasagna beautifully.

    • Change-up the Glaze: Instead of cranberry, try using a tomato sauce with added herbs or a vegan cheese sauce complemented with spices. This creates an entirely new flavor profile while still being incredibly satisfying.

    By utilizing these tips, you can personalize your Vegetable Lasagna, making it uniquely yours and ensuring it never feels repetitive, no matter how often you prepare it!

    How to Store Vegetable Lasagna with Sweet Potato, Butternut Squash & Cranberry Glaze: Best Practices

    When it comes to storing your Vegetable Lasagna with Sweet Potato, Butternut Squash, and Cranberry Glaze, there are some best practices to follow:

    • Refrigeration:
      After cooking, ensure the lasagna cools to room temperature. Once cooled, cover it tightly with aluminum foil or store it in an airtight container. It should keep well in the refrigerator for up to 4-5 days.

    • Freezing:
      If you want to store it for longer, consider freezing. Cut the lasagna into portions, wrap each portion in plastic wrap followed by aluminum foil, and place in a freezer-safe container. It can last for up to three months in the freezer.

    • Reheating:
      When ready to eat, thaw any frozen portions overnight in the refrigerator. You can reheat individual servings in the microwave or place the whole baking dish back into the oven at 350°F (175°C) for about 30-35 minutes, covering it with foil to keep it moist.

    These storage tips help maintain the flavor and texture of your lasagna, making it convenient for meal prepping or quick weeknight dinners.

    Nutritional Value of Vegetable Lasagna with Sweet Potato, Butternut Squash & Cranberry Glaze

    A serving of this Vegetable Lasagna is not only tasty but also packed with nutrition. Here’s a breakdown of the approximate nutritional value per serving (based on 8 servings):

    • Calories: 280-350
    • Total Fat: 10-14g (depending on the addition of cheese)
    • Saturated Fat: 1-3g
    • Cholesterol: 0mg (vegan)
    • Sodium: 400-700mg (varies with added salt and pre-cooked sauces)
    • Total Carbohydrates: 45-55g
    • Dietary Fiber: 8-10g
    • Sugars: 6-10g (natural sugars from the vegetables)
    • Protein: 9-12g (depending on cheese included)

    This composition makes it a wholesome meal, filled with vitamins and minerals from the vegetables. The high fiber content aids digestion and keeps you full longer, while the healthy fats support brain function and overall well-being.

    By enjoying this Vegetable Lasagna, you contribute positively to your nutritional intake while enjoying an indulgent and flavorful dish!

    FAQs: Frequently Asked Questions About Vegetable Lasagna with Sweet Potato, Butternut Squash & Cranberry Glaze

    Can I substitute the sweet potatoes with other vegetables?

    Absolutely! If sweet potatoes aren’t available, feel free to use regular potatoes, carrots, or even eggplant for a different texture and flavor.

    Is this lasagna suitable for meal prep?

    Yes! This Vegetable Lasagna is perfect for meal prep. You can store individual portions in the fridge or freeze them for later use.

    How can I make this recipe lower in calories?

    To reduce calories, you can use fat-free or reduced-fat cheese options, skip extra oil in sautéing, or reduce the portion size of noodles and increase vegetables.

    Can I use frozen vegetables in this recipe?

    Certainly! Using frozen vegetables can save you time. Just make sure to thaw and drain any excess moisture to prevent the lasagna from becoming watery.

    Is it necessary to include the cranberry glaze?

    While the cranberry glaze adds a unique flavor and brightness, feel free to omit it or substitute with a tomato sauce or pesto to fit your taste preferences.

    Can I make this lasagna ahead of time and bake it later?

    Yes! You can assemble the lasagna ahead of time. Just cover it tightly and store it in the refrigerator, then bake it when you’re ready.

    What sides pair well with this Vegetable Lasagna?

    A fresh garden salad or steamed vegetables complement this dish perfectly. You can also serve garlic bread for a satisfying meal.

    Can I scale this recipe to serve more or fewer people?

    Definitely! Adjust the ingredients proportionally to scale the recipe up or down as needed. Just make sure to use an appropriately sized baking dish.

    Conclusion

    This Vegetable Lasagna with Sweet Potato, Butternut Squash, and Cranberry Glaze is a delicious and versatile addition to your dinner recipe lineup. Not only does it offer a nutritious alternative to traditional comfort food, but it also allows for personalization to ensure it suits a variety of dietary restrictions and preferences. So give it a try, and let the vibrant flavors brighten your dining table! With its ease of preparation and stunning presentation, this lasagna is bound to become a favorite for anyone who values wholesome cooking. Happy cooking!

  • Baked Cottage Cheese Alfredo

    Baked Cottage Cheese Alfredo

    Baked Cottage Cheese Alfredo: A Tropical Delight

    Introduction to Baked Cottage Cheese Alfredo

    Are you on the lookout for innovative dinner recipes that offer both simplicity and flavor? Look no further than Baked Cottage Cheese Alfredo, a dish that beautifully combines the creamy richness of Alfredo with the high-protein goodness of cottage cheese. This delightful recipe not only caters to health-conscious individuals, but it also appeals to busy families, students craving a quick meal, and culinary enthusiasts who want to impress.

    One of the standout qualities of Baked Cottage Cheese Alfredo is its versatility. It can be easily adapted to meet various dietary needs—including vegan and gluten-free options—making it a perfect choice for gatherings. Additionally, it’s a simple dish to prepare, requiring minimal ingredients and effort, yet yielding maximum flavor and satisfaction.

    The creamy texture, enhanced by the melting cheese and savory spices, offers a tropical escape that is wholesome and fulfilling. So whether you’re a working professional looking for a quick meal after a long day or newlyweds experimenting in the kitchen, this recipe will surely hit the spot. Dive into this tropical delight that is not just a meal but an experience, and enjoy the nutritional benefits that accompany each serving.

    Benefits and Advantages of Baked Cottage Cheese Alfredo

    When it comes to dinner recipes, Baked Cottage Cheese Alfredo shines brightly due to its numerous advantages. One of the main benefits is the ease of preparation. It requires minimal time and effort; perfect for busy individuals or families who want a delicious meal without spending hours in the kitchen. Prepping the ingredients takes just a few minutes, and once assembled, it can bake while you relax or attend to other errands.

    Another significant advantage of this dish is its nutritional value. Cottage cheese serves as a fantastic source of protein, calcium, and essential vitamins, making it a healthy alternative to traditional Alfredo recipes that often rely on heavy cream and butter. The protein content can help keep you full longer, which is a boon for diet-conscious individuals looking for filling meals that won’t sabotage their goals.

    For those with dietary restrictions, this recipe is easily customizable. You can make it gluten-free by opting for gluten-free pasta or substituting a few ingredients to create a vegan version. The versatility of Baked Cottage Cheese Alfredo allows it to cater to a wide range of dietary needs, ensuring everyone at the table can enjoy it.

    Lastly, Baked Cottage Cheese Alfredo is deliciously comforting, making it an ideal choice for family gatherings or potlucks. The creamy, cheesy sauce paired with pasta not only satisfies taste buds but also warms the soul during chilly nights. What more could you ask for in a dish that meets various needs and preferences?

    Ingredients Overview

    Essential Ingredients for Baked Cottage Cheese Alfredo

    To whip up this scrumptious Baked Cottage Cheese Alfredo, gather the following essential ingredients:

    • 16 ounces of pasta (gluten-free option available): Choose your favorite type; penne or rotini works well to capture the creamy sauce.
    • 2 cups of cottage cheese (low-fat or full-fat): The star of the dish, providing a protein boost and a creamy texture.
    • 1 cup of shredded mozzarella cheese: Adds melty goodness while making the dish appetizing.
    • ½ cup of grated Parmesan cheese: Enhances flavor with its sharpness.
    • 2 tablespoons of olive oil: Helps in sautéing and adds healthy fats.
    • 4 cloves of garlic (minced): Provides a wonderful aroma and flavor.
    • 1 teaspoon of salt and pepper to taste: Basic but essential for seasoning.
    • 1 teaspoon of dried Italian herbs (basil, oregano): Balance the flavors and add depth to the dish.
    • Optional: Fresh basil or parsley for garnishing.

    This dish offers a sensible approach to dinner recipes, promising both flavor and nutritional benefits.

    Dietary Substitutions to Customize Your Baked Cottage Cheese Alfredo

    Here are some substitutions you can make to accommodate different dietary needs:

    • Pasta Alternatives: If you’re following a gluten-free diet, opt for gluten-free pasta varieties made from rice, corn, or legumes. You can also use zucchini noodles or spaghetti squash for a low-carb option.
    • Vegan Modifications: To make the dish vegan, switch out the cottage cheese for a plant-based alternative. Many brands offer cashew-based or almond-based cheeses that provide a similar creamy texture. Replace the mozzarella and Parmesan with vegan cheese blends or nutritional yeast for a cheesy flavor without dairy.
    • Low-Calorie Adjustments: Use low-fat cottage cheese and mozzarella to reduce calorie count while still enjoying the dish’s creamy goodness. You can also reduce the amount of cheese in the recipe if you’re watching your fat intake.

    With these adaptations in mind, this recipe remains flexible enough to serve a wide audience while still delivering deliciousness to every plate.

    How to Prepare the Perfect Baked Cottage Cheese Alfredo: Step-by-Step Guide

    Creating your own Baked Cottage Cheese Alfredo is a journey that anyone can undertake, regardless of their cooking experience. Follow this carefully curated, step-by-step guide to achieve the best results.

    1. Prepare the Pasta:
    2. Start by boiling a large pot of salted water. Once boiling, add your pasta of choice and cook it according to package instructions until it’s al dente. This usually takes around 8-10 minutes. Drain the pasta and set aside.

    3. Sauté the Garlic:

    4. In a large skillet, heat the olive oil over medium heat. Add the minced garlic and sauté until fragrant and golden, approximately 1-2 minutes. Be cautious not to burn it, as this could impart a bitter taste.

    5. Mix the Base:

    6. In a mixing bowl, combine the cooked pasta, cottage cheese, mozzarella cheese, Parmesan cheese, sautéed garlic, salt, pepper, and dried herbs. Stir until all the ingredients are well incorporated, ensuring the pasta is fully coated with the cheese mixture.

    7. Transfer to Baking Dish:

    8. Preheat your oven to 350°F (175°C). Grease a 9×13-inch baking dish lightly with cooking spray. Transfer the pasta-cheese mixture to the dish, spreading it evenly.

    9. Add Extra Cheese:

    10. For an indulgent touch, sprinkle some additional mozzarella or Parmesan on top of the pasta. This layer will create a delectable golden crust when baked.

    11. Bake:

    12. Place the baking dish in the preheated oven and bake for 25-30 minutes, or until the cheese is melted, bubbly, and slightly golden on top.

    13. Serve:

    14. Once out of the oven, allow it to cool for a few minutes. Garnish with fresh basil or parsley, and serve hot. Enjoy your meal with a side salad or steamed vegetables.

    Remember, the beauty of this recipe lies in its adaptability. Feel free to throw in seasonal vegetables like spinach, zucchini, or bell peppers to increase its nutritional value without compromising the flavor.

    Mastering Baked Cottage Cheese Alfredo: Advanced Tips and Variations

    Once you’ve mastered the base recipe, consider the following advanced tips and variations to elevate your Baked Cottage Cheese Alfredo experience:

    1. Incorporate Proteins:
    2. For additional protein, consider adding cooked chicken, shrimp, or even chickpeas if you want to keep it plant-based. Simply mix them in just before transferring the pasta to the baking dish.

    3. Experiment with Cheeses:

    4. Use a combination of cheeses for depth of flavor. Cheddar, gouda, or even a spicy pepper jack can add an interesting twist to the traditional recipe.

    5. Try Different Herbs and Spices:

    6. Play around with herbs to create a unique flavor profile. Consider using fresh herbs like rosemary or thyme or spices such as cayenne for added heat.

    7. Add a Crunchy Topping:

    8. For added texture, sprinkle breadcrumbs mixed with a bit of melted butter on top before baking. This will create a crispy layer that contrasts perfectly with the creamy pasta.

    9. Make it a One-Pan Dish:

    10. For an even simpler meal, prepare the pasta and bake it all in one pan. Just cook your proteins and garlic directly in the baking dish and combine everything before baking.

    These tips not only enhance your dish but also encourage creativity in the kitchen. Feel free to experiment until you find your favorite version of Baked Cottage Cheese Alfredo!

    How to Store Baked Cottage Cheese Alfredo: Best Practices

    Storing your Baked Cottage Cheese Alfredo properly ensures that you can enjoy leftovers without compromising quality. Here are the best practices:

    • Refrigeration: Allow the baked dish to cool to room temperature before covering it with plastic wrap or aluminum foil. Properly stored, it can last in the refrigerator for up to 3-4 days.

    • Freezing: If you have a larger batch, consider freezing it. To do this, allow it to cool, then portion it into airtight containers. It can be stored in the freezer for up to 2-3 months.

    • Reheating: When ready to enjoy a leftover serving, thaw it in the refrigerator overnight if frozen. You can then reheat it in the oven at 350°F (175°C) for about 20-25 minutes until heated through. Adding a splash of milk or water can help rehydrate the dish and revive its creamy texture.

    By following these storage practices, you can maintain the integrity of the flavors while enjoying this delicious dish for multiple meals.

    Nutritional Value of Baked Cottage Cheese Alfredo

    Understanding the nutritional value of your meals is essential, especially when considering healthy dinner recipes. Here is an approximate breakdown of the nutritional value per serving of Baked Cottage Cheese Alfredo:

    • Calories: 350-400 kcal
    • Protein: 20-25 grams
    • Fat: 12-15 grams
    • Carbohydrates: 45-50 grams
    • Fiber: 2-4 grams
    • Calcium: 300-400 mg
    • Sodium: 600-800 mg

    These values may vary based on ingredient choices and portion sizes, but they help provide insight into how this dish can fit into a balanced diet. With high protein content and essential nutrients, Baked Cottage Cheese Alfredo is ideal for individuals looking to maintain a nutritious lifestyle while enjoying delightful dinners.

    FAQs: Frequently Asked Questions About Baked Cottage Cheese Alfredo

    1. Can I substitute ricotta cheese for cottage cheese in this recipe?
    2. Absolutely! Ricotta can be used for a creamier texture, but it will change the nutritional profile slightly, providing less protein than cottage cheese.

    3. Is Baked Cottage Cheese Alfredo suitable for a gluten-free diet?

    4. Yes! Simply use gluten-free pasta of your choice, and enjoy the dish without gluten concerns.

    5. Can I make this recipe ahead of time?

    6. Yes, Baked Cottage Cheese Alfredo can be prepared ahead of time. Assemble it the night before, store it in the refrigerator, and bake it when ready to serve.

    7. What vegetables can I add to the recipe?

    8. Feel free to add vegetables like spinach, broccoli, or roasted peppers to boost the nutrition and add color to your dish.

    9. How long does it take to bake?

    10. The baking process typically takes about 25-30 minutes at 350°F (175°C) until bubbly and golden.

    11. Can I make this dish vegan?

    12. Yes, simply swap out the dairy for plant-based alternatives, as listed in the dietary substitutions section!

    In conclusion, Baked Cottage Cheese Alfredo is not just a recipe; it’s an adaptable dish that caters to various dietary needs while delivering comforting, rich flavors. It’s perfect for any occasion, whether you’re enjoying it at home with your family or serving it during a special gathering. With its health benefits, easy preparation, and deliciousness, you’ll want to make this a recurring staple in your collection of dinner recipes!

  • Baked Cottage Cheese Alfredo

    Baked Cottage Cheese Alfredo

    Baked Cottage Cheese Alfredo: A Tropical Delight

    Introduction to Baked Cottage Cheese Alfredo

    Are you looking for a quick and delightful meal that fits perfectly into your busy lifestyle? The Baked Cottage Cheese Alfredo is not only a simple recipe but also a healthy option that caters to a variety of dietary needs. Perfect for those who seek nutritious dinner recipes that are quick to prepare, this dish incorporates the creamy goodness of cottage cheese into a classic Alfredo sauce, making it both rich in flavor and guilt-free.

    Cottage cheese, often overlooked, is a fantastic source of protein and calcium, making this meal ideal for growing children, fitness enthusiasts, and busy working professionals. Moreover, its versatility means that it can easily be modified to suit vegan and gluten-free diets, allowing everyone to enjoy it.

    What makes this recipe particularly appealing is its ease of preparation. Whether you are a newlywed learning to cook or a seasoned chef in search of a fresh take on a classic dish, the Baked Cottage Cheese Alfredo will inspire you to whip up an impressive dinner in no time. Let’s dive deeper into the benefits of this delectable dish.

    Benefits and Advantages of Baked Cottage Cheese Alfredo

    The Baked Cottage Cheese Alfredo isn’t just a meal; it’s a cooking experience with numerous benefits. Firstly, it promotes simplicity. The preparation doesn’t involve complicated techniques or hard-to-find ingredients. With just a few steps, you can create a fantastic dinner recipe that impresses family and friends alike.

    Secondly, this dish boasts several health benefits. Cottage cheese is high in protein and low in fat, helping to keep your calorie intake in check without sacrificing flavor. It is rich in probiotics and vital nutrients, which promote gut health and aid digestion. Packed with vitamins and minerals, this meal supports overall well-being, making it a smart choice for diet-conscious individuals.

    Moreover, the customization options are endless. From vegan swaps to gluten-free alternatives, everyone can enjoy this delicious Alfredo. Parents will appreciate how easily it fits into their kids’ diets, while health enthusiasts can indulge guilt-free. This versatility is a standout feature that makes the Baked Cottage Cheese Alfredo an advantageous addition to your collection of dinner recipes.

    Nutritional Value:

    Many dinner recipes lack nutrition; however, this dish offers a healthy balance of macronutrients. The calcium from cottage cheese strengthens bones, while protein aids in muscle repair and growth. You can also incorporate a variety of veggies to boost the nutritional content – think spinach, sun-dried tomatoes, or broccoli.

    In summary, the benefits of Baked Cottage Cheese Alfredo lie in its simplicity, health-conscious ingredients, and versatility, making it a must-try recipe that caters to various dietary preferences.

    Ingredients Overview

    Essential Ingredients for Baked Cottage Cheese Alfredo

    Creating a delightfully nutritious Baked Cottage Cheese Alfredo starts with the right ingredients. Here is what you’ll need for this recipe:

    1. Cottage Cheese (2 cups): The star of the dish, cottage cheese provides creaminess while being rich in protein.
    2. Pasta (8 oz): Choose whole wheat or gluten-free pasta to boost the health factor (considering dietary needs).
    3. Alfredo Sauce (2 cups): You can either use store-bought or make your own using low-fat milk and flour.
    4. Garlic Powder (1 teaspoon): Adds a flavorful kick without the hassle of peeling fresh garlic.
    5. Parmesan Cheese (½ cup, grated): Essential for that authentic Alfredo taste (omit for vegan adaptations).
    6. Black Pepper (to taste): For seasoning, adding just the right amount of spice.
    7. Salt (to taste): Necessary for bringing together all flavors.
    8. Fresh Spinach (1 cup, chopped): Optional, but highly recommended for an extra health boost.
    9. Olive Oil (2 tablespoons): For sautéing and adding healthful fats.

    Diet-conscious options:
    – For a vegan version, substitute cottage cheese with silken tofu blended until smooth, and use nutritional yeast instead of Parmesan.
    – For a gluten-free option, ensure you select gluten-free pasta.

    Dietary Substitutions to Customize Your Baked Cottage Cheese Alfredo

    This recipe is flexible, allowing you to adapt it to various dietary requirements or ingredient availability:

    • Dairy-Free: Replace cottage cheese with a vegan cream cheese or a nut-based cheese. Use coconut milk instead of regular milk for the sauce.
    • Low-Carb: Swap regular pasta with zucchini noodles or spaghetti squash. The texture might differ slightly, providing a different but delicious take.
    • Vegetable Boost: For added nutrition, consider adding diced bell peppers, peas, or mushrooms. Not only do they incorporate more vitamins, but they also add vibrant colors and textures to the dish.

    Customization makes this recipe unique and ensures that it can serve anyone’s dietary needs while still being delicious.

    How to Prepare the Perfect Baked Cottage Cheese Alfredo: Step-by-Step Guide

    Now that you have all the ingredients prepared, it’s time to dive into the step-by-step instructions for creating your Baked Cottage Cheese Alfredo.

    1. Preheat the Oven:
      Preheat your oven to 375°F (190°C). This will ensure that your dish cooks evenly.

    2. Cook the Pasta:
      In a large pot, boil water and add a pinch of salt. Once boiling, add your chosen pasta and cook according to the package instructions until al dente. Drain the pasta and set aside.

    3. Prepare the Alfredo Sauce:
      In a saucepan over medium heat, combine the cottage cheese, garlic powder, and salt. If you’re making your own sauce, add low-fat milk gradually until you achieve your desired consistency. Stir continuously until heated through.

    4. Mix Ingredients:
      In a large mixing bowl, combine the cooked pasta with the Alfredo sauce. Stir well to ensure the pasta is generously coated. If you’re adding spinach or other vegetables, fold them in at this point.

    5. Transfer to Baking Dish:
      Pour the pasta mixture into a greased baking dish. Make sure to spread it evenly.

    6. Add Toppings:
      Sprinkle the grated Parmesan on the top evenly and add a dash of black pepper for added flavor. For an even more decadent dish, consider drizzling a touch of olive oil over the top.

    7. Bake:
      Place the baking dish in the preheated oven and bake for approximately 25-30 minutes, or until the top is golden and bubbly.

    8. Cool and Serve:
      Once out of the oven, let it cool for a few minutes before serving. This allows the sauce to thicken slightly and enhances the flavor!

    Making Baked Cottage Cheese Alfredo can be an enjoyable experience for all skill levels. The key is to follow these clear instructions, and you’ll have an impressive meal ready in no time.

    Mastering Baked Cottage Cheese Alfredo: Advanced Tips and Variations

    To elevate your Baked Cottage Cheese Alfredo, consider trying these advanced tips and variations:

    • Herb Infusions: Add fresh herbs like basil or thyme to the Alfredo sauce for an aromatic twist. Dried herbs work well, too, but fresh enhances flavor remarkably.
    • Protein Add-Ins: For those who want added protein, consider incorporating grilled chicken or shrimp into the mix.
    • Cheesy Variations: Experiment with blending different cheeses, such as mozzarella or cheddar, to give a complex flavor profile to the dish.
    • Colorful Veggies: Roasting vegetables beforehand can bring out their sweetness, adding depth to your dish. Roasted tomatoes can lend a delightful burst of flavor.
    • Spicy Kick: If you enjoy a bit of heat, don’t hesitate to add red pepper flakes or chopped jalapeños.

    These variations and tips will not only help you master the Baked Cottage Cheese Alfredo but also encourage creativity and diversity in your dinner recipes collection.

    How to Store Baked Cottage Cheese Alfredo: Best Practices

    Proper storage of your Baked Cottage Cheese Alfredo is essential for maintaining its flavor and freshness. Here are the best practices to follow:

    • Refrigeration: Allow the dish to cool completely before transferring it to an airtight container. Stored in the fridge, it should stay fresh for up to 4-5 days.

    • Freezing: If you want to save a portion for later, consider freezing it. Wrap your dish in plastic wrap, then cover it with a layer of aluminum foil to prevent freezer burn. Baked Cottage Cheese Alfredo can last up to 2-3 months in the freezer.

    • Reheating: For best results when reheating, let the frozen dish thaw in the fridge overnight. Reheat in the oven at 350°F (175°C) for about 20-25 minutes, or until heated through. You can use a microwave for faster reheating but note that the texture may differ.

    These simple storage methods ensure that you enjoy your Baked Cottage Cheese Alfredo for days to come!

    Nutritional Value of Baked Cottage Cheese Alfredo

    Understanding the nutritional value of your meal is essential for anyone wanting to maintain a balanced diet. Here are the estimated nutritional facts per serving (serving approximately 1 cup):

    • Calories: 250 kcal
    • Protein: 22 g
    • Fat: 9 g
    • Carbohydrates: 30 g
    • Fiber: 4 g
    • Sugars: 3 g

    Nutritional Benefits

    The primary ingredients in Baked Cottage Cheese Alfredo contribute various nutrients:
    Cottage Cheese: High in protein and calcium, promotes muscle health and strong bones.
    Whole Wheat Pasta: Provides fiber and B vitamins essential for energy levels.
    Fresh Vegetables: Depending on your additions, they will add vitamins A, C, and K to fortify the dish nutritionally.

    Remember, variations in ingredients (e.g., choosing low-fat options or adding more vegetables) can alter these values, so you can adjust the recipe to meet your dietary preferences while still enjoying healthful benefits!

    FAQs: Frequently Asked Questions About Baked Cottage Cheese Alfredo

    1. Can I make Baked Cottage Cheese Alfredo vegan?

    Yes! Substitute cottage cheese with silken tofu and omit Parmesan or replace it with nutritional yeast for a cheesy flavor without dairy.

    2. How can I make this dish gluten-free?

    Simply use gluten-free pasta to make sure the entire recipe meets gluten-free standards.

    3. What vegetables can I add to this recipe?

    You can enhance the dish with a variety of vegetables like spinach, bell peppers, zucchini, and even mushrooms for added flavor and nutrients.

    4. How do I store leftovers?

    Once cooled, store leftover Baked Cottage Cheese Alfredo in an airtight container in the refrigerator for up to 5 days or freeze for up to 3 months.

    5. Can I use low-fat milk instead of whole milk for the sauce?

    Absolutely! Using low-fat milk is a great way to cut calories while maintaining creaminess in the sauce.

    6. How can I reheat the Baked Cottage Cheese Alfredo?

    To reheat, place the dish in an oven preheated to 350°F (175°C) for about 20-25 minutes, or heat in the microwave for a few minutes, covered.

    In conclusion, the Baked Cottage Cheese Alfredo is a wonderful addition to any repertoire of dinner recipes, combining health, convenience, and delicious flavors. Whether you’re adapting for dietary needs, preparing for a busy week, or treating yourself, this dish checks all the boxes for a wholesome, satisfying meal. Happy cooking!

  • Creamy Broccoli Cheddar Chicken Rice

    Creamy Broccoli Cheddar Chicken Rice

    Creamy Broccoli Cheddar Chicken Rice: A Tropical Delight

    Introduction to Creamy Broccoli Cheddar Chicken Rice

    Searching for easy dinner recipes that are both healthy and delicious? Look no further than Creamy Broccoli Cheddar Chicken Rice! This delightful dish combines tender chicken, fresh broccoli, and creamy cheddar cheese, all served over fluffy rice. It’s not just a meal but an experience that brings warmth and satisfaction to your dinner table.

    The beauty of this recipe lies in its simplicity; it’s quick to prepare and uses common pantry staples. Furthermore, it’s a versatile option that caters to various dietary needs. Busy parents can whip it up on weeknights, while health-conscious individuals can enjoy a hearty dish packed with nutrients. Overall, it is suitable for a wide audience, including students looking for budget-friendly meals, seniors who desire easy-to-chew options, and young couples wanting to impress their partners with minimal effort.

    Beyond its ease of preparation, Creamy Broccoli Cheddar Chicken Rice is also rich in vitamins and minerals. Broccoli is a powerhouse of nutrition, loaded with vitamin C, fiber, and antioxidants. Along with protein from chicken, this dish supports a balanced diet. Whether you’re a food enthusiast or simply seeking a comforting meal after a long day, this recipe promises to please your palate without compromising your health goals.

    Benefits and Advantages of Creamy Broccoli Cheddar Chicken Rice

    Discovering the advantages of Creamy Broccoli Cheddar Chicken Rice is essential for anyone looking for easy dinner recipes that deliver on both flavor and health. One of the standout features of this dish is its straightforward preparation. With minimal cooking time and effort, even novice chefs can enjoy success in the kitchen. In just about 30 minutes, you can have a complete meal that is sure to impress family and friends alike.

    Nutritional Benefits

    Loaded with nutrients, this dish serves as a wholesome meal by incorporating lean protein from chicken and a rich source of vitamins from broccoli. The cheddar cheese not only adds creaminess but also provides calcium, which is essential for strong bones. This recipe is particularly effective in meeting your daily nutritional needs while also being satisfying.

    Versatility and Adaptability

    Another benefit of Creamy Broccoli Cheddar Chicken Rice is its ability to adapt to various dietary needs. Whether you’re gluten-free, vegan, or following a low-calorie lifestyle, this dish can be customized to suit your preferences. For instance, opting for brown rice instead of white rice can enhance fiber content, making it a healthier option for those focusing on digestive health.

    Moreover, it’s a budget-friendly recipe, making it ideal for students and young families. With affordable ingredients, you can prepare a nutritious meal without breaking the bank. This adaptability, coupled with its rich taste, truly makes it a standout choice for anyone looking for easy dinner recipes.

    Ingredients Overview

    Essential Ingredients for Creamy Broccoli Cheddar Chicken Rice

    Here’s a detailed list of all the ingredients you will need to prepare Creamy Broccoli Cheddar Chicken Rice, complete with precise measurements:

    • 2 cups uncooked rice (white or brown)
    • 1 lb boneless, skinless chicken breasts – source of lean protein
    • 2 cups fresh broccoli florets – packed with vitamins
    • 1 cup cheddar cheese, shredded – adds creaminess and flavor
    • 1 medium onion, chopped – for added sweetness
    • 2 cloves garlic, minced – boosts flavor profile
    • 2 cups chicken broth – base for the creamy texture
    • 1 cup heavy cream or a dairy-free alternative (e.g., coconut cream) – for richness
    • 2 tbsp olive oil – for sautéing
    • Salt and pepper to taste
    • Optional: 1 tsp paprika for added flavor

    Dietary Options:
    Vegan: Substitute chicken with chickpeas or tofu, replace cream and cheese with vegan alternatives.
    Gluten-Free: Use gluten-free rice and broth.

    These ingredients not only come together to create a scrumptious dish but also ensure that you’re serving a meal that’s healthful and satisfying.

    Dietary Substitutions to Customize Your Creamy Broccoli Cheddar Chicken Rice

    To make the Creamy Broccoli Cheddar Chicken Rice suitable for various dietary preferences, consider these substitutions:

    • For a Low-Calorie Option: Use skinless chicken thighs instead of breast or reduce the amount of cheese.
    • Dairy-Free Version: Replace cheddar cheese with nutritional yeast for a cheesy flavor and use unsweetened almond milk in place of heavy cream.
    • Vegetarian Alternative: Instead of chicken, add mushrooms or lentils for protein and texture.

    These substitutions allow you to cater to different dietary needs while still enjoying the delicious flavors of this comforting dish. With a little creativity, this recipe easily transforms to fit any lifestyle or preference!

    How to Prepare the Perfect Creamy Broccoli Cheddar Chicken Rice: Step-by-Step Guide

    Ready to make your Creamy Broccoli Cheddar Chicken Rice? Follow these detailed, step-by-step instructions to create a dish that’s sure to become a family favorite!

    1. Prepare the Base: Begin by cooking the rice according to the package instructions. For added flavor, consider cooking it in chicken broth instead of water.

    2. Sauté the Aromatics: In a large skillet, heat 2 tablespoons of olive oil over medium heat. Add the chopped onion and minced garlic. Sauté for 3-4 minutes until translucent.

    3. Cook the Chicken: Add the boneless, skinless chicken breasts to the skillet. Season with salt, pepper, and optional paprika. Cook for about 6-7 minutes on each side until the chicken is no longer pink. Remove from the skillet and set aside to rest.

    4. Prepare the Creamy Sauce: In the same skillet, add 2 cups of chicken broth and 1 cup of heavy cream. Stir to combine, scraping the bottom to release any flavorful bits left from the chicken. Bring to a simmer.

    5. Add the Broccoli: Add the broccoli florets to the simmering sauce and cook for 4-5 minutes or until the broccoli is tender but still vibrant green.

    6. Shred the Chicken: While the broccoli cooks, shred the rested chicken into bite-sized pieces using two forks.

    7. Combine Ingredients: Return the shredded chicken to the skillet and stir well to incorporate everything. Add the shredded cheddar cheese, stirring until melted and creamy.

    8. Mix in the Rice: Finally, add the cooked rice to the skillet. Stir until well combined and heated through.

    9. Serve and Enjoy: Taste and adjust seasoning if necessary. Serve hot, garnished with additional cheese or a sprinkle of fresh herbs if desired.

    This step-by-step guide ensures that you get a delicious and creamy meal every time. Remember, this recipe is perfect for easy dinner recipes that you can tweak according to your lifestyle!

    Mastering Creamy Broccoli Cheddar Chicken Rice: Advanced Tips and Variations

    Now that you know how to make Creamy Broccoli Cheddar Chicken Rice, here are some advanced tips and variations to elevate your dish for special occasions or simply for more variety.

    Enhance Flavor

    • Herbs: Fresh herbs such as thyme and parsley elevate the flavor profile, making the dish taste gourmet.
    • Spices: Add a pinch of cayenne pepper or chili flakes for a hint of heat.

    Variations

    • Add More Veggies: Feel free to incorporate other vegetables like bell peppers, carrots, or spinach for added nutrients.
    • Protein Variants: Switch out chicken for turkey, shrimp, or even plant-based proteins like chickpeas or seitan to suit your dietary preferences.

    These tips and recipes encourage creativity in the kitchen, showcasing how Creamy Broccoli Cheddar Chicken Rice can be a blank canvas for your culinary adventures.

    How to Store Creamy Broccoli Cheddar Chicken Rice: Best Practices

    To ensure you can enjoy your Creamy Broccoli Cheddar Chicken Rice over multiple meals, follow these storage tips:

    • Refrigeration: Allow the dish to cool completely, then transfer it to an airtight container. It will keep in the fridge for up to 3-4 days. When you’re ready to enjoy your leftovers, pop it in the microwave or reheat on the stove, adding a splash of milk or broth to restore its creaminess.

    • Freezing: For longer storage, this dish freezes well. Portion out the rice into freezer-safe containers and store it for up to 3 months. When you’re ready to eat, defrost in the fridge overnight and reheat on the stove.

    By implementing these best practices, you ensure that you maximize the shelf life of this creamy delicacy, allowing easy access to a wholesome meal any day of the week!

    Nutritional Value of Creamy Broccoli Cheddar Chicken Rice

    Understanding the nutritional value of Creamy Broccoli Cheddar Chicken Rice can keep your health goals in check while enjoying an easy dinner recipe. Here’s a breakdown of the approximate nutritional content per serving based on standard ingredients:

    • Calories: 450-500
    • Protein: 30g
    • Fat: 20g
    • Carbohydrates: 50g
    • Fiber: 5g
    • Calcium: 25% of Daily Value

    Nutritional Considerations

    • High Protein: Packed with lean chicken, this dish is ideal for muscle maintenance.
    • Rich in Vitamins: Broccoli provides essential vitamins, including C and K.
    • Balanced Meal: The combination of protein, carbohydrates, and healthy fats makes this dish a well-rounded meal.

    By incorporating Creamy Broccoli Cheddar Chicken Rice into your meal rotation, you not only satisfy your taste buds but also nourish your body with essential nutrients.

    FAQs: Frequently Asked Questions About Creamy Broccoli Cheddar Chicken Rice

    Q1: Can I use brown rice instead of white rice for this recipe?

    A1: Yes! Brown rice is a fantastic option as it is higher in fiber and adds a nuttier flavor. Just adjust the cooking time according to the rice package instructions, as brown rice usually takes longer to cook.

    Q2: How can I make this dish dairy-free?

    A2: To make it dairy-free, simply substitute the cheddar cheese with a dairy-free alternative and opt for coconut cream or a plant-based heavy cream in place of heavy cream.

    Q3: Can I prepare this recipe in advance?

    A3: Absolutely! You can prep the ingredients ahead of time. Simply store the cooked chicken, broccoli, and sauce separately and combine them when ready to serve.

    Q4: What can I substitute if I don’t have chicken broth?

    A4: Vegetable broth or water can be excellent substitutes for chicken broth. You may miss out on some flavor, but adding additional spices can help enhance the taste.

    With these FAQs, you can navigate the common inquiries surrounding Creamy Broccoli Cheddar Chicken Rice, ensuring a smooth cooking experience. This dish is truly one of the best easy dinner recipes that everyone can enjoy!


    By following this guide, you’re equipped to create a delectable Creamy Broccoli Cheddar Chicken Rice that not only satisfies your hunger but is also flexible to fit various dietary needs. It’s a wonderful choice, whether you’re busy making dinner for the family or hosting a casual dinner party with friends. Give it a try for a flavor-packed experience that you won’t soon forget!

  • White Trash Casserole with Doritos

    White Trash Casserole with Doritos

    White Trash Casserole with Doritos: A Tropical Delight

    Introduction to White Trash Casserole with Doritos

    Are you in search of easy dinner recipes that are both crowd-pleasers and incredibly simple to whip up? Look no further! The White Trash Casserole with Doritos is a delightful fusion of flavors and textures that will quickly become a household favorite. This comforting dish combines crunchy Doritos with a creamy chicken mixture, lively veggies, and savory spices to create an explosion of taste in every bite. Whether you’re a busy parent, a college student wanting a quick meal, or a health-conscious individual, rest assured this casserole can easily adapt to suit your needs.

    While it may carry the name “White Trash,” don’t let that fool you—this recipe’s charm lies in its simplicity and versatility. Need a gluten-free version for a friend? Or perhaps you want to make it vegan for a plant-based meal? This casserole can handle it all! Plus, it’s made with readily available ingredients, making it not only accessible but also incredibly budget-friendly. In the following sections, we’ll explore the numerous advantages of this dish, break down the ingredients, and provide step-by-step instructions, tips, and more to ensure you create the perfect casserole every time.

    Benefits and Advantages of White Trash Casserole with Doritos

    This White Trash Casserole with Doritos is the epitome of ease and convenience, making it an ideal option for anyone looking for easy dinner recipes without compromising on flavor. Here’s why you should add this casserole to your dinner repertoire:

    1. Effortless Preparation: This dish comes together in mere minutes, allowing even the busiest of cooks to produce a hearty meal. The cooking process is straightforward, requiring minimal kitchen skills. Just layer the ingredients, pop it in the oven, and let it bake!

    2. Customizable: The versatility of this recipe is phenomenal. Are you gluten-free? Use gluten-free Doritos and cream of mushroom soup. Want a vegetarian option? Swap the chicken for hearty beans and add extra vegetables. Change it according to dietary needs or what’s available in your pantry.

    3. Health-Conscious Options: While this casserole can indulge comfort food cravings, it can also be tailored for health-conscious eaters. Consider using low-fat cheese, lean chicken, or even subbing zoodles (zucchini noodles) for pasta to reduce calories and carbohydrates while adding nutritional value.

    4. Family-Friendly: Children and adults alike adore the crunchy topping and creamy filling. It’s a fantastic way to get picky eaters to consume more vegetables without them realizing it!

    5. Meal Prep Favorite: This dish is perfect for meal prepping. Make a big batch at the start of the week, and you’ll have ready-made meals for busy days ahead.

    In essence, the White Trash Casserole with Doritos checks all the boxes—ease of preparation, health-conscious options, and an adaptable nature make it a standout choice among easy dinner recipes.

    Ingredients Overview

    Essential Ingredients for White Trash Casserole with Doritos

    To whip up your White Trash Casserole, you’ll need the following ingredients:

    • 3 cups cooked chicken (shredded or diced)
    • 2 cups Doritos (Nacho Cheese flavor or your preference)
    • 1 can cream of chicken soup (or gluten-free/vegan alternative)
    • 1 cup sour cream (you can use Greek yogurt for a healthier option)
    • 1 cup shredded cheese (cheddar works best; swap for dairy-free cheese if needed)
    • 1 cup frozen mixed vegetables (like peas, corn, and carrots)
    • 1 tablespoon ranch seasoning mix
    • Salt and pepper to taste

    The ingredients provide a base for a flavorful casserole, with each element playing a vital role in crafting the perfect dish. The Doritos add an iconic crunch, while the cream of chicken soup and sour cream give the casserole its comforting, creamy texture.

    Dietary Substitutions to Customize Your White Trash Casserole with Doritos

    1. Vegan Option: Substitute cooked chicken with shredded jackfruit or chickpeas. Replace the cream of chicken soup with a vegan cream substitute, and use a vegan sour cream and dairy-free cheese to keep it plant-based.

    2. Gluten-Free Option: Use gluten-free Doritos and choose gluten-free cream of mushroom soup. Be sure to check all labels on any prepackaged ingredients to confirm they meet gluten-free standards.

    3. Low-Calorie Option: To create a lower-calorie version, opt for shredded rotisserie chicken, use reduced-fat sour cream, and limit the cheese. You can also boost nutrition by adding more veggies, like spinach or mushrooms.

    4. Low-Carb Option: Swap out the Doritos for crushed pork rinds or almond flour-based chips to create a low-carb version. You can also replace the chicken with cauliflower for a substantial base.

    By utilizing these dietary substitutions, you ensure that this versatile casserole can suit a range of dietary preferences and needs while remaining accessible. Keep these adaptations in mind as you explore this delightful dish.

    How to Prepare the Perfect White Trash Casserole with Doritos: Step-by-Step Guide

    Follow these easy steps to create your delicious White Trash Casserole with Doritos. Whether you’re a seasoned cook or a beginner looking for easy dinner recipes, you’ll find this guide straightforward:

    1. Preheat Your Oven: Begin by preheating your oven to 350°F (175°C).

    2. Prepare Your Chicken: If you haven’t cooked your chicken yet, boil, bake, or sauté it until fully cooked. Allow it to cool, then shred or dice into bite-sized pieces.

    3. Mix the Base: In a large mixing bowl, combine the shredded chicken, cream of chicken soup, sour cream, and ranch seasoning.

    4. Add Vegetables: Gently fold in the frozen mixed vegetables, ensuring they are evenly distributed throughout the mixture.

    5. Layer the Dish: In a greased 9×13-inch baking dish, layer half of the crushed Doritos to cover the bottom.

    6. Pour the Chicken Mixture: Layer the chicken and veggie mixture over the Doritos, spreading it evenly across the entire dish.

    7. Top with Cheese: Sprinkle the shredded cheese evenly over the chicken layer for an extra cheesy finish.

    8. Add More Doritos: Lastly, top with the remaining crushed Doritos, providing that delightful crunch on top.

    9. Bake the Casserole: Place the baking dish in the preheated oven and bake for 30–35 minutes, or until the cheese is melted and bubbly. Consider covering the dish with foil if it browns too quickly.

    10. Cool and Serve: Once fully baked, remove the dish from the oven and let it cool for a few minutes. Serve warm and enjoy!

    Feel free to adapt any of the steps according to your dietary restrictions or preferences. The beauty of this casserole lies in its adaptability.

    Mastering White Trash Casserole with Doritos: Advanced Tips and Variations

    To truly make the most out of your White Trash Casserole with Doritos, consider the following tips and variations:

    • Use Leftover Chicken: This dish is a great way to use leftover rotisserie chicken or turkey, saving you time and reducing waste.

    • Experiment with Flavors: Add different spices or sauces, such as hot sauce for a kick or BBQ chicken for a tangy twist.

    • Flavor Boosters: For enhanced flavor, sauté onions and garlic before adding them to the chicken mixture. Aromatics can elevate the overall taste of the casserole.

    • Vegetable Variations: Feel free to include your favorite vegetables like bell peppers, mushrooms, or spinach. The more colorful, the better!

    • Make It Spicy: For heat lovers, include jalapeños or a sprinkle of cayenne pepper in the chicken mixture.

    Remember, this dish is highly adaptable! Don’t hesitate to let your creativity shine as you experiment with new ingredients and flavors.

    How to Store White Trash Casserole with Doritos: Best Practices

    Proper storage is vital to keeping your White Trash Casserole delicious for future meals. Here’s how to effectively store your dish:

    • Refrigeration: Store leftovers in an airtight container in the refrigerator for up to 3-4 days. Make sure the casserole has cooled completely before transferring it to avoid condensation, which can make the dish soggy.

    • Freezing: For extended storage, freeze your casserole. Wrap it tightly in plastic wrap and then in aluminum foil or transfer it to a freezer-safe container. It can last up to 2-3 months in the freezer.

    • Reheating: When you’re ready to enjoy leftovers, reheat in the oven at 350°F (175°C) for about 20-30 minutes, or until heated through. If the casserole is frozen, it’s best to let it thaw in the fridge overnight before reheating for even cooking.

    By utilizing these storage tips, you can maximize the shelf life of your casserole while maintaining its delightful flavors.

    Nutritional Value of White Trash Casserole with Doritos

    Understanding the nutritional composition of your dishes is essential, especially when preparing easy dinner recipes. For a serving size of approximately one cup of White Trash Casserole with Doritos, the nutritional information is as follows (Exact values can vary based on substitutions and specific brands used):

    • Calories: 350-400
    • Total Fat: 20g
    • Saturated Fat: 10g
    • Cholesterol: 90mg
    • Sodium: 800mg
    • Total Carbohydrates: 30g
    • Dietary Fiber: 3g
    • Sugars: 2g
    • Protein: 22g

    These values make the casserole a hearty option, boasting a good amount of protein to keep you satiated. However, nutritional content can vary, particularly with different dietary substitutions, so consider this template while customizing your recipe.

    FAQs: Frequently Asked Questions About White Trash Casserole with Doritos

    Q: Can I use other chips instead of Doritos?
    A: Absolutely! Feel free to swap Doritos for any other crunchy chips you have on hand, such as Fritos, tortilla chips, or even crushed crackers.

    Q: Is it possible to prepare this casserole in advance?
    A: Yes, you can prepare the casserole up to a day ahead. Just assemble it, cover with foil, and store in the fridge. When ready to bake, cook as directed, adding a few extra minutes if baking straight from the fridge.

    Q: Can I make this casserole without chicken?
    A: Definitely! You can opt for a vegetarian version by using beans or lentils instead of chicken. You can also add more vegetables for added nutrition and flavor.

    Q: Can I freeze the casserole?
    A: Yes! You can freeze the casserole either before baking or after leftovers. Just ensure you wrap it well to avoid freezer burn.

    Q: How can I make this dish spicier?
    A: To add some heat, include diced jalapeños or a pinch of cayenne pepper mixed into the chicken mixture.

    With these FAQs, we hope to clarify any doubts you may have about the recipe, allowing you to dive into making your own White Trash Casserole with Doritos confidently!

    In summary, this White Trash Casserole with Doritos is not merely your average casserole. Its adaptability, ease of preparation, and delightful flavors make it a fantastic option for anyone seeking easy dinner recipes. Whip it up for a family gathering, meal prep, or a cozy weeknight dinner—this dish has got you covered! Enjoy cooking and happy eating!

  • Sun-Dried Tomato and Spinach Risotto

    Sun-Dried Tomato and Spinach Risotto

    Sun-Dried Tomato and Spinach Risotto: A Tropical Delight

    Introduction to Sun-Dried Tomato and Spinach Risotto

    Welcome to one of the most delightful dinner recipes that you can whip up in no time – Sun-Dried Tomato and Spinach Risotto! This dish is a celebration of rich flavors and nutritious ingredients that can elevate any meal. Risotto is often seen as a sophisticated dish, but the truth is: it’s incredibly easy to prepare. With just a handful of ingredients, including vibrant sun-dried tomatoes and nutrient-packed spinach, you can create a sumptuous, creamy risotto that whets the appetite of even the most discerning palates.

    Whether you’re a busy parent juggling multiple responsibilities, a student on a budget looking for quick meals, or a health-conscious individual who believes in wholesome eating, this recipe fits the bill. It’s simple enough for a novice cook yet impressive enough for dinner parties. The best part? This dish is both vegan and gluten-free, making it a versatile choice for various dietary needs.

    In addition to being a treat for your taste buds, this risotto is also a fantastic source of vitamins and minerals. Spinach is loaded with iron and essential nutrients, while sun-dried tomatoes add depth and a myriad of health benefits. Serving this dish not only satisfies your hunger but also provides wholesome nourishment. So, roll up your sleeves and learn how to prepare this delicious Sun-Dried Tomato and Spinach Risotto – a must-try for anyone who loves making healthy dinner recipes at home!

    Benefits and Advantages of Sun-Dried Tomato and Spinach Risotto

    The allure of Sun-Dried Tomato and Spinach Risotto goes beyond its picturesque presentation and robust flavor. There are several benefits that this dish offers, making it an excellent addition to your cooking repertoire.

    Ease of Preparation

    One of the standout features of this risotto is its straightforward preparation method. Unlike traditional risottos, which can be time-consuming, this version simplifies the cooking process without sacrificing taste. Dinner recipes that require minimal effort make weeknight cooking much more manageable for busy individuals or families. You can prepare this risotto in under 30 minutes! Additionally, it does not require any fancy equipment; a good pot and a wooden spoon are all you need to craft this dish.

    Health Benefits

    Health-conscious individuals will appreciate that this dish is loaded with health benefits. Spinach serves as a powerhouse of nutrients, notably vitamins A, C, and K, while also being high in fiber. Sun-dried tomatoes contribute antioxidants, which support heart health and the immune system. This risotto is naturally low in calories, especially if you manage your portion sizes, making it suitable for those mindful of their caloric intake.

    Versatile and Customizable

    Furthermore, this risotto can adapt to various dietary preferences. With a few ingredient swaps, you can make it suitable for vegan, gluten-free, or low-carb diets. For example, using vegetable broth instead of chicken broth enables a vegan dish without compromising taste. The recipe allows creativity, as you can add other vegetables, proteins, or spices to personal taste.

    Suitable for Any Occasion

    Whether it’s a relaxed family dinner, a dinner party with friends, or a meal prep option for the week, Sun-Dried Tomato and Spinach Risotto is a delightful dish that can fit various occasions. It is equally loved by kids and adults, making it the perfect choice for families.

    In summary, Sun-Dried Tomato and Spinach Risotto is a simple yet delicious dish that stands out due to its ease of preparation, health benefits, and versatility. It also allows home cooks to explore new flavors while accommodating various dietary needs—all of which make it a fantastic choice among blossoming dinner recipes.

    Ingredients Overview

    Essential Ingredients for Sun-Dried Tomato and Spinach Risotto

    Say goodbye to complicated recipes! Here’s everything you’ll need for a delightful Sun-Dried Tomato and Spinach Risotto:

    • 1 cup Arborio rice: The star of any risotto; its high starch content gives the dish its creamy texture.
    • 4 cups vegetable broth (or chicken broth): For cooking the rice; make sure it’s warm for better absorption.
    • 1 cup sun-dried tomatoes (packed in oil): Adds rich flavor and color; chopped into small pieces.
    • 2 cups fresh spinach: Nutrient-rich and adds a beautiful hue.
    • 1 medium onion: Finely diced; it builds the base flavor of the risotto.
    • 3 cloves garlic: Minced; a must-have for aromatic flavor.
    • 2 tablespoons olive oil: Provides a healthy fat and flavor enhancement.
    • ½ cup nutritional yeast (optional): For a cheesy flavor without dairy, making it perfect for vegans.
    • Salt and pepper to taste: Essential for seasoning your dish.

    The above ingredients make a solid base for the risotto, focusing on wholesome, plant-based components. Most of them are pantry staples, making it easy to whip up this dish whenever cravings hit!

    Dietary Substitutions to Customize Your Sun-Dried Tomato and Spinach Risotto

    No two kitchens are alike, and often, ingredient availability can differ significantly. Here are some suggested substitutions to cater to varying dietary needs:

    • Rice Alternatives: If you’re gluten-free, Arborio rice is a safe choice. Alternatively, you could use quinoa or couscous for a different texture.
    • Broth Options: For a nutrient boost, consider using mushroom broth to introduce an umami flavor, particularly appealing to those who follow vegetarian or vegan diets.
    • Sun-Dried Tomatoes: For a fresh take, use roasted tomatoes if sun-dried aren’t available. You could also use fresh cherry tomatoes, but add them later in the cooking process to prevent them from disintegrating.
    • Cheese Alternatives: Omit nutritional yeast for a creamier texture or experiment with vegan cheese if you are looking for a dairy-free option.
    • Protein Additions: To make it a heartier meal, consider adding chickpeas or edamame, or if you enjoy chicken, stir cooked chicken pieces in towards the end.

    With these substitutions, this risotto can accommodate a wider audience with ease. The goal is for you to enjoy the cooking process without the stress of fitting into specific dietary guidelines.

    How to Prepare the Perfect Sun-Dried Tomato and Spinach Risotto: Step-by-Step Guide

    Now that we have covered everything from benefits to ingredients, it’s time to get cooking! Follow this straightforward, step-by-step guide to prepare Sun-Dried Tomato and Spinach Risotto.

    1. Prepare the Base: In a large skillet or pot, heat 2 tablespoons of olive oil over medium heat. Add the finely diced onion and cook until it becomes translucent, about 3-4 minutes. Stir in the minced garlic and sauté for an additional 1-2 minutes until fragrant.

    2. Toast the Rice: Add 1 cup of Arborio rice to the pan. Stir well to combine and toast the rice for about 2 minutes. You’ll notice that the edges of the rice start to look translucent, indicating it’s time to add the broth.

    3. Add the Broth Gradually: Pour in 1 cup of warm vegetable broth, stirring continuously. This technique releases the rice’s starch and develops that creamy texture. Once the broth has mostly evaporated, add another cup, repeating the process until you’ve used 3 cups in total (this should take about 15-20 minutes).

    4. Incorporate Sun-Dried Tomatoes: When the rice is nearly al dente, around the 15 to 20-minute mark, fold in 1 cup of chopped sun-dried tomatoes. Continue to stir gently until well incorporated.

    5. Introduce Spinach: Add 2 cups of fresh spinach to the risotto. As it wilts, mix it thoroughly into the rice. Season with salt and pepper to taste.

    6. Finish Creaminess: Once the rice is perfectly cooked and creamy (it should have a slight bite), stir in ½ cup of nutritional yeast or your choice of cheese. This step enriches the flavor and creaminess.

    7. Let it Rest: Turn off the heat and cover the pot for a couple of minutes. This resting time helps to meld all the flavors together.

    8. Serve It Up: Spoon the risotto into bowls. You can garnish it with extra sun-dried tomatoes, a sprinkle of nutritional yeast, or some freshly cracked black pepper.

    Congratulations! You have just created an exquisite Sun-Dried Tomato and Spinach Risotto that is impressive enough for guests yet simple enough for a weeknight meal.

    This risotto suits a variety of dietary needs, and you can customize it to fit your preferences easily. Now, let’s look at some advanced tips and variations to take your dish to the next level.

    Mastering Sun-Dried Tomato and Spinach Risotto: Advanced Tips and Variations

    Tips for Success

    • Quality Ingredients Matter: Use quality sun-dried tomatoes and organic spinach for the best flavor. Fresh, high-quality ingredients can significantly elevate your dish.
    • Consistent Stirring: Be attentive while stirring the rice; consistency keeps the texture creamy. Use a wooden spoon for the best results.
    • Broth Temperature: Always ensure your broth is warm before adding it to the rice; cold broth can shock the grains and alter the cooking process.
    • Taste as You Go: Start seasoning gradually. You can always add more salt or spices later, but you can’t take them out once they’re in!

    Flavor Variations

    • Add lemon zest: Brighten up the risotto by adding a teaspoon of lemon zest along with the nutritional yeast for a refreshing twist.
    • Spice it Up: For those who like a spicy kick, consider adding crushed red pepper flakes or diced jalapeños.
    • Mushroom Medley: Sauté some mushrooms with the onions and garlic for an earthy flavor that pairs beautifully with the sun-dried tomatoes.
    • Nutty Flavor: Toasted pine nuts or slivered almonds sprinkled on top add texture and a nutty flavor that complements the dish nicely.

    Regardless of how you choose to master this risotto, the key is in the love and care you put into it. Each variation can turn a simple dish into something memorable.

    How to Store Sun-Dried Tomato and Spinach Risotto: Best Practices

    To ensure the longevity of your freshly made Sun-Dried Tomato and Spinach Risotto, it’s essential to store it correctly. Following best practices will help maintain its flavor and texture even after storage.

    Refrigeration

    • Cool Before Storing: Allow the risotto to cool to room temperature before placing it in the fridge to avoid condensation and sogginess.
    • Airtight Container: Transfer the risotto into an airtight container. Stored this way, it can last for up to 3-4 days in the refrigerator.

    Freezing

    If you’ve made a large batch, you might want to freeze some for later use:
    Individual Portions: Consider freezing the risotto in smaller, portion-sized containers. This makes it easy to defrost only what you need.
    Label and Date: Mark the containers with the date they were prepared to track freshness. Properly stored, the risotto can last for up to 3 months in the freezer.

    Reheating

    • Microwave Method: Reheat individual portions in the microwave. Add a splash of broth or water to keep it moist while heating.
    • Stovetop Method: For larger portions, reheating on the stovetop works best. Stir in a bit of broth or water, heating over low heat until warmed through, stirring often to maintain creaminess.

    Following these storage tips will help you enjoy your Sun-Dried Tomato and Spinach Risotto long after it’s been prepared, enhancing its viability as one of your favorite dinner recipes.

    Nutritional Value of Sun-Dried Tomato and Spinach Risotto

    Understanding the nutritional value of your meals is essential, especially when trying to maintain a balanced diet. Below is the estimated nutritional breakdown of Sun-Dried Tomato and Spinach Risotto per serving (assuming 4 servings):

    • Calories: 320
    • Total Fat: 10g
    • Saturated Fat: 1.5g
    • Carbohydrates: 52g
    • Fiber: 4g
    • Protein: 7g
    • Sugars: 2g
    • Sodium: 600mg

    Health Benefits Overview

    • Low in Calories: Ideal for those on calorie-restricted diets.
    • Rich in Fiber: Supports digestive health and contributes to feeling full.
    • Vitamins and Minerals: Packed with micronutrients from spinach and sun-dried tomatoes.
    • Plant-Based Goodness: Vegetarian and vegan-friendly, great for lowering the intake of animal products.

    Given its hearty yet healthy components, this dish not only nurtures your body but also delights your taste buds! It stands out as a healthy option among dinner recipes, ensuring flavor and nutrition go hand in hand.

    FAQs: Frequently Asked Questions About Sun-Dried Tomato and Spinach Risotto

    1. Can I make this risotto without Arborio rice?

      • Yes, but Arborio rice is recommended for its unique starch properties that create the creamy texture essential in risotto. If not available, use Carnaroli or Vialone Nano rice as alternatives, or opt for quinoa for a different take.
    2. What can I substitute for sun-dried tomatoes?

      • Fresh cherry tomatoes or roasted red peppers can work in a pinch. For best results, consider adding them later in the cooking process to avoid them breaking down completely.
    3. Is this risotto gluten-free?

      • Absolutely! As long as you use vegetable or chicken broth that does not contain gluten, this dish can be enjoyed by those with gluten sensitivities.
    4. How can I make this recipe creamy without dairy?

      • Nutritional yeast allows for a cheesy flavor while being completely dairy-free. Adding little splashes of non-dairy milk while stirring will also enhance creaminess.
    5. Can I make risotto ahead of time?

      • You can prepare the risotto in advance but keep in mind that it may thicken upon cooling. It’s best enjoyed fresh. However, you can easily reheat it per our storage guidelines above.

    In summary, this Sun-Dried Tomato and Spinach Risotto is a delicious and healthy option among dinner recipes that cater to various dietary needs and preferences. With rich flavors, easy preparation, and storage options, it’s bound to become a staple in your cooking. Enjoy the experience of creating this delightful dish, and watch it become a beloved favorite in your household!