Irresistible Mozzarella Filled Rosemary Pretzels: A Tropical Delight
Introduction to Irresistible Mozzarella Filled Rosemary Pretzels
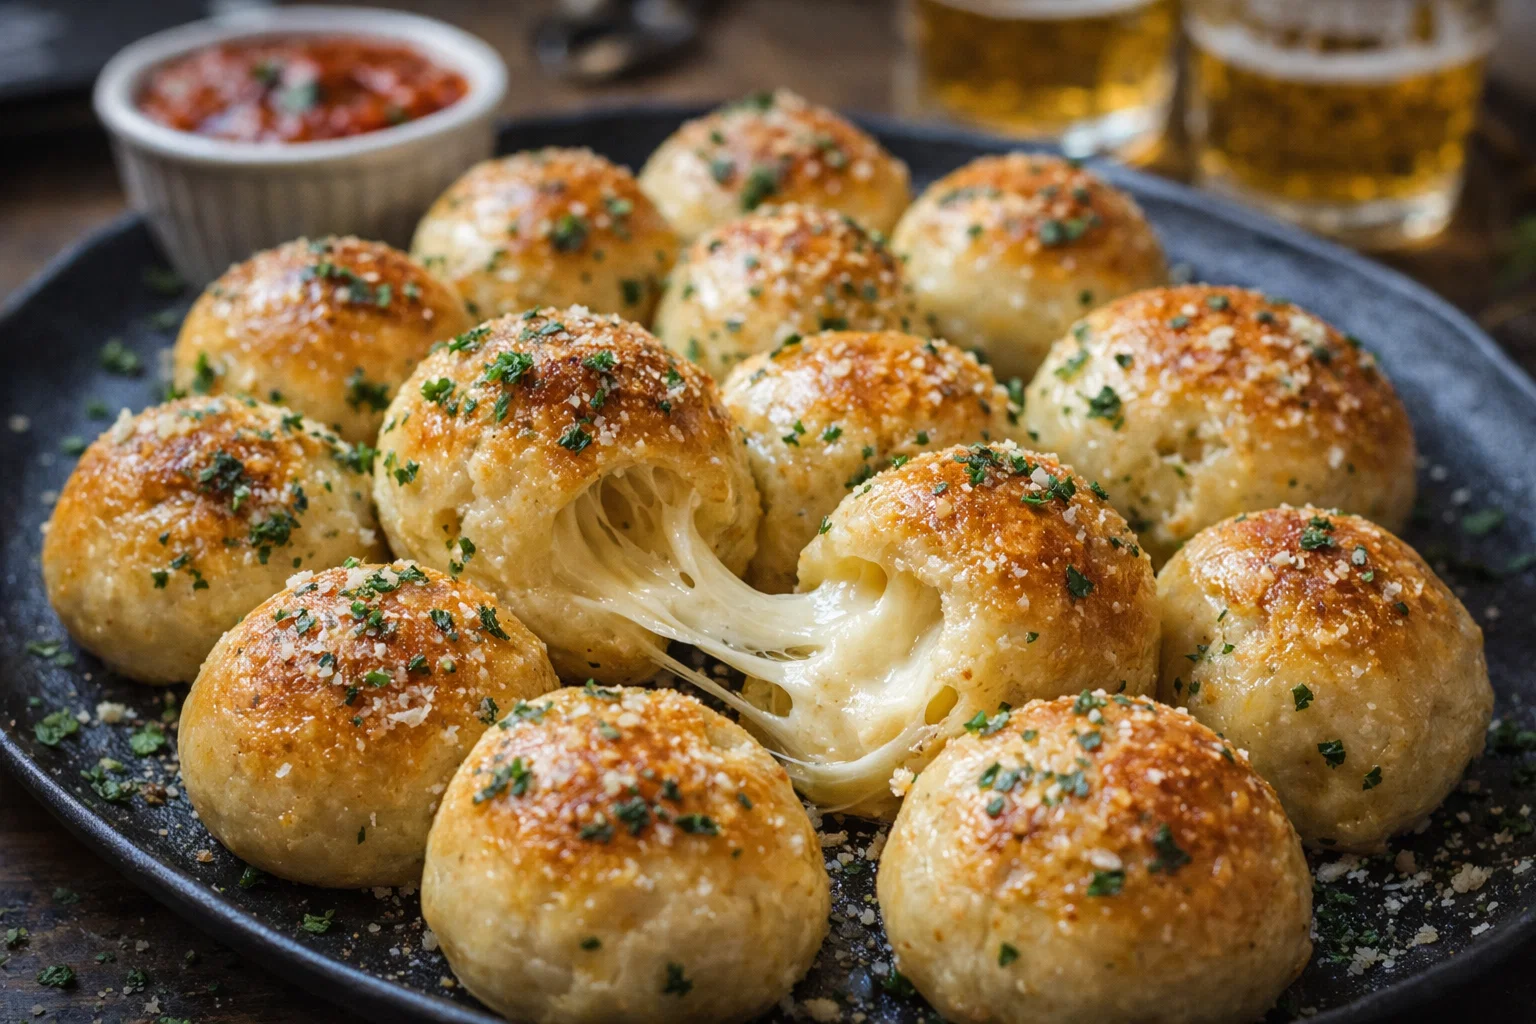
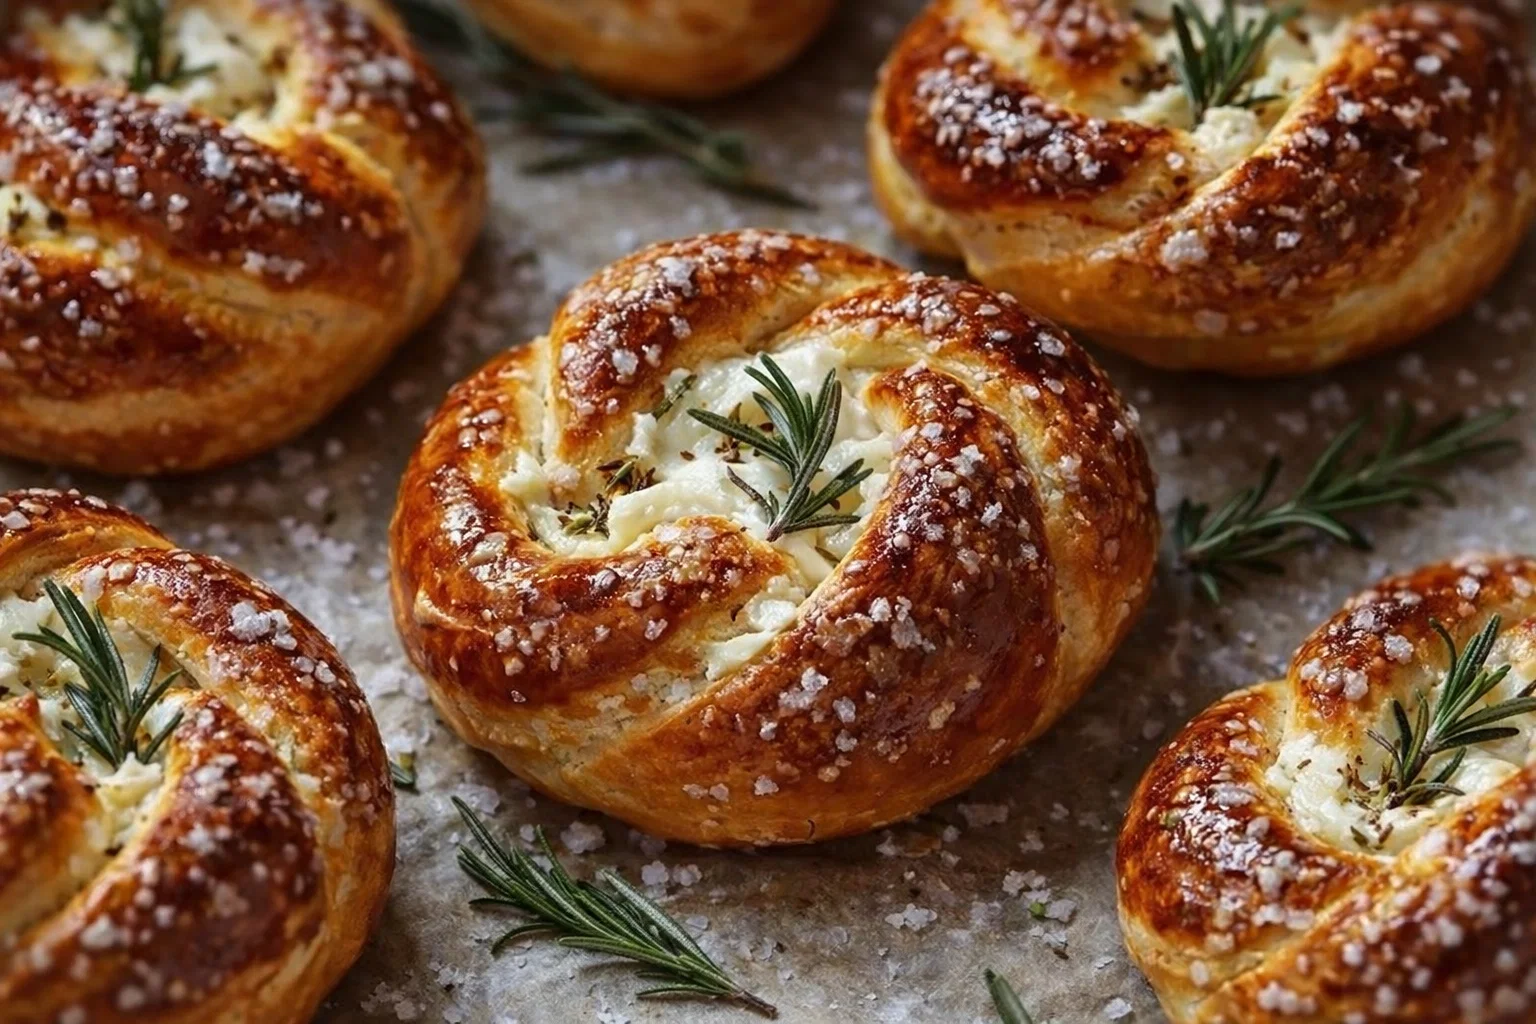
If you’re searching for a tantalizing appetizer recipe that will captivate your guests, look no further than Irresistible Mozzarella Filled Rosemary Pretzels. These delightful morsels combine the aromatic essence of fresh rosemary with gooey mozzarella cheese, wrapped in a warm, soft pretzel dough that is simply irresistible. Whether you’re hosting a backyard barbecue, a cozy game night, or a festive gathering, these pretzels make an excellent addition to your spread.
Not only are these pretzels easy to whip up, but they also boast a variety of health benefits. Rosemary is known for its antioxidant properties, while mozzarella provides a good source of protein and calcium. Additionally, the recipe can be easily tailored to fit different dietary needs, including gluten-free and vegan options—perfect for busy parents trying to accommodate picky eaters, newlyweds planning their first dinner party, or health-conscious individuals looking for wholesome snack alternatives. With just a handful of ingredients and straightforward steps, you’ll be on your way to masterfully creating an appetizer that your friends and family will rave about.
Benefits and Advantages of Irresistible Mozzarella Filled Rosemary Pretzels
The charm of Irresistible Mozzarella Filled Rosemary Pretzels lies not just in their taste but in the numerous benefits they offer.
Simplicity in Preparation
One of the standout features of this recipe is its simplicity. With just a few ingredients easily found in most kitchens, even novice chefs can create these heavenly bites without breaking a sweat. This ease of preparation is particularly beneficial for busy parents and working professionals who may not have hours to spend in the kitchen.
Health Benefits
On top of being a delectable treat, these pretzels also promote health. The rosemary adds a zing to your palate while contributing significant antioxidants, supporting overall well-being. When paired with the protein-rich mozzarella cheese, these pretzels serve as a satisfying snack that balances taste and nutrition.
Versatility for Various Dietary Needs
This recipe shines when considering dietary restrictions. The core ingredients allow for substitutions to fit various lifestyles. For those following a vegan diet, plant-based mozzarella alternatives work beautifully. If gluten is a concern, the recipe can easily transition to a gluten-free flour blend, ensuring everyone at your table can indulge guilt-free.
A Crowd-Pleaser
These pretzels stand out as a crowd-pleaser due to their comforting nature and delectable flavors. Imagine the joy of guests pulling apart warm, cheesy pretzels that fill the room with a delightful aroma! Whether served as a main dish or a quick snack, your Irresistible Mozzarella Filled Rosemary Pretzels will surely impress.
With such wide-ranging appeal, it’s no wonder this appetizer recipe is perfect for any occasion. The combination of ease, health benefits, and culinary flexibility makes them a must-try for anyone who enjoys good food.
Ingredients Overview
Essential Ingredients for Irresistible Mozzarella Filled Rosemary Pretzels
Here’s what you’ll need to recreate these amazing pretzels:
- 2 cups all-purpose flour (or gluten-free flour blend)
-
Purpose: Provides the base for the pretzel dough. A gluten-free option stands in well for those with dietary restrictions.
-
1 tablespoon sugar
-
Purpose: Adds a touch of sweetness, enhancing the overall flavor profile.
-
1 teaspoon salt
-
Purpose: Balances flavors, making the pretzel more appetizing.
-
1 packet (2 ¼ teaspoons) instant yeast
-
Purpose: Helps the dough rise quickly, resulting in fluffy pretzels.
-
¾ cup warm water (about 110°F or 43°C)
-
Purpose: Activates the yeast, which is essential for proper dough fermentation.
-
1 tablespoon olive oil (or melted vegan butter)
-
Purpose: Adds moisture and helps to enrich the dough for a softer texture.
-
4 oz mozzarella cheese (or vegan mozzarella)
-
Purpose: This gooey center is what makes these pretzels special.
-
1 tablespoon fresh rosemary (chopped)
- Purpose: For that wonderful aroma and flavor that pairs seamlessly with the cheese.
Dietary Substitutions to Customize Your Irresistible Mozzarella Filled Rosemary Pretzels
Gluten-Free Option:
For those looking to maintain a gluten-free diet, simply use a gluten-free flour blend plus a teaspoon of xanthan gum to get the right dough consistency.
Vegan Version:
To make this recipe vegan, substitute mozzarella with a plant-based cheese alternative. Make sure to check the ingredients for any unwanted dairy contents. Additionally, swap out olive oil for vegan butter to enhance flavor.
Low-Calorie Variation:
To lighten the calories, use part-skim mozzarella and reduce the amount of sugar in the dough. You can also create smaller pretzels, which lowers overall calorie consumption per serving.
With these substitutions, you can easily cater to various preferences and dietary restrictions while still delivering a dish that remains truly irresistible.
How to Prepare the Perfect Irresistible Mozzarella Filled Rosemary Pretzels: Step-by-Step Guide
Now that you have your ingredients sorted out, here’s a straightforward guide to creating your mozzarella-filled pretzel wonders:
- Prepare the Dough:
-
In a large mixing bowl, combine the warm water, sugar, and yeast. Stir gently and let it sit for about 5 minutes, or until the mixture becomes frothy. This stage confirms the yeast is active.
-
Mix Ingredients:
-
Once the yeast is ready, add the olive oil, salt, and flour (or gluten-free flour). Mix the combination until a shaggy dough forms. You may switch to a wooden spoon or your hands at this point.
-
Knead the Dough:
-
Transfer the dough onto a lightly floured surface. Knead it for about 5-7 minutes until it becomes smooth and elastic. If you’re using a gluten-free blend, kneading may not take as long.
-
Let It Rise:
-
Form the kneaded dough into a ball. Place it in a lightly oiled bowl, cover with a damp cloth, and let it rise in a warm area for about 1 hour or until doubled in size.
-
Preheat the Oven:
-
As the dough rises, preheat your oven to 425°F (220°C). Line a baking sheet with parchment paper to prevent sticking.
-
Divide the Dough:
-
Once the dough has risen, punch it down to release air. Divide it into 8 equal pieces. Each piece should weigh around 2 oz if you want consistency.
-
Shape the Pretzels:
-
Roll each piece into a rope, about 18 inches long. Make sure to keep the center slightly thicker to hold the mozzarella. Place a small cube of mozzarella at the center of each rope and fold over, pinching the edges to seal the cheese inside.
-
Twist into Pretzel Shape:
-
Take the ends of the dough rope, cross them over one another to form a twist, and press them into the bottom of the pretzel shape.
-
Boil the Pretzels:
-
Bring a large pot of water to a boil. Carefully drop the pretzels in batches into the water. Boil for about 30 seconds, then flip and boil for another 30 seconds. This step creates that signature pretzel crust.
-
Transfer and Season:
- Use a slotted spoon to transfer the pretzels to the prepared baking sheet. Brush them with olive oil and sprinkle with sea salt or coarse salt for that extra crunch.
-
Bake:
- Place the pretzels in the preheated oven and bake for 12-15 minutes until golden brown. The cheese should be bubbling within.
-
Cool and Serve:
- Allow to cool slightly before serving. Enjoy these warm pretzels with your favorite dipping sauce, such as marinara or a garlic-infused olive oil.
With this step-by-step guide, you can easily create these delicious mozzarella-filled pretzels. They’re not just appetizer recipes; they’re a delicious experience.
Mastering Irresistible Mozzarella Filled Rosemary Pretzels: Advanced Tips and Variations
While the basic recipe stands on its own, here are some tips and variations that can elevate your pretzel game further:
Advanced Tips
-
Use Fresh Ingredients: Opt for fresh rosemary rather than dried; the flavor is more pronounced and adds a beautiful aroma.
-
Let the Dough Rest: If time permits, let the dough rest for an additional 10-15 minutes before boiling. This can enhance the texture of your pretzels.
-
Experiment with Dips: Create a variety of dips, such as homemade hummus, spicy mustard, or a creamy cheese sauce, to complement your pretzels.
Variations
-
Cheesy Herb Pretzels: Mix shredded parmesan or cheddar cheese into the dough for a more intense cheesy flavor.
-
Sweet Pretzel Twist: Substitute rosemary with cinnamon and sugar in the filling for a sweet treat topped with icing sugar.
-
Savory Additions: Try adding finely chopped sun-dried tomatoes or olives into the dough for a Mediterranean flair.
These variations and tips ensure that there’s always something new and exciting for you to try with your mozzarella-filled rosemary pretzels.
How to Store Irresistible Mozzarella Filled Rosemary Pretzels: Best Practices
When it comes to storage, keeping your Irresistible Mozzarella Filled Rosemary Pretzels fresh is key. Here’s how to do it:
Refrigeration
If you have leftover pretzels, place them in an airtight container and store them in the refrigerator. They can typically last for up to 3 days this way. To reheat, pop them in the oven at 350°F (175°C) for about 10 minutes, keeping them covered with foil to prevent drying out.
Freezing
For longer storage, consider freezing these delicious pretzels. Wrap each pretzel individually in plastic wrap and then place them in a freezer-safe bag. They can last in the freezer for up to 2 months. To enjoy, simply thaw them overnight in the refrigerator and follow the reheating instructions.
Reheating
For the best results, always reheating in the oven helps maintain the pretzel’s crispiness. Avoid the microwave if possible, as it can make the pretzels chewy.
By following these best practices, you can enjoy your Irresistible Mozzarella Filled Rosemary Pretzels any day of the week.
Nutritional Value of Irresistible Mozzarella Filled Rosemary Pretzels
Understanding the nutritional value of your meals can enhance your overall health. Here’s a breakdown of what you can expect from each serving of these delicious pretzels:
- Calories: Approximately 200-250 calories per pretzel (depending on ingredients)
- Protein: About 8-10 grams
- Fat: Approximately 7 grams
- Carbohydrates: Roughly 30 grams
- Fiber: About 1-2 grams
- Sugar: 1-2 grams
- Sodium: 300-400 mg (depending on salt used)
These numbers can vary based on ingredient choices, such as opting for low-fat cheese or using gluten-free flour. For anyone following specific dietary guidelines, adjusting these ingredients allows for the creation of a nutritious snack that doesn’t compromise on flavor.
FAQs: Frequently Asked Questions About Irresistible Mozzarella Filled Rosemary Pretzels
Can I make the dough ahead of time?
Yes, you can prepare the dough a day before and store it in the refrigerator. Make sure it’s in an airtight container. Let it come to room temperature before rolling out and baking.
What can I substitute for mozzarella in this recipe?
You can use almond-based or soy-based cheese for a vegan option. Alternatively, you can use goat cheese for a tangy flavor.
How can I make these pretzels more flavorful?
Experiment with additional spices and herbs like garlic powder, onion powder, or Italian seasoning for that extra burst of flavor.
Are there any gluten-free options available?
Absolutely! Use a gluten-free flour blend for the dough and add xanthan gum to bind everything together.
How do I prevent the cheese from leaking out during baking?
Make sure to pinch the edges tightly when sealing the dough. You can also chill the filled pretzels for about 15 minutes before boiling, which helps keep the cheese in place.
In conclusion, the Irresistible Mozzarella Filled Rosemary Pretzels are a perfect blend of simplicity and gourmet delight, making them a standout choice among appetizer recipes. With their health benefits, dietary adaptations, and the thrill of creating them from scratch, you’re guaranteed to impress friends and family at your next gathering. So don your apron, gather your ingredients, and get ready to indulge in this culinary creation that’s sure to become a favorite staple in your home!