Category: chicken

  • Chicken Shawarma with Garlic Sauce

    Chicken Shawarma with Garlic Sauce

    Chicken Shawarma with Garlic Sauce: A Tropical Delight

    Introduction to Chicken Shawarma with Garlic Sauce

    When it comes to captivating chicken recipes, Chicken Shawarma with Garlic Sauce stands out as a favorite among home cooks and food enthusiasts alike. This dish captivates the senses with its bold flavors and aromatic spices, making it a perfect meal choice for busy weeknights or casual gatherings. What makes this recipe truly special is its versatility: it’s easy to prepare, health-conscious, and suitable for various dietary requirements.

    Chicken shawarma is a compelling fusion of Middle Eastern flair and tropical zest, where marinated chicken is grilled to perfection and served with a creamy garlic sauce that elevates every bite. Not only is it simple to make, but it’s also packed with protein and nutrients, making it a great choice for those looking to maintain a balanced diet. Interested in enjoying a homemade version of this culinary delight? Keep reading, as we guide you through everything you need to know to whip up this easy chicken recipe, catering to busy parents, working professionals, and culinary novices alike.

    Benefits and Advantages of Chicken Shawarma with Garlic Sauce

    One of the primary benefits of making Chicken Shawarma with Garlic Sauce is its simplicity. The preparation requires minimal cooking skill, making it a culinary adventure accessible to everyone—from college students to seasoned chefs. The marinating process infuses the chicken with robust flavors, while the quick grilling or baking method ensures that you spend less time in the kitchen and more time enjoying your delicious meal.

    Additionally, the health benefits of this dish cannot be overstated. It’s an excellent source of lean protein, essential for muscle repair and overall well-being. The combination of spices used in the marinade not only tantalizes the palate but also comes with health perks. Spices like cumin, coriander, and paprika have anti-inflammatory properties and can aid digestion, making this recipe a wholesome option for health-conscious individuals.

    Furthermore, Chicken Shawarma with Garlic Sauce caters to various dietary preferences. The ingredients can be easily modified to create vegan, gluten-free, or low-calorie alternatives, ensuring that everyone can enjoy this delightful dish. By understanding the benefits of this chicken recipe, you’ll be inspired to try your hand at making it at home and delighting your family or guests with a taste of the tropics.

    Ingredients Overview

    Essential Ingredients for Chicken Shawarma with Garlic Sauce

    Here’s a detailed list of the core ingredients you’ll need to prepare Chicken Shawarma with Garlic Sauce:

    • 1 lb boneless, skinless chicken thighs: Juicy and tender, these are perfect for absorbing flavors.
    • 2 tablespoons olive oil: Adds healthy fats that enrich the dish.
    • 3 cloves garlic, minced: Provides an aromatic base for marinating.
    • 1 teaspoon ground cumin: Offers a warm, earthy flavor.
    • 1 teaspoon ground paprika: Gives the dish its signature color and smokiness.
    • 1 teaspoon ground coriander: Delivers a fresh, citrus undertone.
    • 1 teaspoon ground turmeric: Adds vibrant color and strengthens the immune system.
    • Salt and black pepper to taste: Essential for enhancing the flavors.
    • 4 tablespoons plain yogurt (or vegan yogurt): Provides creaminess to the garlic sauce.
    • 2 tablespoons mayonnaise (or vegan mayo): Adds richness to your sauce.
    • 1 tablespoon lemon juice: Brightens up the flavors of the dish.

    Vegan and Gluten-Free Options: For a vegan version, substitute chicken with tofu or tempeh and ensure that all condiments and sauces are gluten-free.

    Dietary Substitutions to Customize Your Chicken Shawarma with Garlic Sauce

    When it comes to dietary preferences and restrictions, this chicken recipe allows for a diverse range of substitutions:

    • Chickpeas: For a plant-based alternative, replace chicken with canned chickpeas. Simply marinate and roast them for a similar flavor profile.
    • Cauliflower: This veggie can also work wonderfully for those looking for a gluten-free and low-calorie option; simply steam or roast.
    • Yogurt Alternatives: If you’re dairy-free, plant-based yogurts made from almond or coconut milk serve as excellent substitutes.
    • Herbs: Fresh herbs like parsley or cilantro can be used as toppings, enhancing flavor and visual appeal.
    • Wraps and Breads: Serve the shawarma in gluten-free wraps or pita bread for a suitable meal for those avoiding gluten.

    With these substitutions, Chicken Shawarma with Garlic Sauce can easily fit into various dietary lifestyles, making it an adaptable addition to any mealtime repertoire.

    How to Prepare the Perfect Chicken Shawarma with Garlic Sauce: Step-by-Step Guide

    Ready to create an irresistible platter of Chicken Shawarma with Garlic Sauce? Follow these simple steps, and enjoy the savory explosion of flavors!

    1. Prepare the Marinade: In a large bowl, whisk together olive oil, minced garlic, cumin, paprika, coriander, turmeric, salt, and black pepper. Ensure the spices are well combined to marinate the chicken evenly.

    2. Marinate the Chicken: Add the chicken thighs to the marinade. Coat them thoroughly. Cover the bowl with plastic wrap or seal it in a zip-lock bag. Allow the chicken to marinate for at least 30 minutes, or for the best flavor, refrigerate it overnight.

    3. Prepare the Garlic Sauce: In a separate bowl, combine the yogurt, mayonnaise (or vegan alternative), lemon juice, and a pinch of salt. Whisk the ingredients until they form a smooth, creamy sauce. Adjust lemon juice and seasoning to taste.

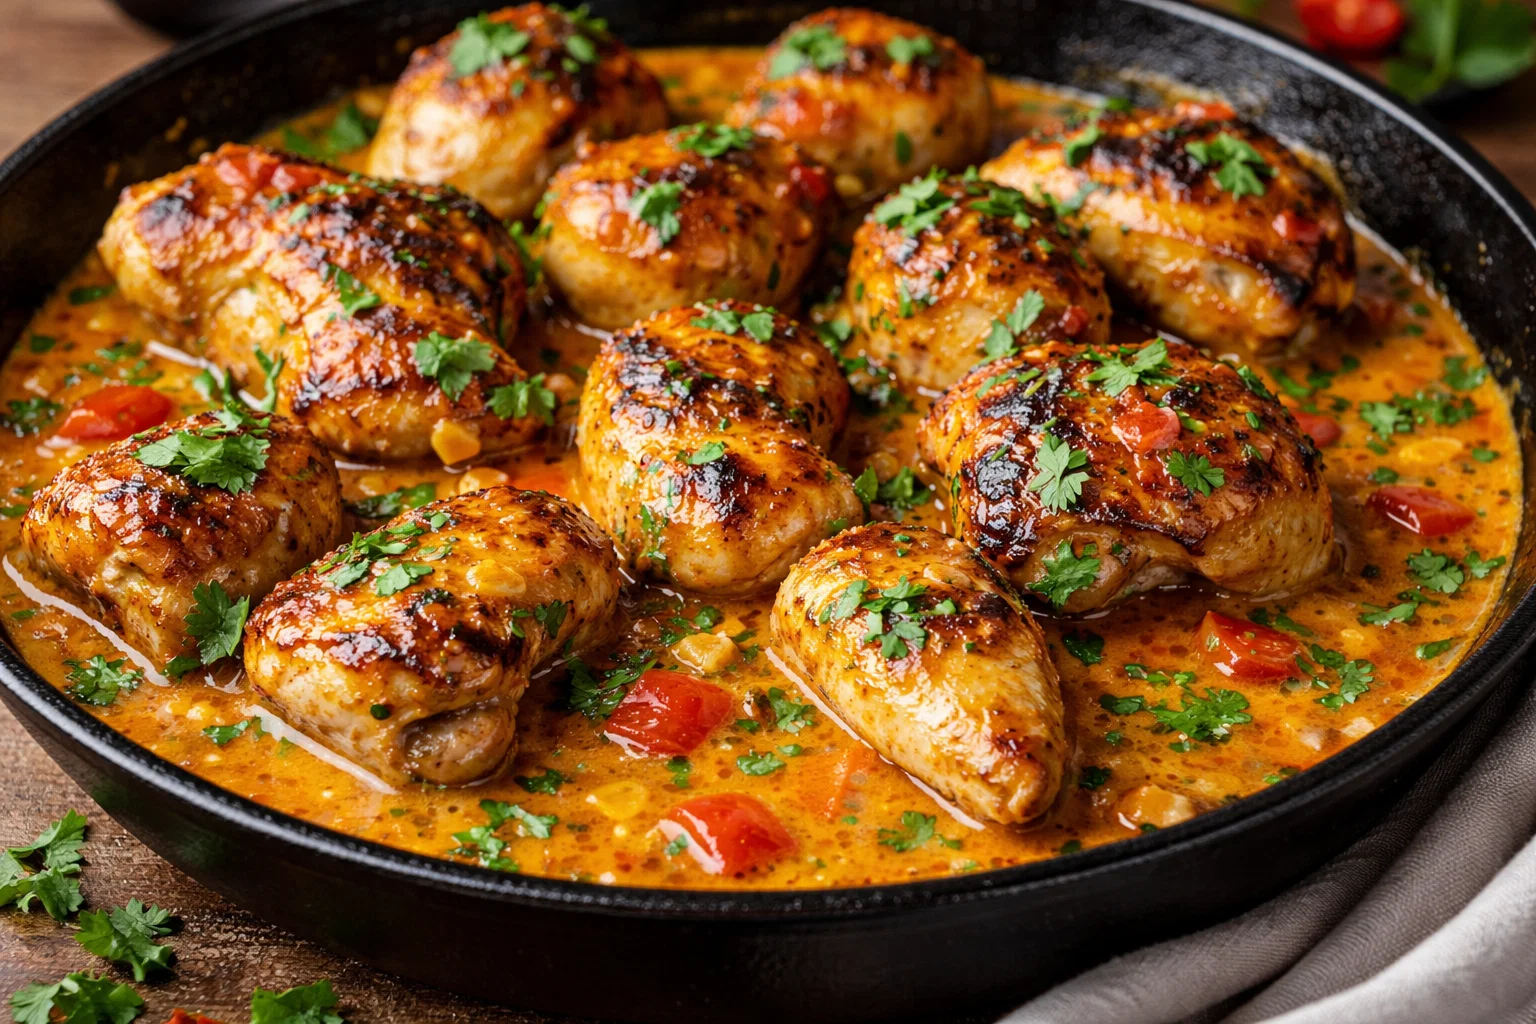
    4. Cook the Chicken: Preheat your grill or skillet over medium-high heat. Remove the chicken from the marinade and place it on the grill. Cook for about 6-7 minutes per side or until the internal temperature reaches 165°F (75°C). For baking, preheat your oven to 400°F (200°C) and bake for 20-25 minutes.

    5. Rest the Chicken: Once cooked, remove the chicken from the heat and let it rest for about 5 minutes. This helps the juices redistribute within the meat, ensuring every bite stays moist and tender.

    6. Slice the Chicken: Using a sharp knife, slice the chicken into thin strips. This allows for easier serving and eating, providing a delightful experience with each bite.

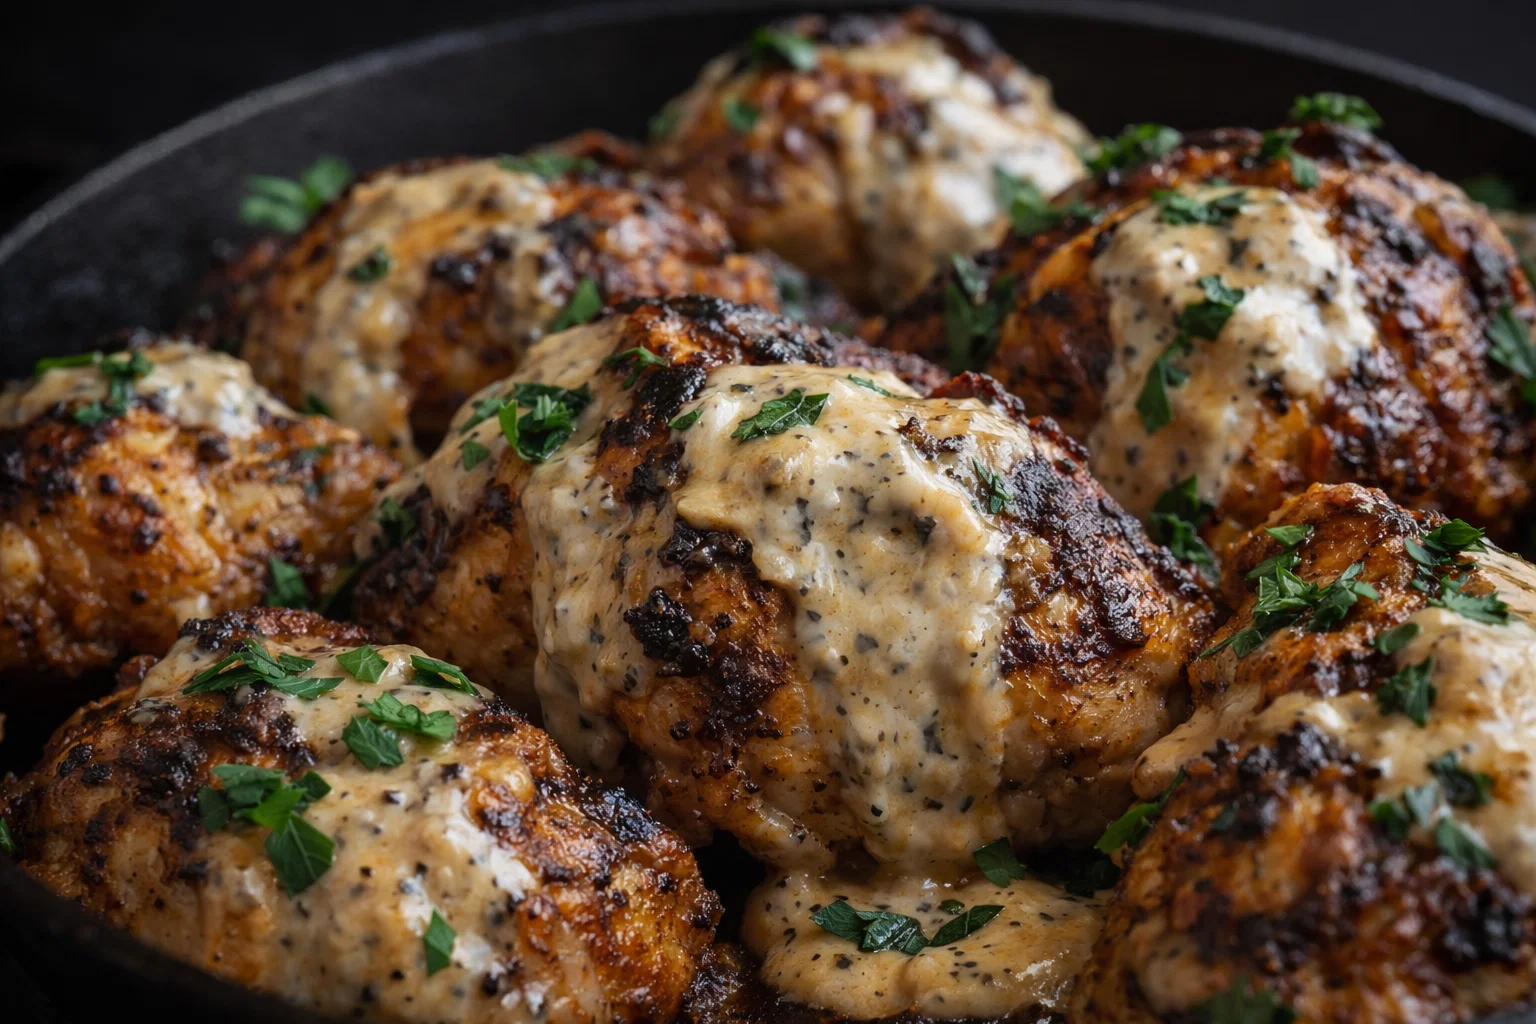
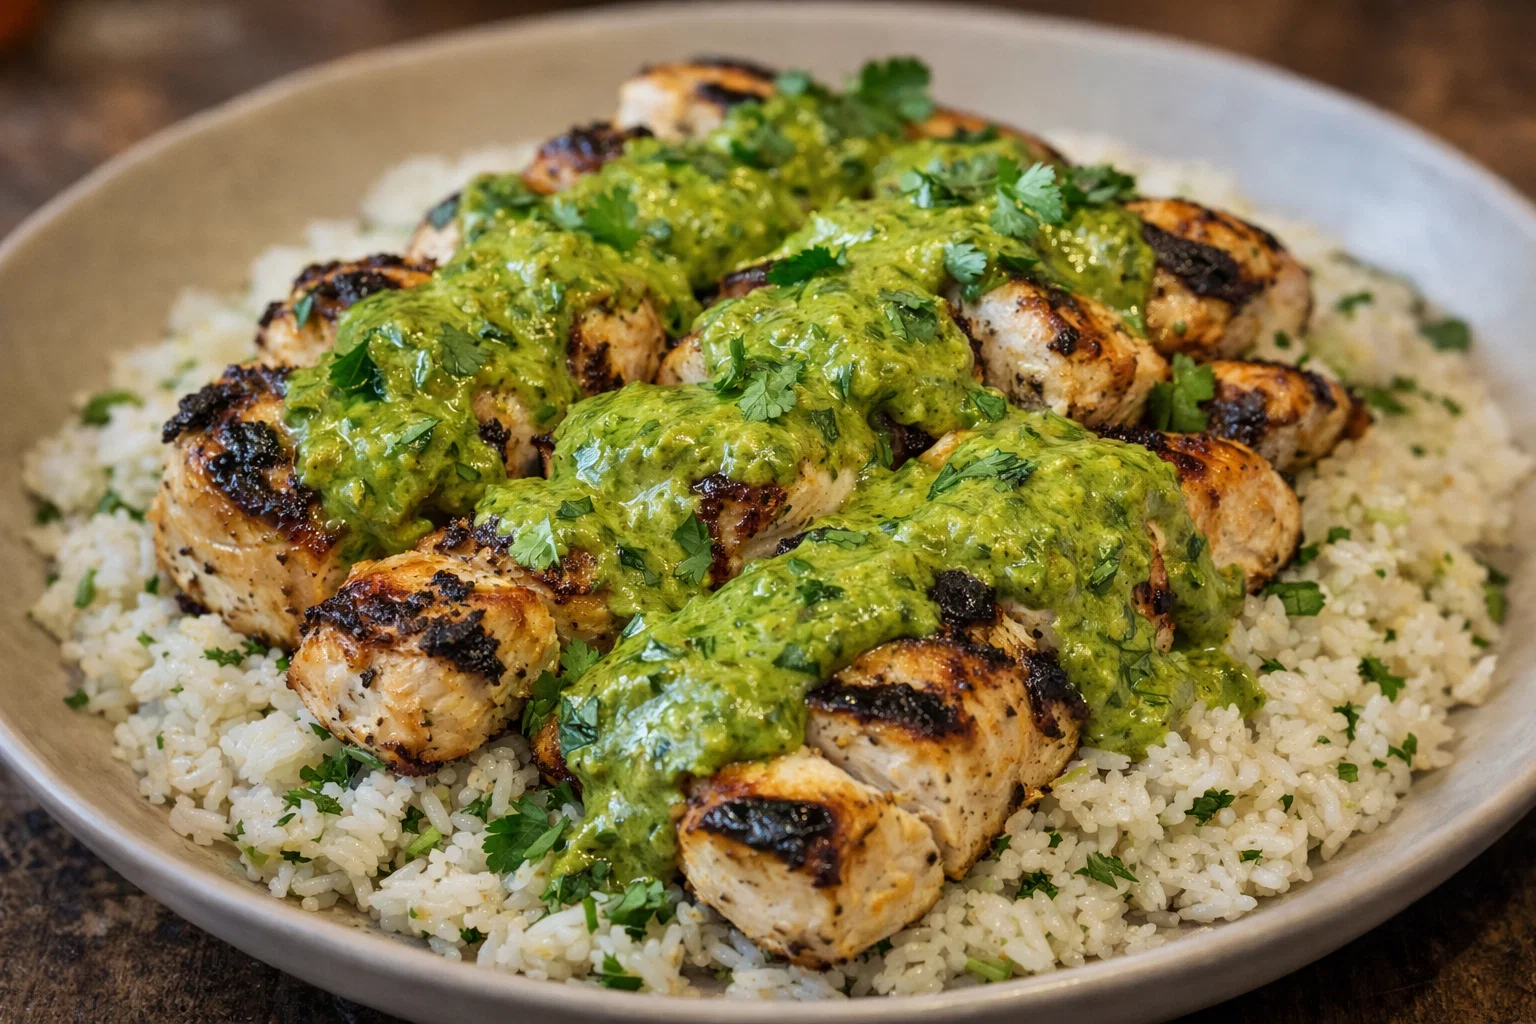
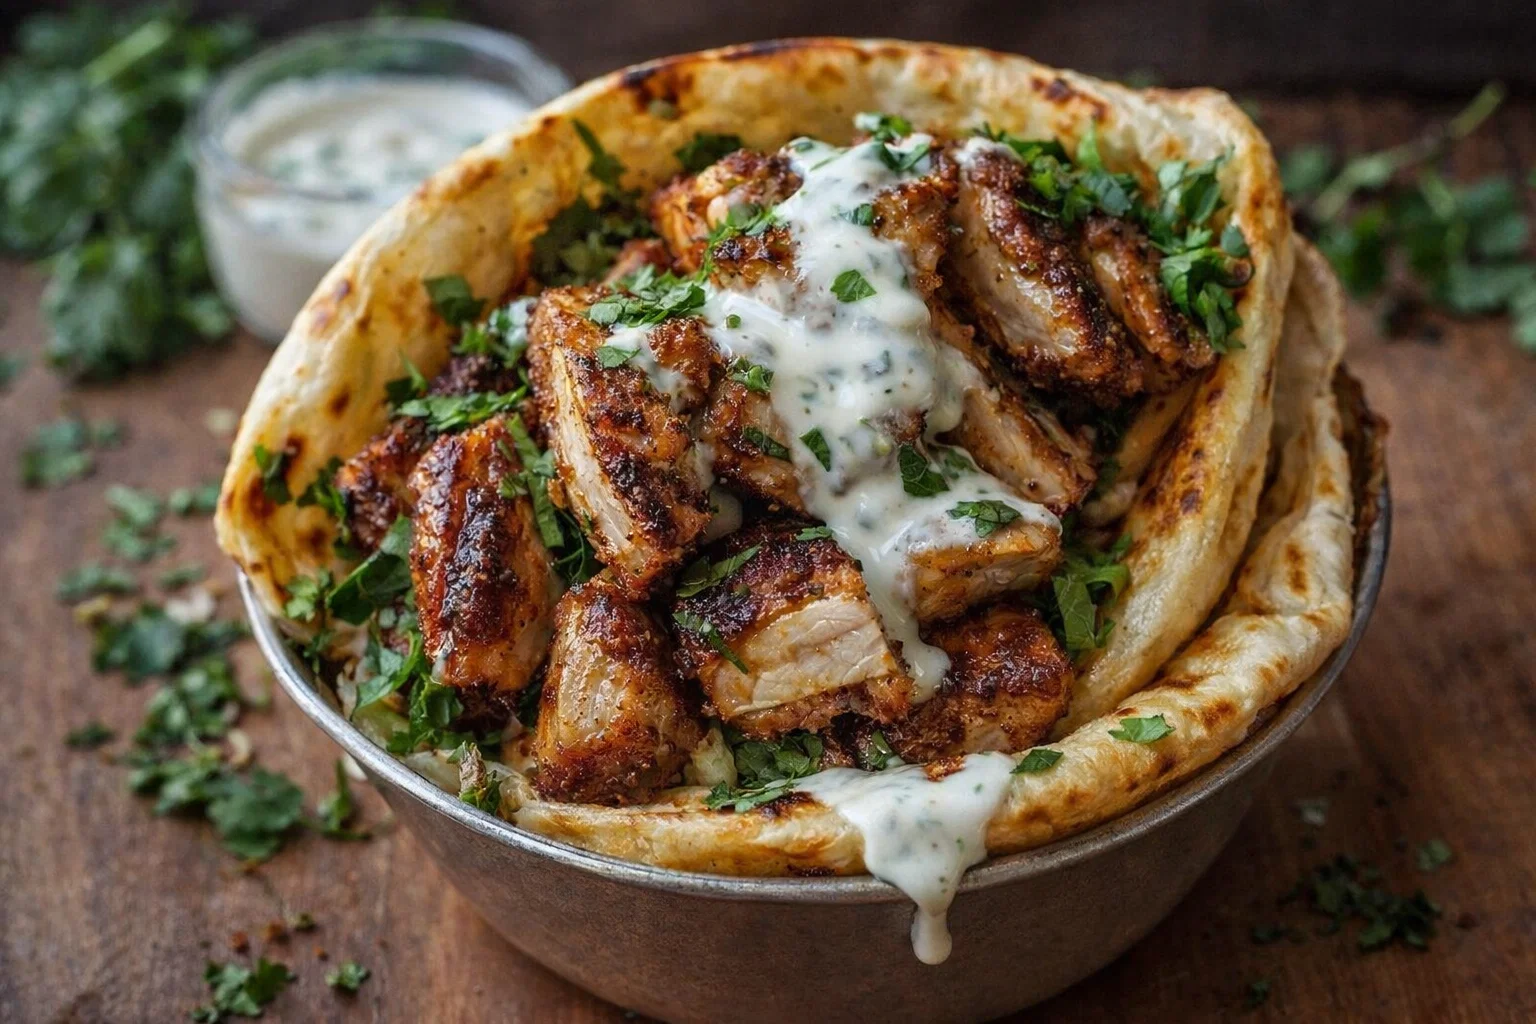
    7. Assemble the Shawarma: In a plate or wrap, layer the sliced chicken with fresh vegetables such as lettuce, cucumbers, tomatoes, and a generous drizzle of garlic sauce.

    8. Garnish and Serve: Sprinkle fresh herbs on top and serve with pita bread or alongside rice. Enjoy your homemade Chicken Shawarma with Garlic Sauce warm and fresh!

    Mastering Chicken Shawarma with Garlic Sauce: Advanced Tips and Variations

    Want to take your chicken shawarma to the next level? Here are some advanced tips and variations to enhance your culinary experience:

    • Use a Meat Thermometer: To ensure perfect doneness, use a meat thermometer. This will give you an accurate reading and guarantee juicy, tender chicken.
    • Experiment with Spices: Feel free to adjust the spice levels. Adding a pinch of cayenne or chili powder can elevate the heat for those who like their food with a bit of kick!
    • Add Vegetables: Incorporate grilled or roasted bell peppers, onions, or zucchini to introduce more flavor and texture.
    • Wrap Variations: Try wrapping the chicken in a flatbread or tortilla with a fusion of toppings like avocado or spicy salsa for a modern twist.
    • Shawarma Bowl: For a low-carb option, serve the chicken over a bed of greens, quinoa, or couscous, topped with garlic sauce and veggies.

    Incorporating these variations can make your meal more enjoyable and cater to different tastes and preferences.

    How to Store Chicken Shawarma with Garlic Sauce: Best Practices

    After enjoying your Chicken Shawarma with Garlic Sauce, proper storage is essential for maintaining its freshness. Here are some best practices to ensure your dish remains delectable for later:

    • Refrigeration: Place any leftover chicken in an airtight container in the refrigerator. It will stay fresh for up to 3-4 days.
    • Freezing: If you want to extend shelf life, consider freezing portions in freezer-safe bags or containers. Frozen chicken shawarma is best consumed within 3 months. To thaw, place it in the refrigerator overnight or use the microwave.
    • Reheating: Reheat any leftovers in the oven at 350°F (175°C) until warmed through, or use the microwave for quick results. Add a splash of water to the container to keep it moist.

    These practices will help you enjoy your Chicken Shawarma with Garlic Sauce while minimizing waste and preserving quality.

    Nutritional Value of Chicken Shawarma with Garlic Sauce

    Understanding the nutritional value of Chicken Shawarma with Garlic Sauce can help you make informed dietary choices. Here’s a rough breakdown of the nutritional content per serving (based on 4 servings):

    • Calories: 350-400
    • Protein: 30g
    • Fat: 20g
    • Carbohydrates: 15g
    • Fiber: 2g
    • Sugar: 3g
    • Sodium: 800mg

    This chicken recipe not only provides a substantial amount of protein necessary for daily muscle function, but it also offers healthy fats from olive oil and hummus, along with beneficial spices that contribute to its antioxidant properties. This dish can easily be made more nutritious by serving it with a generous side of vegetables or whole grains.

    FAQs: Frequently Asked Questions About Chicken Shawarma with Garlic Sauce

    Q: Can I use chicken breast instead of chicken thighs?
    A: Yes, chicken breast is a leaner alternative but may result in a drier texture. To remedy this, marinate it for longer and avoid overcooking.

    Q: Is it possible to make this dish vegetarian?
    A: Absolutely! Substitute chicken with firm tofu or chickpeas for a delicious plant-based version.

    Q: Can I prepare the chicken shawarma in advance?
    A: You can marinate the chicken ahead of time (up to 24 hours) to enhance flavors. Cook just before serving for the best taste.

    Q: What should I serve with chicken shawarma?
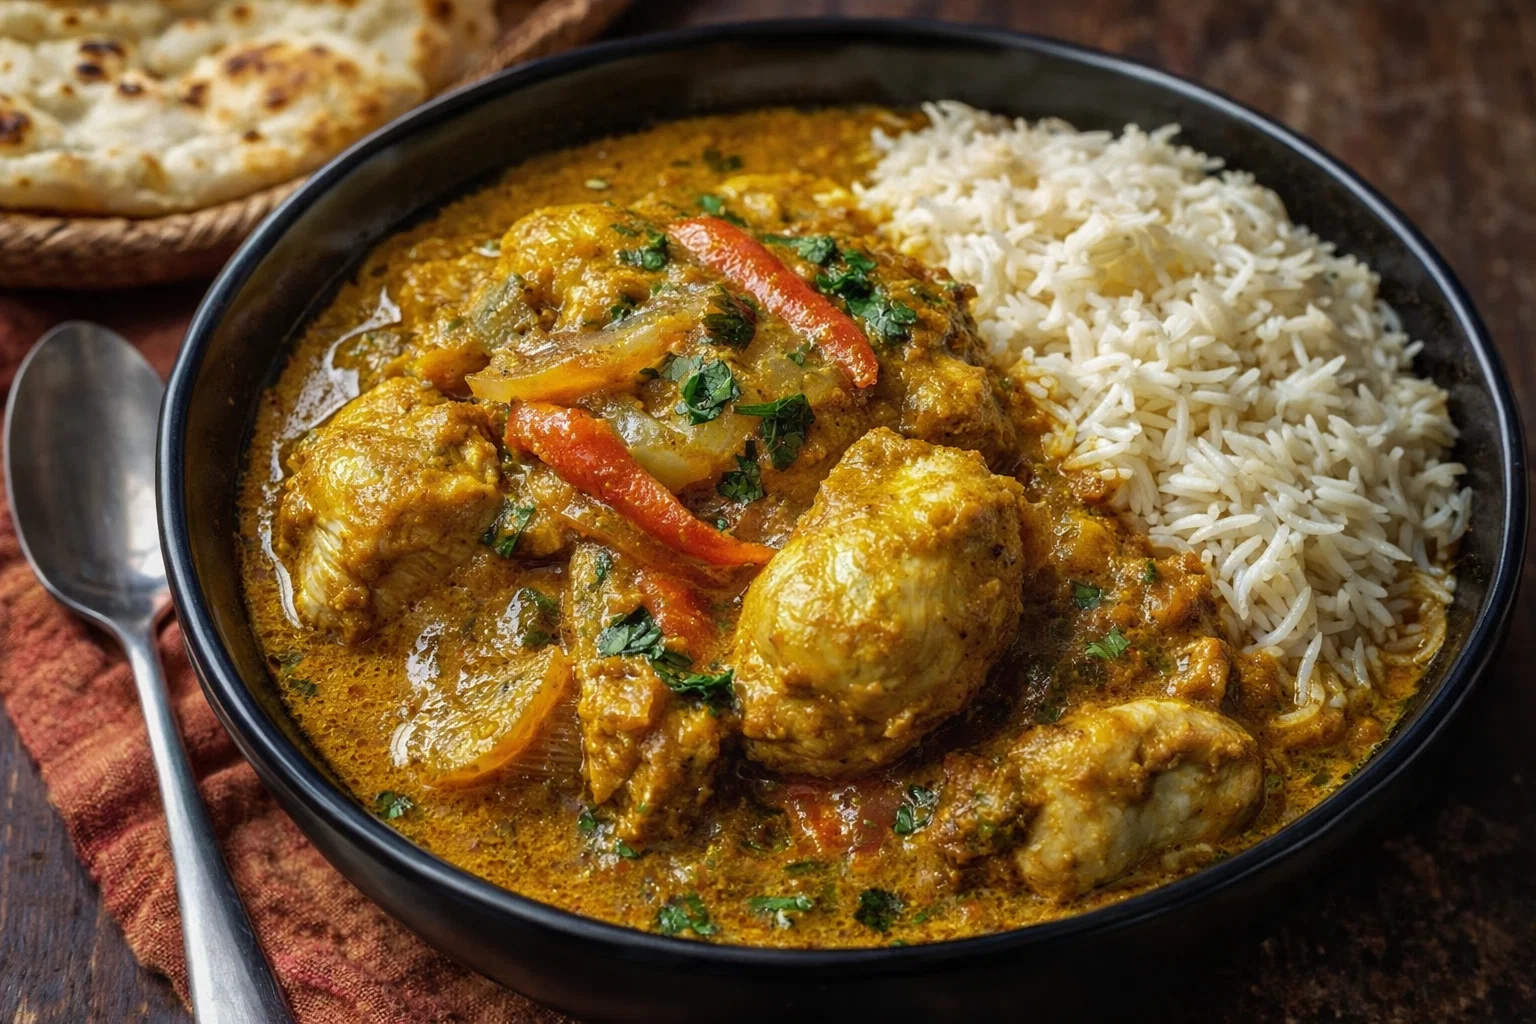
    A: Accompany this dish with fresh vegetables, pita bread, or a side of rice or couscous for a complete meal experience.

    Q: Is this recipe gluten-free?
    A: Yes, as long as you use gluten-free wraps or serve it over rice, this dish is suitable for gluten-sensitive diners.

    By addressing these FAQs, you enhance the understanding and accessibility of your Chicken Shawarma with Garlic Sauce recipe for all readers, ensuring they feel confident to try it at home.

    In conclusion, Chicken Shawarma with Garlic Sauce is not just another recipe; it’s a versatile dish that brings joy, nourishment, and flavor to your dinner table. By following the guidelines and tips provided here, anyone can create a tantalizing dish that pleases a wide array of palates. So gather your ingredients, roll up your sleeves, and dive into this tropical adventure today!

  • Mississippi Mud Chicken

    Mississippi Mud Chicken

    Mississippi Mud Chicken: A Tropical Delight

    Introduction to Mississippi Mud Chicken

    Are you on the lookout for a delicious yet uncomplicated addition to your repertoire of chicken recipes? Look no further than the mouthwatering Mississippi Mud Chicken. This dish combines tender chicken, rich flavors, and amazing versatility, making it a fantastic choice for home cooks of all skill levels. The best part? It’s both healthy and packed with nutrients, making it suitable for busy parents, students, and anyone who craves a flavorful meal without spending hours in the kitchen.

    With the simplicity of preparation and the potential for dietary adjustments, Mississippi Mud Chicken is ideal for diverse lifestyles—from newlyweds looking to impress each other with a home-cooked meal, to seniors seeking nourishing and easy-to-digest options. Plus, this recipe can easily be adapted to suit vegan, gluten-free, and low-calorie diets.

    By experimenting with a few key ingredients and methods, you can whip up this delightful dish that will surely impress family and friends alike. With the right blend of spices and the comforts of a home-cooked meal, Mississippi Mud Chicken is a culinary adventure worth embarking on. So tie your apron and let’s dive deeper into this recipe that’s bound to become a staple in your collection of chicken recipes!

    Benefits and Advantages of Mississippi Mud Chicken

    Mississippi Mud Chicken is not just a dish; it’s an experience that encompasses flavor, convenience, and health. One of the most compelling benefits of this recipe is its adaptability. Busy parents and working professionals will appreciate the straightforward preparation process, which can be completed in under an hour. Say goodbye to complicated meal prep—this recipe offers a quick path to an impressive dinner.

    Nutritionally, this chicken recipe is a powerhouse. Chicken itself is a lean source of protein, packed with essential amino acids necessary for muscle repair and overall health. By using wholesome ingredients like vegetables, and healthy fats, you can enhance the nutritional value further, making it an excellent choice for diet-conscious individuals.

    Moreover, Mississippi Mud Chicken stands out because it caters to various dietary requirements. Whether you are vegan, gluten-free, or following a low-calorie regimen, there’s a way to tweak this recipe to make it work for you. Notably, coconut milk used in the recipe provides healthy fats and contributes to the tropical flair, while also being a suitable option for those following a dairy-free lifestyle.

    In summary, the advantages of Mississippi Mud Chicken lie in its effortless preparation, adaptability for dietary needs, and health benefits. It’s a colorful, flavorful representation of home-cooked goodness that invites you to try your hand at a dish sure to impress your guests, family, or just yourself!

    Ingredients Overview

    Essential Ingredients for Mississippi Mud Chicken

    To create the perfect Mississippi Mud Chicken, gather the following ingredients:

    • 2 lbs Chicken Breasts (skinless and boneless): A great source of lean protein, perfect for a healthy lifestyle.
    • 1 cup Coconut Milk: Adds creaminess and a subtle tropical flavor, also suitable for dairy-free diets.
    • 1/2 cup Chicken Broth: Enhances the flavor of the dish.
    • 1/2 cup Brown Sugar: Provides sweetness; can be substituted with a natural sweetener like honey or agave syrup.
    • 2 tbsp Soy Sauce (or Tamari for gluten-free option): Adds depth of flavor (use coconut aminos for a soy-free alternative).
    • 1 tbsp Worcestershire Sauce: Brings umami richness.
    • 1 tsp Garlic Powder or 2 cloves Fresh Garlic (minced): Essential for enhancing flavors.
    • 1 tsp Onion Powder: Complements other flavors delicately.
    • 1/2 tsp Paprika: Adds a warm flavor and beautiful color.
    • Salt and Pepper to taste: For seasoning.

    These ingredients not only come together to create a satisfying dish but can also be adjusted to suit various dietary requirements.

    Dietary Substitutions to Customize Your Mississippi Mud Chicken

    1. For Vegan Options: Replace chicken breast with tofu or tempeh to enjoy the full textures and flavors without compromising your dietary preferences. Use vegetable broth and coconut milk to maintain the creamy consistency.

    2. For Gluten-Free: Ensure to use gluten-free soy sauce or coconut aminos instead of regular soy sauce. Check all label ingredients for gluten hidden in sauces.

    3. Low-Calorie Alternatives: Consider using chicken thighs instead of breasts for a richer flavor that remains lower in calories than heavy cream. Also, reduce the brown sugar or replace it with a natural calorie-free sweetener.

    By considering these substitutions, Mississippi Mud Chicken can effortlessly cater to a wide range of diets, ensuring everyone at the table can enjoy this delicious recipe!

    How to Prepare the Perfect Mississippi Mud Chicken: Step-by-Step Guide

    Ready to get cooking? Follow these easy steps to prepare Mississippi Mud Chicken. This straightforward process will guide you through each action, resulting in a dish that is sure to impress.

    1. Prepare the Chicken: Start by rinsing your chicken breasts under cold water and patting them dry with a paper towel. This helps to remove any excess moisture and allows for better browning when cooking.

    2. Season the Chicken: Season both sides of the chicken breasts generously with salt, pepper, garlic powder, onion powder, and paprika. Make sure the seasoning is evenly distributed to enhance flavor across every bite.

    3. Create the Sauce: In a medium bowl, whisk together the coconut milk, chicken broth, brown sugar, soy sauce, and Worcestershire sauce until well combined. This sauce will infuse flavor into the chicken while cooking.

    4. Heat the Pan: In a large skillet over medium heat, add a tablespoon of olive oil. Once hot, place the seasoned chicken breasts in the pan, cooking each side for about 4-5 minutes or until they develop a beautiful golden brown crust.

    5. Add the Sauce: Pour the prepared sauce mixture over the chicken in the skillet. Bring the sauce to a gentle simmer, then cover the skillet with a lid. This allows the chicken to cook through while absorbing the rich flavors of the sauce.

    6. Cook Thoroughly: Allow the chicken to cook for approximately 15-20 minutes, or until the internal temperature reaches 165°F (75°C). If using a meat thermometer, insert it into the thickest part of the chicken to check.

    7. Serve and Enjoy: Once the chicken is cooked through, transfer it from the skillet to a serving plate, spooning some of the remaining sauce over the top. Serve with a side of rice, quinoa, or steamed vegetables for a complete meal.

    8. Optional Finishing Touch: For an extra dimension of flavor, sprinkle fresh herbs such as parsley or cilantro over the top before serving.

    This step-by-step guide ensures that your Mississippi Mud Chicken is prepared perfectly, serving as a wonderful example of easy and rewarding chicken recipes that anyone can master!

    Mastering Mississippi Mud Chicken: Advanced Tips and Variations

    After you’ve made Mississippi Mud Chicken, you might be interested in taking your dish to the next level. Here are some advanced tips and variations to consider:

    • Modify the Protein: Experiment with different proteins like pork or shrimp to see how they adapt to the delicious sauce. Each protein will impart its unique texture and flavors while still absorbing the influences of the spices.

    • Spice it Up: If you’re in the mood for a little heat, add a pinch of cayenne pepper or chili flakes to the sauce. This adjustment not only balances the sweetness of the dish but also gives it an exhilarating flavor kick.

    • Vegetable Additions: For an all-in-one meal, consider adding vegetables like bell peppers, zucchini, or carrots during the cooking process. This adds extra nutrients, color, and texture to your dish, boosting its appeal while keeping it healthy.

    • Modify the Cooking Method: You can adapt this recipe for the oven by transferring the chicken and sauce into a preheated oven at 375°F (190°C) for about 25-30 minutes or until cooked thoroughly. This alternative cooking method can make your meal prep even easier!

    These variations and tips can inspire creativity in the kitchen, making Mississippi Mud Chicken even more enjoyable for yourself and your guests.

    How to Store Mississippi Mud Chicken: Best Practices

    Like many chicken recipes, Mississippi Mud Chicken can be stored with care, ensuring that nothing goes to waste. Here’s how to best preserve your delicious meal:

    • Refrigeration: Allow any leftovers to cool completely before transferring them to an airtight container. Properly stored, your Mississippi Mud Chicken will last in the refrigerator for up to 3-4 days. Be sure to keep the sauce with the chicken to maintain moisture and flavor.

    • Freezing: For long-term storage, Mississippi Mud Chicken can also be frozen. Portion it into freezer-safe containers or bags, squeezing out as much air as possible, and label them with the date. It can be frozen for up to 3 months. When you’re ready to enjoy it again, simply thaw in the refrigerator overnight.

    • Reheating: To reheat, place the chicken in a skillet over low heat, adding a splash of chicken broth or water if needed to avoid drying out. Alternatively, you can use a microwave on medium power, ensuring the chicken is heated thoroughly while retaining moisture.

    Storing your Mississippi Mud Chicken with these practices allows you to savor its flavors without sacrificing quality!

    Nutritional Value of Mississippi Mud Chicken

    Understanding the nutritional value of Mississippi Mud Chicken is essential for those who keep health in mind while cooking. Here’s a breakdown of the estimated nutrition per serving (based on a recipe serving about 4):

    • Calories: 350
    • Protein: 28g
    • Fat: 18g
    • Carbohydrates: 30g
    • Fiber: 2g
    • Sugar: 8g
    • Sodium: 700mg

    Mississippi Mud Chicken provides a healthy balance of macronutrients, ensuring you’re fueling your body well. The protein content supports muscle repair and growth, while healthy fats from coconut milk are beneficial for heart health. Adjustments made to reduce sugar or substitute healthier fats can further enhance its nutritional profile, making it a versatile dish for different dietary preferences.

    FAQs: Frequently Asked Questions About Mississippi Mud Chicken

    1. Can I use frozen chicken for this recipe?

    Yes, you can use frozen chicken, but ensure to thaw it in the refrigerator overnight beforehand to allow it to cook through evenly.

    2. Is there a vegetarian option for Mississippi Mud Chicken?

    Absolutely! Substitute the chicken with tofu or tempeh. Adjust cooking times to ensure the vegetarian protein is adequately heated.

    3. How can I make this dish less sweet?

    To reduce the sweetness, cut back on the brown sugar or replace it with a less sweet alternative like a sugar substitute or simply omit it altogether.

    4. Can I make Mississippi Mud Chicken in advance?

    Yes, Mississippi Mud Chicken can be made in advance and stored in the refrigerator for 3-4 days or frozen for up to 3 months. Just ensure it is stored properly to maintain flavor and moisture.

    5. What can I serve with Mississippi Mud Chicken?

    This dish pairs well with a variety of sides such as rice, quinoa, steamed vegetables, or even a fresh salad. The versatility allows it to complement numerous side dishes effectively.

    In conclusion, Mississippi Mud Chicken is more than just another recipe; it’s a flavorful experience that can adapt to various dietary needs and delight all who partake. So why not take action today and try this delightful dish? Your taste buds will thank you!

  • Irresistible Honey Mustard BLT Chicken Sliders

    Irresistible Honey Mustard BLT Chicken Sliders

    Irresistible Honey Mustard BLT Chicken Sliders: A Tropical Delight

    Introduction to Irresistible Honey Mustard BLT Chicken Sliders

    Are you looking for a quick and delicious recipe that will impress your family and friends? Enter the Irresistible Honey Mustard BLT Chicken Sliders! These mini sandwiches are not only bursting with flavor, but they’re also incredibly simple to prepare, making them ideal for busy weeknights or casual gatherings. By blending a touch of sweetness from honey mustard with the savory flavors of crispy bacon, lettuce, and tender chicken, these sliders are delightful in every bite.

    If you’re a fan of chicken recipes, you’ll love how versatile this dish can be. It’s easy to adapt for different dietary needs, making it suitable for everyone—from health-conscious eaters to busy parents. Plus, the health benefits are notable: chicken is a fantastic source of lean protein, while the fresh vegetables add essential nutrients and fiber.

    These sliders can also be veganized by substituting the chicken with chickpeas or tofu, and for gluten-free options, simply use gluten-free buns. The ultimate goal of this recipe is to inspire cooks of all backgrounds to try their hand at gourmet flavors, even in a rush. With just a few ingredients and quick steps, you’ll have a meal that leaves your tastebuds dancing. So, let’s dive into the details!

    Benefits and Advantages of Irresistible Honey Mustard BLT Chicken Sliders

    Beyond their mouthwatering flavor, Irresistible Honey Mustard BLT Chicken Sliders have multiple advantages that set them apart from other chicken-based dishes. Here are some reasons you’ll want to add this recipe to your go-to list:

    1. Simplicity: While some chicken recipes can be labor-intensive, these sliders prioritize simplicity without sacrificing taste. They can be prepared in under 30 minutes, making them perfect for busy evenings when you need a quick meal.

    2. Health-conscious: Lean chicken, paired with fresh lettuce and tomatoes, provides essential vitamins and minerals. Moreover, honey adds natural sweetness without the excessive calories of sugary condiments, making this a healthier option than many restaurant choices.

    3. Flexibility in preparation: Whether you choose to grill, bake, or sauté the chicken, this recipe allows for various cooking methods, accommodating your kitchen setup or personal preferences.

    4. Crowd-pleaser: With their bite-sized format and flavor-packed filling, these sliders are always a hit at parties, picnics, or family dinners. They can be made in large batches, catering to both large gatherings and intimate family meals.

    5. Dietary adaptability: Notably, this recipe can easily suit various dietary needs. By offering substitutions for gluten-free or vegan diets, more people can enjoy these tasty sliders without feeling left out.

    Overall, the Honey Mustard BLT Chicken Sliders are a delightful solution for home cooks seeking a nutritious, flavorful, and versatile recipe that can adapt to various tastes and dietary requirements.

    Ingredients Overview

    Essential Ingredients for Irresistible Honey Mustard BLT Chicken Sliders

    To whip up these delicious chicken sliders, you’ll need a handful of ingredients that are easy to find and relatively inexpensive. Here’s a detailed list along with their purpose:

    • 1 Pound Chicken Breast (or thighs): The foundation of your sliders, chicken provides protein and moisture. You can use skinless, boneless pieces for convenience.

    • 1/4 Cup Honey Mustard: This tangy-sweet condiment is the star of the show, providing a balanced dressing that enhances the freshness of the other ingredients.

    • 8 slices of Bacon: Get the crispy, salty flavor that perfectly complements the chicken. For a healthier option, consider turkey bacon or bacon alternatives.

    • 4 Hamburger Buns: Choose gluten-free or whole wheat buns to add fiber and texture. You can also use lettuce wraps for a low-carb option.

    • 1 Cup Leafy Lettuce (e.g., romaine or spinach): Provides a fresh, crunchy element that’s essential for the classic BLT experience.

    • 1 Medium Tomato, sliced: Adds juiciness and freshness; it’s best to choose ripe, flavorful tomatoes.

    • Salt and Pepper, to taste: Essential for seasoning the chicken for overall flavor enhancement.

    Dietary Substitutions to Customize Your Irresistible Honey Mustard BLT Chicken Sliders

    Here’s how to make substitutions based on dietary needs:

    • Vegan: Replace chicken with chickpeas, tofu, or tempeh marinated in honey mustard. Use vegan bacon substitutes for the crispy element.

    • Gluten-Free: Instead of regular buns, opt for gluten-free hamburger buns or use lettuce leaves to wrap the filling.

    • Low-Calorie: Use a light honey mustard dressing and eliminate the bacon or opt for turkey bacon. Serve in lettuce wraps to minimize carbs.

    Whether you’re lactose intolerant or following a low-carb diet, adjustments can be made easily while still maintaining the recipe’s integrity.

    How to Prepare the Perfect Irresistible Honey Mustard BLT Chicken Sliders: Step-by-Step Guide

    Ready to create your Irresistible Honey Mustard BLT Chicken Sliders? Follow this straightforward step-by-step guide to ensure your sliders turn out perfectly:

    1. Prepare the Chicken: Rinse the chicken breasts under cold water and pat them dry with paper towels. Slice them into smaller pieces to fit the buns more easily.

    2. Season and Cook the Chicken: Season both sides of the chicken with a pinch of salt and pepper. Heat a grill or skillet over medium-high heat and cook the chicken for about 6-7 minutes on each side, or until the internal temperature reaches 165°F (75°C).

    3. Cook the Bacon: While the chicken is cooking, place the bacon slices on a separate skillet over medium heat. Cook until crispy, then transfer to paper towels to drain excess grease.

    4. Mix the Honey Mustard: In a small bowl, combine honey and mustard to create the sauce. Adjust the ratio depending on your taste preference—more honey for sweetness and more mustard for tanginess.

    5. Assemble the Sliders: Slice the buns in half. Spread a generous amount of honey mustard on the bottom half. Layer with crispy bacon, followed by the cooked chicken, fresh lettuce, and slices of tomato. Top with the other half of the bun.

    6. Optional: Toast the Buns: For added texture and flavor, toast the assembled sliders on a skillet for a few minutes until golden brown. This step enhances the overall taste.

    7. Serve: Cut the sliders in half if desired, and serve them warm. Enjoy with your favorite side dishes like sweet potato fries or a fresh salad.

    Tips for Adaptation

    • If making ahead, prep the chicken and the fixings separately, assembling simply before serving.
    • For added flavor, consider marinating the chicken in the honey mustard for a more robust taste.

    By accident or by design, you’ll find this easy approach to preparing sliders not only gets dinner on the table quickly but will also impress even the most discerning guests.

    Mastering Irresistible Honey Mustard BLT Chicken Sliders: Advanced Tips and Variations

    To elevate your Irresistible Honey Mustard BLT Chicken Sliders, consider these advanced tips and variations:

    • Flavor Infusions: Infuse more flavors by marinating the chicken in your favorite herbs and spices. Adding garlic powder, onion powder, or paprika can enhance the flavor profile, making it even more irresistible.

    • Cheese Lover’s Delight: Slices of cheddar or gouda cheese added to the sliders can introduce a rich creaminess that complements the honey mustard. Melt the cheese on top of the chicken just before assembling for an oozy effect.

    • Veggie Variations: Roasted or grilled veggies such as bell peppers, onions, or avocados can be an excellent addition, catering to more veggie-loving eaters.

    • Condiment Alternatives: While honey mustard is delicious, experimenting with BBQ sauce or a spicy aioli can give a unique twist to these sliders.

    • Bite-Sized Appetizers: For gatherings, adapt the recipe to create mini sliders using small dinner rolls for bite-sized snacks that everyone can enjoy.

    These tips not only add variety but also encourage creativity in the kitchen. If you’re looking to wow guests or simply enjoy a new take on a timeless classic, these adaptations can take your dish to the next level.

    How to Store Irresistible Honey Mustard BLT Chicken Sliders: Best Practices

    If you find yourself with leftovers or want to meal prep for the week ahead, here are some storage insights for your Irresistible Honey Mustard BLT Chicken Sliders:

    • Refrigeration: Once the sliders have cooled, place them in an airtight container and store in the refrigerator for up to 3-4 days. This way, they remain fresh and easy to reheat.

    • Freezing: For extended storage, wrap individual sliders securely in plastic wrap and place them in a freezer-safe bag. You can freeze them for up to three months. When you’re ready to eat, thaw in the fridge overnight or warm them in the microwave.

    • Reheating: To reheat, it’s best to use an oven or air fryer for maximum crispness. Preheat the oven to 350°F (175°C) and warm the sliders on a baking sheet for about 10-15 minutes until heated through.

    Avoid reheating more than once, as chicken can lose its quality and moisture on repeat cycles.

    Nutritional Value of Irresistible Honey Mustard BLT Chicken Sliders

    One of the advantages of making Irresistible Honey Mustard BLT Chicken Sliders is that they can be both delicious and nutritious. Here’s a breakdown of the nutritional value for a single slider (with the mentioned ingredients):

    • Calories: 350-400 calories per slider, depending on the bun and sauce used.
    • Protein: Approximately 25g, thanks to the chicken and bacon.
    • Fat: 15g, primarily from the bacon; opting for turkey bacon can reduce this.
    • Carbohydrates: 30g, primarily from the bun; whole grain options will add more fiber.
    • Fiber: 3-4g from the lettuce and tomato, contributing to your daily intake.

    This nutritional breakdown shows that while the sliders are indulgent, they also fit well within a balanced diet if portioned accordingly. Adjustments can be made by substituting ingredients to create lower-calorie or higher-fiber options.

    FAQs: Frequently Asked Questions About Irresistible Honey Mustard BLT Chicken Sliders

    1. Can I make these sliders ahead of time?

    Absolutely! You can prep the chicken and toppings ahead. Just assemble right before serving to keep everything fresh.

    2. What can I substitute for bacon?

    Feel free to use turkey bacon or vegan bacon substitutes for a healthier or plant-based option.

    3. How do I ensure the chicken stays juicy?

    Avoid overcooking the chicken. Use a meat thermometer to check for doneness at 165°F (75°C), and consider marinating beforehand for added flavor.

    4. Can I use a different sauce?

    Yes! BBQ sauce or a spicy aioli can bring a different flavor experience. Don’t be afraid to experiment with flavors!

    5. Are these sliders suitable for meal prep?

    Yes! You can prepare these sliders in advance and store them in the fridge or freezer for later.

    In closing, Irresistible Honey Mustard BLT Chicken Sliders serve as a delightful addition to your culinary repertoire. They’re quick, healthy, and versatile, making them fit seamlessly into every lifestyle. Whether you’re a busy professional, a cooking enthusiast, or anyone in between, this recipe has something for everyone. So gather your ingredients and enjoy the process of creating something truly delicious!

  • Curry Chicken Roti

    Curry Chicken Roti

    Curry Chicken Roti: A Tropical Delight

    Introduction to Curry Chicken Roti

    Curry Chicken Roti is not just a meal; it’s an experience that carries the vibrant flavors of the tropics right into your kitchen. Imagine biting into a flaky, golden-brown roti filled with a savory and aromatic chicken curry. This dish embodies the harmony of spices and comfort food all in one, making it a fantastic addition to your repertoire of chicken recipes.

    One of the standout features of Curry Chicken Roti is its versatility. It caters to various dietary needs, whether you’re looking for a healthy weeknight meal, a satisfying dish for your family, or something that fits into a busy schedule. The roti can be made gluten-free or even vegan with simple substitutions, making it an inclusive option for everyone at the table.

    Not only is this dish simple to prepare, but it also boasts an array of health benefits. The combination of lean chicken, spices, and fresh vegetables creates a nutritious meal that is rich in protein and flavor. Additionally, it can be customized easily to include seasonal vegetables, promoting a balanced diet.

    Let’s embark on this culinary adventure and discover how to create your own delicious Curry Chicken Roti. This easy-to-follow recipe will inspire even novice cooks to create something truly wonderful!

    Benefits and Advantages of Curry Chicken Roti

    There are several compelling reasons to include Curry Chicken Roti in your meal rotation.

    1. Ease of Preparation: This dish shines as a practical choice for busy parents, working professionals, and students alike. The recipe involves straightforward techniques that breathe life into the kitchen without overwhelming you. With ingredients that are easy to find, you won’t spend hours searching for exotic spices; your pantry will mostly contain what’s required.

    2. Health Benefits: When compared to other chicken recipes, Curry Chicken Roti stands out for its healthy profile. The dish is rich in protein from the chicken, which is essential for muscle repair and growth, while vibrant spices such as turmeric and ginger not only add flavor but also offer anti-inflammatory benefits. Vegetables incorporated into the curry increase fiber intake, promoting digestive health.

    3. Customizable: The true beauty of Curry Chicken Roti lies in its flexibility. For those conscious of their diet, you can easily tweak traditional recipes to be low-calorie, gluten-free, or even vegan by substituting chicken with tofu or chickpeas. This adaptability makes it suitable for a diverse range of dietary requirements.

    4. Flavorful and Satisfying: Let’s not ignore the flavor explosion! The spices bring warmth and comfort to each bite, while the roti gives a satisfying contrast in texture. Whether you decide to serve it at a family dinner or at a casual gathering with friends, it is sure to impress and satisfy.

    By integrating Curry Chicken Roti into your cooking routine, you’re not just providing a meal; you’re serving up comfort, nutrition, and joy all wrapped in a delightful package.

    Ingredients Overview

    Essential Ingredients for Curry Chicken Roti

    To prepare the ultimate Curry Chicken Roti, gather the following ingredients:

    For the Curry Filling:

    • 1 lb (450g) boneless chicken thighs or breasts, cubed (lean protein source)
    • 2 tablespoons vegetable oil (coconut oil is a delicious alternative)
    • 1 large onion, finely chopped
    • 3 cloves garlic, minced
    • 1 tablespoon fresh ginger, minced
    • 2 teaspoons curry powder (or garam masala for a deeper flavor)
    • 1 teaspoon ground cumin
    • 1 can (14 oz) coconut milk (for creaminess, can use low-fat version)
    • 1 diced tomato (adds freshness)
    • Salt and pepper to taste
    • 1 cup spinach or any leafy greens (optional, boosts nutrition)

    For the Roti:

    • 3 cups all-purpose flour (or whole wheat for a healthier option; for gluten-free use chickpea flour or almond flour)
    • 1 teaspoon salt
    • 1 tablespoon vegetable oil (or ghee for a richer flavor)
    • Water (as needed, to form a dough)

    This list captures the essence of a well-rounded dish that is filled with nutrition and flavor, while also picking ingredients that cater to various dietary needs.

    Dietary Substitutions to Customize Your Curry Chicken Roti

    Creating a dish that caters to diverse dietary preferences can feel challenging, but for Curry Chicken Roti, it’s all about making simple substitutions:

    • Gluten-Free Option: Use gluten-free flour, such as chickpea (besan) flour or a gluten-free baking blend, for the roti. Be conscious of the ratio of water since gluten-free flours may absorb liquid differently.

    • Vegan Version: Swap the chicken for chickpeas or tofu. Season the tofu well to infuse flavor, or opt for lentils for an equally nutritious plant-based protein. Use coconut cream instead of coconut milk to maintain creaminess.

    • Low-Calorie Adjustment: If you’re aiming for a lighter dish, lean chicken cuts are key. For the roti, you can reduce the oil or use a non-stick spray when cooking to cut calories significantly.

    • Fiber Boost: Add more veggies into your filling such as bell peppers, carrots, or zucchini. Not only do they provide texture and flavor, but they also increase the fiber content.

    These substitutions allow each cook to create a perfect Curry Chicken Roti suited to their dietary needs, making it an adaptable and inclusive choice.

    How to Prepare the Perfect Curry Chicken Roti: Step-by-Step Guide

    Ready to tackle this delicious meal? Follow these step-by-step instructions to make your own Curry Chicken Roti:

    1. Prepare the Dough: In a bowl, mix 3 cups of flour and 1 teaspoon of salt. Add 1 tablespoon of oil and gradually mix in water until a soft dough forms. Knead for about 5-7 minutes until smooth. Cover the dough with a damp cloth, allowing it to rest for 30 minutes.

    2. Cook the Filling: In a pan, heat 2 tablespoons of oil over medium heat. Add the chopped onion and sauté until translucent, about 5 minutes. Stir in the garlic and ginger, and cook for another 2 minutes until fragrant.

    3. Add Spices: Mix in the curry powder and ground cumin, cooking for an additional minute. This helps to release the essential oils in the spices, enhancing the flavor of your chicken recipes.

    4. Cook the Chicken: Add the cubed chicken to the pan. Cook, stirring occasionally, until the chicken is browned and cooked through, about 8-10 minutes.

    5. Incorporate the Vegetables: Pour in the can of coconut milk and add the diced tomato. Allow the mixture to simmer for about 10-15 minutes until slightly thickened—this step is crucial as it melds all the flavors together beautifully. Season with salt and pepper according to taste.

    6. Add Greens: If using spinach or any leafy greens, stir them in during the last 2-3 minutes of cooking to wilt slightly.

    7. Make the Roti: Divide the rested dough into equal portions (about 8-10 pieces). Roll each piece into a ball and then flatten into a circle, about 1/4 inch thick.

    8. Cook the Roti: Heat a skillet over medium heat. Place the rolled roti on the skillet. Cook for about 2 minutes on each side until golden brown, and bubble start to form. Brush with a little oil or butter for a richer taste if desired.

    9. Assemble the Meal: Place a generous spoonful of your savory curry filling inside the roti and fold it like a wrap or danish. Serve hot with a side of yogurt or a simple salad for a delightful contrast.

    10. Enjoy!: Share with family and friends and watch as they rave about your cooking skills. This dish will surely become a family favorite.

    By following these steps, you’ll create a satisfying meal that showcases your culinary flair. Whether you’re a seasoned cook or just beginning, Curry Chicken Roti is approachable and rewarding.

    Mastering Curry Chicken Roti: Advanced Tips and Variations

    To take your Curry Chicken Roti to the next level, consider these advanced tips and variations:

    • Fresh Herbs: For an added layer of flavor, fold in fresh cilantro or mint into your curry filling before stuffing the roti. The fresh herbs will elevate the dish.

    • Spice Level: Adjust the heat according to your taste! Add chopped green chilies or a pinch of cayenne pepper for a spicier version. Conversely, omit the spices for a milder flavor for kids or those sensitive to spice.

    • Saucy Option: Make a curry sauce by keeping the coconut milk a bit runnier and topping the roti with extra sauce before serving. This ensures the dish is creamy and richer, perfect for scooping with the roti.

    • Make-ahead Possibilities: Prepare the filling ahead of time and store it in the refrigerator for up to three days. This is a time-saver for busy cooks, allowing you to whip up fresh roti when ready to eat.

    • Alternative Fillings: Think outside the box! Try different protein options like shrimp or lamb, or wholly vegetarian versions using lentils and beans. Each variation opens doors to new flavor combinations and experiences.

    With these tips, you can add your personal touch to the recipe, making every cooking session a delightful exploration.

    How to Store Curry Chicken Roti: Best Practices

    Storing your Curry Chicken Roti correctly is essential to maintain its flavor and texture. Here’s how to do it:

    • Refrigeration: Once prepared, store leftover curry filling in an airtight container in the refrigerator for up to three days. The roti can be kept at room temperature for 1 day, but it’s better to refrigerate them too if you’re not consuming immediately.

    • Freezing: For longer storage, you can freeze the roti. Place parchment paper between cooked rotis when stacking to prevent them from sticking. Seal them in a freezer-safe bag, and they’ll keep for up to three months. The curry filling can also be frozen separately.

    • Reheating: To reheat frozen roti, place them in a heated skillet for about 1-2 minutes per side until warmed through. For the curry, reheat on low heat in a saucepan, adding a splash of water or coconut milk if the sauce is too thick.

    By following these storage techniques, you ensure that your Curry Chicken Roti remains fresh and delicious, ready whenever a tasty craving strikes!

    Nutritional Value of Curry Chicken Roti

    Understanding the nutritional profile of Curry Chicken Roti helps in meal planning, especially for those who are health-conscious. Let’s break down its key components:

    • Calories: A standard serving of Curry Chicken Roti, including the chicken filling and roti, ranges around 450-500 calories depending on the specific ingredients used.

    • Protein: Thanks to the chicken and veggies, you can expect about 25-30 grams of protein per serving, making it quite filling and beneficial for muscle recovery.

    • Fat: The use of coconut milk contributes saturated fats; each serving contains about 20 grams of total fat, of which approximately 10 grams are saturated. For a healthier option, using light coconut milk can reduce this figure.

    • Carbohydrates: Each serving has approximately 50-60 grams of carbohydrates, primarily from the roti. The fiber content can stand at around 4-5 grams, especially if using whole wheat flour.

    • Vitamins and Minerals: This recipe is packed with vitamins and minerals. The inclusion of leafy greens adds vitamins A, C, and iron, which are crucial for overall health.

    This nutritional breakdown indicates that Curry Chicken Roti can easily fit into a balanced diet without compromising flavor. Enjoying it mindfully contributes to your well-being while delighting your taste buds!

    FAQs: Frequently Asked Questions About Curry Chicken Roti

    1. Can I make Curry Chicken Roti in advance?

    Absolutely! The curry filling can be made ahead of time and stored in the refrigerator for up to three days. Just prepare the roti when you’re ready to eat for the best texture.

    2. How can I make this dish vegan?

    For a vegan option, substitute chicken with chickpeas, lentils, or tofu. Use coconut cream instead of chicken for a delightful texture without compromising on flavor.

    3. What can I use instead of coconut milk?

    You can use low-fat dairy milk or vegetable broth if you’re looking for a lighter option. However, these will alter the richness of the dish.

    4. Is it possible to freeze Curry Chicken Roti?

    Yes, you can freeze both the roti and the curry filling. Just make sure to separate them with parchment paper to avoid sticking.

    5. How do I spice it for kids?

    If you’re serving children, consider reducing the amount of curry powder and avoiding additional spicy ingredients like chilies. You can always add spice for adults later!

    6. Can I make the roti without oil?

    Yes, you can make the roti without oil, but oil helps create a flaky texture. If you prefer, try using a non-stick pan to minimize sticking without using fat.

    Each of these questions addresses common concerns and further inspires readers to try out the recipe with confidence.


    In conclusion, Curry Chicken Roti is a delightful, versatile recipe that’s an excellent addition to any home cook’s collection. With easy preparation, countless customization options, and a host of health benefits, it can adapt to any dietary needs. So whisk up your apron, roll out the dough, and dive into a tropical culinary adventure!

  • Curry Chicken Roti

    Curry Chicken Roti

    Curry Chicken Roti: A Tropical Delight

    Introduction to Curry Chicken Roti

    Curry Chicken Roti is a deliciously comforting dish that embodies the warmth of tropical flavors, making it a staple in many households. This recipe stands out not only for its rich taste but also for its versatility, appealing to home cooks, busy parents, food enthusiasts, and anyone looking for straightforward yet flavorful chicken recipes. The beauty of Curry Chicken Roti lies in its simplicity; it marries tender pieces of chicken in a fragrant curry sauce with a soft, flaky roti that wraps up the goodness, ensuring every bite is filled with flavor.

    Whether you’re a student rushing to prepare dinner or a newlywed eager to impress your partner with your cooking skills, this dish fits the bill perfectly. With a focus on health, Curry Chicken Roti can be customized to suit various dietary preferences. It offers a nourishing option for those conscious about their eating habits without sacrificing taste. Plus, it’s easily adjustable to accommodate vegan and gluten-free diets, ensuring that everyone at the table can enjoy this tropical delight. So, roll up your sleeves and prepare to create a dish that’s not only pleasing to the palate but also nourishes the body and soul!

    Benefits and Advantages of Curry Chicken Roti

    Curry Chicken Roti boasts numerous benefits that make it an ideal choice for various occasions. First and foremost, the ease of preparation is a game-changer for busy individuals and families. The recipe allows for meal prep for the week ahead, making it a great solution for those juggling work and home life.

    In terms of health benefits, this dish brings together lean protein from the chicken, coupled with the nutritional perks of spices like turmeric and cumin. These spices are known to have anti-inflammatory properties and are beneficial for digestion. Additionally, you can easily incorporate vegetables into the curry sauce, enhancing the overall nutrient profile of the meal.

    For those who may be sensitive to gluten or carbs, making a gluten-free roti is a breeze with just a few adjustments to the ingredients. Likewise, for the vegan crowd, substituting chicken with chickpeas, tofu, or lentils brings an entirely new dimension to the dish.

    This recipe stands out among other chicken recipes because it allows for creativity in the kitchen. You can customize the spice level, add seasonal vegetables, or serve it with different sauces to elevate the flavor. This flexibility not only enriches the dining experience but also makes it more culturally immersive.

    By choosing to prepare Curry Chicken Roti, you also address the growing trend of home-cooked meals that are healthier and more economical than dining out. If you’re looking for a recipe that pleases a variety of palates while still being mindful of nutrition, you’ve found it right here!

    Ingredients Overview

    Essential Ingredients for Curry Chicken Roti

    To create your own Curry Chicken Roti, gather the following ingredients:

    For the Curry:

    • 2 tablespoons oil (vegetable or coconut oil, for cooking)
    • 1 medium onion, finely chopped (adds sweetness and depth)
    • 2-3 cloves garlic, minced (for flavor)
    • 1 tablespoon ginger, minced (helps with digestion)
    • 1 teaspoon turmeric powder (anti-inflammatory benefits)
    • 1 teaspoon cumin powder (adds warmth)
    • 1 teaspoon coriander powder (balances flavors)
    • 1/2 teaspoon chili powder (optional, for heat)
    • 1 pound boneless chicken thighs or breasts, cut into cubes (lean protein)
    • 1 can (14 oz) coconut milk (creamy richness)
    • Salt to taste
    • Fresh cilantro for garnish (optional, adds freshness)

    For the Roti:

    • 2 cups all-purpose flour (or whole wheat for added fiber)
    • 1/2 teaspoon salt
    • 3/4 cup warm water (for pliable dough)
    • 2 tablespoons melted butter or ghee (for flakiness)

    Dietary Substitutions to Customize Your Curry Chicken Roti

    • To make it Vegan: Substitute chicken with 1 can chickpeas, drained, or 1 block of firm tofu, pressed and diced.
    • Gluten-Free Option: Replace all-purpose flour with gluten-free flour blend or almond flour for the roti.
    • Low-Calorie Version: Reduce the amount of coconut milk and swap it for low-fat yogurt, or skip the roti for a lighter meal option.
    • Spicy Version: Add extra chili powder or fresh chilies to the curry for those who enjoy a kick.

    These substitutions not only make the dish available for diverse dietary needs but also encourage experimenting with flavors and textures.

    How to Prepare the Perfect Curry Chicken Roti: Step-by-Step Guide

    Get ready to bring the tropical flavors of Curry Chicken Roti into your kitchen with these clear, actionable steps.

    1. Prepare the Base:

    Heat 2 tablespoons of oil in a large skillet over medium heat. Add the chopped onion, cooking until it’s soft and translucent (about 5 minutes).

    2. Mix Ingredients:

    Stir in the minced garlic and ginger. Cook for an additional 1-2 minutes until fragrant. Then, add turmeric, cumin, coriander, and chili powder. Mix well and let the spices bloom for about 30 seconds.

    3. Cook the Chicken:

    Add the chicken cubes to the skillet, mixing them with the spices and onion. Cook until the chicken is browned on all sides (around 5-7 minutes).

    4. Add Coconut Milk:

    Pour in the coconut milk, stirring to combine all ingredients. Bring the mixture to a simmer, then reduce the heat to low, allowing it to cook gently. Cover the skillet and simmer for 15-20 minutes, until the chicken is tender and cooked through.

    5. Season the Curry:

    Taste the dish and season with salt as needed. If you’re preparing a vegan version, allow the chickpeas or tofu to cook down in the same way for the same amount of time.

    6. Prepare the Roti:

    In a large bowl, whisk together flour and salt. Gradually add warm water until a dough forms. Knead the dough on a floured surface for about 5 minutes until smooth and elastic.

    7. Let the Dough Rest:

    Cover the dough with a damp cloth and let it rest for at least 30 minutes. This is an essential step for achieving soft, flaky rotis.

    8. Roll Out the Roti:

    Divide the rested dough into smaller balls. Roll each ball into a circle about 1/8 inch thick.

    9. Cook the Roti:

    Heat a cast-iron skillet over medium-high heat. Cook each roti for about 1-2 minutes on each side until golden and slightly puffed. Brush with melted butter or ghee if desired.

    10. Serve:

    Serve the warm curry over the cooked roti, garnish with fresh cilantro, and enjoy a hearty meal!

    With these steps, you’ll create a delicious, comforting dish ideal for any occasion. Adjust the steps as needed based on personal preference to make your Curry Chicken Roti unique.

    Mastering Curry Chicken Roti: Advanced Tips and Variations

    For those looking to elevate their culinary experience with Curry Chicken Roti, consider these advanced tips and variations:

    • Add Vegetables: Incorporate vegetables such as bell peppers, spinach, or peas into the curry for added nutrition. They can also provide vibrant color and texture.
    • Experiment with Spices: Try adding ingredients like fenugreek for a unique flavor profile or garam masala for a touch of warmth.
    • Serve with Sides: Pair your roti with a refreshing cucumber salad or a spicy mango chutney to complement the flavors of the curry.
    • Make Ahead: Prepare the curry in bulk and store it. This will allow you to have a delicious meal ready to go whenever you’re short on time.
    • Try Different Meats: While chicken is the star here, you can also swap for lamb, beef, or even seafood, changing the dynamics and accentuating different culinary elements.

    These suggestions not only make the recipe richer in flavor but also invite creativity into the kitchen.

    How to Store Curry Chicken Roti: Best Practices

    To store leftover Curry Chicken Roti effectively, follow these guidelines:

    • Refrigeration: Store any leftover curry in an airtight container in the refrigerator for up to 3 days. The flavors will continue to meld, enriching the taste.
    • Freezing: The curry freezes well for up to 3 months, but the roti is best fresh. Consider freezing only the curry. To do this, pour the cooled curry into freezer-safe bags and lay them flat in the freezer to save space.
    • Reheating: When ready to enjoy the leftovers, reheat the curry in a saucepan over low heat or in the microwave, stirring occasionally. If the coconut milk separates, whisk it before serving. For the roti, reheat it on a skillet for that fresh-off-the-griddle taste.

    Following these steps ensures that you enjoy your Curry Chicken Roti at its best even after initial preparation.

    Nutritional Value of Curry Chicken Roti

    Understanding the nutritional profile of Curry Chicken Roti emphasizes its benefits as a healthy meal option. Here’s a breakdown of the approximate nutritional values per serving:

    • Calories: 450-500 (depending on the use of coconut milk and type of roti)
    • Fat: 25-30g (largely from coconut milk and any added butter/ghee)
    • Protein: 25-30g (availing mostly from chicken)
    • Carbohydrates: 40-50g (from the roti)
    • Fiber: 3-5g (if using whole wheat flour)

    The presence of healthy fats from coconut milk not only enhances the flavor but also contributes to essential nutrient absorption. Furthermore, the dish provides a hearty helping of protein, making it a satisfying meal.

    By customizing your ingredients, you can alter the nutrition to better suit your dietary needs while enjoying every bite of this tropical delight.

    FAQs: Frequently Asked Questions About Curry Chicken Roti

    Q1: Can I make Curry Chicken Roti in advance?
    Yes, you can prepare the curry up to a few days in advance. Reheat it when you’re ready to serve along with freshly made roti.

    Q2: How do I make the roti soft?
    Letting your dough rest and ensuring you use warm water helps in achieving a soft and pliable roti.

    Q3: What can I serve with Curry Chicken Roti?
    Cucumber salad, mango chutney, or pickles pair wonderfully with the dish, balancing the spiciness of the curry.

    Q4: Is this recipe suitable for meal prep?
    Absolutely! The curry freezes well and can be portioned out for easy reheating on busy days.

    Q5: Can I adjust the spice level?
    Definitely! Adjust the amount of chili powder according to your taste preference or omit it for a milder flavor.

    With these guidelines and tips, your culinary journey to mastering Curry Chicken Roti is now complete. Enjoy the tropical flavors, nutritional benefits, and versatility this dish brings to your table!

  • Spicy Brazilian Coconut Chicken

    Spicy Brazilian Coconut Chicken

    Spicy Brazilian Coconut Chicken: A Tropical Delight

    Introduction to Spicy Brazilian Coconut Chicken

    When it comes to chicken recipes, few can match the vibrant flavors of Spicy Brazilian Coconut Chicken. This dish brings the exotic taste of Brazil right into your kitchen, combining succulent chicken with rich coconut milk and a medley of spices that deliver a tropical punch with every bite. Not only is this recipe simple to prepare, but it also offers a plethora of health benefits, making it suitable for busy parents, students, and health-conscious individuals alike.

    This delightful recipe is generously flavored with ingredients that boast anti-inflammatory properties and healthy fats, allowing you to indulge without the guilt. Whether you are a novice cook or an experienced chef, you’ll find that this dish is highly accessible and versatile. The beauty of Spicy Brazilian Coconut Chicken lies not just in its taste but also in its adaptability. This recipe can cater to various dietary needs, including gluten-free and lower-calorie options, which means everyone at the table can enjoy this tropical delight.

    By incorporating this dish into your rotation, you not only bring an explosion of flavor to your meals but also a nutritious option that nourishes your body and satisfies your taste buds. So, gather your ingredients and get ready to embark on a culinary adventure that embodies the essence of Brazil!

    Benefits and Advantages of Spicy Brazilian Coconut Chicken

    Spicy Brazilian Coconut Chicken stands out among other chicken recipes due to its unique combination of flavors, health benefits, and ease of preparation. Let’s explore some of the advantages that make this dish a favorite among home cooks and food enthusiasts.

    1. Simple to Prepare

    For busy individuals and families, the thought of a complex recipe can be daunting. Thankfully, Spicy Brazilian Coconut Chicken only requires fundamental cooking skills. With straightforward steps, it takes about 30 minutes from start to finish, making it an ideal weeknight meal that doesn’t compromise on taste or quality.

    2. Nutritional Benefits

    Coconut milk is a standout ingredient in this recipe, loaded with healthy fats and essential vitamins. It helps improve digestion, boosts immunity, and promotes heart health. Additionally, the spices used—such as turmeric and cayenne—add not only flavor but also various health benefits, including anti-inflammatory properties. Thus, you don’t just get a delicious dish; you’re also nourishing your body.

    3. Versatility for Dietary Needs

    This chicken recipe is inherently gluten-free and can easily be adapted for various diets, whether you’re vegan, paleo, or on a low-carb diet. With simple ingredient substitutions, such as using tofu instead of chicken for a vegan option or serving it over cauliflower rice for a low-carb alternative, everyone can enjoy the tropical flavors of Brazil.

    4. Meal Prep Friendly

    If you’re looking to save time on meal prep, Spicy Brazilian Coconut Chicken is perfect for batch cooking. It keeps well in the fridge for a few days, making it easy to have on hand for lunches or quick dinners. Plus, it can be frozen for longer-term storage, making this recipe not only delicious but practical for any busy lifestyle.

    By embracing this Spicy Brazilian Coconut Chicken recipe, you can experience a range of health benefits, flavor-packed meals, and adaptability to fit any dietary lifestyle. Elevate your cooking regime with a dish that promises to impress and satisfy.

    Ingredients Overview

    Essential Ingredients for Spicy Brazilian Coconut Chicken

    Here’s a detailed list of the ingredients you will need for this vibrant dish, along with their precise measurements and explanations of why they’re crucial:

    • 1 pound chicken thighs (skinless, boneless): These are juicy and flavorful, perfect for absorbing spices.
    • 1 can (14 oz) coconut milk: Adds creaminess and richness while providing healthy fats (can substitute with lite coconut milk for lower calories).
    • 1 medium onion, chopped: Contributes sweetness and depth to the flavor profile.
    • 3 cloves garlic, minced: Adds aromatic flavor and health benefits.
    • 1 tablespoon ginger, grated: Provides a zingy flavor and aids digestion.
    • 1 tablespoon olive oil: Used for sautéing the onions and chicken; extra virgin olive oil offers additional antioxidants.
    • 1-2 tablespoons cayenne pepper (adjust for spice preference): Gives the dish its characteristic spiciness.
    • 1 teaspoon turmeric powder: Known for its anti-inflammatory properties and vibrant color.
    • Salt and pepper to taste: Essential for enhancing all flavors.
    • Fresh cilantro for garnish: Adds a fresh herbal note and vibrant color to the dish.

    If you prefer to cater to specific dietary needs, keep reading for valuable substitutions.

    Dietary Substitutions to Customize Your Spicy Brazilian Coconut Chicken

    Are you finding some ingredients hard to source, or do you have dietary restrictions? Here are some easy substitutions to ensure everyone can enjoy this delicious recipe.

    • For a Vegan Option: Replace chicken thighs with extra-firm tofu or chickpeas. Both absorb flavors well and provide ample protein.
    • Gluten-Free Option: This recipe is naturally gluten-free thanks to ingredients like coconut milk and spices. Just ensure that any store-bought stock or sauces used are labeled gluten-free.
    • Low-Calorie Option: Use lite coconut milk to reduce calories while retaining creaminess. You can also serve this dish over steamed vegetables or cauliflower rice instead of traditional rice.
    • Lower Sodium Option: Instead of regular salt, use herbal salt or lemon juice to add flavor without the sodium content.

    Feel free to mix and match these substitutions to cater to your dietary preferences and ingredient availability while keeping the heart of Spicy Brazilian Coconut Chicken intact!

    How to Prepare the Perfect Spicy Brazilian Coconut Chicken: Step-by-Step Guide

    Get ready to whip up a fabulous dish with this step-by-step guide on how to prepare Spicy Brazilian Coconut Chicken! You’ll find that making this enticing recipe is not only easy but also rewarding.

    1. Prepare the Ingredients: Gather all your ingredients and utensils. Chopping the onion, garlic, and ginger ahead of time will help streamline your cooking process.

    2. Sauté the Aromatics: In a large skillet or saucepan, heat the olive oil over medium heat. Once hot, add onions and sauté for about 3-4 minutes until translucent. Then, add garlic and ginger, cooking for an additional minute until fragrant.

    3. Cook the Chicken: Add the chicken thighs to the skillet. Sear each side for 5-7 minutes, allowing the chicken to achieve a golden brown color.

    4. Season the Chicken: Next, sprinkle cayenne pepper, turmeric, salt, and pepper over the chicken, ensuring each piece is well coated. This step is crucial as it layers the flavor throughout the dish.

    5. Add Coconut Milk: Pour in the can of coconut milk, stirring to combine. Bring the mixture to a gentle simmer, allowing all the flavors to meld together beautifully.

    6. Simmer and Thicken: Cover the skillet and let the dish simmer on low-medium heat for about 15-20 minutes. The chicken will become tender, and the sauce will thicken slightly.

    7. Check for Doneness: Use a meat thermometer to ensure the chicken reaches an internal temperature of 165°F. Adjust seasoning with more salt or pepper if necessary.

    8. Garnish and Serve: Once cooked, remove the skillet from heat. Garnish with fresh cilantro before serving hot. Pair it with rice, quinoa, or steamed vegetables for a complete meal.

    Adaptations for Various Dietary Needs

    You can easily modify each step based on dietary requirements. For a low-carb version, consider skipping the rice and garnishing with additional herbs or lime. For vegans, follow the same steps while substituting chicken with tofu, ensuring full flavor infusion is maintained.

    Mastering Spicy Brazilian Coconut Chicken: Advanced Tips and Variations

    Now that you’ve grasped the basics, let’s delve into advanced tips and exciting variations to enhance your Spicy Brazilian Coconut Chicken experience!

    1. Add Tropical Fruits: Consider adding diced mango or pineapple during the last minutes of cooking. This sweet addition will balance the dish’s heat beautifully, creating a tropical salsa.

    2. Experiment with Spice Levels: If you adore heat, try incorporating diced jalapeños or crushed red pepper flakes along with the cayenne for an extra kick.

    3. Substitute Proteins: While chicken is the star here, feel free to swap in shrimp or fish for a completely different flavor profile. Both proteins cook quickly and offer a delightful alternative.

    4. Add Vegetables: For those wanting to boost the nutrition factor, add sliced bell peppers, or spinach during the simmering phase. These will cook down, adding more vitamins and a variety of textures.

    5. Herb Infusions: For a unique twist, experiment with different herbs. Add a dash of Thai basil or even mint for an unexpected layer of flavor that harmonizes beautifully with coconut milk.

    By employing these tips and variations, you can truly tailor the dish to your palate, making it a personal favorite.

    How to Store Spicy Brazilian Coconut Chicken: Best Practices

    To make the most of your cooking experience, it’s important to know the best methods for storing your Spicy Brazilian Coconut Chicken.

    Refrigeration

    If you have leftovers, refrigerate your fully cooked dish in an airtight container within 2 hours of cooking. Properly stored, it will last for 3-4 days in the fridge. Reheat your portion in the microwave or stovetop until warmed through.

    Freezing

    For longer storage, Spicy Brazilian Coconut Chicken can be frozen. Transfer the cooled dish into freezer-safe containers, leaving some space at the top for expansion. When stored appropriately, it can last for up to 3 months in the freezer.

    Reheating

    When you’re ready to enjoy your frozen Spicy Brazilian Coconut Chicken, simply thaw it overnight in the fridge, then use the stovetop or microwave to heat it. If you find the sauce thickened too much after freezing, add a splash of chicken broth or water for a more desirable consistency.

    By following these storage tips, you can ensure that your meal remains fresh and delicious for days or even months to come, making it an excellent option for meal prepping.

    Nutritional Value of Spicy Brazilian Coconut Chicken

    Understanding the nutritional content of your favorite chicken recipes is crucial for maintaining a balanced diet. Here’s a breakdown of the estimated nutritional information for Spicy Brazilian Coconut Chicken (per serving):

    • Calories: 350
    • Protein: 28g
    • Fat: 24g
    • Saturated Fat: 15g
    • Carbohydrates: 10g
    • Dietary Fiber: 2g
    • Sugars: 3g
    • Sodium: 450mg

    Health Benefits

    • High in Protein: Chicken is an excellent source of lean protein, essential for muscle building and repair.
    • Rich in Healthy Fats: Coconut milk contains medium-chain triglycerides (MCTs) that can enhance metabolism and provide quick energy.
    • Vitamins and Minerals: Ingredients like garlic, onions, and spices contribute antioxidants and essential vitamins such as C and B6, supporting overall health.

    By being conscious of the nutritional value of Spicy Brazilian Coconut Chicken, you can enjoy this dish guilt-free while ensuring it aligns with your health goals.

    FAQs: Frequently Asked Questions About Spicy Brazilian Coconut Chicken

    1. Can I make Spicy Brazilian Coconut Chicken ahead of time?

    Absolutely! This dish stores well in the fridge for several days and can be frozen for long-term storage.

    2. Is this recipe suitable for meal prep?

    Yes! It’s perfect for meal prep. Cook a batch and portion it out for easy lunches or dinners throughout the week.

    3. Can I substitute chicken with another protein?

    Definitely! Shrimp, fish, or even roasted vegetables can be used in place of chicken for delightful alternatives.

    4. How spicy is this dish?

    The spice level can be adjusted based on your taste. Start with a smaller amount of cayenne pepper and adjust as necessary to suit your preference.

    5. What can I serve with Spicy Brazilian Coconut Chicken?

    This dish pairs beautifully with rice, quinoa, or steamed vegetables. You can also serve it with a fresh salad or flatbreads to soak up the delicious sauce.

    6. Is this recipe gluten-free?

    Yes! All the ingredients used are gluten-free. Just ensure that any additional sauces or stocks you use are certified gluten-free.

    By addressing these common queries, you’ll be able to prepare and enjoy Spicy Brazilian Coconut Chicken with confidence, regardless of your cooking experience. Unleash your inner chef and enjoy this dish in good company!

  • Brazilian Coconut Chicken

    Brazilian Coconut Chicken

    Brazilian Coconut Chicken: A Tropical Delight

    Introduction to Brazilian Coconut Chicken

    Are you on the lookout for simple yet exotic chicken recipes to elevate your cooking game? Look no further than Brazilian Coconut Chicken. This delightful dish captures the vibrant flavors of Brazil while remaining accessible to home cooks of all skill levels. Whether you’re a busy parent trying to whip up something nutritious for your family, a student looking for a budget-friendly meal, or simply someone with a passion for exploring new gastronomic territories, this recipe is perfect for you.

    Brazilian Coconut Chicken combines succulent chicken pieces with creamy coconut milk and an array of aromatic spices, creating a flavorful meal that transports your taste buds straight to the tropics. Not only is it simple to prepare, but it’s also healthy. With an array of fresh ingredients, this dish boasts vitamins, protein, and healthy fats. Plus, it can easily be adapted to fit a variety of dietary needs, including vegan, gluten-free, and low-calorie options.

    Imagine serving this tropical delight at your next dinner party or family gathering, where it’s sure to impress your guests and leave them craving more. The best part? You can have this dish on your table faster than you can say “Brazilian Coconut Chicken!” Let’s dive into the benefits of this incredible recipe and why it should be a staple in your kitchen.

    Benefits and Advantages of Brazilian Coconut Chicken

    Brazilian Coconut Chicken shines among countless chicken recipes for several reasons. Let’s explore the standout features that make it such an appealing choice for cooks and families alike.

    Simple Preparation

    One of the main appeals of this dish is its simplicity. You don’t need to be a culinary expert to enjoy a flavorful meal. With straightforward steps and easily accessible ingredients, Brazilian Coconut Chicken is designed for busy individuals who still want to savor something delicious and homemade. From chopping vegetables to simmering the sauce, this recipe can be completed in less than an hour, making it ideal for weeknight dinners.

    Health Benefits

    Health-conscious cooks will appreciate the nutritional benefits of this recipe. Coconut milk, while rich and flavorful, is a great source of medium-chain triglycerides (MCTs) that are known to support metabolism and provide energy. Coupled with lean chicken breast, this dish becomes a protein powerhouse perfect for those aiming to maintain a balanced diet.

    Additionally, the use of fresh vegetables contributes vitamins and minerals, making it a well-rounded meal. The inclusion of garlic and onions, known for their immune-boosting properties, adds both flavor and health benefits.

    Diet Versatility

    Whether you’re following a gluten-free, paleo, or low-carb diet, Brazilian Coconut Chicken can be tailored to meet your specific needs. By replacing the chicken with tofu or seitan, you can easily create a vegan alternative without sacrificing flavor. Moreover, the recipe can easily be adjusted to reduce calories with simple ingredient swaps.

    Every ingredient can work together harmoniously, allowing you the flexibility to customize according to your dietary restrictions. It’s rare to find a dish that checks all the boxes—delicious, healthy, and adaptable, but Brazilian Coconut Chicken does just that.

    Ingredients Overview

    Essential Ingredients for Brazilian Coconut Chicken

    To prepare Brazilian Coconut Chicken, you’ll need the following essential ingredients:

    1. Boneless, Skinless Chicken Breasts (2 lbs): The star of the dish provides lean protein.
    2. Coconut Milk (1 can, ~14 oz): This creamy base adds richness and flavor.
    3. Garlic (3 cloves, minced): Adds aromatic depth and immune support.
    4. Onion (1 medium, chopped): Provides sweetness and texture to the dish.
    5. Bell Peppers (1 red, 1 green, sliced): Adds color, crunch, and vitamins.
    6. Tomatoes (1 large, chopped): Enhances flavor and introduces juiciness.
    7. Olive Oil (2 tablespoons): For sautéing the vegetables.
    8. Salt and Pepper to taste: Essential seasonings to enhance flavor.
    9. Paprika (1 teaspoon): Provides a smoky undertone that complements the coconut.
    10. Cilantro (for garnish): Fresh herbs add a burst of color and freshness.

    Dietary Substitutions to Customize Your Brazilian Coconut Chicken

    Brazilian Coconut Chicken is not just a dish; it’s a versatile recipe you can easily adjust according to dietary preferences:

    • Vegan Option: Substitute chicken with firm tofu or chickpeas. Use vegetable broth instead of chicken broth if desired.
    • Gluten-Free: This recipe is inherently gluten-free, but ensure any added seasonings (like condiments) are certified gluten-free.
    • Low-Calorie Option: Use skinless chicken thighs instead of breasts or replace the coconut milk with low-fat coconut milk to reduce fat and calories.
    • Spice it Up: For those who enjoy a bit of heat, consider adding a chopped jalapeño or a pinch of cayenne pepper to the mix for an exciting twist.

    By catering to various dietary restrictions, this dish becomes a crowd-pleaser at any gathering.

    How to Prepare the Perfect Brazilian Coconut Chicken: Step-by-Step Guide

    Ready to create a culinary masterpiece? Follow these simple steps to prepare Brazilian Coconut Chicken:

    1. Prepare the Base: Heat the olive oil in a large skillet over medium heat. Add the chopped onions and sauté for about 3-4 minutes until they become translucent.

    2. Add Aromatics: Toss in the minced garlic and sauté for an additional minute until fragrant, taking care not to let it burn.

    3. Incorporate the Chicken: Add the chicken breasts to the skillet. Season with salt, pepper, and paprika. Cook the chicken for about 6-8 minutes, stirring occasionally until the chicken is browned on all sides.

    4. Introduce the Vegetables: Stir in the sliced bell peppers and chopped tomatoes. Cook for another 5 minutes, allowing the vegetables to soften and release their juices.

    5. Pour in the Coconut Milk: Add the coconut milk to the skillet and bring the mixture to a gentle simmer. Lower the heat and let it cook for 15-20 minutes, allowing the flavors to meld together.

    6. Adjust Seasonings: Taste the sauce and adjust the seasoning as needed. If you prefer more heat, add crushed red pepper or cayenne at this stage.

    7. Finalize Cooking: If using tofu, ensure it is heated through, or check the chicken for doneness using a meat thermometer (it should be at least 165°F).

    8. Garnish and Serve: Remove from heat and garnish with freshly chopped cilantro. Serve the Brazilian Coconut Chicken over rice or quinoa for a hearty meal, or with a green salad for a lighter option.

    9. Allow for Cooling: If you have leftovers, allow the chicken to cool before transferring it to an airtight container for storage.

    This recipe is straightforward, and with a little practice, you’ll master the art of Brazilian Coconut Chicken in no time.

    Mastering Brazilian Coconut Chicken: Advanced Tips and Variations

    To take your Brazilian Coconut Chicken to the next level, consider these advanced tips and tempting variations:

    • Infuse with Citrus: Adding lime zest or a squeeze of fresh lime juice before serving can brighten the dish and add a refreshing touch.
    • Add Nuts for Crunch: Chopped cashews or peanuts can be stirred in just before serving to add a delightful crunch.
    • Experiment with Vegetables: Add more vegetables like zucchini or spinach for added nutrients and texture.
    • Create a Coconut Rice: Cook rice in coconut milk instead of water for an extra layer of flavor that pairs beautifully with the chicken.
    • Make It Spicy: Incorporating finely chopped fresh chili, such as serrano or bird’s eye, into the sauté phase can add depth and heat according to your preference.

    Each variation enables you to experiment with flavors while still centering this dish’s tropical essence.

    How to Store Brazilian Coconut Chicken: Best Practices

    Proper storage of your Brazilian Coconut Chicken ensures that it remains delicious and safe to eat:

    • Refrigeration: Allow leftover chicken to cool completely before transferring it to an airtight container. It will last for up to 3-4 days in the fridge.
    • Freezing: For longer storage, you can freeze the chicken. Ensure it’s tightly sealed in a freezer-safe container or bag. It can be frozen for up to 3 months.
    • Reheating: When you’re ready to enjoy your leftovers, simply reheat in a skillet over medium heat, adding a splash of water or coconut milk to keep it from drying out, or microwave in short intervals until warmed through.

    By following these best practices, you’ll ensure your Brazilian Coconut Chicken stays flavorful and ready to be enjoyed.

    Nutritional Value of Brazilian Coconut Chicken

    Understanding the nutritional value of your meals is vital to maintaining a balanced diet. Here’s a rough breakdown per serving (based on the above ingredients):

    • Calories: ~350
    • Protein: ~25g
    • Fat: ~20g (Healthy fats from coconut milk)
    • Carbohydrates: ~10g
    • Fiber: ~3g
    • Sugars: ~4g

    This meal not only satisfies your hunger but also fuels your body with essential nutrients. Moreover, the dish is adaptable; depending on your ingredient substitutes, the nutritional content might vary, allowing you to control your dietary intake effectively.

    FAQs: Frequently Asked Questions About Brazilian Coconut Chicken

    Can I use other proteins besides chicken?

    Absolutely! Feel free to substitute chicken with shrimp, fish, or plant-based proteins such as tofu or tempeh for a vegan version.

    How spicy is Brazilian Coconut Chicken?

    The base recipe is mildly spiced, but you can easily adjust the spice level by adding more chili or hot sauce according to your taste.

    Can I prepare Brazilian Coconut Chicken in advance?

    Yes, this dish can be made ahead of time. Simply store it in the refrigerator and reheat when ready to serve. It often tastes even better the next day as the flavors deepen.

    Is Brazilian Coconut Chicken suitable for freezing?

    Yes! As mentioned earlier; make sure to allow it to cool completely before putting it in a freezer-safe container.

    What side dishes go well with Brazilian Coconut Chicken?

    Brazilian Coconut Chicken pairs wonderfully with rice, quinoa, or a fresh green salad. For a heartier meal, consider serving it with roasted vegetables or plantains.

    Can I adjust the flavor profile of this dish?

    Definitely! Feel free to experiment with different herbs and spices. Adding turmeric, ginger, or lemongrass can create a unique twist.

    By addressing commonly asked questions, you’ll provide valuable insights that make readers feel confident in trying this delicious Brazilian Coconut Chicken recipe.

    In conclusion, Brazilian Coconut Chicken is a delightful, adaptable, and nutritious dish that resonates with cooks and food enthusiasts alike. Don’t hesitate to bring a taste of Brazil into your home kitchen and impress your family and friends. Enjoy your cooking adventure!

  • Succulent Italian Braised Chicken Marsala

    Succulent Italian Braised Chicken Marsala

    Succulent Italian Braised Chicken Marsala: A Tropical Delight

    Introduction to Succulent Italian Braised Chicken Marsala

    Welcome to a culinary adventure where Italian flavors meet simplicity! The Succulent Italian Braised Chicken Marsala is a dish that embodies the essence of home-cooked comfort food while ensuring it is accessible for all. This recipe is perfect for anyone who seeks robust flavors without spending hours in the kitchen. Ideal for family dinners or intimate gatherings, it appeals to a broad range of dietary preferences.

    Not only is this meal incredibly delicious, but it also boasts several health benefits. Chicken is a fantastic source of lean protein, which is vital for muscle repair and overall body function. Coupled with nutrient-rich mushrooms and a flavorful Marsala wine reduction, this dish creates a symphony of taste and nutrition.

    Whether you’re a busy parent looking for a quick, healthy meal, a student wanting to impress their friends, or a culinary enthusiast keen to try your hand at comfort food, this recipe is for you! The balance of simplicity and flavor makes this one of the standout chicken recipes you’ll want to add to your collection. So, roll up your sleeves and get ready to create something delightful that everyone will love!

    Benefits and Advantages of Succulent Italian Braised Chicken Marsala

    Why should you consider adding Succulent Italian Braised Chicken Marsala to your repertoire of chicken recipes?

    Easy Preparation

    One of the most appealing aspects of this dish is its straightforward preparation. With minimal effort, you can create a restaurant-quality meal that is perfect for any occasion. This recipe is designed to promote a stress-free cooking experience, making it ideal for busy weekdays or gathering with friends on weekends.

    Health Benefits

    This dish not only tantalizes your taste buds but also packs in various nutritional benefits. Chicken is a lean source of protein, essential for maintaining energy levels and muscle mass. When combined with mushrooms, known for their immune-boosting properties and antioxidants, you elevate the health quotient of your meal. Moreover, the use of Marsala wine adds depth to the flavors without excessive calories.

    Ingredients Versatility

    What sets this recipe apart is its versatility. You can easily customize the dish to cater to different dietary needs. For instance, you can use gluten-free flour or opt for low-sodium chicken broth, making it suitable for those who are health-conscious or have specific dietary restrictions. The adaptability of the recipe ensures that everyone at your dining table can indulge guilt-free.

    Flavor Profile

    The rich, savory taste of Marsala wine combined with tender, braised chicken and earthy mushrooms creates an aromatic explosion in every bite. The sauce envelops the chicken, ensuring each piece is bursting with flavor. This mouthwatering delight is sure to impress your family and friends, making it an excellent choice for entertaining guests or celebrating special occasions.

    In conclusion, the Succulent Italian Braised Chicken Marsala stands out in the realm of chicken recipes as a nourishing, simple, and absolutely delicious option perfect for any dinner table.

    Ingredients Overview

    Essential Ingredients for Succulent Italian Braised Chicken Marsala

    To create this delectable dish, you’ll need a few key ingredients that complement each other beautifully. Here is a comprehensive list:

    • 4 boneless, skinless chicken breasts (or thighs for added flavor)
    • Salt and black pepper to taste
    • 1 cup all-purpose flour (or gluten-free flour for a gluten-free version)
    • 3 tablespoons olive oil
    • 1 cup mushrooms, sliced (button or cremini mushrooms work well)
    • 1/2 cup Marsala wine (for alcohol-free, substitute with chicken broth mixed with grape juice)
    • 1 cup chicken broth (low-sodium preferred)
    • 2 cloves garlic, minced
    • 1 tablespoon fresh thyme (or dried thyme)
    • Fresh parsley for garnish (optional)

    These ingredients not only come together to create an outstanding dish but also contribute to its overall health benefits and flavor richness.

    Dietary Substitutions to Customize Your Succulent Italian Braised Chicken Marsala

    If you have specific dietary needs, don’t worry! Here are some customization tips:

    • Vegan Option: Substitute chicken with firm tofu or seitan, and use vegetable broth instead of chicken broth. Additionally, use a vegan coffee or grape juice blend instead of Marsala wine.

    • Gluten-Free Option: Replace all-purpose flour with a gluten-free blend. Ensure your chicken broth is gluten-free as well.

    • Low-Calorie Version: Use skinless chicken, reduce oil to 1 tablespoon, and opt for reduced-sodium broth. Consider adding extra vegetables, such as spinach or bell peppers, for added nutrition without many extra calories.

    Incorporating these dietary substitutions makes the Succulent Italian Braised Chicken Marsala suitable for everyone, ensuring that no one has to miss out on this wonderful dish.

    How to Prepare the Perfect Succulent Italian Braised Chicken Marsala: Step-by-Step Guide

    1. Prepare the Chicken Breasts

    Start by seasoning the chicken breasts with salt and black pepper. Dredge them in all-purpose flour, covering both sides. This step will help create a beautiful, golden crust during cooking.

    2. Heat the Olive Oil

    In a large skillet over medium-high heat, heat the olive oil. Ensure it’s hot enough so that the chicken sizzles as soon as you place it in the pan.

    3. Sear the Chicken

    Carefully add the floured chicken breasts to the skillet. Sear them for about 5-7 minutes on each side or until golden brown. You might need to do this in batches to avoid overcrowding the skillet, which can cause steaming instead of searing.

    4. Remove Chicken and Add Mushrooms

    Once the chicken is perfectly browned, remove it from the skillet and transfer it to a plate. In the same skillet, add the sliced mushrooms and sauté until they’re tender and browned, about 4-5 minutes.

    5. Add Garlic and Thyme

    Stir in the minced garlic and thyme, sautéing until fragrant, about 30 seconds. This will enhance the overall aroma of your dish.

    6. Pour in Marsala Wine

    Next, carefully pour in the Marsala wine, scraping the bottom of the skillet to deglaze it. Allow the wine to simmer for about 2-3 minutes, reducing slightly.

    7. Add Chicken Broth

    Pour in the chicken broth, stirring to combine. Bring the mixture to a gentle simmer.

    8. Return the Chicken

    Return the seared chicken breasts to the skillet, nestling them into the sauce. Ensure the chicken is fully submerged, allowing it to absorb all those lovely flavors.

    9. Cover and Braise

    Cover the skillet, reduce the heat to low, and let the chicken braise for 25-30 minutes. This slow cooking process makes the chicken incredibly tender and juicy.

    10. Garnish and Serve

    After the cooking time is up, remove the skillet from heat and garnish the dish with fresh parsley, if desired. Serve with your choice of sides, such as pasta, rice, or a simple salad.

    This step-by-step guide demonstrates how easy it is to create this incredible dish. Your family and friends will be amazed, and this recipe can easily adapt to various dietary preferences.

    Mastering Succulent Italian Braised Chicken Marsala: Advanced Tips and Variations

    To take your Succulent Italian Braised Chicken Marsala to the next level, consider these advanced tips and variations:

    • Add Vegetables: Incorporate extra vegetables like bell peppers or spinach into the braising liquid. This addition boosts vitamins and adds vibrant colors to your dish.

    • Experiment with Different Wines: While Marsala is traditional, consider using sherry or white wines for a different flavor explosion. Each type of wine brings its unique earthy note.

    • Herb Infusion: Try infusing your sauce with additional herbs like rosemary or sage for a more complex flavor profile. The key is to adjust to your personal taste.

    • Coconut Milk Alternative: For a creamier version, add a splash of coconut milk or heavy cream towards the end of the cooking process for richness, keeping the sauce luscious and inviting.

    • Slow Cooker Method: If you prefer a hands-off approach, consider using a slow cooker. Sear the chicken and mushrooms as directed but transfer to a slow cooker with the liquids and herbs. Cook on low for 4-6 hours for tender results.

    These tips will ensure that you master this dish and elevate it to your personal standards, impressing everyone at the table with your culinary finesse.

    How to Store Succulent Italian Braised Chicken Marsala: Best Practices

    Proper storage of your Succulent Italian Braised Chicken Marsala is essential for maintaining its taste and texture.

    1. Refrigeration: Allow the dish to cool completely before transferring it to an airtight container. It can be stored in the refrigerator for up to 3-4 days.

    2. Freezing: If you want to save leftovers for longer, freeze the dish in an airtight container or freezer bag for up to 3 months. Ensure to label with the date for easy tracking.

    3. Reheating: When you’re ready to eat, thaw in the refrigerator overnight if frozen. Reheat in a skillet over low heat or in the microwave until warm, adding a bit of broth if the sauce has thickened too much during storage.

    By following these storage practices, you’ll be able to enjoy your Succulent Italian Braised Chicken Marsala at a later time without compromising its deliciousness.

    Nutritional Value of Succulent Italian Braised Chicken Marsala

    Understanding the nutritional value of your food is vital, especially if you’re conscious about your diet. Here’s what to expect from one serving of Succulent Italian Braised Chicken Marsala (based on recipe proportions):

    • Calories: Approximately 320 calories
    • Protein: 35 grams
    • Fat: 12 grams
    • Carbohydrates: 15 grams
    • Fiber: 1 gram
    • Sugar: 2 grams
    • Sodium: 650 mg (varies based on broth type)

    This dish offers a well-balanced profile filled with protein and a moderate amount of fats, mainly from olive oil, making it a wholesome option for various eating plans.

    Additionally, the dish’s ingredients can help you incorporate essential vitamins and minerals into your diet, further enhancing its value as one of the go-to chicken recipes in your rotation.

    FAQs: Frequently Asked Questions About Succulent Italian Braised Chicken Marsala

    1. Can I use red wine instead of Marsala wine?
    While Marsala is traditional, you can substitute red wine, though it will change the flavor profile. A dry red like Cabernet Sauvignon will work but may require some balance with a bit of sugar or broth to reduce acidity.

    2. Is this dish suitable for meal prepping?
    Absolutely! This recipe is excellent for meal prep. Just store it in an airtight container and reheat as needed.

    3. Can I make this dish in advance?
    Yes, you can prepare this dish a day in advance. The flavors will deepen as it sits in the refrigerator overnight.

    4. What can I serve with Chicken Marsala?
    Pair it with pasta, rice, or creamy mashed potatoes to soak up the delicious gravy. A fresh green salad or roasted vegetables also makes a wonderful accompaniment.

    5. Is there a vegetarian alternative to Chicken Marsala?
    Yes! You can replace chicken with tofu or eggplant for a vegetarian version while keeping the mushroom and sauce components.

    These FAQs address common concerns for new cooks, making achieving an amazing Succulent Italian Braised Chicken Marsala an easy endeavor.

    In summary, this dish is not just a meal; it’s an experience, rich in flavor and perfect for any occasion. Whether you’re whipping it up for family dinner or a special occasion, the Succulent Italian Braised Chicken Marsala is sure to satisfy the palates of all those fortunate to partake. Happy cooking!

  • Peruvian Chicken with Aji Verde  Cilantro Rice

    Peruvian Chicken with Aji Verde Cilantro Rice

    Peruvian Chicken with Aji Verde & Cilantro Rice: A Tropical Delight

    Introduction to Peruvian Chicken with Aji Verde & Cilantro Rice

    Dive into the vibrant world of Peruvian Chicken with Aji Verde & Cilantro Rice, a striking dish that marries rich flavors with delightful textures. This recipe stands out not just for its deliciousness but also for its simplicity and health benefits, making it a perfect addition to your repertoire of chicken recipes.

    Crafted for busy home cooks and culinary enthusiasts alike, this dish showcases juicy, succulent chicken marinated with earthy spices and served alongside aromatic cilantro rice. The accompanying Aji Verde, a zesty green sauce, elevates the meal with its vibrant flavors. Moreover, this recipe caters to a variety of dietary needs. Whether you’re looking for a low-calorie meal, gluten-free options, or simply a wholesome dinner that can be prepared in under an hour, this dish has it all.

    From newlyweds looking to impress their partner to busy parents juggling dinner prep, Peruvian Chicken with Aji Verde & Cilantro Rice is not just a meal—it’s an experience. Imagine serving this colorful dish at your dinner table, inviting warmth and togetherness. With its heart-healthy ingredients and vibrant presentation, this recipe will inspire your culinary journey and leave your guests asking for seconds.

    Benefits and Advantages of Peruvian Chicken with Aji Verde & Cilantro Rice

    The beauty of Peruvian Chicken with Aji Verde & Cilantro Rice lies in its myriad of benefits. It’s not just another recipe; it’s one that checks all the boxes for a healthy, satisfying meal without much effort.

    Effortless Preparation

    One of the most appealing aspects of this dish is how simple it is to prepare. With minimal ingredients and straightforward methods, even novice cooks can whip up an impressive meal. The marinade can be prepared in advance, and the chicken can even be marinated overnight for enhanced flavor. This makes it an excellent choice for busy weeknights or impromptu gatherings.

    Health Benefits

    Packed with lean protein, complex carbohydrates, and essential vitamins, this dish supports a nutritious diet. Chicken is an excellent source of protein, crucial for muscle repair and overall health. Meanwhile, the cilantro rice provides fiber and aids digestion, making it a balanced meal.

    Customizable for Dietary Needs

    Whether you’re vegan, gluten-sensitive, or calorie-conscious, this recipe can be easily adapted. For a vegan version, substituting chicken with tofu or jackfruit while keeping the marinade creates a delightful alternative. For gluten-free options, ensuring your spices and sauces contain no gluten will keep the dish suitable for all diets.

    An Inviting Presentation

    The vibrant colors of the Aji Verde, the bright green of the cilantro rice, and the golden-brown chicken make for a visually stunning plate. This dish turns an ordinary dinner into a celebratory occasion, suitable for both casual family meals and festive gatherings.

    Ingredients Overview

    Essential Ingredients for Peruvian Chicken with Aji Verde & Cilantro Rice

    Below is a list of all the ingredients you’ll need to create this mouthwatering dish, complete with precise measurements:

    For the Chicken:

    • 4 boneless, skinless chicken breasts – The heart of any chicken recipe, providing lean protein.
    • 1/4 cup olive oil – Adds richness and aids in marination.
    • 1/4 cup fresh lime juice – Brightens the flavors and tenderizes the chicken.
    • 4 cloves garlic, minced – Infuses the dish with aromatic notes.
    • 2 teaspoons ground cumin – Provides warmth and depth.
    • 1 teaspoon paprika – Adds both color and subtle sweetness.
    • Salt and pepper to taste – Enhances all the other flavors.

    For the Aji Verde:

    • 1 cup fresh cilantro – The star ingredient in the sauce.
    • 2 jalapeños, seeds removed – Adds heat and zest.
    • 1/4 cup mayonnaise (or Greek yogurt for a lighter option) – Creates a creamy texture.
    • 2 cloves garlic – For an extra kick.
    • Juice of 1 lime – Balances the spice with acidity.
    • Salt to taste – For flavor enhancement.

    For the Cilantro Rice:

    • 1 cup long-grain rice – The base of the dish.
    • 2 cups water or chicken broth – For cooking the rice and adding flavor.
    • 1/2 cup chopped cilantro – Reinforces the fresh herb flavor.
    • 1 tablespoon lime juice – Enhances the flavor profile.

    Dietary Substitutions to Customize Your Peruvian Chicken with Aji Verde & Cilantro Rice

    1. Vegan Options:
    – Substitute chicken with extra-firm tofu, chickpeas, or jackfruit.
    – Use a vegan mayonnaise alternative for the Aji Verde.

    2. Gluten-Free:
    – Ensure the chicken broth (if used) is gluten-free and opt for gluten-free, low-sodium soy sauce as a marinade alternative.

    3. Low-Calorie:
    – Replace mayonnaise with Greek yogurt in the Aji Verde.
    – Choose skinless chicken thighs instead of breasts for more flavor without high calories.

    By customizing these ingredients, you can make this dish compatible with various dietary preferences while enjoying its original flavors and benefits.

    How to Prepare the Perfect Peruvian Chicken with Aji Verde & Cilantro Rice: Step-by-Step Guide

    Crafting a delicious plate of Peruvian Chicken with Aji Verde & Cilantro Rice has never been easier. Follow these concise steps to prepare a feast that will delight your taste buds:

    1. Prepare the Marinade: In a bowl, combine olive oil, lime juice, minced garlic, cumin, paprika, salt, and pepper. This flavorful mixture will infuse the chicken with a robust taste.

    2. Marinate the Chicken: Place the chicken breasts in a resealable plastic bag or shallow container and pour the marinade over them. Seal and refrigerate for at least 30 minutes or up to overnight for maximum flavor.

    3. Rinse the Rice: In a sieve, rinse the long-grain rice under cold water for a few minutes to remove excess starch. This will help achieve fluffy rice.

    4. Cook the Rice: In a medium saucepan, bring 2 cups of water or chicken broth to a boil. Add the rinsed rice, cover, and reduce to a simmer. Cook for 18-20 minutes or until water is absorbed. Once done, remove from heat and let sit for 5 minutes.

    5. Prepare the Aji Verde: While the rice is cooking, combine cilantro, jalapeños, mayonnaise (or yogurt), garlic, lime juice, and salt in a blender. Blend until smooth and creamy. Adjust seasoning if necessary.

    6. Grill or Bake the Chicken: Preheat your grill or oven to 400°F (200°C). Remove the chicken from the marinade and either grill for about 6-7 minutes per side or bake in a preheated oven for 20-25 minutes, until cooked through and juices run clear.

    7. Fluff the Rice: Once the rice has rested, use a fork to fluff it up. Stir in chopped cilantro and lime juice for added flavor.

    8. Serve: On each plate, spoon a generous serving of cilantro rice, top with grilled chicken, and drizzle the Aji Verde over the top. Enjoy your culinary journey!

    Mastering Peruvian Chicken with Aji Verde & Cilantro Rice: Advanced Tips and Variations

    To elevate your culinary skills even further, consider these advanced tips and variations that can help you master Peruvian chicken recipes:

    Advanced Tips:

    • Let the Chicken Rest: Always allow grilled or baked chicken to rest for at least 5 minutes after cooking. This keeps the meat juicy and flavorful.
    • Perfect Aji Verde Consistency: For a thinner sauce, add a few tablespoons of water or extra lime juice to your Aji Verde while blending.
    • Try Different Proteins: While chicken is the primary protein used, experimenting with shrimp or fish can offer exciting twists.

    Variations:

    • Add Vegetables: Consider adding grilled corn, peppers, or avocado as a colorful and nutritious garnish.
    • Spice Levels: If you prefer a milder flavor, reduce the number of jalapeños or substitute with milder pepper varieties.
    • Serve with Beans: Adding black beans or lentils can provide an extra layer of texture while increasing the meal’s nutritional value.

    These tips and variations can help you adjust the dish to suit your tastes or elevate your culinary experience, providing you with a variety of homemade chicken recipes.

    How to Store Peruvian Chicken with Aji Verde & Cilantro Rice: Best Practices

    After enjoying your delicious meal, proper storage will ensure that your Peruvian chicken recipes remain fresh and flavorful. Here’s how to store your leftovers effectively:

    Refrigeration

    • Allow the chicken and rice to cool completely before transferring them to airtight containers.
    • Store in the refrigerator for up to 3-4 days.
    • Keep Aji Verde in a sealed jar or container for up to a week in the fridge.

    Freezing

    • Chicken can be frozen for up to 3 months. Wrap in plastic wrap and then foil or place in freezer-friendly bags.
    • For rice, refrigerate it first and then freeze in flat portions, which will help it thaw quickly.
    • Aji Verde can also be frozen, although it may slightly change in texture upon thawing.

    Reheating

    • Reheat chicken in a preheated oven to 350°F (175°C) for 10-15 minutes or until heated through.
    • Rice can be microwaved with a splash of water for moisture for about 1-2 minutes.
    • Aji Verde can be served chilled or at room temperature, or gently warmed.

    Following these best practices will ensure your delicious Peruvian chicken meal stays fresh for later enjoyment.

    Nutritional Value of Peruvian Chicken with Aji Verde & Cilantro Rice

    Understanding the nutritional value of Peruvian Chicken with Aji Verde & Cilantro Rice is essential for those watching their diets or looking for healthy meal options. Here’s a breakdown of the nutritional information per serving:

    • Calories: Approximately 450-500 calories
    • Protein: 35-40 grams
    • Fat: 25 grams (depending on the oil and mayonnaise/yogurt used)
    • Carbohydrates: 40 grams
    • Fiber: 3-5 grams
    • Sodium: 600-800 mg (can vary based on salt added)

    This dish provides a balanced meal consisting of lean protein, healthy fats, and carbohydrates. The addition of vegetables and herbs increases vitamin content, making it a wholesome addition to any diet.

    FAQs: Frequently Asked Questions About Peruvian Chicken with Aji Verde & Cilantro Rice

    Can I use chicken thighs instead of breasts?

    Yes, chicken thighs can be used as a substitute for a richer flavor. Adjust cooking times as they may require slightly longer cooking.

    Is the Aji Verde spicy?

    The heat level can be adjusted based on the number of jalapeños used. For a milder sauce, use fewer or deseed the peppers.

    How long does the chicken need to marinate?

    For optimal flavor, marinate the chicken for at least 30 minutes, but preferably overnight.

    Can I make this dish in advance?

    Absolutely! You can prepare the chicken, rice, and Aji Verde a day ahead of time. Just reheat before serving.

    What can I serve alongside this dish?

    A refreshing salad, grilled vegetables, or plantains make excellent side dishes to complement the main meal.

    By answering common questions surrounding Peruvian chicken recipes, we aim to equip you with the knowledge you need for a successful culinary experience.


    In conclusion, Peruvian Chicken with Aji Verde & Cilantro Rice is more than just a delicious meal; it’s a complete culinary experience. Whether you’re feeding a family or cooking for one, this recipe caters to everyone’s needs and preferences, making it a delightful dish worth trying. So gather your ingredients and let the tropical flavors inspire your cooking journey!

  • Spicy Brazilian Coconut Chicken

    Spicy Brazilian Coconut Chicken

    Spicy Brazilian Coconut Chicken: A Tropical Delight

    Introduction to Spicy Brazilian Coconut Chicken

    If you’re searching for a standout recipe that combines bold flavors with simplicity, look no further than Spicy Brazilian Coconut Chicken. This dish not only embodies the vibrant spirit of Brazilian cuisine, but it also meets a variety of dietary needs, making it a well-rounded choice for home cooks and culinary adventurers alike. Whether you’re a busy parent juggling a hectic schedule, a newlywed experimenting in the kitchen, or a food enthusiast longing for new tastes, this recipe is designed with you in mind.

    The use of coconut milk creates a creamy texture that perfectly complements the spices, while the chicken provides a source of lean protein. Furthermore, this dish can easily be tailored to suit gluten-free or low-calorie diets, ensuring that everyone at the table can dig in without a worry. Plus, with culinary influences from the tropics, the vibrant colors and enticing aromas make it a feast for the senses.

    Incorporating this Spicy Brazilian Coconut Chicken into your list of easy chicken recipes will not only elevate your cooking game but also offer a health-conscious meal option that the whole family will love. So, roll up your sleeves and prepare to embark on a flavorful adventure that combines nutrition with authentic Brazilian taste!

    Benefits and Advantages of Spicy Brazilian Coconut Chicken

    Spicy Brazilian Coconut Chicken stands out among various chicken recipes for several compelling reasons. First and foremost, its ease of preparation makes it an ideal choice for cooks of all skill levels. The recipe typically requires minimal chopping and cooking techniques, allowing even novice cooks to succeed. Busy parents and working professionals can whip this dish together in less than an hour, making it a perfect weeknight dinner option.

    Moreover, health-conscious individuals will appreciate the nutritional benefits of this recipe. Chicken is a fantastic source of lean protein, essential for building and repairing tissues, and when paired with coconut milk, you gain additional health advantages. Coconut milk is rich in medium-chain fatty acids (MCFAs), which are beneficial for metabolism and can provide an energy boost. The recipe is easily adaptable to accommodate various dietary restrictions; for instance, by substituting regular chicken with plant-based protein options, it can be transformed into a vegan delight, while still retaining its rich flavors.

    Lastly, Spicy Brazilian Coconut Chicken offers nutritional diversity. With the incorporation of spices like paprika, cumin, and chili flakes, it isn’t just a source of protein; it also provides antioxidants and anti-inflammatory properties. This makes it a standout option in the vast world of chicken recipes. By bringing a little piece of Brazil to your dinner table, you’ll not only savor amazing flavors but also promote wellness with this nutritious dish.

    Ingredients Overview

    Essential Ingredients for Spicy Brazilian Coconut Chicken

    To prepare your Spicy Brazilian Coconut Chicken, gather the following ingredients:

    • 2 lbs chicken thighs or breasts (boneless, skinless): These cuts provide tenderness and moisture once cooked.
    • 1 can (13.5 oz) coconut milk: The primary ingredient that adds creaminess and a rich flavor.
    • 1 medium onion, finely chopped: Adds sweetness and depth to your dish.
    • 3 cloves garlic, minced: Infuses the dish with aromatic flavors.
    • 1 tablespoon fresh ginger, minced: Offers a zesty kick and anti-inflammatory benefits.
    • 1 tablespoon paprika: Contributes a smoky flavor and vibrant color.
    • 1 tablespoon cumin: Deepens the flavor profile with earthy notes.
    • 1 teaspoon chili flakes (adjust to taste): Adds the desired level of spiciness.
    • 1 tablespoon olive oil or coconut oil: For sautéing and healthy fats.
    • Salt and pepper to taste: Enhances the overall taste.
    • Juice of 1 lime: Brightens flavors and adds acidity.
    • Fresh cilantro for garnishing (optional): Offers a fresh herbal note.

    Dietary Options:
    – To make the dish vegan, substitute chicken with chickpeas or tofu and use a vegan coconut milk alternative.
    – For gluten-free options, all ingredients listed are naturally gluten-free.
    – For low-calorie choices, consider using skinless chicken breasts.

    Dietary Substitutions to Customize Your Spicy Brazilian Coconut Chicken

    Customizing the Spicy Brazilian Coconut Chicken is easy with a few substitution suggestions. Here are some ideas according to various dietary preferences:

    • For a Vegetarian Version: Replace chicken with either chickpeas, which are high in protein and fiber, or firm tofu. Cook the tofu until crispy for a satisfying texture.
    • For Gluten Sensitivity: All ingredients are gluten-free, but ensure that any sauces or added flavorings you may use do not contain gluten.
    • Low-Carb Options: Swap out the chicken for eggplant or cauliflower and keep the coconut sauce for a flavorful vegetarian dish.
    • To Reduce Fat Content: Use light coconut milk instead of regular full-fat coconut milk; this will still offer creaminess while reducing calories.

    By incorporating these substitutions, you can create a dish that aligns with your dietary goals while still delivering the vibrant flavors of Brazilian cuisine.

    How to Prepare the Perfect Spicy Brazilian Coconut Chicken: Step-by-Step Guide

    Follow these detailed steps to recreate this delectable Spicy Brazilian Coconut Chicken:

    1. Prepare the Base: Start by heating the olive oil (or coconut oil) in a large skillet over medium heat. Add the chopped onion and sauté until it becomes translucent and soft, about 5 minutes. You can sprinkle a bit of salt to speed up this process.

    2. Add Aromatics: Stir in the minced garlic and ginger, continuing to sauté for another minute until fragrant. The combination of onion, garlic, and ginger creates a flavorful base that enhances the dish.

    3. Season the Chicken: While your base is cooking, season the chicken pieces with salt, pepper, paprika, cumin, and chili flakes. This is the first layer of flavor that will infuse through the meat.

    4. Cook the Chicken: Increase the heat to medium-high and add the seasoned chicken into the pan. Cook for 5-7 minutes on each side, until the chicken is golden brown and cooked through. If using a meat thermometer, ensure the internal temperature reaches 165°F (74°C).

    5. Add Coconut Milk: Once the chicken is nicely browned, pour in the coconut milk. Reduce heat to medium-low and let it simmer for about 15-20 minutes. This allows the chicken to absorb the creamy richness of the coconut milk.

    6. Finish with Lime: After simmering, squeeze the juice of one lime to brighten the flavors, and adjust the seasoning with additional salt and pepper if needed.

    7. Garnish: Serve your Spicy Brazilian Coconut Chicken hot, garnished with freshly chopped cilantro for a touch of freshness and color.

    8. Serve with Accompaniments (Optional): This dish pairs beautifully with steamed jasmine rice, quinoa, or a fresh garden salad.

    This step-by-step guide ensures that every home chef can follow along regardless of their cooking expertise, making it easier to whip up this delicious dish in no time.

    Mastering Spicy Brazilian Coconut Chicken: Advanced Tips and Variations

    To elevate your Spicy Brazilian Coconut Chicken further, here are some advanced tips and creative variations:

    • Add Vegetables: Consider adding bell peppers, zucchini, or spinach during the sautéing phase. This increases the nutritional value and adds more texture and flavor to the dish.
    • Spice Level Adjustment: For those who enjoy heat, try incorporating fresh chopped chili peppers along with chili flakes. A couple of jalapeños or serranos will ramp up the spiciness significantly.
    • Coconut Rice: Serve this chicken on a bed of coconut rice by cooking rice with coconut milk instead of water. This complements the chicken’s flavors wonderfully.
    • Experiment with Proteins: Besides chicken, this recipe works excellently with shrimp or even fish. Adjust cooking times accordingly to ensure the proteins are cooked through.
    • Slow-Cooker Adaptation: For a hands-off approach, you can slow-cook the ingredients. Combine all ingredients in a slow cooker and let it simmer on low for 4-6 hours for tender, flavorful chicken.

    By trying these tips and variations, you can make this dish uniquely yours while enjoying the vibrant taste of Brazilian cuisine.

    How to Store Spicy Brazilian Coconut Chicken: Best Practices

    Storing your Spicy Brazilian Coconut Chicken properly can help maintain its freshness and flavor. Here are the best practices for storage:

    • Refrigeration: Allow the dish to cool to room temperature. Transfer the chicken to an airtight container and store it in the refrigerator. It will remain fresh for 3-4 days.

    • Freezing: For longer storage, you can freeze the chicken. Divide it into meal-sized portions and place them in freezer-safe bags or containers. Ensure to remove as much air as possible to prevent freezer burn. It can be frozen for up to 3 months.

    • Reheating: When ready to enjoy, thaw the frozen chicken overnight in the refrigerator. To reheat, you can warm it on the stove over low heat or in the microwave. Add a splash of coconut milk or water if the sauce thickens too much during storage.

    Storing your Spicy Brazilian Coconut Chicken properly not only preserves its delicious flavors but also enables convenient meal prep for busy days.

    Nutritional Value of Spicy Brazilian Coconut Chicken

    The Spicy Brazilian Coconut Chicken is not only delicious but also packed with essential nutrients. Here’s a breakdown of approximate nutrition information per serving (based on a 4-serving total):

    • Calories: 450 kcal
    • Protein: 30 g
    • Fat: 30 g (from coconut milk and chicken)
    • Carbohydrates: 14 g
    • Fiber: 2 g
    • Sugar: 3 g
    • Sodium: 500 mg (adjust according to added salt)

    This dish provides a balance of macronutrients while being low in carbohydrates, making it a suitable option for those watching their carb intake. Moreover, the use of coconut milk adds healthy fats, contributing to fullness and energy.

    Additionally, the spices included provide antioxidants, supporting your overall health. By incorporating Spicy Brazilian Coconut Chicken into your meal plan, you’re not just treating yourself to exceptional flavor; you’re also fueling your body with nourishing ingredients.

    FAQs: Frequently Asked Questions About Spicy Brazilian Coconut Chicken

    Here are some common questions about Spicy Brazilian Coconut Chicken:

    1. Can I use breast meat instead of thighs?
      Absolutely! Chicken breast works well but keep in mind it may dry out more quickly due to its lower fat content. Adjust cooking times accordingly.

    2. What can I use instead of coconut milk?
      If you are not a fan of coconut milk, try substituting with almond milk or heavy cream. However, this will alter the dish’s creamy texture.

    3. Can I make this recipe ahead of time?
      Yes, this dish holds up well when made in advance. Store it in the refrigerator for up to 4 days or freeze it for longer storage.

    4. What are some good side dishes to serve with this chicken?
      Serve this flavorful chicken alongside steamed rice, quinoa, or a fresh salad. You can also enjoy it with tortilla chips or in a wrap for lunch.

    5. Is this recipe suitable for meal prepping?
      Yes! This recipe is excellent for meal prep. Just follow the storage guidelines mentioned, and it can make for easy lunches or dinners throughout the week.

    In tackling these questions, we hope to empower readers to confidently dive into making this delicious Brazilian dish. Whether it’s your first time cooking chicken recipes or you’re a seasoned chef, Spicy Brazilian Coconut Chicken is sure to impress!

    With its unique flavors, health benefits, and diversity in options, this recipe is a must-try for anyone wanting to add a tropical flair to their culinary repertoire. Enjoy cooking and bon appetit!