Category: chicken

  • Brown Sugar Pineapple Chicken

    Brown Sugar Pineapple Chicken

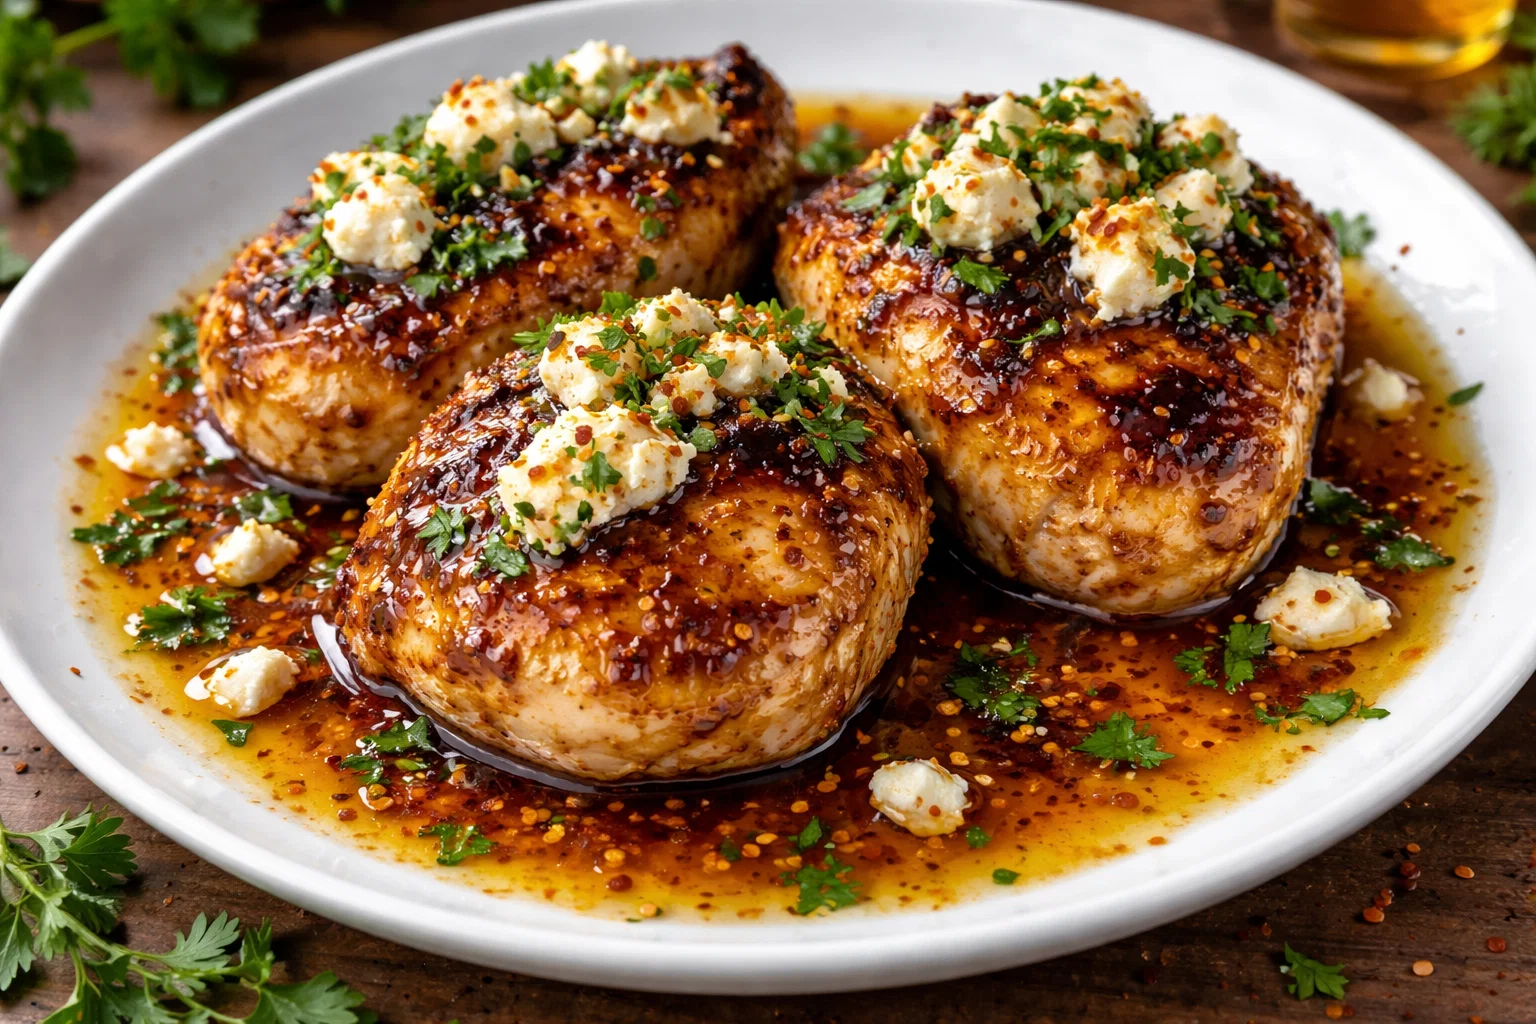
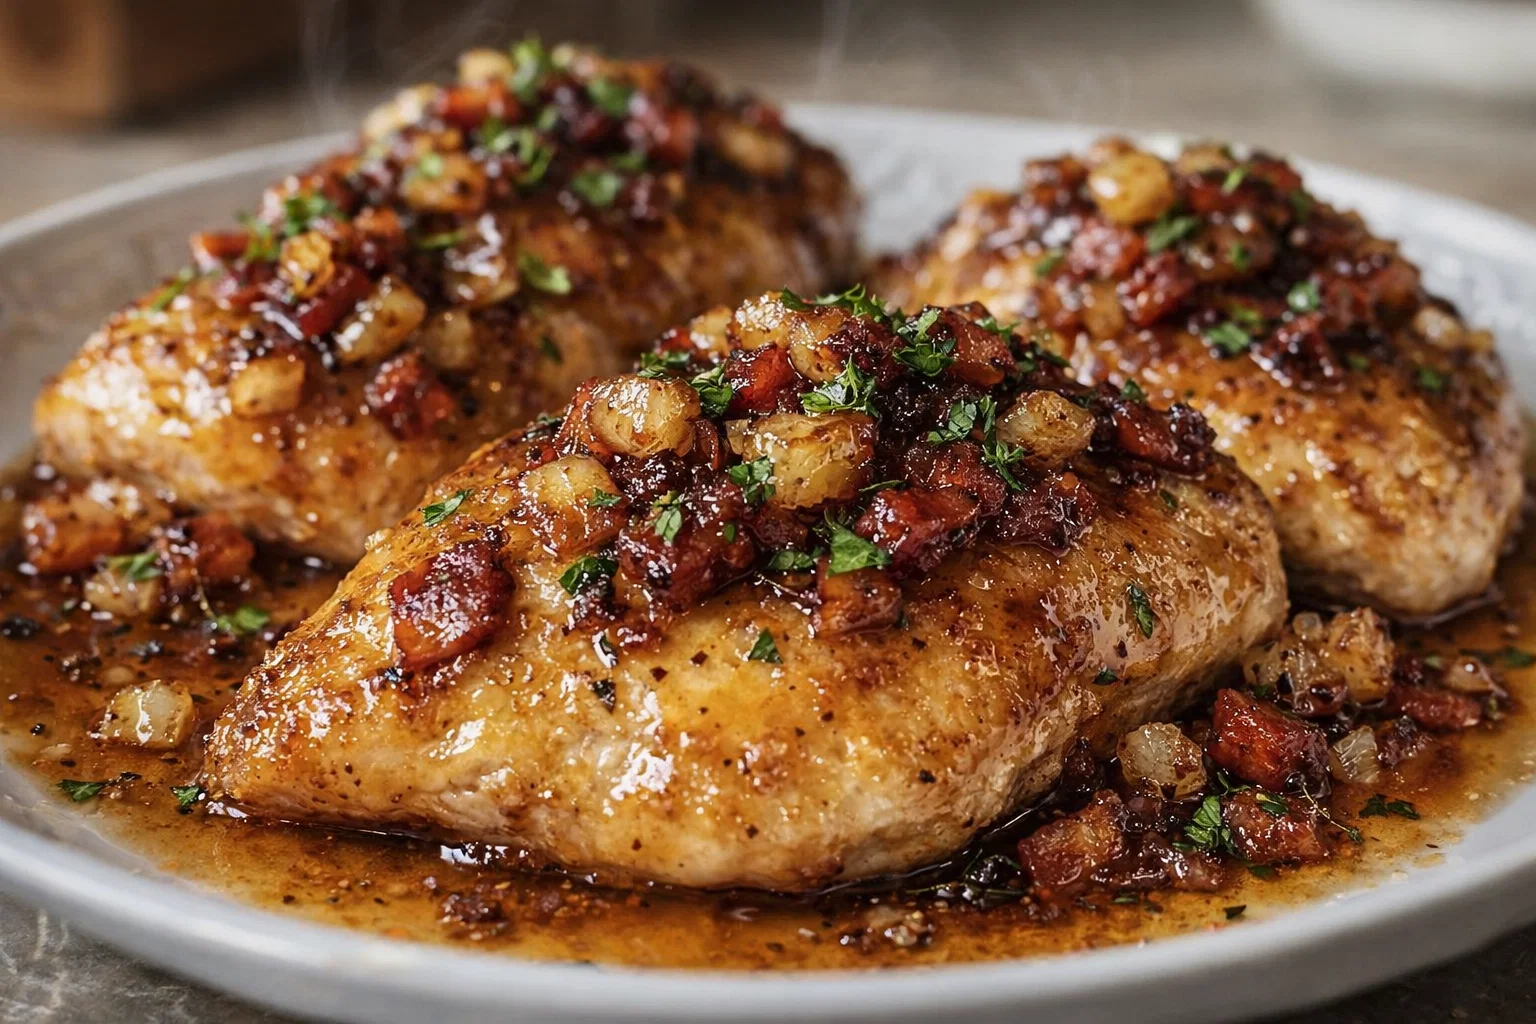
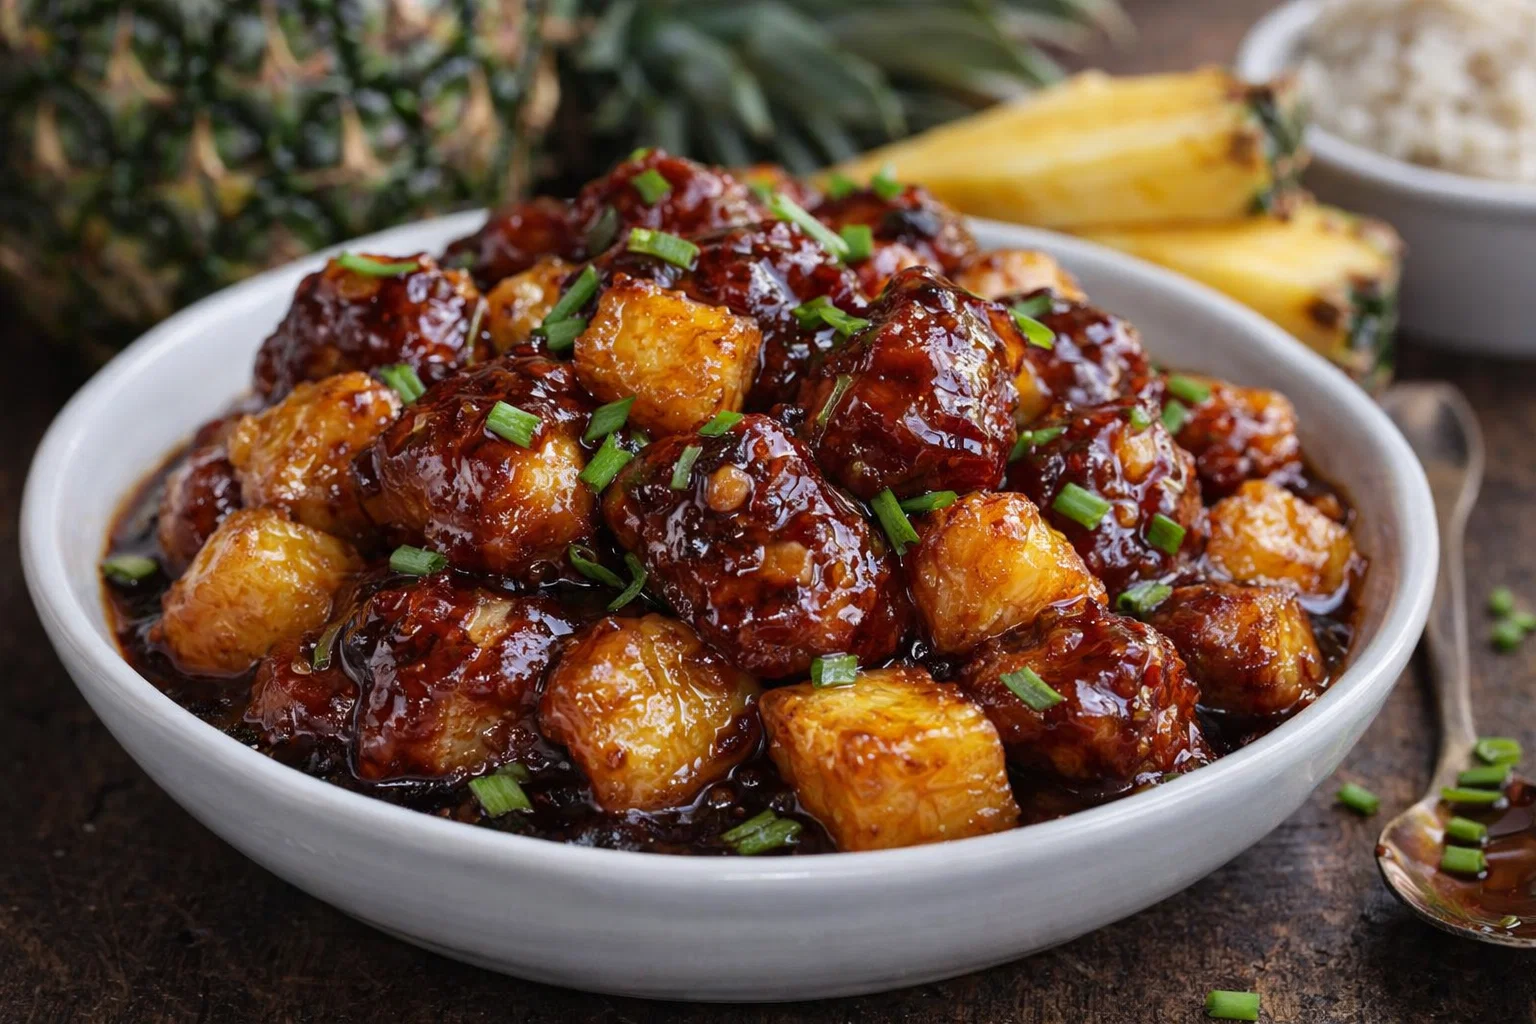
    Brown Sugar Pineapple Chicken: A Tropical Delight

    Introduction to Brown Sugar Pineapple Chicken

    If you’re searching for a new and exciting twist on your everyday protein choices, look no further than Brown Sugar Pineapple Chicken. This dish beautifully marries the savory goodness of chicken with the sweet, tangy flavors of pineapple, creating a taste sensation that will delight your palate. Perfect for busy weeknights or special gatherings, this recipe promises to inspire cooks of all skill levels.

    Not only is this recipe simple to prepare, but it’s also packed with nutritional benefits, making it an excellent choice for health-conscious individuals. The combination of chicken, which is a lean source of protein, and pineapple, rich in vitamins and digestive enzymes, makes it both a hearty and wholesome meal. The sweet glaze adds a delightful punch without overwhelming your taste buds.

    This Brown Sugar Pineapple Chicken serves as a versatile dish that can be easily adapted for different dietary needs, including gluten-free or low-calorie options. It’s perfect for home cooks, busy parents, students whipping up a quick meal, and anyone looking to impress guests with minimal fuss. Dive into this tropical treat, and let it elevate your collection of chicken recipes!

    Benefits and Advantages of Brown Sugar Pineapple Chicken

    Brown Sugar Pineapple Chicken stands out among other chicken recipes for several compelling reasons. First and foremost, its preparation is straightforward and requires minimal culinary finesse, making it perfect for novice cooks and seasoned chefs alike. The entire dish can be made in under 30 minutes, providing a quick solution for busy weeknight dinners.

    Health-wise, this dish is an excellent choice. Utilizing chicken breast as the main protein source means you’re choosing a low-fat option packed with essential amino acids and proteins needed for muscle repair and overall health. The addition of pineapple contributes a myriad of vitamins and minerals, including vitamin C, vitamin B6, and dietary fiber – all while bringing an enticing sweetness that reduces the need for overly sugary sauces.

    Another benefit is this dish’s adaptability. It can be served on a bed of whole grains like brown rice or quinoa for a better carbohydrate source. For those following a low-carb or ketogenic diet, serving it alongside non-starchy vegetables like broccoli or sautéed zucchini can keep the meal nutritious and satisfying.

    Additionally, this recipe can easily cater to diverse dietary restrictions with a few tweaks. It’s gluten-free and can be made low-calorie by adjusting the amount of brown sugar or using a sugar substitute. Vegan versions can also be made using tofu or jackfruit as a protein alternative. Overall, the balance of flavors and nutritional benefits makes Brown Sugar Pineapple Chicken a fantastic option for anyone seeking delicious chicken recipes that don’t compromise on health.

    Ingredients Overview

    Essential Ingredients for Brown Sugar Pineapple Chicken

    Before we dive into creating this delectable dish, let’s take a look at the essential ingredients you’ll need:

    • 4 boneless, skinless chicken breasts (about 1.5 lbs) – A lean protein source that cooks quickly and absorbs flavors well.
    • 1 cup fresh pineapple chunks (or canned, drained) – Adds natural sweetness and juiciness; rich in vitamin C.
    • 1/3 cup brown sugar – For a rich, caramel-like sweetness that perfectly complements the pineapple.
    • 1/4 cup soy sauce (or tamari for gluten-free) – Adds umami depth and balances the sweetness.
    • 2 tablespoons olive oil (or avocado oil) – Provides healthy fats and aids in cooking the chicken to tenderness.
    • 1 tablespoon apple cider vinegar – Enhances acidity for a balanced flavor profile.
    • 2 cloves garlic, minced – Infuses a savory note and contributes antioxidant properties.
    • Salt and black pepper to taste – Essential seasonings to elevate the overall flavor.

    Vegan, Gluten-Free, and Low-Calorie Options:

    • Vegan Option: Substitute chicken with firm tofu or jackfruit, adjusting the cooking time accordingly.
    • Gluten-Free Option: Use tamari instead of soy sauce.
    • Low-Calorie Option: Reduce brown sugar to 2 tablespoons or substitute with a sugar alternative like erythritol.

    Dietary Substitutions to Customize Your Brown Sugar Pineapple Chicken

    Adapting the Brown Sugar Pineapple Chicken to meet various dietary needs is easy:

    • For a Spicy Kick: Add 1 teaspoon of crushed red pepper flakes or Sriracha to the marinade before baking.
    • To Enhance Flavor: Consider adding ginger (fresh or ground) to the marinade for another layer of warmth.
    • Low-Fat Option: Replace regular chicken with chicken thighs, which can be more succulent, and use a sugar substitute to reduce calories.
    • For Enhanced Nutrients: Include sliced bell peppers or snap peas along with the chicken and pineapple in the dish for added vitamins.

    With these substitutions and variations, this Brown Sugar Pineapple Chicken recipe remains versatile and appealing, making it one of the most exciting chicken recipes for your culinary repertoire.

    How to Prepare the Perfect Brown Sugar Pineapple Chicken: Step-by-Step Guide

    Creating mouthwatering Brown Sugar Pineapple Chicken is simple! Follow these steps to craft a dish that will surely impress:

    1. Gather Your Ingredients: Make sure all the ingredients are prepared and within reach to streamline the cooking process.

    2. Preheat the Oven: Set your oven to 375°F (190°C) to prepare it for baking.

    3. Prepare the Marinade:

    4. In a medium-sized mixing bowl, combine the brown sugar, soy sauce, olive oil, apple cider vinegar, and minced garlic. Whisk until the sugar dissolves and the mixture is well-blended.

    5. Season the Chicken:

    6. Pat the chicken breasts dry with paper towels. Season both sides lightly with salt and black pepper.

    7. Marinate the Chicken:

    8. Place the seasoned chicken breasts in a large ziplock bag or shallow dish.
    9. Pour the marinade over the chicken, ensuring it’s evenly coated. Seal the bag or cover the dish and let it marinate in the refrigerator for at least 15 minutes (or longer for more profound flavors).

    10. Prepare Baking Dish:

    11. In a baking dish suitable for the oven, arrange the pineapple chunks in a single layer.

    12. Add Chicken:

    13. After marinating, remove the chicken from the marinade (reserve the marinade) and place the chicken on top of the pineapple in the baking dish.

    14. Pour Marinade Over Chicken:

    15. Drizzle the reserved marinade over the chicken, ensuring everything is well-coated.

    16. Bake the Chicken:

    17. Place the baking dish in the preheated oven and bake for approximately 25-30 minutes, or until the chicken reaches an internal temperature of 165°F (75°C) and is cooked through. For a golden finish, broil for the last 3-5 minutes, watching carefully to avoid burning.

    18. Let it Rest:

      • Once cooked, remove the dish from the oven and let it rest for about 5 minutes, allowing the juices to redistribute for tender chicken.
    19. Serve:

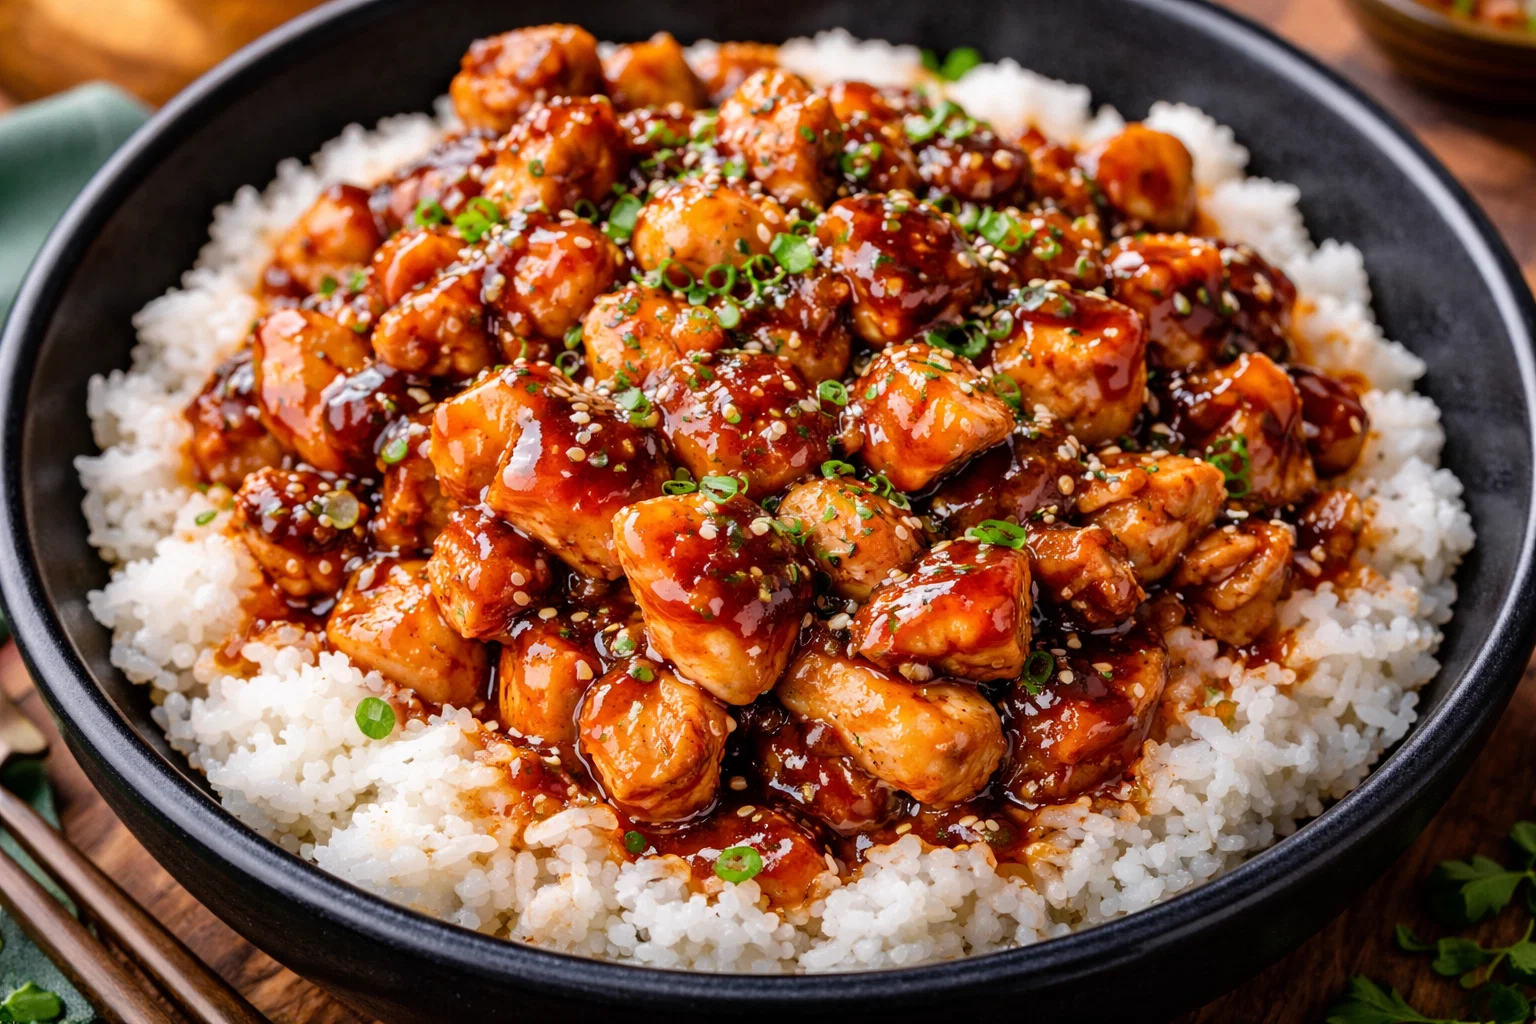
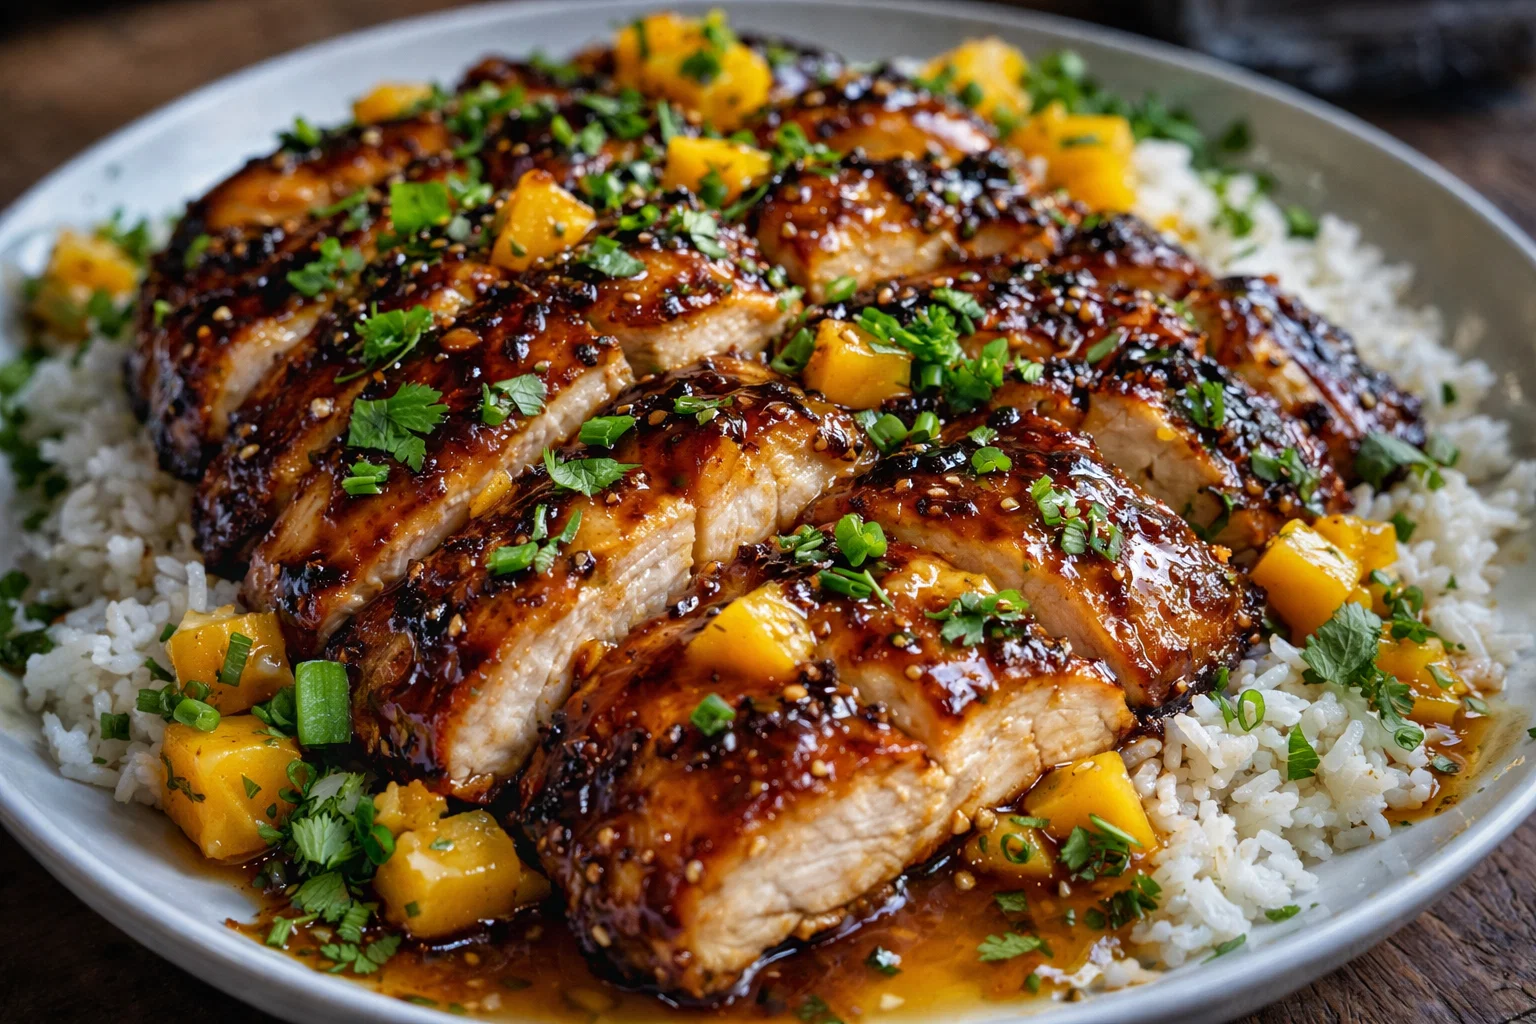
      • Serve the Brown Sugar Pineapple Chicken hot, garnished with freshly chopped cilantro or green onions as a delightful touch. Pair with rice, quinoa, or steamed vegetables as desired.

    This step-by-step guide to preparing Brown Sugar Pineapple Chicken ensures a delicious meal perfect for any occasion. The simplicity of this recipe, combined with its versatility, secures its place as one of the top chicken recipes in your collection.

    Mastering Brown Sugar Pineapple Chicken: Advanced Tips and Variations

    To elevate your Brown Sugar Pineapple Chicken experience even further, consider the following advanced tips and variations:

    • Grilling Option: Instead of baking, grill the marinated chicken for a smoky flavor. Preheat your grill and cook for about 6-7 minutes on each side until the chicken is fully cooked.
    • Slow Cooker Variation: For an easy weeknight meal, toss the marinated chicken and pineapple into a slow cooker, cooking on low for 4-6 hours. This method locks in moisture and deepens flavors.
    • Tropical Fruit Additions: Feel free to customize the fruity aspect by adding mango or bell peppers to the dish for a colorful presentation and diverse taste.
    • Flavor Infusions: For more depth of flavor, add a splash of coconut milk to the marinade, a pinch of garlic powder, or layer on fresh herbs like basil or cilantro before serving.
    • Serving Alternatives: Serve the dish in lettuce wraps or on tortillas for a fun, hand-held meal, perfect for casual gatherings or taco night.

    These advanced tips and variations will provide you with limitless options, making Brown Sugar Pineapple Chicken a standout dish in the diverse world of chicken recipes.

    How to Store Brown Sugar Pineapple Chicken: Best Practices

    Proper storage of your Brown Sugar Pineapple Chicken ensures that you can enjoy leftovers safely and deliciously. Here’s how you can store this dish:

    • Refrigeration: Allow the chicken to cool completely before transferring it to an airtight container. Store in the refrigerator for up to 3-4 days. When reheating, ensure the chicken reaches an internal temperature of 165°F (75°C).

    • Freezing: For longer storage, freeze the chicken in an airtight freezer-safe container or a resealable freezer bag. Properly stored, it can last in the freezer for up to 3 months. To reheat, thaw it overnight in the refrigerator before cooking.

    • Reheating: For best results, reheat the chicken in the oven at 350°F (175°C) for 15-20 minutes or until heated through. Microwaving is also an option, but it may result in a less satisfying texture.

    Storing your Brown Sugar Pineapple Chicken using these best practices allows you to easily enjoy this tropical delight long after preparation, proving its merits amongst your favorite chicken recipes.

    Nutritional Value of Brown Sugar Pineapple Chicken

    Understanding the nutritional profile of your meals is vital, especially for health-conscious cooks. Below is the approximate nutritional value per serving (based on 4 servings):

    • Calories: 350
    • Protein: 28g
    • Fat: 12g
    • Carbohydrates: 38g
    • Fiber: 1g
    • Sugar: 18g
    • Sodium: 700mg
    • Vitamin C: 15% of the Daily Value
    • Calcium: 2% of the Daily Value
    • Iron: 6% of the Daily Value

    This Brown Sugar Pineapple Chicken recipe packs a nutritious punch, offering a satisfying balance of macronutrients while providing essential vitamins and minerals. Adjustments, like using less sugar or alternative cooking methods, can easily lower the calorie count and enhance its health benefits without sacrificing flavor.

    Being aware of the nutritional value further endorses the decision to incorporate this dish into your repertoire of delightful chicken recipes.

    FAQs: Frequently Asked Questions About Brown Sugar Pineapple Chicken

    1. Can I use frozen chicken for this recipe?

    Absolutely! If using frozen chicken, ensure it is fully thawed before marinating. Cooking times may need slight adjustments depending on the chicken thickness.

    2. What if I don’t have brown sugar?

    You can substitute brown sugar with white sugar mixed with a little molasses for a similar flavor. Alternatively, a sugar-free sweetener like stevia or erythritol can work well.

    3. Can I make this recipe ahead of time?

    Yes! You can marinate the chicken up to 24 hours in advance for even more flavor. Just be sure to store it in the refrigerator until you’re ready to cook.

    4. Is there a vegan alternative for Brown Sugar Pineapple Chicken?

    For a vegan version, substitute chicken with cubed firm tofu or young jackfruit. The cooking times will differ slightly, with tofu typically requiring about 15-20 minutes to sear.

    5. Can I bake this dish in one pan with vegetables?

    Certainly! Adding vegetables like bell peppers or snap peas into the baking dish will waive the need for a side and enhance the flavor profile. Adjust baking time as necessary for the optimal doneness of veggies.

    6. How can I make this recipe spicier?

    For an extra kick, incorporate crushed red pepper flakes or a dash of chili sauce into the marinade. Alternatively, consider ginger or a mild chili pepper for balanced heat.

    Incorporating FAQs, addresses common concerns and curiosities, enriching the reader’s understanding and experience with this delightful dish, and expanding their repertoire of chicken recipes.


    With Brown Sugar Pineapple Chicken, you get a meal that’s as flavorful as it is simple. Whether you serve it for a family dinner or a casual gathering with friends, this dish is sure to impress. It’s more than just a recipe; it’s an invitation to explore the delicious intersection of sweet and savory that defines great cooking. Happy cooking!

  • Basil Chicken in Coconut Curry Sauce

    Basil Chicken in Coconut Curry Sauce

    Basil Chicken in Coconut Curry Sauce: A Tropical Delight

    Introduction to Basil Chicken in Coconut Curry Sauce

    If you’re searching for the perfect balance of flavor and convenience in your weeknight meals, Basil Chicken in Coconut Curry Sauce might just be the perfect fit for you. This delectable dish combines tender chicken pieces smothered in a creamy coconut curry sauce, enriched with fresh basil and a mélange of spices. Not only does it burst with tropical flavors, but this recipe also embodies the simplicity of home cooking, making it an ideal candidate for busy parents, students, and anyone who enjoys good food without the fuss.

    As one of the standout chicken recipes, basil chicken in coconut curry sauce is versatile enough to accommodate various dietary needs, including gluten-free and dairy-free options. It’s also packed with essential nutrients, providing a balanced meal that can suit diet-conscious individuals and health enthusiasts alike. The aromatic herbs and spices not only enhance the taste but also bring numerous health benefits, such as anti-inflammatory properties and rich antioxidants. Whether you’re a newlywed looking to impress your partner, a senior wanting to enjoy easy-to-digest meals, or a baking enthusiast in search of a savory dish, this recipe caters to all.

    Let’s dive deeper into the benefits of this fabulous recipe and discover why it should top your dinner list!

    Benefits and Advantages of Basil Chicken in Coconut Curry Sauce

    Easy to Prepare

    One of the most appealing aspects of Basil Chicken in Coconut Curry Sauce is its straightforward preparation. Whether you’re a novice cook or an experienced Chef, this recipe offers an inviting opportunity to create a delightful meal without the need for complicated skills or extensive time commitment. Within just 30 to 40 minutes, you can serve a mouthwatering dish that looks as impressive as it tastes. The minimal prep and cooking time make it an excellent choice for busy weeknights, ensuring that you can maintain quality meal time with family or roommates without sacrificing flavor.

    Health Benefits

    Incorporating coconut milk in this recipe not only brings a creamy texture but also provides healthy fats that contribute to heart health. Moreover, basil is loaded with essential vitamins and minerals, making it a great addition to any diet. This dish can also be customized to be lighter by choosing lean chicken breasts or thighs, making it a fantastic option for health-conscious individuals. The spices used in the curry, such as turmeric and ginger, boast anti-inflammatory properties and can aid digestion, making this a savory yet healthful meal.

    Versatility

    The versatility of Basil Chicken in Coconut Curry Sauce is another reason it stands out among other chicken recipes. You can easily swap out chicken for tofu or chickpeas to create a vegetarian or vegan version that still packs a punch in flavor. This adaptability makes it perfect for hosting gatherings as you can cater to your guests’ dietary needs effortlessly without compromising taste. Additionally, you can adjust the spice levels to suit your palate, making this dish an exciting choice for everyone at the table, whether they’re spice lovers or prefer milder flavors.

    Ingredients Overview

    Essential Ingredients for Basil Chicken in Coconut Curry Sauce

    To whip up this delightful dish, you will need the following ingredients:

    • Chicken Breast or Thighs (500g): Provides lean protein. (For vegan substitutes, use tofu or tempeh.)
    • Coconut Milk (400ml): Adds creaminess and rich flavor while being dairy-free.
    • Fresh Basil Leaves (1 cup): Imparts a fragrant aroma and an explosion of freshness.
    • Onion (1 medium, chopped): For a savory base.
    • Garlic (3 cloves, minced): Boosts the dish with robust flavors.
    • Fresh Ginger (1 inch, grated): Offers a warming spice that’s great for digestion.
    • Curry Powder (2 tablespoons): The key seasoning for that aromatic flair.
    • Olive Oil (2 tablespoons): Used for sautéing the onion and garlic.
    • Salt & Pepper (to taste): Essential to enhance the overall flavors.
    • Lime Juice (1 tablespoon): Brightens the dish with acidity.

    Note: For a gluten-free option, ensure your curry powder and other ingredients do not contain gluten.

    Dietary Substitutions to Customize Your Basil Chicken in Coconut Curry Sauce

    • Plant-Based Protein: For a vegan option, replace chicken with cubed tofu or chickpeas. Both will absorb the coconut curry flavors beautifully.

    • Vegetables: Feel free to add vegetables like bell peppers, spinach, or zucchini for extra nutrients and color.

    • Low-Calorie Options: Use skinless chicken or opt for lean cuts of meat. For a lighter dish, use low-fat coconut milk.

    • Curry Alternatives: If you prefer a different flavor profile, you can experiment with other curry pastes or powders, such as Thai red curry paste or Massaman curry, to mix things up.

    With these options, you’re prepared to make a fantastic meal that everyone can enjoy, no matter their dietary preferences!

    How to Prepare the Perfect Basil Chicken in Coconut Curry Sauce: Step-by-Step Guide

    Creating Basil Chicken in Coconut Curry Sauce is not only incredibly simple, but it’s also a delightful journey through flavors. Below is a step-by-step guide on how to make this tropical dish:

    1. Prepare the Base: Begin by heating olive oil over medium heat in a large skillet or saucepan. Once the oil is shimmering, add the chopped onion. Sauté it until translucent, about 5 minutes.

    2. Add Garlic and Ginger: Stir in minced garlic and grated ginger, cooking for an additional 1-2 minutes until fragrant.

    3. Incorporate the Chicken: Add the chicken pieces to your pan. Season with salt and pepper. Cook, stirring occasionally, until the chicken is browned on all sides and cooked through, typically about 7-10 minutes.

    4. Add Curry Powder: Sprinkle the curry powder over the cooked chicken and stir well to evenly coat it. Allow it to cook for 1 minute to fully awaken the spices.

    5. Pour in Coconut Milk: Gently pour in the coconut milk, stirring to combine with the chicken and spices. Bring the mixture to a gentle simmer.

    6. Simmer and Thicken: Let the sauce simmer for about 10 minutes on low heat. The flavors will meld beautifully, and the sauce will thicken slightly. Stir occasionally to prevent sticking.

    7. Add Fresh Basil: Just before serving, stir in the fresh basil leaves. This will enhance the aromatic qualities of the dish.

    8. Finish with Lime Juice: Add a touch of lime juice to brighten the flavors. Taste and adjust the seasoning as necessary.

    9. Serve: Serve your basil chicken with warm rice or quinoa to soak up the delicious sauce. Garnish with additional fresh basil if desired.

    This straightforward methodology makes it easy for anyone—even beginners—to craft a beautiful meal that impresses without the stress of long prep times.

    Mastering Basil Chicken in Coconut Curry Sauce: Advanced Tips and Variations

    While the basic recipe is fantastic, there are several ways to elevate your Basil Chicken in Coconut Curry Sauce:

    • Infuse Different Flavors: Consider adding a dash of fish sauce or soy sauce for a depth of umami.

    • Spice it Up: If you appreciate spice, include red chili flakes or diced fresh chilies when sautéing the onions for an extra kick.

    • Cooking Methods: For an even more effortless preparation, consider preparing the dish in a slow cooker. Simply toss in all your ingredients (except for basil and lime) and cook on low for 4-6 hours.

    • Serving Suggestions: Serve it alongside naan, or a fresh salad to balance the rich flavors.

    These tips can transform a beloved dish into a unique culinary experience that can be tailored to suit your taste.

    How to Store Basil Chicken in Coconut Curry Sauce: Best Practices

    To keep your Basil Chicken in Coconut Curry Sauce preserved and taste fresh, here are some best practices for storage:

    • Refrigeration: Allow the chicken curry to cool down to room temperature. Store it in an airtight container in the refrigerator where it can last for about 3-4 days.

    • Freezing: For longer storage, consider freezing the curry. Pour it into a freezer-safe container or zip-top freezer bag, ensuring you remove as much air as possible. It can be frozen for up to three months.

    • Reheating: When ready to enjoy your leftovers, reheat the curry in a saucepan over medium heat until warmed through. If frozen, it’s best to thaw overnight in the refrigerator before reheating.

    These simple storage tips ensure that you minimize waste while still enjoying your delicious dish days later!

    Nutritional Value of Basil Chicken in Coconut Curry Sauce

    Understanding the nutritional impact of what you’re cooking is vital for health-conscious individuals. Here’s a breakdown of the nutritional content for a standard serving of Basil Chicken in Coconut Curry Sauce (assuming typical ingredients):

    • Calories: Approximately 400 calories
    • Total Fat: 22g
      • Saturated Fat: 10g from coconut milk
    • Protein: 30g
    • Carbohydrates: 10g
      • Dietary Fiber: 3g
    • Sugars: 2g
    • Sodium: 700mg (may vary depending on additional seasoning)

    These values can vary based on specific ingredient choices, such as using low-fat coconut milk or different protein sources. Overall, this dish offers a wholesome combination of protein, healthy fats, and a manageable carbohydrate count.

    FAQs: Frequently Asked Questions About Basil Chicken in Coconut Curry Sauce

    Q1: Can I make Basil Chicken in Coconut Curry Sauce in advance?

    A1: Yes! This dish can be made ahead of time, making it perfect for meal prep. Just store it in the fridge or freezer as previously mentioned, and it will taste delicious even after a few days.

    Q2: How spicy is this dish?

    A2: The spice level can be adjusted to suit your taste. If you enjoy mild flavors, use a milder curry powder and reduce added spices. Alternatively, if you prefer more heat, add chili flakes or fresh chilies during cooking.

    Q3: Can this be made vegetarian?

    A3: Absolutely! Simply replace chicken with tofu or chickpeas. You can also add a variety of vegetables for added nutrients.

    Q4: What do I serve with this recipe?

    A4: This aromatic dish pairs beautifully with warm rice, quinoa, or even naan bread to soak up the delightful coconut curry sauce.

    Q5: What if I don’t have fresh basil?

    A5: While fresh basil adds an incredible flavor, you can use dried basil or other herbs like cilantro or mint, but perhaps at a lesser quantity due to the difference in strength.


    With this comprehensive guide, you have all the tools you need to create a mouthwatering Basil Chicken in Coconut Curry Sauce. Its balance of flavor, health benefits, and versatility make it one of the most exciting chicken recipes to try. So gather your ingredients, follow the steps, and embark on a culinary adventure that transports you straight to a tropical paradise!

  • Hot Honey Feta Chicken

    Hot Honey Feta Chicken

    Hot Honey Feta Chicken: A Tropical Delight

    Introduction to Hot Honey Feta Chicken

    If you’re searching for a delicious and colorful addition to your weeknight dinner rotation, look no further than Hot Honey Feta Chicken. Not only is this dish bursting with vibrant flavors, but it also embodies the simplicity that busy cooks crave. Effortlessly blending the sweetness of honey, the rich tang of feta cheese, and the savory depth of chicken, this recipe is a wonderful example of the variety of possibilities found in chicken recipes.

    Hot Honey Feta Chicken is not just limited to meat-eaters; it can easily be adapted to suit vegan or gluten-free diets, making it a versatile choice for everyone at the table. This delightful dish is perfect for health-conscious individuals—it’s protein-packed, and the layers of flavor mean you won’t be missing out while keeping things light.

    Whether you’re a cooking novice or an experienced chef looking for a fresh take on your meals, Hot Honey Feta Chicken offers a wonderful way to excite your palate. Plus, its easy preparation means you’ll have more time to spend with family or friends. Stay tuned as we explore the many benefits, ingredients, and techniques to create this delightful dish that will impress anyone who tries it!

    Benefits and Advantages of Hot Honey Feta Chicken

    Hot Honey Feta Chicken stands out among numerous chicken recipes for many reasons that cater not just to flavor but also to practical culinary needs. Here’s why this dish is a fantastic choice:

    1. Quick and Easy Preparation: The preparation for Hot Honey Feta Chicken is straightforward, requiring few steps and minimal cooking time. This makes it perfect for busy parents, students, and working professionals who need to get dinner on the table fast without sacrificing flavor.

    2. Health Benefits: Chicken is a source of lean protein, making this dish a healthier alternative to heavier fare. The addition of honey not only adds a delectable sweet touch but can also offer antioxidant properties. Feta cheese brings in calcium and healthy fats, further enhancing the dish’s nutritional profile.

    3. Versatility: The recipe allows for numerous substitutions and modifications, which means you can cater it to various dietary needs without compromising on taste. Whether gluten-free, low-carb, or dairy-free options are required, this chicken dish can be adapted to fit those requirements.

    4. Flavor Explosion: With the sweet and spicy combination of hot honey and feta cheese, this dish creates an explosion of flavors in your mouth. The balance of sweet, spicy, and savory not only satisfies your taste buds but also elevates your dining experience.

    5. Social and Occasion Ready: Hot Honey Feta Chicken is not just a weeknight meal; it’s also perfect for entertaining guests. Its vibrant presentation and unforgettable taste will impress friends and family, making it ideal for gatherings or special occasions.

    By embracing this recipe, you take a step into a world where flavors marry health benefits and convenience, creating an enjoyable cooking experience that caters to all.

    Ingredients Overview

    Essential Ingredients for Hot Honey Feta Chicken

    To create the vibrant Hot Honey Feta Chicken, you’ll need to gather a few essential ingredients that blend together seamlessly. Here’s a detailed list along with their purpose:

    • Boneless Chicken Breasts (4 pieces)
      Lean protein source; meat can be substituted with plant-based alternatives for vegan options.
    • Hot Honey (1/3 cup)
      Adds sweetness and heat; organic honey or a honey substitute can work as alternatives.
    • Feta Cheese (1 cup, crumbled)
      Adds creaminess and a tangy flavor; vegan feta can be used for a dairy-free option.
    • Olive Oil (2 tablespoons)
      For cooking and flavor; can replace with avocado oil for a different taste.
    • Garlic Cloves (3, minced)
      Enhances flavor and offers various health benefits; can be omitted for garlic-free diets.
    • Fresh Herbs (like parsley or basil, for garnish)
      Provides fresh flavor; optional but recommended for presentation.
    • Salt and Pepper (to taste)
      Enhances overall flavor; optional spices can be used for additional heat or flavor variations.

    These ingredients come together to create a dish that is not only mouthwatering but also tailored to suit different dietary preferences.

    Dietary Substitutions to Customize Your Hot Honey Feta Chicken

    1. Vegan: To make this recipe vegan, substitute the chicken for tofu or chickpeas, and replace eggs with flaxseed or chia seeds if needed.

    2. Gluten-Free: The recipe is naturally gluten-free, but be cautious when purchasing any packaged products; ensure they are certified gluten-free.

    3. Low-Calorie: Utilize skinless chicken breasts or substitute chicken with a protein-rich vegetable such as eggplant or cauliflower for a lower-calorie option.

    4. Dairy-Free: Swap feta cheese with a dairy-free alternative or cashew cream to maintain creaminess without dairy.

    5. Spiciness Adjustment: Modify the heat level by adjusting the quantity of hot honey. Use less for mild taste or add chili flakes for extra heat!

    By customizing these ingredients, you can make Hot Honey Feta Chicken an inclusive dish that suits any dietary requirement while maintaining its delightful taste and texture.

    How to Prepare the Perfect Hot Honey Feta Chicken: Step-by-Step Guide

    Ready to dive into making this delicious dish? Follow this step-by-step guide to create your own Hot Honey Feta Chicken. We’ve simplified the process so that home cooks of any level can follow along.

    1. Prepare the Chicken:
    2. Start by trimming any fat off the chicken breasts. Rinse them under cold water and pat them dry with paper towels. Season both sides with salt and pepper.

    3. Heat the Pan:

    4. In a large skillet, heat 2 tablespoons of olive oil over medium-high heat. This will create the ideal environment for searing the chicken, ensuring a delicious golden crust.

    5. Cook the Chicken:

    6. Once the oil is hot, carefully add the chicken breasts to the pan. Cook for about 6-7 minutes on each side or until they are golden brown and cooked through. The internal temperature should reach 165°F (75°C). If you’re using a meat substitute, adjust cooking time as necessary.

    7. Add Garlic:

    8. After flipping the chicken, add minced garlic to the skillet. Stir it around the meat so it can infuse its flavor but don’t let it burn. Wonderful aromas will start to fill your kitchen!

    9. Mix the Hot Honey:

    10. While the chicken is cooking, take a separate bowl and combine the hot honey with crumbled feta cheese. Mix well to create a creamy, spicy topping that will elevatethe dish.

    11. Top the Chicken:

    12. Once the chicken is fully cooked, turn off the heat and pour the hot honey and feta mixture over the chicken breasts. Be generous and make sure each chicken breast is covered.

    13. Broil for Extra Flavor:

    14. For an added touch, place the skillet underneath the broiler for 2-3 minutes until the feta becomes slightly browned and bubbly. Make sure to keep an eye on it!

    15. Garnish and Serve:

    16. Turn off the broiler and let the chicken cool for a moment. Garnish with fresh herbs like parsley or basil for an extra burst of flavor and color. Serve warm alongside your favorite sides—think simple salads, roasted vegetables, or quinoa.

    17. Customize It:

    18. Feel free to experiment with the ingredients and spices according to your personal preferences. Give it your unique twist to make it special!

    Following these steps will lead you to a sumptuously flavorful dish that will be a hit at any meal.

    Mastering Hot Honey Feta Chicken: Advanced Tips and Variations

    Now that you are familiar with the basic recipe, here are some advanced tips and variations to make your Hot Honey Feta Chicken experience even better:

    • Marinating Options: Consider marinating the chicken in olive oil, lemon juice, garlic, and herbs for an hour before cooking. This will infuse more flavor into the chicken.

    • Veggie Addition: Add seasonal vegetables like bell peppers, onions, and zucchini into the skillet while cooking the chicken. This will create a complete meal packed with nutrients.

    • Baked Version: Instead of pan-frying, bake the chicken in a preheated oven at 400°F (200°C) for about 20-25 minutes. This method yields a juicy chicken with an equally delicious topping.

    • Grill It: Take your Hot Honey Feta Chicken outdoors by grilling it! Preheat your grill and cook the chicken until fully cooked. The smoky flavor will elevate this dish to new heights.

    • Serving Suggestions: Pair with warm pita bread or use it as a filling for wraps. A side of herbed couscous or a tangy Greek salad makes for an excellent accompaniment.

    • Make it a Meal Prep: This dish stores well, making it ideal for meal prep. Cook a big batch on the weekend and portion it out for quick lunches or easy dinners throughout the week.

    These advanced tips and variations allow you to explore a wider range of flavors and presentations, ensuring you can enjoy Hot Honey Feta Chicken in numerous exciting ways!

    How to Store Hot Honey Feta Chicken: Best Practices

    One of the best things about Hot Honey Feta Chicken is that it keeps well, making leftovers easy to enjoy.

    • Refrigeration: Store any leftovers in an airtight container within the refrigerator for up to 3-4 days. When properly sealed, the dish will retain its flavors and moisture.

    • Freezing: If you want to keep it longer, Hot Honey Feta Chicken can be frozen for up to 2-3 months. Ensure it’s in a freezer-safe container or properly wrapped to prevent freezer burn.

    • Reheating: When you’re ready to enjoy your leftovers, thaw them overnight in the fridge if frozen. Reheat in the microwave or in a preheated oven at 350°F (175°C) until warmed through, adding a splash of water to prevent drying out.

    Careful storage practices extend the life of your meal and provide easy access to a recipe that’s as delightful on day three as it was on day one!

    Nutritional Value of Hot Honey Feta Chicken

    Understanding the nutritional content can help you appreciate the health benefits of Hot Honey Feta Chicken. Here’s a simplified breakdown of nutritional information, but please note that actual values may vary based on ingredient brands and cooking methods.

    • Calories: Approximately 320 calories per serving (one chicken breast)
    • Protein: 28g
    • Fat: 16g (include healthy fats from olive oil and feta)
    • Carbohydrates: 10g, with potential adjustments based on added sides
    • Fiber: 0g (dishes can be paired with fiber-rich sides for balance)
    • Vitamins & Minerals: Rich in Vitamin B6, Calcium from feta cheese, and Iron from chicken.

    With these nutritional values, it’s easy to see how this dish fits into a balanced meal plan while also providing deliciousness at the forefront!

    FAQs: Frequently Asked Questions About Hot Honey Feta Chicken

    You may have some lingering questions about making Hot Honey Feta Chicken. Here are common queries along with clear answers to help you out:

    1. Can I substitute chicken thighs for breasts?
      Yes! Chicken thighs will yield a juicier result. Ensure they are cooked thoroughly before serving.

    2. How can I make this dish lower in sugar?
      You can reduce the amount of hot honey, or replace it with a sugar-free honey alternative.

    3. What can I serve with Hot Honey Feta Chicken?
      It pairs well with a fresh salad, rice pilaf, roasted vegetables, or even in a wrap with fresh greens.

    4. Is Hot Honey Feta Chicken gluten-free?
      Yes, the basic recipe is gluten-free. Ensure that any accompaniments or ingredient substitutes adhere to gluten-free standards.

    5. Can I make this dish ahead of time?
      Absolutely! Prepare it a day ahead, store it in the refrigerator, and reheat before serving for an easy meal.

    By addressing these common questions, you can feel confident that your culinary journey into Hot Honey Feta Chicken will be a successful one. This dish is not just a meal but an experience—a vibrant blend of health, flavor, and ease, ready to tantalize taste buds around the table. Enjoy!

  • Crock Pot Bourbon Chicken and Rice

    Crock Pot Bourbon Chicken and Rice

    Crock Pot Bourbon Chicken and Rice: A Tropical Delight

    Introduction to Crock Pot Bourbon Chicken and Rice

    Crock Pot Bourbon Chicken and Rice is a delightful way to explore a medley of tropical flavors without stepping into the kitchen for hours. This stress-free dish is not only incredibly easy to prepare but is also a fantastic option for busy parents, working professionals, food enthusiasts, and anyone looking for a healthy meal that does not compromise on taste. This recipe embraces the concept of crockpot recipes, from the sizzling bourbon-glazed chicken to the aromatic rice that absorbs all those rich flavors.

    Imagine coming home after a long day to a dinner that is ready and waiting for you! The slow cooking process transforms simple ingredients into a hearty, family-friendly dish, making it perfect for everyone at the dinner table. Plus, Bourbon Chicken is not just about taste; it’s made with wholesome ingredients and can cater to various dietary preferences. Whether you’re looking for gluten-free, low-calorie, or even vegan options, this recipe can easily be tailored to meet individual needs.

    The beauty of this dish lies in its simplicity – throw your ingredients into the crock pot, set it, and let it work its magic while you go about your day. You can enjoy this favorite comfort food guilt-free, knowing that you are nourishing your body while savoring bold flavors that warm the soul.

    Benefits and Advantages of Crock Pot Bourbon Chicken and Rice

    When it comes to crockpot recipes, the benefits are plentiful, and Bourbon Chicken and Rice is no exception. For starters, the simplicity of preparing this dish is unparalleled. You require minimal prep time and a handful of ingredients, making it ideal for those hectic weeknight dinners where you need something quick yet satisfying.

    Nutritional Advantages

    Health-wise, this dish offers numerous benefits. Packed with protein from the chicken and fiber from the rice and vegetables, it’s a balanced meal that keeps you full and energized. You can easily sneak in extra vegetables like bell peppers or broccoli for added nutrients, making it a great choice for health-conscious individuals. It’s also adaptable to accommodate dietary restrictions; you can use brown rice instead of white for a fiber boost or choose low-sodium soy sauce to keep the sodium content in check.

    Family-Friendly and Convenient

    This recipe delights family members of all ages. Children and adults alike will love the sweet and savory notes of bourbon and soy sauce, which can sometimes make vegetables more palatable for picky eaters. Additionally, the convenience of a slow cooker means you can prepare the dish in a fraction of the time compared to traditional methods. Working parents, students, and seniors will find this method incredibly desirable, allowing them to spend more time engaging in what they love while still enjoying a satisfying meal at the end of the day.

    Flexibility with Ingredients

    One of the standout features of this crockpot recipe is its flexibility. You can experiment with various proteins, grains, and flavors based on what you have on hand. This means less food waste and more creative cooking!

    Ingredients Overview

    Essential Ingredients for Crock Pot Bourbon Chicken and Rice

    To make your own Crock Pot Bourbon Chicken and Rice, you will need the following essential ingredients:

    • Chicken thighs: 2 lbs (boneless, skinless; provides flavorful protein)
    • Rice: 1 cup (white or brown; serves as the base of the dish)
    • Soy sauce: 1/2 cup (low-sodium, for minimize salt intake)
    • Brown sugar: 1/4 cup (adds sweetness to balance flavors)
    • Bourbon: 1/4 cup (for the signature flavor; can substitute with apple juice for a non-alcoholic version)
    • Garlic: 3 cloves, minced (for an aromatic touch)
    • Ginger: 1-inch piece, grated (adds warmth and richness)
    • Green onions: 1/4 cup, chopped (for garnish and extra flavor)
    • Sesame seeds: 1 tablespoon (optional, for garnish)
    • Salt and pepper: to taste

    Dietary Substitutions to Customize Your Crock Pot Bourbon Chicken and Rice

    Customizing this recipe for various dietary needs is easy! Here are some substitutions you can consider:

    • Vegan Option: Replace chicken thighs with tofu or tempeh, increasing the cooking time slightly until well-marinated.
    • Gluten-Free Option: Use tamari in place of soy sauce to accommodate gluten-sensitive diets.
    • Low-Calorie Option: Opt for skinless chicken breast and brown rice, and reduce brown sugar or use a sugar substitute.
    • Vegetarian Version: Include chickpeas in place of chicken, and use vegetable broth for added depth of flavor.

    These ingredient swaps contribute to the versatility of this recipe, making sure that it can fit a variety of dietary preferences.

    How to Prepare the Perfect Crock Pot Bourbon Chicken and Rice: Step-by-Step Guide

    Creating the perfect Crock Pot Bourbon Chicken and Rice is a breeze if you follow these simple steps. Here’s how to do it:

    1. Prepare the Base: In a large bowl, combine the soy sauce, brown sugar, bourbon, minced garlic, and grated ginger. Mix until the sugar is dissolved.

    2. Add the Chicken: Place the boneless, skinless chicken thighs in the bottom of your crock pot. Ensure they are spread out evenly to absorb all the flavors.

    3. Pour the Sauce: Pour the prepared sauce mixture over the chicken. Ensure that it fully covers the chicken for optimal flavor infusion.

    4. Add the Rice: Spread 1 cup of rice evenly over the chicken. Do not stir. This allows the rice to absorb the liquids while cooking, which is essential for achieving that perfect consistency.

    5. Add Water: Pour in 2 cups of water or chicken broth. This extra liquid is crucial for cooking the rice properly.

    6. Season: Add salt and pepper to taste, based on your preference.

    7. Cook: Cover the crock pot with a lid and cook on low for 6-7 hours or on high for 3-4 hours. The longer you cook, the more tender the chicken will be.

    8. Check Doneness: Near the end of your cooking time, check that the chicken is fully cooked (internal temperature should reach 165°F or 74°C), and the rice is fluffy and fully absorbed the liquid.

    9. Serve and Garnish: Once done, fluff the rice with a fork, then serve the dish hot. Garnish with freshly chopped green onions and sesame seeds for that added flair.

    10. Enjoy! Dive into your warming bowl of Crock Pot Bourbon Chicken and Rice, and savor each bite!

    This simple yet flavorful step-by-step approach embodies the genius of crockpot recipes, allowing home cooks to create a dish bursting with flavor without the complexity of traditional cooking methods.

    Mastering Crock Pot Bourbon Chicken and Rice: Advanced Tips and Variations

    To elevate your Crock Pot Bourbon Chicken and Rice, consider these advanced tips and variations:

    • Flavor Depth: For more profound flavor, sear the chicken thighs in a pan with a little olive oil before adding them to the crock pot. This step caramelizes the chicken, providing an additional layer of richness.
    • Vegetable Add-Ins: Consider adding chopped bell peppers, diced carrots, or peas during the last hour of cooking. This not only enhances nutrition but adds vibrant colors to your dish.
    • Bourbon Alternatives: If you prefer not to use alcohol, replace bourbon with apple or pineapple juice for a sweet note without the whiskey.
    • Curry Kick: For a unique twist, add curry powder or coconut milk to the sauce for a different flavor profile. This change adds a tropical flair that complements the dish beautifully.

    These variations allow you to harness the adaptability of crockpot recipes, customizing meals to match your palate and dietary requirements.

    How to Store Crock Pot Bourbon Chicken and Rice: Best Practices

    Storing your delicious Crock Pot Bourbon Chicken and Rice properly ensures you can enjoy leftovers without a hitch:

    • Refrigeration: After cooling completely, transfer leftover chicken and rice into an airtight container. In the refrigerator, it can last for about 3-4 days.

    • Freezing: For long-term storage, portion out the dish in freezer-safe containers. It can be frozen for up to 2-3 months. Make sure to label the containers with the date and contents for easy identification.

    • Reheating: To reheat, thaw overnight in the fridge if frozen. You can microwave individual portions or reheat in the crock pot on low heat until warmed through. Adding a bit of water can help maintain moistness during reheating.

    Following these storage practices ensures that you enjoy every last bite of your amazing crockpot recipes without any waste.

    Nutritional Value of Crock Pot Bourbon Chicken and Rice

    A crucial part of any recipe revolves around its nutritional value. Here’s a breakdown of the approximate nutrition per serving of Crock Pot Bourbon Chicken and Rice (based on 6 servings):

    • Calories: 320
    • Total Fat: 10g
    • Saturated Fat: 3g
    • Cholesterol: 85mg
    • Sodium: 800mg
    • Total Carbohydrates: 35g
    • Dietary Fiber: 2g
    • Sugars: 6g
    • Protein: 25g

    This nutritional information is essential for diet-conscious individuals, helping them to make informed choices. With a perfect balance of protein, fats, and carbohydrates, this recipe stands out amongst crockpot recipes as a healthy meal option.

    FAQs: Frequently Asked Questions About Crock Pot Bourbon Chicken and Rice

    1. Can I use frozen chicken in this recipe?

    Yes, you can use frozen chicken, but be aware that this may increase the overall cooking time by 1-2 hours. Ensure that the chicken reaches a safe internal temperature of 165°F (74°C).

    2. What can I substitute if I don’t have bourbon?

    If you prefer not to use bourbon, apple juice, or chicken broth can be suitable substitutes that still provide a pleasant flavor.

    3. Can I make this dish vegan?

    Absolutely! Replace the chicken with firm tofu or chickpeas and follow the same instructions for preparing the sauce. The flavor will still be delicious!

    4. Can I cook it on high if I’m short on time?

    Definitely! If you’re short on time, you can cook it on high for about 3-4 hours instead of low for 6-7 hours. Just ensure to check the doneness of the chicken.

    5. How do I know when the chicken is done?

    The chicken is fully cooked when it reaches an internal temperature of 165°F (74°C). For best results, use a meat thermometer for accuracy.

    In conclusion, Crock Pot Bourbon Chicken and Rice is not just a dish; it’s an experience that uplifts your dinner routine with ease, flavor, and adaptability. With its nurturing ingredients and straightforward preparation, it’s a recipe that’s sure to become a favorite in every home there. Grab your crock pot and enjoy this tropical delight today!

  • Maple Garlic Bacon Chicken

    Maple Garlic Bacon Chicken

    Maple Garlic Bacon Chicken: A Tropical Delight

    Introduction to Maple Garlic Bacon Chicken

    When it comes to succulent chicken recipes, few dishes rival the flavor combination found in Maple Garlic Bacon Chicken. This delightfully simple recipe harmoniously balances the sweetness of pure maple syrup, the earthy warmth of garlic, and the savory depth of crispy bacon. It’s a dish that not only tantalizes the taste buds but also fits perfectly into a busy lifestyle—ideal for home cooks, working professionals, and busy parents looking to enjoy a gourmet meal without spending hours in the kitchen.

    One of the standout features of this recipe is its health benefits. The ingredients are chosen not only for their flavor but also for their nutritional value. Chicken is a lean protein, which can help in building and repairing muscle while keeping calorie counts in check. Meanwhile, garlic is known for its numerous health benefits, including boosting the immune system, and maple syrup provides a natural sweetness that’s less processed than table sugar.

    Furthermore, this dish can be enjoyed by various dietary needs. While it’s naturally gluten-free, alternatives can easily be made for those seeking vegan options—just swap out the chicken for plant-based protein and the bacon for coconut bacon. Whether you’re a seasoned chef or just starting out, Maple Garlic Bacon Chicken is a versatile dish that beckons to be tried!

    Benefits and Advantages of Maple Garlic Bacon Chicken

    Maple Garlic Bacon Chicken offers several advantages, making it a must-try in the world of chicken recipes. First and foremost, it’s incredibly easy to prepare. With a straightforward ingredient list and simple cooking steps, even novice cooks can produce a meal that feels sophisticated and satisfying. In just under an hour, you can go from ingredients scattered on your kitchen counter to a beautifully plated dish ready for family or guests.

    Health-wise, this recipe checks numerous boxes. Chicken, especially skinless and boneless chicken breasts, is a heart-healthy protein. It’s low in saturated fats, making it suitable for those watching their cholesterol levels. The addition of garlic not only enhances flavor but is also considered a superfood. Benefits such as improved cardiovascular health and enhanced immune function give an added boost to your meal.

    Another aspect worth mentioning is versatility. This dish can easily accommodate various dietary preferences. As noted earlier, alternate ingredients allow individuals following vegan, keto, or gluten-free diets to relish the flavors without sacrificing their dietary restrictions. In addition, the recipe is naturally low in carbs, making it perfect for those maintaining a low-carb diet.

    Finally, flavorful meals like Maple Garlic Bacon Chicken can foster connection and enjoyment at the dinner table. Whether you’re hosting a dinner party or cooking a quiet meal for yourself, this recipe encourages exploration and conversation about delicious food. You may even inspire others to dive into their own cooking adventures!

    Ingredients Overview

    Essential Ingredients for Maple Garlic Bacon Chicken

    To whip up this delectable Maple Garlic Bacon Chicken, gather the following ingredients:

    • 3 to 4 Chicken Breasts (boneless, skinless): This lean meat is the star of the dish, providing protein and essential nutrients.
    • 4 strips of Bacon: Adds a smoky, savory flavor that beautifully complements the sweetness of maple and garlic.
    • 1/4 cup Maple Syrup: Offers a natural sweetness while also providing minerals like manganese and zinc.
    • 4 cloves Garlic (minced): Not only does garlic enrich the taste, but it’s also a health powerhouse.
    • 1 tablespoon Olive Oil: For sautéing, this heart-healthy oil can prevent sticking and add a touch of flavor.
    • Salt and Pepper: Essential seasonings for enhancing all flavors.
    • Fresh Herbs (optional, like parsley or thyme): For garnish, they can elevate the visual appeal and offer additional layers of flavor.

    For diet-conscious readers, various substitutions can be made. For gluten-free versions, ensure the maple syrup is pure and free from additives. Vegan alternatives can substitute chicken with seitan or tempeh, and bacon can be replaced with coconut bacon or smoked tempeh.

    Dietary Substitutions to Customize Your Maple Garlic Bacon Chicken

    Here are some suggested substitutions to cater to different dietary preferences:

    • Vegan Option: Replace chicken with plant-based protein such as tofu, tempeh, or chickpeas. Use coconut bacon or an alternative that mimics the flavors and texture of bacon.
    • Gluten-Free: Ensure that your maple syrup contains no additives that may contain gluten, and always check the ingredient labels.
    • Keto-Friendly: For a low-carb alternative, consider adding spinach or kale to your dish while maintaining the principal components of chicken and maple syrup.
    • Low-Calorie: Substitute the bacon with turkey bacon or omit it entirely, adding a sprinkle of smoked paprika to enhance the flavor without extra calories.

    Ultimately, the beauty of Maple Garlic Bacon Chicken lies in its adaptability, catering to both traditional and modern culinary preferences while ensuring everyone at the table can enjoy this tropical delight!

    How to Prepare the Perfect Maple Garlic Bacon Chicken: Step-by-Step Guide

    Ready to make your very own Maple Garlic Bacon Chicken? Follow these easy steps to create a flavorful dish the whole family will enjoy.

    1. Prepare the Ingredients: Gather and measure all your ingredients. Mince the garlic and set it aside. If using fresh herbs, chop them up as well.

    2. Cook the Bacon: In a large skillet over medium heat, add the bacon strips. Cook until they’re crispy, about 6-8 minutes, turning occasionally. Once done, remove the bacon from the skillet and place it on paper towels to drain the excess grease.

    3. Sauté Garlic: In the same skillet, leave about a tablespoon of bacon grease (or discard for a healthier option). Add the minced garlic and sauté for 2-3 minutes or until fragrant, stirring occasionally to avoid burning.

    4. Prepare Chicken Breasts: Season the chicken breasts with salt and pepper on both sides. If you have dietary restrictions, you can opt for a no-salt seasoning.

    5. Cook Chicken: Increase the heat to medium-high. Add a tablespoon of olive oil to the skillet and then place the seasoned chicken breasts in. Sear for 5-7 minutes on each side, or until cooked through (internal temperature should reach 165°F).

    6. Add Bacon and Maple Syrup: Once the chicken is cooked, crumble the crispy bacon over the top. Pour in the maple syrup, ensuring the chicken is well-coated. Cook for an additional 2-3 minutes, letting the syrup caramelize slightly.

    7. Arrange for Serving: Remove the skillet from heat. Let the chicken sit for a few minutes to absorb the flavors.

    8. Garnish and Serve: Sprinkle with fresh herbs before serving. Pair with a side of sautéed vegetables, rice, or a fresh salad to round out the meal.

    With these straightforward steps, you can create Maple Garlic Bacon Chicken that impresses at any table setting.

    Mastering Maple Garlic Bacon Chicken: Advanced Tips and Variations

    Once you’ve mastered the basics, consider these additional tips and variations for your Maple Garlic Bacon Chicken:

    • Marinate for Extra Flavor: Consider marinating the chicken breasts in a mixture of maple syrup and garlic for a few hours before cooking. This can intensify the flavors significantly.

    • Grill Instead of Pan-Fry: Take your dish outdoors by grilling the chicken. The char from the grill not only enhances flavor but can also be an exciting change in preparation.

    • Add Vegetables: For an all-in-one meal, toss in some bell peppers, asparagus, or broccoli into the skillet as the chicken cooks. These will soak up the flavor of the sauce while adding extra nutrients.

    • Experiment with Herbs: Try adding herbs like rosemary or thyme during cooking for another layer of flavor. They pair beautifully with the garlic and maple syrup.

    • Create a Sauce: Reserve some pan drippings, adding a touch more maple syrup and chicken broth to create a sauce that can be drizzled over the chicken before serving.

    These suggestions will keep your Maple Garlic Bacon Chicken experience fresh and exciting each time you make it.

    How to Store Maple Garlic Bacon Chicken: Best Practices

    If you have leftovers (which is unlikely given how delicious this dish is), follow these best storage practices to ensure your Maple Garlic Bacon Chicken remains flavorful:

    • Refrigeration: Place leftovers in an airtight container and store in the refrigerator. They should remain fresh for about 3-4 days.

    • Freezing: For longer storage, Maple Garlic Bacon Chicken can be frozen. Portion out the chicken in freezer-safe bags or containers, removing as much air as possible. It can last up to 2-3 months in the freezer.

    • Reheating: To reheat, thaw in the refrigerator overnight and then microwave until warm or reheat in a skillet over medium heat. Adding a splash of water or broth can help maintain moisture.

    These practices not only aid in preserving your dish but also add ease to your weeknight dinners.

    Nutritional Value of Maple Garlic Bacon Chicken

    Understanding the nutritional value of your meals is essential, especially when adding new recipes to your repertoire. Here’s a rough estimate of the nutritional content per serving (based on a recipe serving of 4):

    • Calories: Approximately 350-450 (varies based on bacon type and usage)
    • Protein: 32g
    • Carbohydrates: 15g (mostly from maple syrup)
    • Fat: 20g (including healthy fats from olive oil and bacon)
    • Fiber: 0g
    • Sodium: 600mg (varies based on added salt and bacon type)

    This dish stands out amongst other chicken recipes for its well-rounded nutritional profile, balancing lean protein and healthy fats, making it well-suited for a variety of diets without sacrificing taste.

    FAQs: Frequently Asked Questions About Maple Garlic Bacon Chicken

    In this section, we’ll answer some commonly asked questions about Maple Garlic Bacon Chicken to clarify any uncertainties you may have:

    Can I use other types of chicken cuts?

    Yes, you can use thighs or drumsticks instead of breasts. Just be sure to adjust cooking times as darker meats can take longer to cook through.

    Is there a vegan version of Maple Garlic Bacon Chicken?

    Absolutely! You can substitute chicken with tofu or tempeh and use coconut bacon for an equivalent flavor and texture without animal products.

    How do I know when the chicken is done cooking?

    The best way to check doneness is by using a meat thermometer, ensuring that the internal temperature has reached 165°F (75°C). You can also check that the juices run clear.

    Can I prepare this dish ahead of time?

    You can prepare the chicken and sauce ahead of time; just reheat when you’re ready to serve. This makes it a wonderful dish for meal prepping!

    What can I serve Maple Garlic Bacon Chicken with?

    This versatile dish pairs wonderfully with steamed vegetables, quinoa, or a fresh green salad. The choice of sides allows you to cater to various dietary preferences.

    By addressing these questions, we hope to make your cooking experience easier and more enjoyable!


    With its delightful flavors, health benefits, and adaptability for various dietary preferences, Maple Garlic Bacon Chicken is a culinary gem you’ll want in your meal rotation. This recipe proves to be a fantastic addition to the vast world of chicken recipes, perfect for home cooks, busy parents, and food enthusiasts alike. Why not give it a try and bring a touch of tropical delight to your dinner table today? Happy cooking!

  • Irresistible Sweet  Savory Asian Mango Glazed Chicken Twists

    Irresistible Sweet Savory Asian Mango Glazed Chicken Twists

    Irresistible Sweet & Savory Asian Mango Glazed Chicken Twists: A Tropical Delight

    Introduction to Irresistible Sweet & Savory Asian Mango Glazed Chicken Twists

    Indulging in a delightful dish starts with the right recipe, and if you’re looking for an exquisite combination of flavors in chicken recipes, the Irresistible Sweet & Savory Asian Mango Glazed Chicken Twists are the perfect choice. Not only does this recipe tantalize your taste buds with its sweet and savory profile, but it also boasts numerous health benefits. With the vibrant sweetness of mangoes combined with savory Asian spices, this dish transforms an ordinary dinner into a tropical experience.

    Whether you are a busy parent, a student seeking a quick meal, or a health-conscious individual, these chicken twists are ideal for you. This dish stands out for its simplicity — taking only about 30 minutes to prepare and cook, making it perfect for those hectic weeknights. It is naturally gluten-free and can easily be made low-calorie by using skinless chicken and adjusting the amount of glaze.

    Additionally, this recipe also caters to diverse dietary needs. With options for substituting ingredients to create a vegan version, even plant-based eaters can indulge in this culinary delight. The harmonious flavors, ease of preparation, and versatility make the Irresistible Sweet & Savory Asian Mango Glazed Chicken Twists an unforgettable addition to your recipe collection.

    Benefits and Advantages of Irresistible Sweet & Savory Asian Mango Glazed Chicken Twists

    The Irresistible Sweet & Savory Asian Mango Glazed Chicken Twists are more than just a delightful meal. Here’s why this recipe is particularly effective in meeting the diverse demands of today’s eaters:

    1. Ease of Preparation

    One of the primary advantages of this recipe is its simplicity. Preparing a flavorful dish doesn’t have to be complicated, and this recipe exemplifies that. In just a few straightforward steps, you can create a restaurant-quality meal in the comfort of your home. The use of fresh ingredients means there’s no need for extensive marinating or complex cooking techniques.

    2. Health Benefits

    Incorporating chicken into your diet offers various health benefits. This lean protein source supports muscle growth and maintenance, making it an ideal option for fitness enthusiasts. The mango glaze provides a natural sweetness without the need for refined sugars, along with the added benefits of vitamins A and C. Moreover, using fresh vegetables in your twists enhances the overall nutritional value, giving you an added dose of antioxidants.

    3. Diet-Friendly Options

    Whether you’re adhering to a gluten-free lifestyle, looking to cut calories, or following a vegan diet, this recipe has you covered. By making a few simple substitutions, you can create a version of the dish that aligns perfectly with your dietary needs. Notably, swapping chicken for tofu or another plant-based protein maintains the integrity of the flavors while serving diverse eating habits.

    4. Versatility

    This recipe is incredibly versatile. You can serve the chicken twists as an appetizer, main dish, or as part of a festive spread during gatherings. The tropical sweetness of the mango glaze pairs well with a variety of sides, including steamed rice, mixed greens, or even as fillings for wraps.

    In summary, when considering various chicken recipes, these mango-glazed chicken twists shine through due to their ease, health benefits, dietary adaptability, and versatility. They open the door for a world of culinary creativity that anyone can embrace, regardless of skill level.

    Ingredients Overview

    Essential Ingredients for Irresistible Sweet & Savory Asian Mango Glazed Chicken Twists

    To create this delicious dish, it’s essential to gather the following ingredients:

    • 1 lb Chicken Breasts: Lean meat that serves as the base of the recipe. (For a low-calorie option, opt for skinless chicken.)
    • 2 ripe Mangoes: Freshly diced, these provide a naturally sweet and tangy glaze. (Choose organic if possible!)
    • 1/4 cup Soy Sauce: For a savory flavor that enhances the glaze. Use tamari for a gluten-free version.
    • 2 tbsp Honey or Maple Syrup: Acts as a sweetener in the glaze. You can also use agave nectar for vegan alternatives.
    • 2 cloves Garlic: Minced, for added flavor depth.
    • 1 tsp Fresh Ginger: Grated, bringing a zesty kick to the dish.
    • 1 tbsp Rice Vinegar: Provides acidity, balancing the flavors.
    • 1 tbsp Sesame Oil: Adds a nutty aroma; you can substitute with olive oil if needed.
    • Salt and Pepper to taste: Basic seasoning to enhance flavor.
    • 1-2 tbsp Cornstarch: Used for thickening the glaze.
    • Green onions and Sesame Seeds: For garnish, giving a vibrant look and added crunch.

    Notes on Vegan, Gluten-Free, and Low-Calorie Options:

    You can easily make this dish vegan by substituting chicken with firm tofu or tempeh. Ensure all sauces used are gluten-free if that is a dietary consideration. For low-calorie options, use less honey or substitute with a sugar-free alternative.

    Dietary Substitutions to Customize Your Irresistible Sweet & Savory Asian Mango Glazed Chicken Twists

    To accommodate various dietary needs, consider the following substitutions:

    • For Vegan Options: Use firm tofu or Dr. Praeger’s veggie patties instead of chicken. Ensure the soy sauce is a plant-based variant like tamari or coconut aminos.
    • For Gluten-Free Needs: Ensure your soy sauce is gluten-free as well as verifying that any added sauces and seasonings meet gluten-free standards.
    • For Lower Calorie: Remove the honey or use a low-calorie sweetener. Opt for skinless chicken breasts or use a smaller portion of the glaze.

    These substitutions will allow anyone to enjoy this recipe tailor-fit to their dietary preferences while maintaining the delicious essence of the original dish.

    How to Prepare the Perfect Irresistible Sweet & Savory Asian Mango Glazed Chicken Twists: Step-by-Step Guide

    Follow these easy steps to create your Irresistible Sweet & Savory Asian Mango Glazed Chicken Twists:

    1. Prepare the Chicken:
    2. Start by rinsing the chicken breasts under cold water. Pat them dry with paper towels, then slice them into strips about 1 inch thick. This will ensure quick and even cooking.

    3. Make the Mango Glaze:

    4. In a blender, combine the diced mangoes, soy sauce, honey (or maple syrup), minced garlic, grated ginger, rice vinegar, and sesame oil. Blend until smooth. You can adjust sweetness by adding more honey or syrup if desired.

    5. Thicken the Glaze:

    6. Pour the mango mixture into a saucepan over medium heat. Bring it to a simmer, stirring occasionally. In a small bowl, mix cornstarch with a couple of tablespoons of water and stir until smooth. Gradually add this mixture to the simmering glaze to thicken. Continue to cook until it reaches your desired consistency, then remove from heat.

    7. Cook the Chicken:

    8. In a non-stick skillet, heat a little sesame oil over medium-high heat. Add the chicken strips in a single layer, lightly seasoning with salt and pepper. Cook for about 5-7 minutes, flipping halfway through, until the chicken is golden and cooked through.

    9. Coat with Glaze:

    10. Once the chicken is fully cooked, reduce heat to low and pour the mango glaze over the chicken in the pan. Toss gently to ensure all pieces are well coated in delicious sauce, allowing them to soak in the flavors for about 2-3 minutes.

    11. Twist and Assemble:

    12. Remove the chicken from the heat and let it cool slightly. Take a small amount of chicken and place it at one end of a tortilla or wrap. Roll it tightly, folding the ends in like a burrito to secure the filling.

    13. Garnish:

    14. Arrange the chicken twists on a serving plate. Garnish them with sliced green onions and a sprinkle of sesame seeds for visual appeal and crunch.

    15. Serve and Enjoy:

    16. Serve the chicken twists warm, alongside steamed rice or a crisp salad, and enjoy the explosion of tropical flavors in every bite!

    The cooking process is simple but allows for personalization at each step. Whether you want more vegetables or a spicier glaze, this recipe is flexible for adaptation.

    Mastering Irresistible Sweet & Savory Asian Mango Glazed Chicken Twists: Advanced Tips and Variations

    To truly master these chicken twists, consider the following advanced tips and variations:

    1. Experiment with Herbs and Spices: While the recipe already emphasizes ginger and garlic, experiment with adding fresh cilantro or basil for added herbal flavors.

    2. Add Crunch: Including finely chopped bell peppers or carrots not only enhances the presentation but also provides a nice crunch to your dish.

    3. Spicy Variation: If you’re a fan of heat, add a teaspoon of chili flakes or Sriracha to your glaze for a spicy kick. The balance between sweet and spicy can be exceptional!

    4. Baking Option: Instead of pan-frying, take this recipe to the oven. Spread the chicken pieces on a baking sheet, drizzle with glaze, and bake at 400°F (200°C) for about 20 minutes until cooked through. This method can allow for a healthier cooking option.

    5. Presentation Ideas: When hosting, serve the chicken twists on a platter with a light drizzle of additional glaze, creating an eye-catching centerpiece. Complement your dish with fresh mango slices or a colorful salad.

    6. Make-ahead meals: These twists store well and can be made ahead of time for meal prep. Pre-portion them in airtight containers with sauce on the side to keep them fresh.

    With these tips and tricks, you’re not just making a dish; you’re creating an experience that will have your family and friends asking for seconds!

    How to Store Irresistible Sweet & Savory Asian Mango Glazed Chicken Twists: Best Practices

    After you’ve prepared your Irresistible Sweet & Savory Asian Mango Glazed Chicken Twists, knowing how to store them properly is key for preserving both flavor and safety:

    • Refrigeration: Store leftover twists in an airtight container in the refrigerator for up to 3 days. This allows the flavors to meld and enhance over time.

    • Freezing: For longer storage, consider freezing the chicken twists. Place them in a single layer on a baking sheet to freeze individually, then transfer them to a freezer-safe bag or container. They can be kept for up to 3 months.

    • Reheating: To reheat, simply thaw overnight in the fridge if frozen. Microwave until heated through or reheat in a skillet on medium low heat. If desired, add a touch of water or extra glaze to prevent drying out.

    By following these storage methods, you can enjoy your chicken twists well beyond the initial meal, making for a quick and tasty option during busy days!

    Nutritional Value of Irresistible Sweet & Savory Asian Mango Glazed Chicken Twists

    When it comes to any recipe, understanding its nutritional value is essential, especially for those conscious of their dietary choices. Here’s a breakdown of the approximate nutritional information for one serving (2 twists):

    • Calories: 320
    • Protein: 28g
    • Fat: 10g (mostly healthy fats from the sesame oil)
    • Carbohydrates: 30g
    • Fiber: 2g
    • Sugars: 8g (naturally from mango and honey)

    Healthier Options

    As noted previously, the nutrition can vary based on your ingredient choices:
    – For a lower-calorie option, use less glaze or leaner cuts of chicken.
    – Replace honey with a no-calorie sweetener for those reducing sugar intake.
    – Adding more veggies will bump up the fiber content and reduce calories per serving.

    Keeping track of nutritional facts supports those who are diet conscious, ensuring that this delicious dish also aligns with their health goals.

    FAQs: Frequently Asked Questions About Irresistible Sweet & Savory Asian Mango Glazed Chicken Twists

    Q1: Can I prepare the sauce ahead of time?

    Yes! The mango glaze can be made up to 3 days in advance. Store it in an airtight container in the fridge until you’re ready to cook.

    Q2: Is this recipe kid-friendly?

    Absolutely! The sweet mango glaze is often a hit among kids. Plus, they can help wrap the chicken in the tortillas, making it a fun family activity.

    Q3: Can I use other fruits in the glaze?

    Definitely! Other fruits like pineapple or peach can add a unique flavor profile while retaining the tropical essence of this dish.

    Q4: How do I know when the chicken is cooked?

    Chicken should reach an internal temperature of 165°F (75°C) when fully cooked. Using a meat thermometer is the most reliable way to check.

    Q5: What can I serve alongside the chicken twists?

    These versatile twists pair beautifully with sides such as cucumber salad, jasmine rice, or a crunchy slaw.

    Q6: Can I make this recipe in advance for meal prep?

    Yes! The chicken twists store wonderfully in the fridge for up to three days, making them a great option for meal preppers.

    These FAQs help clear common concerns and encourage readers to jump into the kitchen without hesitation.

    In conclusion, the Irresistible Sweet & Savory Asian Mango Glazed Chicken Twists offer a delightful mix of tropical flavors with a recipe that’s simple, healthy, and adaptable. Perfect for various dietary needs, this dish captivates the palette and simplifies meal preparation. Embrace this mouth-watering recipe and turn a weekday meal into a tropical escape with every bite!

  • Italian Chicken Saltimbocca

    Italian Chicken Saltimbocca

    Italian Chicken Saltimbocca: A Tropical Delight

    Introduction to Italian Chicken Saltimbocca

    Italian Chicken Saltimbocca is a dish that encapsulates the spirit of Italian cuisine—simple yet bursting with flavor. This incredible recipe is not only a delightful addition to your collection of chicken recipes, but it also offers a splendid combination of juicy chicken breasts, aromatic herbs, and the richness of prosciutto. The beauty of this dish lies in its ease of preparation, making it perfect for busy parents, newlyweds, and anyone looking to whip up a delicious meal in a flash.

    The health benefits are notable too. Chicken is a powerhouse of lean protein, ideal for those looking to maintain a healthy lifestyle, while sage—a primary seasoning in this dish—provides antioxidants and anti-inflammatory properties. Additionally, Saltimbocca can easily be tailored to fit various dietary requirements, appealing to a wide audience, including gluten-free and low-calorie eaters.

    Whether you’re cooking for a romantic dinner or a family gathering, Italian Chicken Saltimbocca stands out as not only an appetizing choice but also as a dish that can accommodate different tastes and dietary restrictions. With this guide, you’ll discover the flavors of Italy right in your kitchen, inspiring you to gather friends and family around the table for a delightful culinary experience.

    Benefits and Advantages of Italian Chicken Saltimbocca

    The allure of Italian Chicken Saltimbocca extends beyond its delightful taste. Let’s delve into the multiple benefits it offers, making it a standout amongst traditional chicken recipes.

    Ease of Preparation

    One of the first things you’ll appreciate about this dish is how simple it is to prepare. The entire recipe can be completed in under 30 minutes, allowing busy individuals—be they working professionals, students, or parents—to create an impressive meal without spending hours in the kitchen.

    Health Benefits

    Italian Chicken Saltimbocca is not only delicious but also packed with valuable nutrients. Chicken breast is an excellent source of protein, crucial for muscle health and recovery. It’s also low in fat and calories, making it suitable for diet-conscious individuals. Meanwhile, fresh sage helps boost digestion and adds a fragrant aromatic profile to the dish.

    Customization

    Another attribute that makes this recipe particularly appealing is its adaptability. It can be easily modified to cater to various dietary needs. For example, you can substitute prosciutto with a plant-based alternative for a vegan option or use gluten-free breadcrumbs if necessary. Such flexibility ensures that everyone can enjoy a plate of this exquisite dish.

    Flavorful Experience

    Most importantly, the balance of flavors from the chicken, salty prosciutto, and the earthiness of sage creates a wow factor that is impressive yet completely approachable. This dish can transport you to the charming streets of Italy with just a single bite, making it ideal for food enthusiasts and travelers longing for authentic Italian cuisine.

    By choosing to make Italian Chicken Saltimbocca, you take a step towards a culinary adventure loaded with health benefits, flavor, and convenience.

    Ingredients Overview

    Essential Ingredients for Italian Chicken Saltimbocca

    Creating the perfect Italian Chicken Saltimbocca requires selecting quality ingredients. Below is a detailed list of all components you’ll need:

    Ingredients:
    4 boneless, skinless chicken breasts (approximately 1.5 lbs): Source of lean protein.
    8 slices of prosciutto: Adds a savory, salty flavor (substitutable with turkey bacon for a lower-calorie option).
    1/2 cup fresh sage leaves (approximately 20-30 leaves): Provides aromatic flavors and health benefits.
    1/4 cup all-purpose flour: Optional for dredging (use gluten-free flour for gluten-free diets).
    1/4 cup olive oil: For sautéing; rich in healthy fats.
    1/2 cup white wine (or chicken broth for a non-alcoholic option): Enhances the sauce’s flavor.
    Salt and pepper (to taste): Essential for seasoning, enhance the overall taste profile.
    Lemon wedges (for garnish): Optional, to brighten up the flavors when serving.

    These carefully selected ingredients work together to create a dish that is not only appealing to the palate but also nutritious. Now, let’s explore dietary substitutions to ensure everyone can enjoy this recipe.

    Dietary Substitutions to Customize Your Italian Chicken Saltimbocca

    Dietary needs can vary, and this dish can be adapted accordingly without compromising flavor or experience. Here are some suggestions for substitutions:

    1. For a Vegan Option:
    2. Chicken: Substitute traditional chicken with thinly sliced, marinated tofu or eggplant.
    3. Prosciutto: Use a plant-based prosciutto-style product to maintain a similar taste profile.
    4. White Wine: Opt for vegetable broth.

    5. For Gluten-Free:

    6. Flour: Substitute all-purpose flour with gluten-free flour or cornstarch.
    7. Breadcrumbs (if desired): Use gluten-free alternatives.

    8. For Lower Calorie Options:

    9. Fat Content: Utilizing cooking spray instead of olive oil can help reduce the total calorie count.
    10. Prosciutto: Consider turkey bacon, as it tends to be lower in calories.

    11. Spice it up: For those who enjoy a bit of heat, consider adding crushed red pepper flakes to the final sauce.

    These dietary adaptations allow anyone to savor the flavors of Italian Chicken Saltimbocca without worry, making the dish a fantastic choice for inclusive gatherings.

    How to Prepare the Perfect Italian Chicken Saltimbocca: Step-by-Step Guide

    Creating Italian Chicken Saltimbocca is a breeze when following these step-by-step instructions. Let’s get started on bringing this delightful recipe from your kitchen to the dining table.

    Step-by-Step Instructions

    1. Prepare the Chicken: Place the chicken breasts between two sheets of plastic wrap. Use a meat mallet to pound each piece gently until about 1/2 inch thick. This step ensures even cooking.

    2. Season the Chicken: Sprinkle salt and pepper to taste on both sides of the chicken. Seasoning is crucial for enhancing the flavor profile of the dish.

    3. Assemble the Saltimbocca: Lay two sage leaves on each piece of chicken, then top with two slices of prosciutto. Press them down lightly so they adhere. This layering ensures the flavors meld beautifully during cooking.

    4. Dredge in Flour (Optional): If you choose to use flour, lightly dredge each piece of prosciutto-topped chicken in flour. Shake off any excess. This step helps create a crispier texture when sautéed.

    5. Heat Olive Oil: In a large skillet, heat the olive oil over medium heat. Ensure that the pan is hot enough to create a satisfying sizzle when you add the chicken.

    6. Cook the Chicken: Place the chicken in the skillet, prosciutto-side down. Cook for about 4-5 minutes on each side, or until golden brown and cooked through. If it looks a little crisped at the edges, that’s a sign of extra flavor.

    7. Remove and Keep Warm: Once cooked, remove the chicken from the skillet and keep it warm on a plate covered loosely with aluminum foil. This retention of warmth ensures the chicken stays juicy.

    8. Create the Sauce: In the same skillet, add the white wine (or chicken broth) and scrape up the browned bits on the bottom of the pan (these are flavor gold!). Cook for about 3 minutes, allowing it to reduce slightly.

    9. Finish with Lemon: Squeeze in the juice of one lemon, adjust seasoning with salt and pepper if needed, and return the chicken to the skillet for a final coating in the sauce.

    10. Serve: Plate the chicken, drizzling the sauce on top and garnishing with fresh lemon wedges and additional sage if desired.

    By following these simple yet effective steps, you’ll create a mouth-watering dish that will impress everyone at the table. Each step can be adapted as needed, allowing for variations based on dietary preferences.

    Mastering Italian Chicken Saltimbocca: Advanced Tips and Variations

    Once you’ve nailed the classic Italian Chicken Saltimbocca, consider these advanced tips and variations to elevate your dish:

    1. Play with Flavors: Experiment with adding ingredients like sun-dried tomatoes or olives to the sauce for a Mediterranean twist. These ingredients can offer a different flavor profile that complements the chicken beautifully.

    2. Cheese Lover’s Delight: Mix in some fresh mozzarella before serving; it adds a creamy texture that perfectly contrasts with the salty prosciutto.

    3. Herb Infusions: Integrate other herbs like thyme or rosemary alongside sage to amplify the aroma and flavor complexity. Experimenting with herbs will take your dish to the next level.

    4. Different Proteins: Switch out chicken for veal or fish, as these proteins also lend themselves well to the same preparation methods.

    5. Meal Prep: If you want to enjoy this dish on a busy weeknight, consider prepping the chicken in advance. Assemble the prosciutto and sage, cover and refrigerate. When you’re ready, follow the cooking steps for a quick meal.

    Through these tips and variations, you ensure that Italian Chicken Saltimbocca remains an exciting part of your collection of chicken recipes, adaptable to seasons and assorted tastes.

    How to Store Italian Chicken Saltimbocca: Best Practices

    Proper storage is key to maintaining the quality and flavor of leftover Italian Chicken Saltimbocca. Follow these best practices for refrigeration, freezing, and reheating:

    Refrigeration

    • Cooling: Allow Italian Chicken Saltimbocca to cool completely at room temperature before you store it. This step prevents condensation, which can lead to sogginess.
    • Storing: Place your chicken in an airtight container with any remaining sauce. It can be stored in the refrigerator for up to 3 days.

    Freezing

    • Freezing: If you have leftovers beyond three days, consider freezing for longer preservation. Ensure the dish is cooled fully, wrap it tightly in plastic wrap, then place it in an airtight freezer-safe container or vacuum seal.
    • Duration: You can safely freeze Italian Chicken Saltimbocca for up to 2 months.

    Reheating

    • Thawing: For the best results, thaw the frozen chicken in the refrigerator overnight before reheating.
    • Reheating: Warm in a preheated oven at 350°F (175°C) for about 15-20 minutes or until heated through. To maintain moisture, you can add a splash of white wine or chicken broth and cover with foil.

    Following these storage practices ensures that you can enjoy your Italian Chicken Saltimbocca at its best, even days after you’ve initially prepared it.

    Nutritional Value of Italian Chicken Saltimbocca

    Maintaining a diet-conscious approach while preparing delicious meals is key for many cooks. Here’s a breakdown of the nutritional value of Italian Chicken Saltimbocca per serving:

    Nutritional Information (Approximate Values):
    Calories: 350
    Protein: 30g
    Total Fat: 15g
    Saturated Fat: 4g
    Carbohydrates: 10g
    Dietary Fiber: 1g
    Sugars: 0g
    Sodium: 700mg
    Cholesterol: 80mg

    Health Benefits

    • High Protein: Essential for muscle growth and satiety, this dish serves as an excellent option for those looking to increase protein intake.
    • Low Carbohydrate: Suitable for low-carb diets or anyone wanting to maintain energy levels without excess sugars.
    • Moderate Fat Content: With predominantly healthy fats from olive oil, this recipe promotes overall cardiovascular health.

    These nutritional values illustrate that Italian Chicken Saltimbocca can be a wholesome addition to your collection of chicken recipes, ensuring you can savor indulgent flavors without compromising on health.

    FAQs: Frequently Asked Questions About Italian Chicken Saltimbocca

    1. Can I use chicken thighs instead of breasts?

    Absolutely! Chicken thighs will also work wonderfully, offering a richer flavor and slightly different texture.

    2. How do I make this dish gluten-free?

    To make the recipe gluten-free, simply replace all-purpose flour with gluten-free flour. Ensure that the prosciutto and chicken broth (if used) are also certified gluten-free.

    3. Can I prepare this dish ahead of time?

    Yes! You can assemble the chicken with the prosciutto and sage a few hours ahead of time and refrigerate until you’re ready to cook. This prep helps in expediting the cooking process.

    4. What can I serve with Italian Chicken Saltimbocca?

    Consider pairing with a side of garlic mashed potatoes, roasted vegetables, or a fresh arugula salad to create a balanced meal.

    5. Can I use a different cooking method?

    While frying gives the best texture, you could also bake the stuffed chicken at 375°F (190°C) for about 25-30 minutes until cooked through.

    With these FAQs, you’re armed with the knowledge to tackle any concerns with confidence, allowing you to fully enjoy the process of making Italian Chicken Saltimbocca.

    Conclusion

    Italian Chicken Saltimbocca is more than just a meal; it’s an invitation to enjoy flavors that bring families and friends together. Easy to prepare, adaptable to various dietary needs, and rich in nutrition, this recipe acts as the perfect embodiment of the warmth and affection found in Italian cooking. With its impressive flavor profile and visual appeal, it’s bound to become a favorite in your collection of chicken recipes, whether it’s for a cozy dinner at home or an extravagant feast with loved ones.

    So gather your ingredients, roll up your sleeves, and let the beautiful aroma of Italian Chicken Saltimbocca waft through your kitchen, inspiring everyone to indulge in a delightful culinary experience. Enjoy every bite!

  • Baked Dijon Chicken Thighs

    Baked Dijon Chicken Thighs

    Baked Dijon Chicken Thighs: A Tropical Delight

    Introduction to Baked Dijon Chicken Thighs

    When it comes to easy and delightful meals, baked Dijon chicken thighs stand out as a definitive favorite among home cooks and food enthusiasts alike. This enticing dish not only serves as a delicious dinner option, but also fits perfectly into a balanced lifestyle. Chicken thighs, known for their rich flavor and succulent texture, become an extraordinary centerpiece when coated with tangy Dijon mustard and baked to perfection.

    What truly sets this recipe apart is its simplicity. With just a few key ingredients and minimal prep time, even busy parents or students can whip up a wholesome meal without stress. Packed with protein, these chicken thighs are not only satisfying but also nutritious, making them a great choice for health-conscious individuals.

    Moreover, this recipe can easily be adapted to accommodate various dietary needs. Whether you’re following a gluten-free diet, seeking low-calorie options, or looking for dairy-free alternatives, this dish can be customized to meet your specific requirements. In essence, baked Dijon chicken thighs offer a universal appeal—ideal for busy professionals, newlyweds looking for romantic dinner ideas, travelers craving comfort food, and seniors needing simple nutrition. So, let’s embark on this culinary journey and explore the magic of baked Dijon chicken thighs!

    Benefits and Advantages of Baked Dijon Chicken Thighs

    Baked Dijon chicken thighs are not only delicious, but they also bring an array of benefits that make them a go-to recipe for various lifestyles and dietary preferences. One of the most significant advantages is the ease of preparation. This dish allows you to quickly combine ingredients, pop them in the oven, and let the magic happen—perfect for home cooks with busy schedules.

    From a health perspective, chicken thighs are an excellent source of protein, essential for muscle repair and growth. They contain necessary nutrients like iron, zinc, and Vitamin B12, which support energy levels and overall health. Furthermore, the inclusion of Dijon mustard not only adds fabulous flavor but also delivers health benefits; it contains antioxidants and may aid digestion.

    In addition to being healthy, baked Dijon chicken thighs are versatile. They can be served with a variety of sides, from roasted vegetables to grains, providing endless possibilities for customization. This dish is also perfect for meal prepping, allowing busy parents or working professionals to have a nutritious meal ready to go throughout the week.

    Another appealing aspect is the adaptability of this recipe. It can be a crowd-pleaser at family gatherings, a great option for romantic date nights, or even a fancy dish for hosting guests. In summary, baked Dijon chicken thighs are a quick, healthy, and incredibly flavorful option that fit seamlessly into any lifestyle.

    Ingredients Overview

    Essential Ingredients for Baked Dijon Chicken Thighs

    Here’s a complete list of the ingredients you’ll need to create these mouthwateringly delicious baked Dijon chicken thighs:

    • Chicken Thighs (4-6 pieces): The star of the show, offering juicy, flavorful meat.
    • Dijon Mustard (1/4 cup): Adds tanginess and depth, enhancing the flavor profile.
    • Olive Oil (2 tablespoons): Helps the mustard adhere to the chicken and adds healthy fats.
    • Garlic Cloves (3, minced): Provides aromatic flavor and health benefits.
    • Honey (2 tablespoons): Balances the mustard’s acidity and adds sweetness.
    • Salt (1 teaspoon): Highlights the flavors of the dish.
    • Black Pepper (1/2 teaspoon): Adds a touch of spiciness.
    • Fresh Rosemary or Thyme (1 tablespoon, minced): Offers fragrant herbal notes for added complexity.

    Dietary Options:
    Gluten-Free: This recipe is inherently gluten-free.
    Low-Calorie: Swap honey with a low-calorie sweetener to reduce sugar content.
    Vegan Option: Replace chicken thighs with hearty vegetables like eggplant or tofu, and use a vegan Dijon mustard.

    Dietary Substitutions to Customize Your Baked Dijon Chicken Thighs

    Adapting this recipe for various dietary needs is straightforward. If you prefer boneless chicken thighs, feel free to substitute, noting that they may require slightly shorter cooking times. For those looking to reduce fat intake, skinless chicken thighs will work just as well.

    For individuals on a low-carb diet, simply remove the honey or replace it with a sugar-free alternative like stevia. If you want to go for a spicy twist, adding a pinch of cayenne pepper or swapping the garlic for chili garlic sauce can enhance the flavor profile significantly.

    If you have a busy week ahead and want to incorporate meal prep, the baked Dijon chicken thighs can be cooked in bulk. Simply double the recipe, store the extra servings in airtight containers, and enjoy them for lunch or dinner throughout the week.

    This adaptability makes baked Dijon chicken thighs a fantastic option for anyone, regardless of dietary restrictions or preferences.

    How to Prepare the Perfect Baked Dijon Chicken Thighs: Step-by-Step Guide

    Creating tender and flavorful baked Dijon chicken thighs is easier than you might think. Follow these step-by-step instructions to achieve a delicious, satisfying meal that your family and friends will adore.

    1. Preheat Your Oven: Start by preheating your oven to 425°F (220°C). This high temperature will help create crispy skin and juicy meat.

    2. Prepare the Marinade: In a medium-sized bowl, mix together 1/4 cup of Dijon mustard, 2 tablespoons of olive oil, 3 minced garlic cloves, 2 tablespoons of honey, 1 teaspoon of salt, and 1/2 teaspoon of black pepper. This marinade is what brings your chicken thighs to life.

    3. Coat the Chicken Thighs: Place your chicken thighs in a large mixing bowl. Pour the marinade over the chicken and toss it to ensure each piece is evenly coated. If you have the time, marinating for at least 30 minutes in the refrigerator will enhance the flavors even more.

    4. Arrange in Baking Dish: Once coated, transfer the chicken thighs to a baking dish, placing them skin-side up. Ensure there’s a little space between each thigh to allow even cooking.

    5. Add Fresh Herbs: Sprinkle the minced rosemary or thyme over the chicken thighs, adding an aromatic punch. Fresh herbs elevate the dish!

    6. Bake in Oven: Place the baking dish in your preheated oven and bake for about 35-45 minutes, or until the internal temperature of the chicken reaches 165°F (75°C). The skin should be golden brown and crispy.

    7. Broil for Extra Crispiness (Optional): For an extra crispy finish, consider broiling the chicken thighs for an additional 3-5 minutes after baking. Keep a close eye on them to prevent burning.

    8. Let Rest: After coming out of the oven, let the chicken thighs rest for about 5 minutes. This allows the juices to redistribute, ensuring every bite is tender and juicy.

    9. Serve and Enjoy: Serve your baked Dijon chicken thighs hot, alongside your favorite roasted vegetables, rice, or a fresh salad.

    Pro Tips:

    • For added depth of flavor, consider brining your chicken thighs for a couple of hours before marinating.
    • Gluten-free soy sauce can be added for an umami boost if you want to experiment with flavors.
    • This dish works great on a grill as well, just adjust the cooking times accordingly.

    By following these steps, you’ll have a beautiful dish of baked Dijon chicken thighs that impresses both in flavor and presentation!

    Mastering Baked Dijon Chicken Thighs: Advanced Tips and Variations

    To elevate your baked Dijon chicken thighs even further, consider these advanced tips and variations to perfect the dish or tailor it to your taste.

    1. Add a Citrus Element: Incorporating lemon or lime juice into the marinade not only adds brightness but also enhances the acidity, balancing the richness of the chicken. Simply squeeze half a lemon into the marinade before coating your chicken.

    2. Try Different Mustards: While Dijon mustard is the traditional choice, experimenting with different types of mustard can yield delicious results. Spicy brown mustard or honey mustard can add varying flavor profiles.

    3. Infuse with Spices: Mix in spices like paprika or smoked paprika to the marinade for a smoky twist. This elevates the dish and gives a unique flair to the baked chicken thighs.

    4. Experiment with Vegetable Combinations: For a one-pan meal, consider placing sliced onions, carrots, and bell peppers in the baking dish with the chicken. They’ll roast beautifully and soak up the flavorful drippings.

    5. Serve with a Sauce: Create a quick sauce using the drippings after baking. Simply add a splash of chicken broth and reduce on the stove for a rich, savory glaze to pour over the chicken thighs.

    By using these advanced techniques, your baked Dijon chicken thighs will transform into a culinary masterpiece that’s sure to impress anyone at the dinner table!

    How to Store Baked Dijon Chicken Thighs: Best Practices

    When it comes to storing your delicious baked Dijon chicken thighs, there are best practices to ensure they remain fresh and flavorful for longer:

    1. Refrigeration: Allow the chicken thighs to cool down to room temperature. Once cooled, transfer them to an airtight container, propping the lid to allow steam to escape initially. They can be refrigerated for up to 4 days.

    2. Freezing: If you wish to make a bulk batch, consider freezing portions of the cooked chicken. Wrap individual pieces in plastic wrap or foil, then place them in a sealed freezer bag. This will help prevent freezer burn. Properly packaged, the chicken can be stored in the freezer for up to 3 months.

    3. Reheating: When ready to enjoy leftovers, preheat your oven to 350°F (175°C). Place the chicken thighs in an oven-safe dish, cover with aluminum foil to maintain moisture, and heat for about 20-25 minutes until warmed through. Alternatively, for a quicker option, you can use a microwave, heating for about 2-3 minutes on medium power.

    By following these storage and reheating methods, you can enjoy your baked Dijon chicken thighs several days after they’ve been made—perfect for meal prepping or savoring delicious leftovers!

    Nutritional Value of Baked Dijon Chicken Thighs

    Understanding the nutritional benefits of baked Dijon chicken thighs can help you make informed decisions about your meals. Here’s a standard nutritional breakdown for one serving (assuming a serving size of one chicken thigh weighing approximately 130 g):

    • Calories: 250
    • Protein: 22 g
    • Carbohydrates: 5 g
    • Fat: 17 g
    • Saturated Fat: 3 g
    • Cholesterol: 90 mg
    • Sodium: 400 mg
    • Fiber: 0 g
    • Sugar: 3 g

    These values may vary based on the specific ingredients and portion sizes you choose, especially if you’re opting for lower-fat options or adjusting the marinade. Remember that chicken thighs provide a wealth of nutrients and dietary benefits, including protein, essential vitamins, and healthy fats without an overload of carbohydrates.

    Moreover, if you’re interested in keeping your dish lighter, consider using skinless chicken thighs to significantly reduce fat content while still enjoying all the robust flavors of the Dijon mustard marinade.

    This nutritional overview reinforces why baked Dijon chicken thighs make for a perfect dish that’s healthy and satisfying!

    FAQs: Frequently Asked Questions About Baked Dijon Chicken Thighs

    1. Can I use bone-in chicken thighs instead of boneless?

    Yes! Bone-in chicken thighs are a great substitute, though they will require a slightly longer cooking time. Just ensure the internal temperature reaches 165°F (75°C).

    2. What can I substitute for Dijon mustard?

    If Dijon mustard is not available, you can use yellow mustard, spicy brown mustard, or a mix of mayonnaise and vinegar for a similar tangy flavor.

    3. How do I make this dish gluten-free?

    This recipe is already gluten-free! Just ensure the mustard and any other condiments you use are gluten-free as well.

    4. Can I marinate the chicken thighs overnight?

    Absolutely! Marinating the chicken overnight allows the flavors to deeply penetrate the meat, making it even more flavorful.

    5. What sides pair well with baked Dijon chicken thighs?

    Consider serving the chicken with roasted vegetables, a fresh garden salad, quinoa, or even mashed potatoes. These side dishes complement the rich flavors beautifully!

    6. Can I use this recipe for other types of meat?

    Certainly! This marinade also works well with pork chops or baked salmon, giving diverse options for your meal planning.

    With this comprehensive guide, you’re all set to create mouthwatering baked Dijon chicken thighs that will become a staple in your kitchen. Enjoy the simplicity and flavor that this recipe brings to your dining table!

  • Easy Dijon Chicken Garlic Wine Sauce

    Easy Dijon Chicken Garlic Wine Sauce

    Easy Dijon Chicken Garlic Wine Sauce: A Tropical Delight

    Introduction to Easy Dijon Chicken Garlic Wine Sauce

    Cooking can sometimes feel like a daunting task, especially for busy families and individuals constantly on the go. However, if you’re seeking quick, delicious, and nutritious chicken recipes, look no further than the Easy Dijon Chicken Garlic Wine Sauce. This delightful dish brings the perfect balance of flavors right to your dinner table, transforming ordinary chicken into an extraordinary culinary experience.

    What makes this recipe stand out? First and foremost, its simplicity. The ingredients come together effortlessly, making it ideal for beginners and seasoned cooks alike. Loaded with the rich tang of Dijon mustard, the aromatic embrace of garlic, and a splash of white wine, this sauce enhances the natural flavors of chicken without overwhelming them.

    Not only is this recipe a breeze to prepare, but it also provides multiple health benefits. Chicken is a great source of lean protein, while garlic is known for its immune-boosting properties and potential heart health benefits. The inclusion of Dijon mustard not only adds flavor but offers lower calories compared to heavier sauces while still being supremely satisfying.

    Additionally, this dish is incredibly versatile. It can be adapted to suit various dietary preferences—whether you’re gluten-free, on a low-carb plan, or simply looking for a lighter option, the Easy Dijon Chicken Garlic Wine Sauce checks all the boxes. As you dive into this recipe, you’re sure to discover a new family favorite that caters to your busy lifestyle.

    Benefits and Advantages of Easy Dijon Chicken Garlic Wine Sauce

    The Easy Dijon Chicken Garlic Wine Sauce is not only a delightful culinary creation but also a practical choice for many cooks. Here are some of the key benefits and advantages that make this recipe stand out among other chicken recipes:

    1. Simplicity and Speed: In today’s fast-paced world, the ability to whip up a delicious meal in under 30 minutes is invaluable. This recipe requires minimal preparation, allowing busy parents, students, and professionals to enjoy a home-cooked meal without spending hours in the kitchen.

    2. Health Benefits: The ingredients chosen for this dish are not just flavorful but also hold health benefits. For instance, chicken breast provides a healthy dose of protein essential for muscle repair and energy, while garlic and Dijon mustard are loaded with antioxidants and nutrient compounds. This meal allows you to provide your family with comfort food that doesn’t compromise on health.

    3. Dietary Flexibility: This dish can easily cater to a range of dietary needs. If you’re looking for gluten-free options, simply swap out any gluten-containing products. For those following a vegan diet, substituting chicken with plant-based alternatives ensures everyone can enjoy a tasty meal.

    4. Flavor Profile: The combination of Dijon mustard, garlic, and white wine creates a sauce that is not only tangy but also savory, making it a crowd pleaser at any dining table. It brings out the intrinsic flavors of the chicken and elevates your cooking game.

    5. Perfect for Meal Prep: This recipe is a fantastic option for meal prep enthusiasts. It’s ideal for preparing in batches and can easily be paired with various sides, such as roasted vegetables or whole grains, giving you multiple healthy meal options throughout the week.

    With its ease of preparation, health advantages, and appealing flavor, the Easy Dijon Chicken Garlic Wine Sauce is a winning recipe among popular chicken recipes. Suitable for every occasion, from a weeknight family dinner to entertaining guests, it’s sure to impress.

    Ingredients Overview

    Essential Ingredients for Easy Dijon Chicken Garlic Wine Sauce

    To create the delightful Easy Dijon Chicken Garlic Wine Sauce, you will need the following ingredients:

    • 4 boneless, skinless chicken breasts (approximately 1.5-2 lbs): Lean protein that serves as the main component of the dish.
    • 2 tablespoons Dijon mustard: Adds a tangy flavor, rich in antioxidants while being low in calories.
    • 4 cloves garlic, minced: Known for its numerous health benefits, including boosting immunity and providing flavor.
    • 1 cup white wine (like Sauvignon Blanc): Enhances the sauce and adds depth; you may opt for a non-alcoholic cooking wine if preferred.
    • 1 tablespoon olive oil: A healthy fat that aids in cooking and enhances flavor; can be replaced with avocado oil or butter for different flavor nuances.
    • Salt and pepper to taste: Essential for seasoning the dish; consider using sea salt and freshly cracked pepper for the best flavor.
    • Fresh parsley, chopped, for garnishing (optional): Adds freshness and a pop of color to your plate.

    Dietary Substitutions to Customize Your Easy Dijon Chicken Garlic Wine Sauce

    To cater to various dietary needs or ingredient availability, here are some substitution suggestions:

    • For a Low-Carb Option: Use zoodles (zucchini noodles) or cauliflower rice as a side instead of traditional rice or pasta.
    • For a Gluten-Free Version: Ensure that the Dijon mustard is certified gluten-free. Substituting gluten-free chicken broth can work well if you’re looking to enhance the sauce even more.
    • For Vegan Adaptation: Substitute the chicken with firm tofu or seitan. The preparation remains the same, allowing the sauce to soak into the substitute.
    • For Reduced Fat: Instead of using olive oil, consider using a non-stick spray or cooking the chicken in a non-stick skillet to reduce added fat.
    • Flavor Variations: Substitute the white wine with vegetable broth for a non-alcoholic alternative or even apple cider vinegar for a zestier sauce.

    With these ingredient options and substitutions, the Easy Dijon Chicken Garlic Wine Sauce becomes adaptable for various dietary requirements, illustrating just how versatile this recipe can be.

    How to Prepare the Perfect Easy Dijon Chicken Garlic Wine Sauce: Step-by-Step Guide

    Now that you have all your ingredients ready, let’s get into the preparation of this delightful Easy Dijon Chicken Garlic Wine Sauce. Follow these step-by-step instructions for a mouthwatering dish:

    1. Prepare the Chicken: Start by patting the chicken breasts dry with paper towels. Season both sides generously with salt and pepper. This step ensures the chicken is well-seasoned right from the start.

    2. Heat the Oil: In a large skillet, heat the olive oil over medium heat. Wait until the oil shimmers before adding the chicken. This ensures that the chicken gets a lovely sear.

    3. Sear the Chicken: Once the oil is hot, add the seasoned chicken breast to the skillet. Allow them to cook for about 5-7 minutes on each side or until golden brown and cooked through. For more flavor, you may consider adding herbs like thyme or rosemary during the cooking process.

    4. Remove Chicken: After searing, transfer the chicken to a plate and cover with foil to keep warm while you prepare the sauce.

    5. Sauté Garlic: In the same skillet, lower the heat to medium-low. Add in the minced garlic, sautéing for about 1-2 minutes until fragrant. Be mindful not to burn the garlic, as it can become bitter.

    6. Deglaze with Wine: Slowly pour the cup of white wine into the skillet, deglazing by scraping up any browned bits stuck to the pan. This step is essential for building flavor in the sauce. Allow the wine to simmer for about 3-4 minutes.

    7. Add Dijon Mustard: Whisk in the Dijon mustard to the simmering sauce. Ensure the mustard fully combines, allowing the flavors to meld beautifully.

    8. Return Chicken to the Skillet: Place the chicken back into the skillet and spoon the sauce over the top. Let it simmer in the sauce for another 3-5 minutes. This process ensures the chicken absorbs the rich flavors.

    9. Garnish and Serve: Once done, garnish with freshly chopped parsley for a pop of color. Plate the chicken along with a generous amount of sauce. Serve over rice, whole grains, or alongside fresh vegetables for a balanced meal.

    10. Customization Notes: If you prefer a thicker sauce, consider mixing a tablespoon of cornstarch with a little water before adding it to the sauce. Alternatively, for a lighter version, you can let the wine reduce further for a more concentrated flavor.

    With these straightforward steps, you’re on your way to creating a flavorful and satisfying Easy Dijon Chicken Garlic Wine Sauce that perfectly fits into your busy lifestyle.

    Mastering Easy Dijon Chicken Garlic Wine Sauce: Advanced Tips and Variations

    Once you’ve mastered the basic recipe, why not play around with different flavors and techniques? Here are some advanced tips and variations to elevate your Easy Dijon Chicken Garlic Wine Sauce experience:

    1. Experiment with Wine: While white wine works beautifully in this recipe, you might try using a dry rosé or even a splash of sherry for a different flavor profile.

    2. Add Vegetables: Enhance nutrition and flavor by incorporating vegetables like spinach, mushrooms, or sun-dried tomatoes into the sauce as it simmers. They add depth and color to your dish.

    3. Incorporate Cheese: For those who love cheese, consider adding a sprinkle of grated Parmesan or feta cheese before serving for an extra layer of flavor.

    4. Spice Options: To spice things up, add a pinch of red pepper flakes to the garlic while sautéing or a dash of chili powder for heat.

    5. Add a Creamy Element: If you prefer a richer sauce, stir in a tablespoon of heavy cream or Greek yogurt at the end of cooking. This creates a silky sauce that enhances the overall creaminess without overpowering the Dijon flavor.

    6. Make it a One-Pan Meal: Feel free to toss in some baby potatoes or quinoa along with the chicken, allowing them to absorb the flavors of the sauce as they cook.

    With these variations, you can transform a basic chicken recipe into countless delicious options, ensuring it never gets old. Experimentation is the key to culinary mastery, making the Easy Dijon Chicken Garlic Wine Sauce a perfect base for your creative cooking!

    How to Store Easy Dijon Chicken Garlic Wine Sauce: Best Practices

    If you’ve made the Easy Dijon Chicken Garlic Wine Sauce in larger quantities, you might be wondering how to store the leftovers properly. Here are the best practices for refrigeration, freezing, and reheating:

    1. Refrigeration: Allow the chicken to cool to room temperature before transferring it to an airtight container. Store it in the refrigerator, where it can last for up to 3-4 days. Reheating on the stovetop with a splash of chicken broth or water can help refresh the sauce.

    2. Freezing: For long-term storage, consider freezing the chicken along with the sauce. Place it in a freezer-safe container or a heavy-duty freezer bag, making sure to remove extra air. The dish can be stored for about 3 months. When ready to eat, thaw it overnight in the refrigerator and reheat thoroughly before serving.

    3. Reheating: For the best texture and flavor when reheating, place the chicken and sauce in a skillet over low-medium heat. Stir gently until warmed through. You can also reheat in a microwave; however, be cautious not to overheat, as it may dry out the chicken.

    By following these storage methods, you can enjoy your Easy Dijon Chicken Garlic Wine Sauce even days later, ensuring no deliciousness goes to waste.

    Nutritional Value of Easy Dijon Chicken Garlic Wine Sauce

    Understanding the nutritional value of the Easy Dijon Chicken Garlic Wine Sauce helps you make informed dietary choices. Below is an approximate breakdown of the nutritional content per serving (based on four servings):

    • Calories: 320-350 kcal
    • Protein: 38-40 g
    • Fat: 10-12 g
    • Carbohydrates: 8-10 g
    • Fiber: 0.5 g
    • Sugars: 1 g
    • Sodium: 600-700 mg

    Nutritional Highlights

    • High in Protein: The chicken provides a substantial amount of protein, crucial for muscle repair and overall health.
    • Low in Carbohydrates: With around 8-10 grams per serving, this dish is suitable for keto or low-carb diets.
    • Rich in Vitamins: Garlic, along with any vegetables you choose to add, contributes valuable vitamins and minerals, promoting good health.
    • Healthy Fats: The use of olive oil offers a source of monounsaturated fats, which are heart-healthy and beneficial in moderation.

    By enjoying the Easy Dijon Chicken Garlic Wine Sauce, you not only treat your tastebuds but also fuel your body with this wholesome meal.

    FAQs: Frequently Asked Questions About Easy Dijon Chicken Garlic Wine Sauce

    Q1: Can I use chicken thighs instead of breasts?
    Yes! Chicken thighs provide a richer flavor and remain moist after cooking. Adjust the cooking time slightly, as they may require a few additional minutes.

    Q2: Is the white wine necessary for the recipe?
    While the white wine enhances the sauce’s flavor, you can substitute it with chicken or vegetable broth for a non-alcoholic option.

    Q3: Can I prepare this dish ahead of time?
    Absolutely! The flavors of the sauce intensify when prepared in advance. Store as previously described, and reheat gently before serving.

    Q4: Is there a vegan alternative to the chicken?
    Yes! Firm tofu or tempeh can be used as a substitute for chicken in this recipe. Make sure to follow the same preparation steps for best results.

    Q5: How can I make the sauce thicker?
    For a thicker sauce, you can mix a tablespoon of cornstarch with a little water and add it to the sauce while it simmers. Alternatively, let it reduce longer on low heat.

    Q6: What can I serve alongside this dish?
    This sauce pairs beautifully with rice, quinoa, steamed vegetables, or a fresh green salad.

    Q7: How long will leftovers last in the fridge?
    Leftovers typically last for 3-4 days in the refrigerator. Make sure to store them in an airtight container.

    With the help of these FAQs, you can confidently prepare the Easy Dijon Chicken Garlic Wine Sauce while making any adjustments to suit your dietary preferences and needs.


    This Easy Dijon Chicken Garlic Wine Sauce serves as a fantastic meal for any occasion, providing not only a delicious flavor experience but also various health benefits. Enjoy crafting this dish in your home kitchen, knowing it caters to multiple dietary preferences and is simple enough for anyone to master. Happy cooking!

  • Peach Chicken

    Peach Chicken

    Peach Chicken: A Tropical Delight

    Introduction to Peach Chicken

    In the world of chicken recipes, few dishes can capture the essence of summer quite like Peach Chicken. This delightful dish combines succulent, juicy chicken with the sweet, sun-ripened flavor of peaches, creating a mouthwatering symphony of tastes that will leave your taste buds rejoicing. Whether you’re a busy parent juggling work and family meals or an adventurous traveler looking to recreate a taste of home, this recipe is as versatile as it is delicious.

    What makes Peach Chicken truly remarkable is its simplicity. With a small number of ingredients and straightforward instructions, even novice home cooks can whip up this dish in no time. Plus, it’s a great choice for health-conscious individuals. The lean protein from the chicken paired with the vitamins and antioxidants found in peaches makes this dish a nutritious option for any meal. Think of it as a harmony of flavor, health, and convenience all on one plate.

    Importantly, this recipe caters to various dietary needs as well. By replacing certain ingredients, you can easily adapt it for vegan or gluten-free diets, making it a crowd-pleaser for all your family and friends. Indeed, Peach Chicken is the dish to inspire your cooking endeavors, with endless possibilities and healthy benefits.

    Benefits and Advantages of Peach Chicken

    Peach Chicken not only tantalizes your palate but also offers numerous advantages that make it stand out among other chicken recipes. Here are some key benefits to consider:

    1. Ease of Preparation: For those with a busy lifestyle, Peach Chicken is a lifesaver. The preparation time is minimal, allowing you to serve a delightful meal without spending hours in the kitchen. A quick marinade followed by a simple cooking process makes this dish a winning choice for weekdays or special occasions.

    2. Health Benefits: Chicken is often regarded as a lean source of protein, vital for muscle development and overall health. By incorporating peaches, you’re not only adding sweetness but an abundance of vitamins A and C, potassium, and dietary fiber, which support various bodily functions. This dish fits neatly into a balanced diet, reinforcing your health goals while still being flavorful.

    3. Versatility: One of the best attributes of Peach Chicken is its adaptability. You can grill, bake, or sauté the chicken according to your preference or cooking method. Additionally, it serves beautifully with a wide range of sides, such as quinoa, rice, or fresh salads, ensuring it can harmonize with various meals and dietary styles.

    4. Diet-Friendly Options: This recipe can easily be modified for those with specific dietary requirements. Want to go vegan? Substitute chicken with tofu or chickpeas. Need a gluten-free option? Use gluten-free soy sauce or other compatible ingredients. The ability to cater to dietary restrictions means this dish can be enjoyed by everyone around the table.

    In short, the advantages of Peach Chicken extend beyond just taste. This dish makes life easier while providing health benefits, versatility, and adaptability, positioning it as a go-to recipe in your home.

    Ingredients Overview

    Essential Ingredients for Peach Chicken

    To prepare Peach Chicken, you will need the following ingredients:

    • Chicken Breasts: 4 boneless, skinless chicken breasts (lean protein)
    • Fresh Peaches: 2 ripe peaches, diced (natural sweetness, vitamins)
    • Soy Sauce: 1/4 cup (umami flavor; use tamari for gluten-free)
    • Honey or Maple Syrup: 2 tablespoons (natural sweetener; optional)
    • Olive Oil: 2 tablespoons (healthy fats)
    • Garlic: 3 cloves, minced (adds flavor and health benefits)
    • Ginger: 1 teaspoon, grated (enhances taste and aids digestion)
    • Salt and Pepper: to taste (seasoning)
    • Fresh Basil or Cilantro: for garnish (adds freshness; optional)

    Specialized Ingredient Notes

    • Vegan Option: Substitute chicken with firm tofu or chickpeas to make the dish plant-based while maintaining its delicious flavor profile.
    • Gluten-Free Option: Ensure the soy sauce is gluten-free (such as tamari) for those with sensitivities to gluten.
    • Reduced-Calorie Option: Swap out honey/maple syrup for a sugar substitute that fits your dietary needs.

    This recipe harmonizes healthy ingredients with vibrant flavors, making it a nutritious addition to your collection of chicken recipes.

    Dietary Substitutions to Customize Your Peach Chicken

    When it comes to customizing your Peach Chicken recipe, substitution options abound! Here are some suggestions to accommodate different dietary preferences:

    1. Meat Alternatives: To prepare a vegan version, opt for tofu or seitan. Tofu absorbs flavors well, making it an excellent alternative. If you’re looking for a heartier flavor, consider using chickpeas or tempeh, which also provide a protein boost.

    2. Sweeteners: If you’re aiming to reduce sugar, use stevia or erythritol instead of honey or maple syrup. Natural fruit juice, such as apple or orange, may also sweeten the dish without added sugars.

    3. Fat Options: If you’re monitoring fat intake, consider spraying the pan with cooking spray instead of using olive oil. For a different flavor, you could use avocado oil or coconut oil, which also withstand high heat.

    4. Herb Variations: While fresh basil or cilantro is recommended for garnish, you can experiment with rosemary or thyme for a more robust flavor profile.

    By making these substitutions, you can adapt Peach Chicken to fit your lifestyle and dietary needs while enjoying its delightful flavors just the same.

    How to Prepare the Perfect Peach Chicken: Step-by-Step Guide

    Now that you’re ready to make this wonderful Peach Chicken, follow these easy, step-by-step instructions to achieve the best results:

    1. Marinate the Chicken: In a large mixing bowl, combine the soy sauce, honey (or maple syrup), olive oil, minced garlic, and grated ginger. Whisk until well blended. Add the chicken breasts into the marinade, ensuring they are fully coated. Cover and refrigerate for about 30 minutes to 1 hour. This step enhances the flavor!

    2. Prepare the Peaches: While the chicken marinates, wash the peaches, remove the pits, and dice them into small chunks. Set them aside for later use.

    3. Heat the Pan: Set a large skillet over medium heat and add a splash of olive oil to prevent sticking. Allow the pan to heat for about 2-3 minutes, aiming for a hot but not smoking surface.

    4. Cook the Chicken: Take the marinated chicken out of the refrigerator and place it in the hot skillet. Cook for about 6-7 minutes on each side or until the chicken is golden brown and fully cooked through (an internal temperature of 165°F/75°C).

    5. Add the Peaches: Once the chicken is nearly done, add the diced peaches to the skillet. Stir gently to combine, allowing the peaches to heat through for about 2-3 minutes.

    6. Season to Taste: Taste the mixture and adjust with salt and pepper as needed. Add additional herbs if desired.

    7. Serve: Carefully plate the chicken and spoon the peach mixture over each piece. Garnish with fresh basil or cilantro for an added touch. Serve warm alongside your favorite sides.

    8. Leftovers: If you have any chicken left over, allow it to cool before storing it in an airtight container in the refrigerator for a quick meal later.

    This recipe encompasses the essence of ease and flavor, ensuring that your journey through chicken recipes results in a beautifully cooked Peach Chicken that impresses your guests and family.

    Mastering Peach Chicken: Advanced Tips and Variations

    Once you’ve perfected the basic Peach Chicken, consider these tips and variations to elevate your dish further:

    • Grill Instead of Sauté: For a smoky flavor, you can grill the chicken on a barbecue or grill pan instead of cooking in a skillet. This method not only adds depth but makes for a delightful summer meal.

    • Explore Flavor Combinations: Experiment with additional spices like cayenne pepper for heat or smoked paprika to enhance the overall flavor. These spices blend wonderfully with the sweetness of peaches.

    • Add Vegetables: For a more balanced meal, consider adding chopped bell peppers, asparagus, or zucchini to the skillet, allowing them to cook alongside the chicken and peaches. This adds nutritional value and creates a vibrant dish.

    • Serve Over Grain Bowls: Instead of pairing it with traditional sides, serve Peach Chicken over a bed of quinoa, farro, or brown rice for a healthy grain bowl. Top with fresh veggies and a light vinaigrette for extra zest.

    These advanced techniques will not only improve your cooking skills but also diversify your repertoire of chicken recipes, making Peach Chicken a dish you can revisit and reinvent over time.

    How to Store Peach Chicken: Best Practices

    Storing your delicious Peach Chicken properly ensures it retains its flavor and freshness. Follow these best practices:

    • Refrigeration: Allow leftover Peach Chicken to cool down to room temperature before transferring it to an airtight container. Store it in the refrigerator, where it can last for up to 3 days.

    • Freezing: If you want to keep it longer, consider freezing the prepared Peach Chicken. Place it in a freezer-safe container or freezer bag, ensuring that air is removed to prevent freezer burn. It can be stored in the freezer for up to 2 months.

    • Reheating: To reheat, you can use either the microwave or stovetop. For a microwave, place the chicken in a dish and cover it to prevent drying out. Heat in increments of 30-60 seconds until thoroughly heated. If using the stovetop, warm the skillet over medium heat and add a splash of water or broth to retain moisture, then reheat the chicken.

    Proper storage allows you to enjoy the delightful flavors of Peach Chicken even days later, making this recipe not only convenient but also a great meal prep option.

    Nutritional Value of Peach Chicken

    Understanding the nutritional value of Peach Chicken can help in maintaining a balanced diet. Here’s a breakdown of the average nutritional composition per serving (approximately 5 oz cooked chicken with 1/4 cup peaches):

    • Calories: 290 kcal
    • Protein: 36 g
    • Fat: 10 g
    • Carbohydrates: 15 g
    • Fiber: 2 g
    • Sugars: 5 g
    • Vitamin A: 10% DV
    • Vitamin C: 15% DV
    • Calcium: 4% DV
    • Iron: 8% DV

    As you can see, Peach Chicken is a nutrient-rich dish that offers a high protein content while remaining relatively low in calories. Incorporating this dish into your diet provides you with essential vitamins and minerals from both chicken and peaches, assisting in overall health and wellness.

    FAQs: Frequently Asked Questions About Peach Chicken

    Can I use frozen peaches for this recipe?

    Yes, you can use frozen peaches if fresh ones are unavailable. Just ensure to thaw them first and drain any excess liquid before adding them to the poultry mixture.

    How can I make this dish spicier?

    To add heat, consider incorporating crushed red pepper flakes or jalapeños into the marinade or directly into the skillet while cooking the chicken.

    What side dishes pair well with Peach Chicken?

    Peach Chicken pairs wonderfully with sides like steamed broccoli, wild rice, or a fresh garden salad. You might also try couscous or sweet potato wedges for variety!

    Can I adapt this recipe for meal prep?

    Absolutely! This dish is perfect for meal prep. Cook a double batch, and portion it into meal containers. It freezes well, making for a convenient lunch or dinner option throughout the week.

    How can I ensure my chicken stays juicy?

    Avoid overcooking the chicken by using a meat thermometer to check for an internal temperature of 165°F (75°C). Letting the chicken rest for a few minutes after cooking will also help retain moisture.

    Embrace the beauty of cooking with this Peach Chicken recipe and take comfort in knowing that you’re providing a delicious, nutritious meal for yourself and your loved ones. It’s simple yet sophisticated, and it’s bound to become one of your favorite chicken recipes. Happy cooking!